Category: Mobile Phone Repair

  • How To Repair Your Cell Phone Yourself: Easy DIY Guide

    How To Repair Your Cell Phone Yourself: Easy DIY Guide

    Smartphones are an essential part of daily life. We use them for communication, payments, work, navigation, entertainment, and storing personal memories. When something goes wrong, even a minor issue can feel extremely stressful. Many people rush to a repair shop for every small problem, not realizing that most phone issues are simple and can be fixed at home with basic knowledge.

    This easy, practical guide is designed for beginners, DIY enthusiasts, and anyone curious about how mobile repair works. You don’t need advanced tools or special technical training to fix many common problems. All you need is patience, careful handling, and the right steps.

    As a well-known technician once said, “A phone isn’t complicated—it becomes complicated only when you panic.”
    With the right approach, even tough-looking issues become simple.

    Let’s explore everything you need to know to repair your phone yourself safely and confidently.


    Understanding the Type of Problem (Most Important Step)

    Every repair begins with one essential question:

    What kind of problem is your phone facing?

    Before attempting any fix, identify the category of fault.
    Almost all mobile issues fall into three main types:

    1. Settings Faults
    2. Hardware Faults
    3. Software Faults

    Once you know the category, choosing the right troubleshooting step becomes easy.


    1. Settings Faults: Simple Issues That Need Quick Fixes

    Settings faults are minor problems caused by incorrect settings, accidental changes, or temporary glitches. They are the easiest to fix.

    Examples include:

    • Unable to make or receive calls
    • Phone switching off while opening gallery
    • SMS inbox causing the phone to freeze
    • Screen rotation not working
    • WiFi or Bluetooth behaving strangely
    • Sound profile stuck on silent

    In most cases, these issues are small and can be solved with basic steps.


    Step 1: Restart Your Phone

    This is the simplest and most effective method. Restarting clears temporary bugs and refreshes the system.

    Most problems are fixed simply by restarting.


    Step 2: Reset the Settings (Not Factory Reset)

    If restart doesn’t work, try resetting settings without deleting your data.

    Go to:

    Settings → System → Reset → Reset All Settings

    This restores default system behavior while keeping:

    • Photos
    • Apps
    • Contacts
    • Files

    This is a safe option for beginners.


    Step 3: Factory Reset (Use Only If Needed)

    If the issue continues, perform a factory reset.

    Settings → System → Reset → Factory Data Reset

    This removes:

    • Installed apps
    • Customizations
    • Cached faults
    • Unwanted files

    Your phone becomes fresh like when it was new.

    Important:
    You must remember the security code or screen lock; otherwise, the phone will not allow the reset.

    If a reset does not fix the issue, it may belong to hardware or software categories.


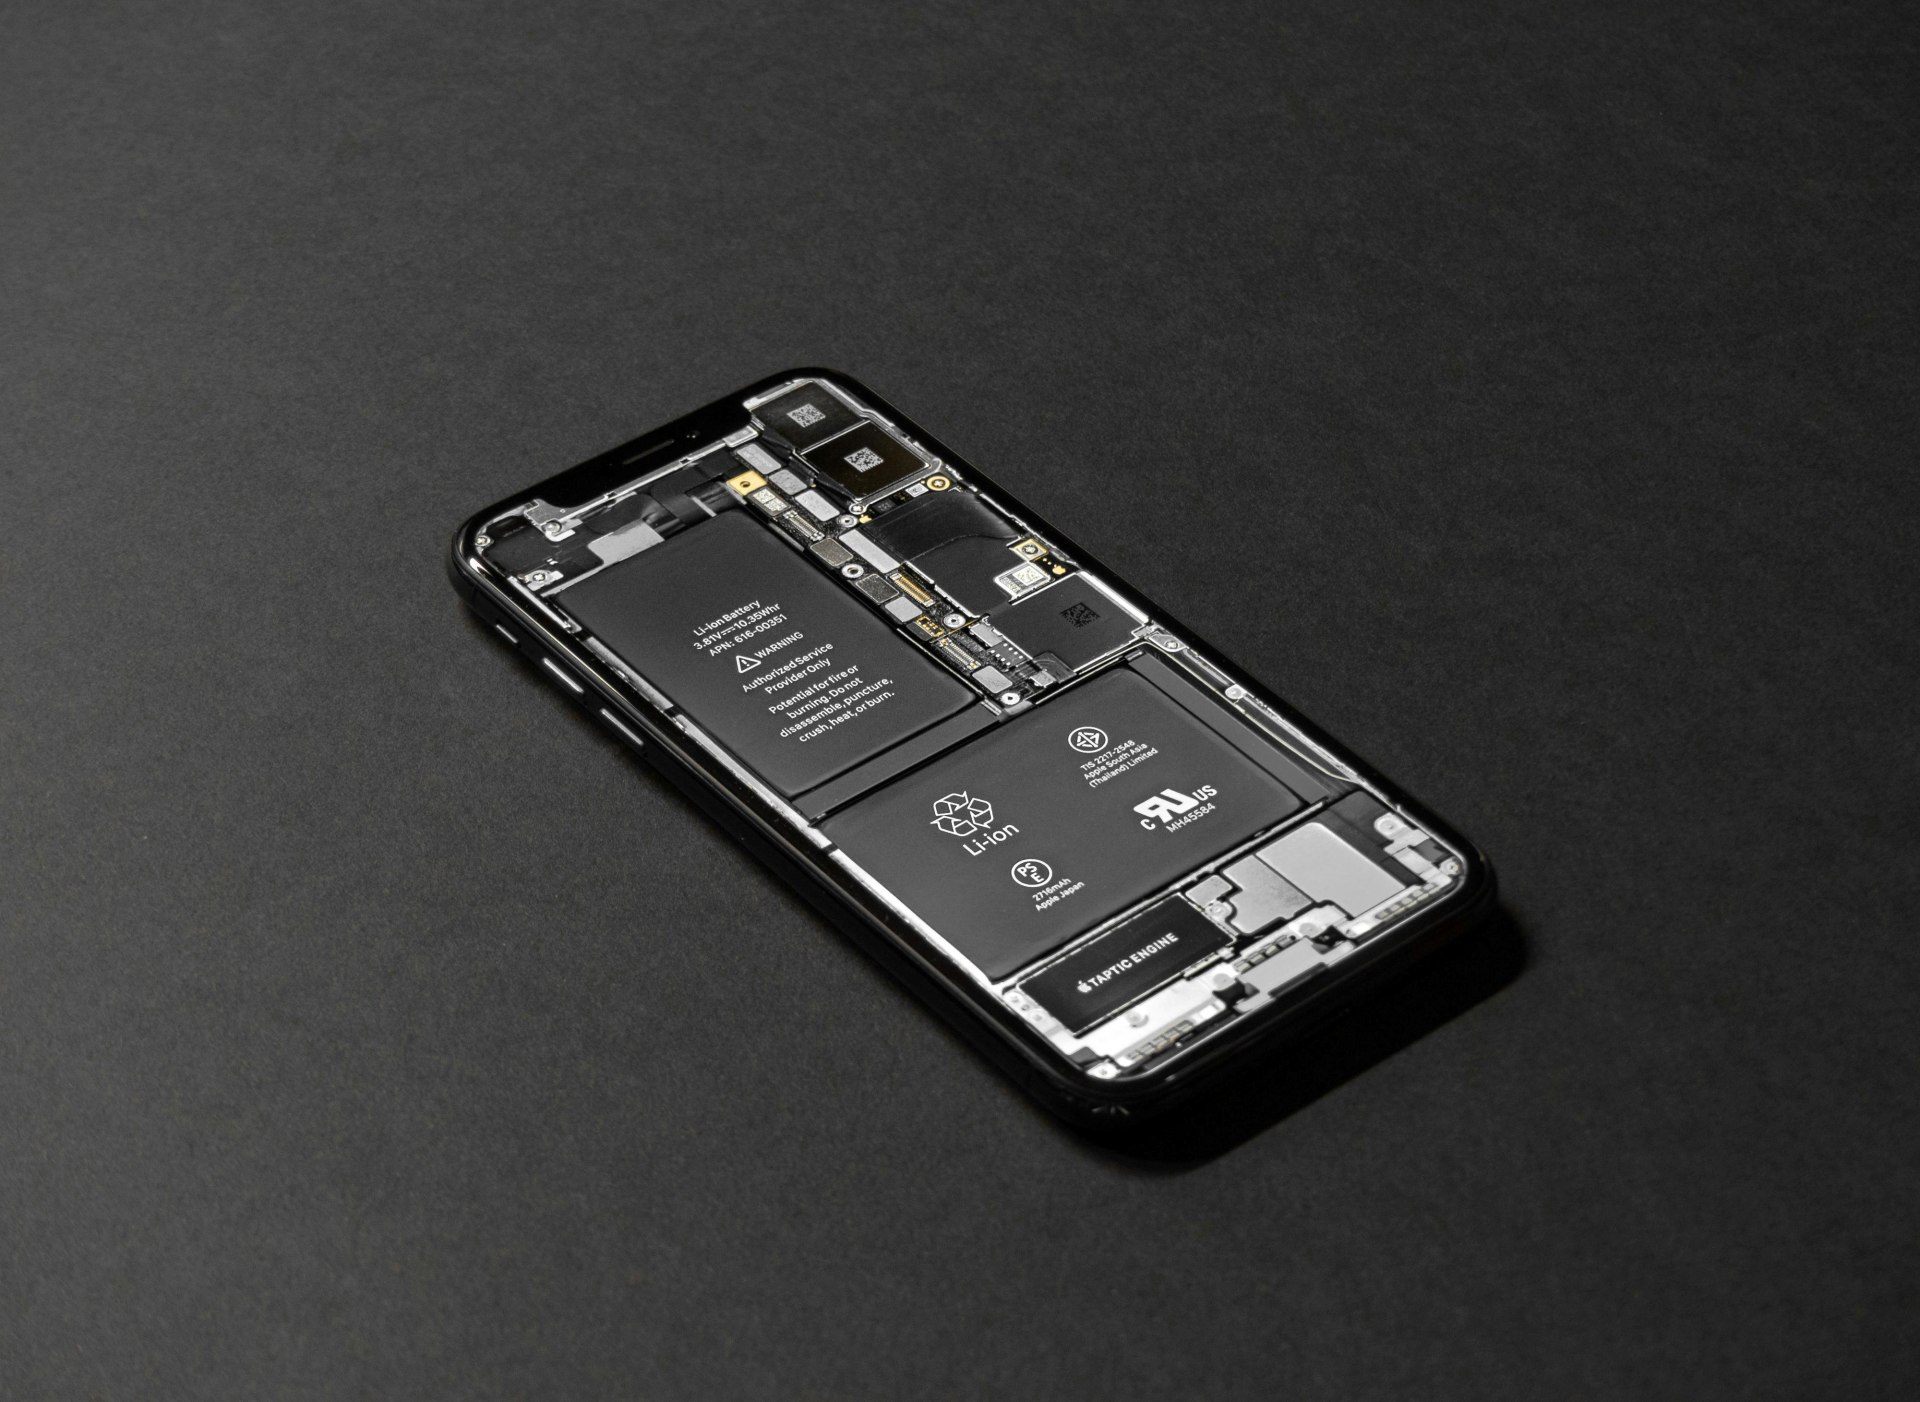
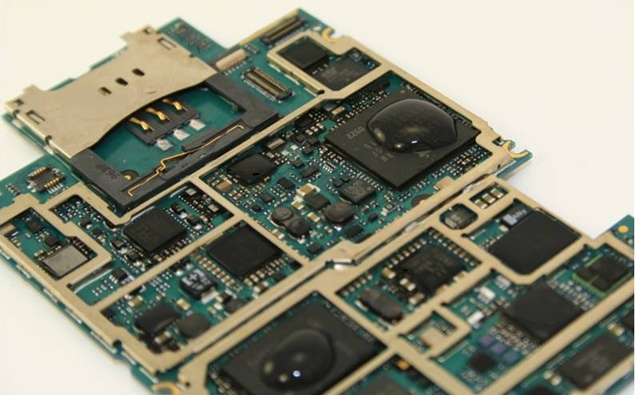
    2. Hardware Faults: Problems Related to Physical Components

    Hardware issues occur due to damage, wear and tear, loose connections, dust, moisture, or failing parts. These problems often require basic tools and careful handling.

    Common hardware problems include:

    You may be surprised to know that many hardware faults are caused by dirt, loose connections, or minor corrosion, not by major damage.


    Before Opening Your Phone: Important Safety Rules

    • Never open the phone if it’s under warranty — you will lose it.
    • Work on a clean surface with good lighting.
    • Use a proper phone opening tool kit (avoid sharp household tools).
    • Disconnect the battery connector first before touching anything else.
    • Do not apply force to connectors or cables.

    If at any point you feel unsure, stop immediately.


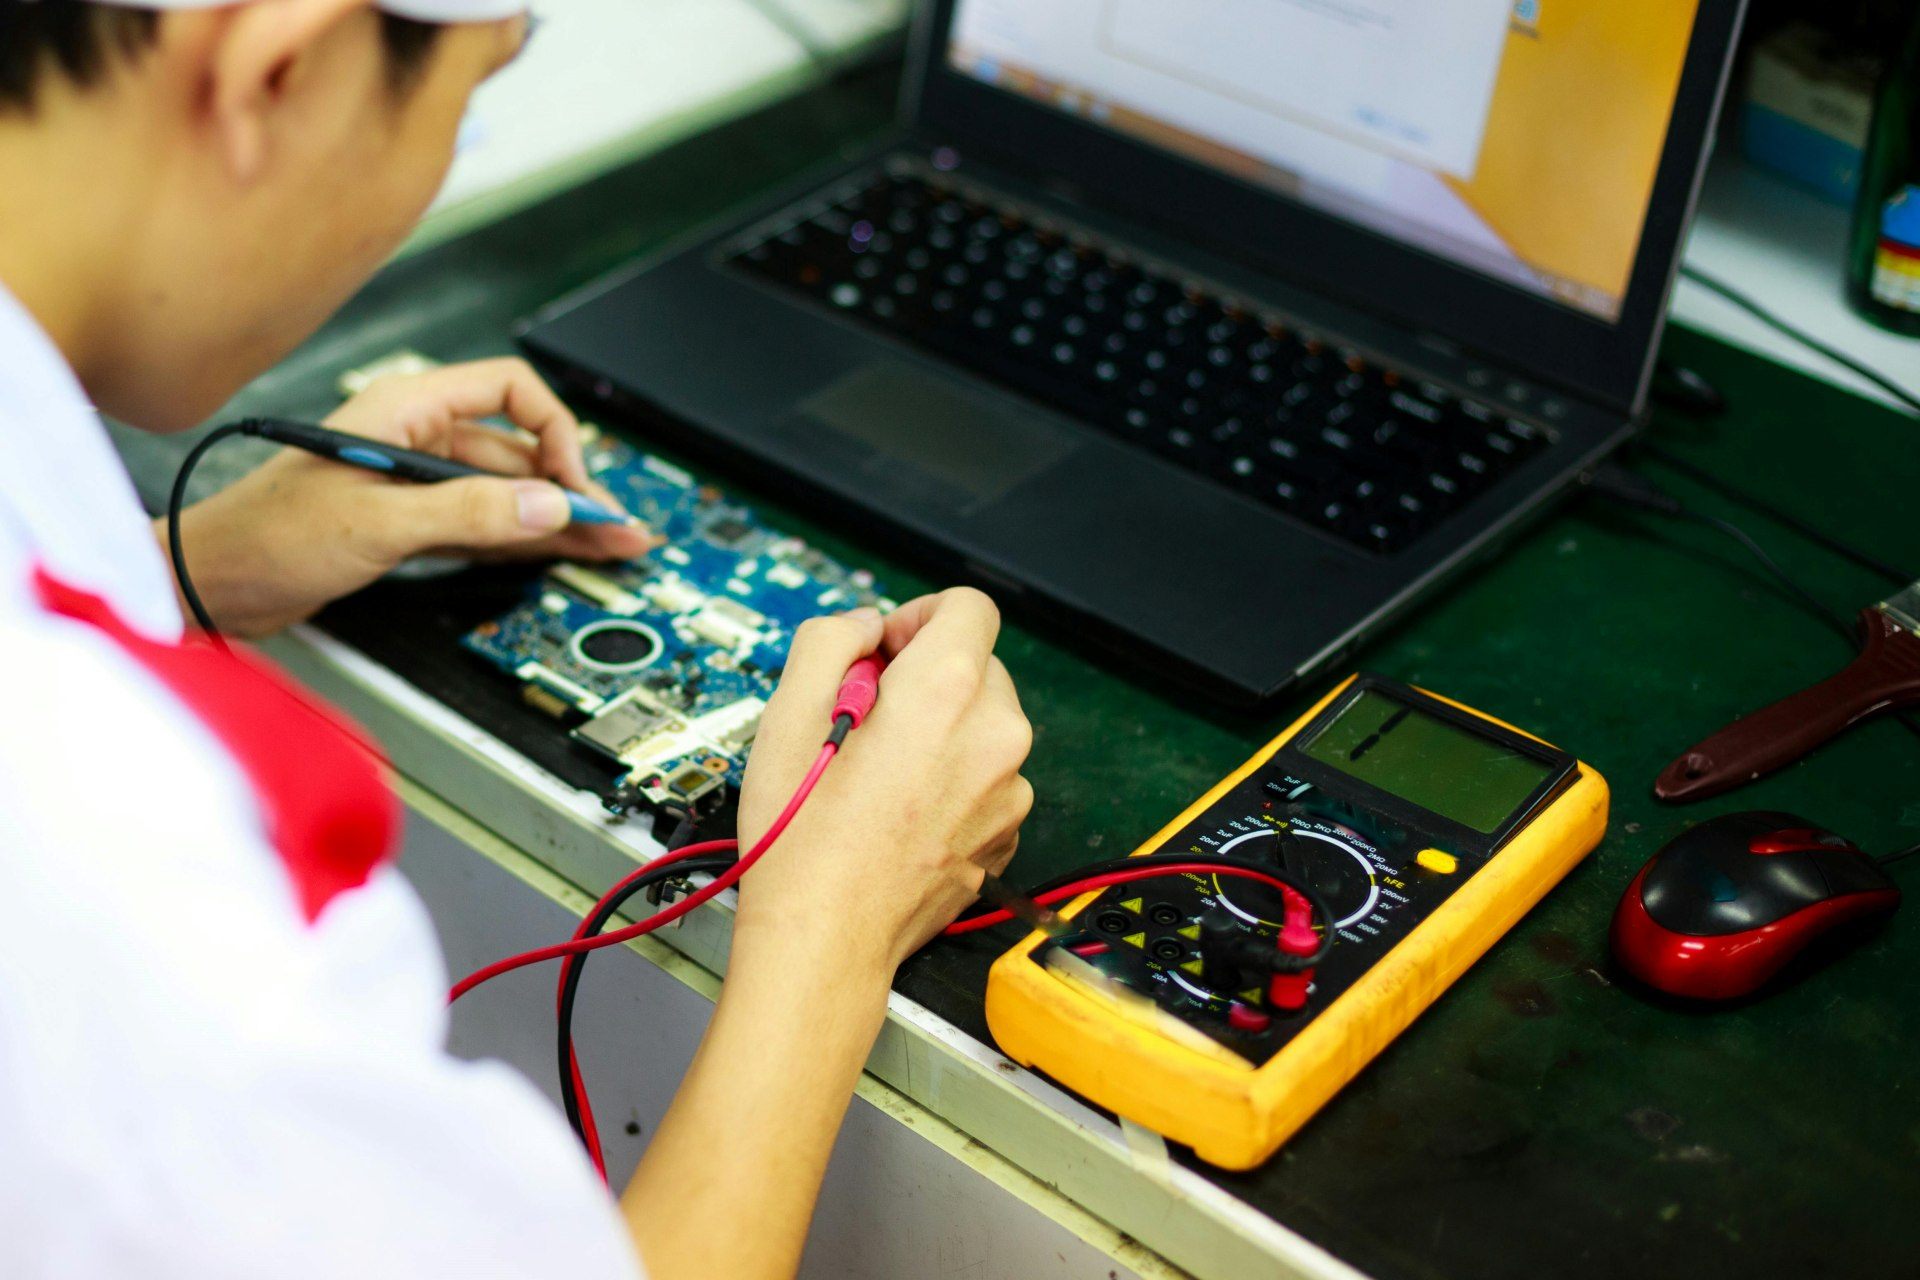
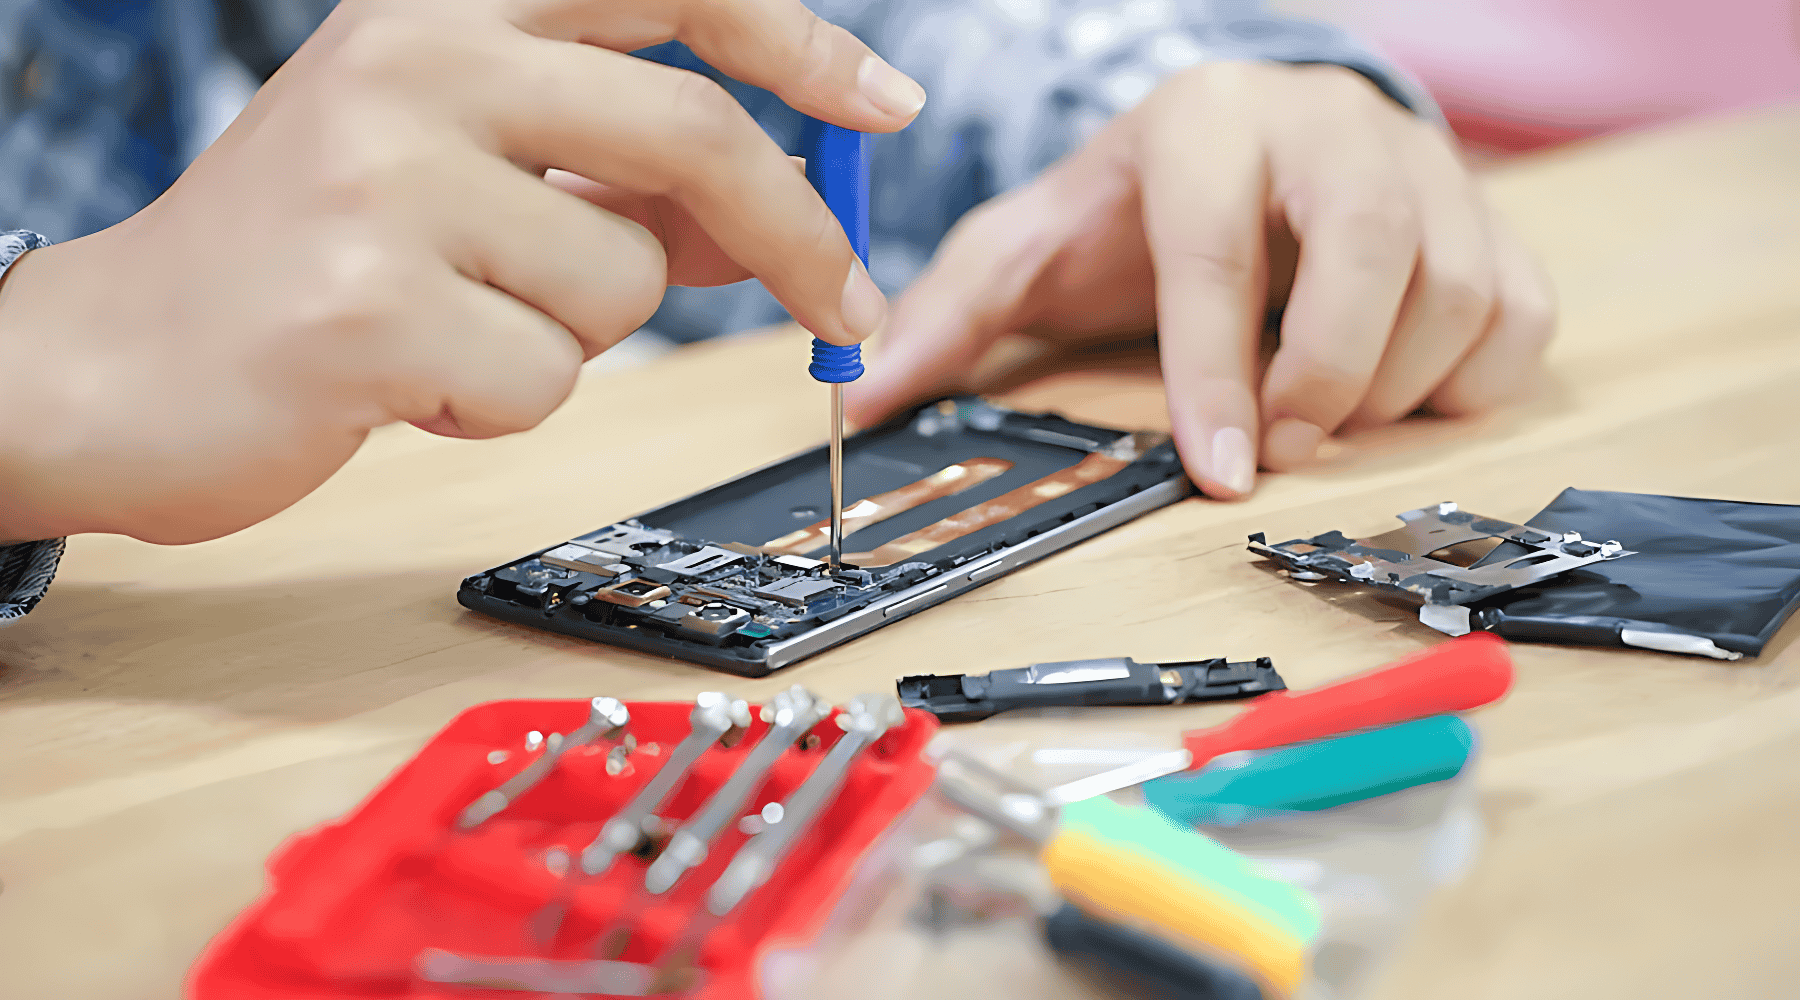
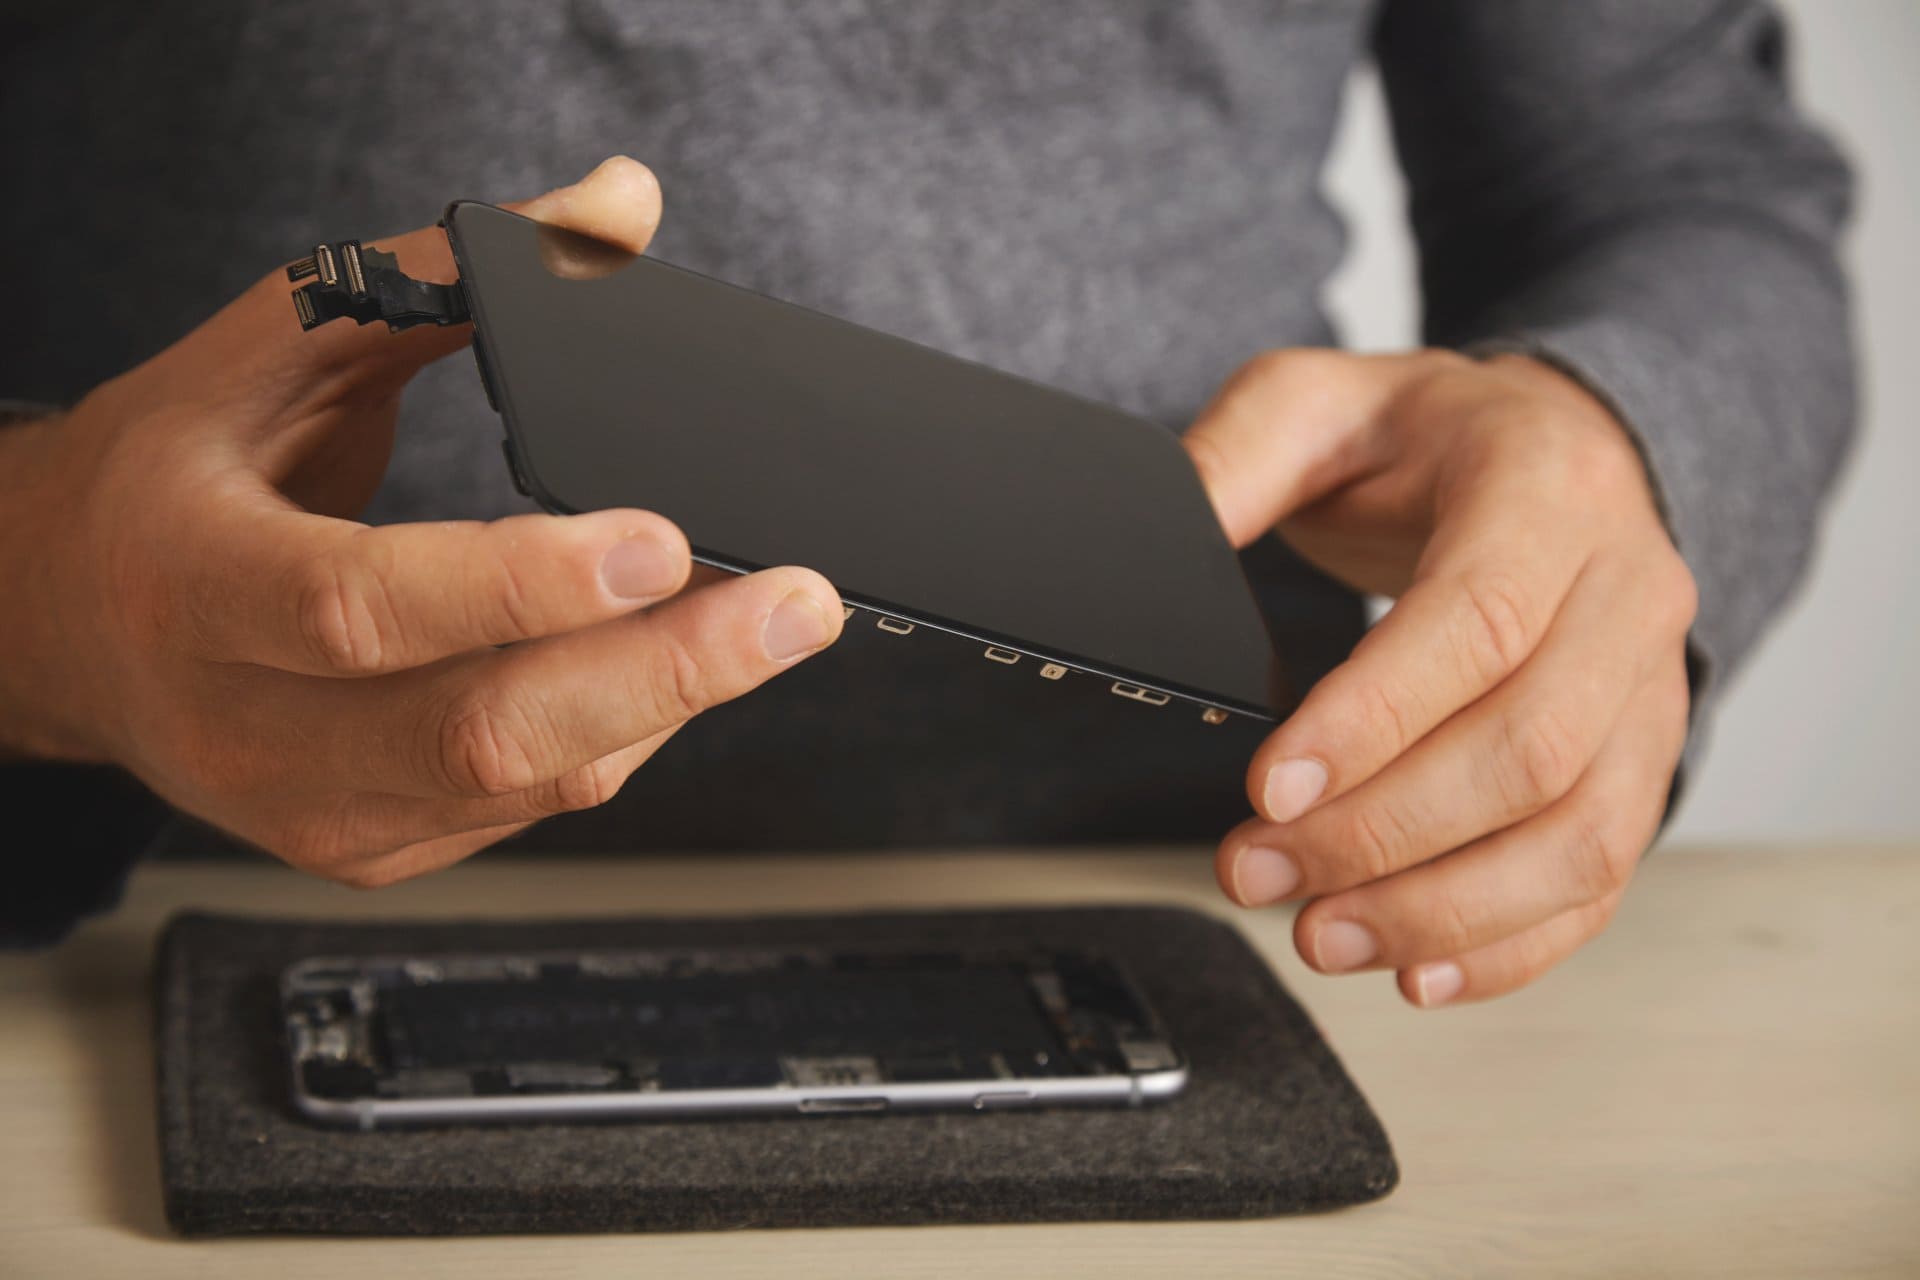
    Step-by-Step Hardware Repair Guide (Beginner Friendly)


    Step 1: Watch a Model-Specific Opening Video

    Search:

    “How to open <your phone model> back cover”

    This ensures you don’t damage internal flex cables or the plastic frame.

    YouTube has detailed videos for almost every phone model.


    Step 2: Clean Dust and Connections

    Most hardware faults happen because:

    • Dirt blocks sensors
    • Speaker mesh gets clogged
    • Charging port filled with dust
    • Button flex loses contact
    • Connectors move slightly out of place

    Use:

    • Soft brush
    • Isopropyl alcohol (IPA)
    • Microfiber cloth
    • Compressed air

    Do not use water or liquid cleaners.


    Common Hardware Fixes You Can Do Yourself

    • Charging Issues

    Reasons:

    • Dust inside charging port
    • Loose port
    • Damaged cable

    Try:

    • Clean the charging port gently
    • Try a different charger
    • Check if the charger supports fast charging

    If the port is physically broken, you may need replacement, which beginners should avoid attempting alone.


    • Speaker or Microphone Not Working

    Often caused by:

    • Dust
    • Blocked grills

    Fix:

    • Clean the grills
    • Check sound settings
    • Test with earphones to confirm

    If sound works on earphones but not on speaker, the speaker module may need replacement.


    • Touchscreen Not Working

    Try:

    • Clean the screen
    • Restart
    • Enter safe mode (to check if an app is causing it)
    • Remove any tempered glass that might be affecting touch

    If still unresponsive, the touch panel may be damaged.


    • Buttons Not Functioning

    Side buttons fail due to:

    • Dust
    • Loose flex
    • Physical damage

    Cleaning and reconnecting the flex often solves the issue.


    • Camera Not Opening

    Try:

    • Restart
    • Clear camera app cache
    • Check for loose connector

    If the camera shows a black screen, the module may need replacement.


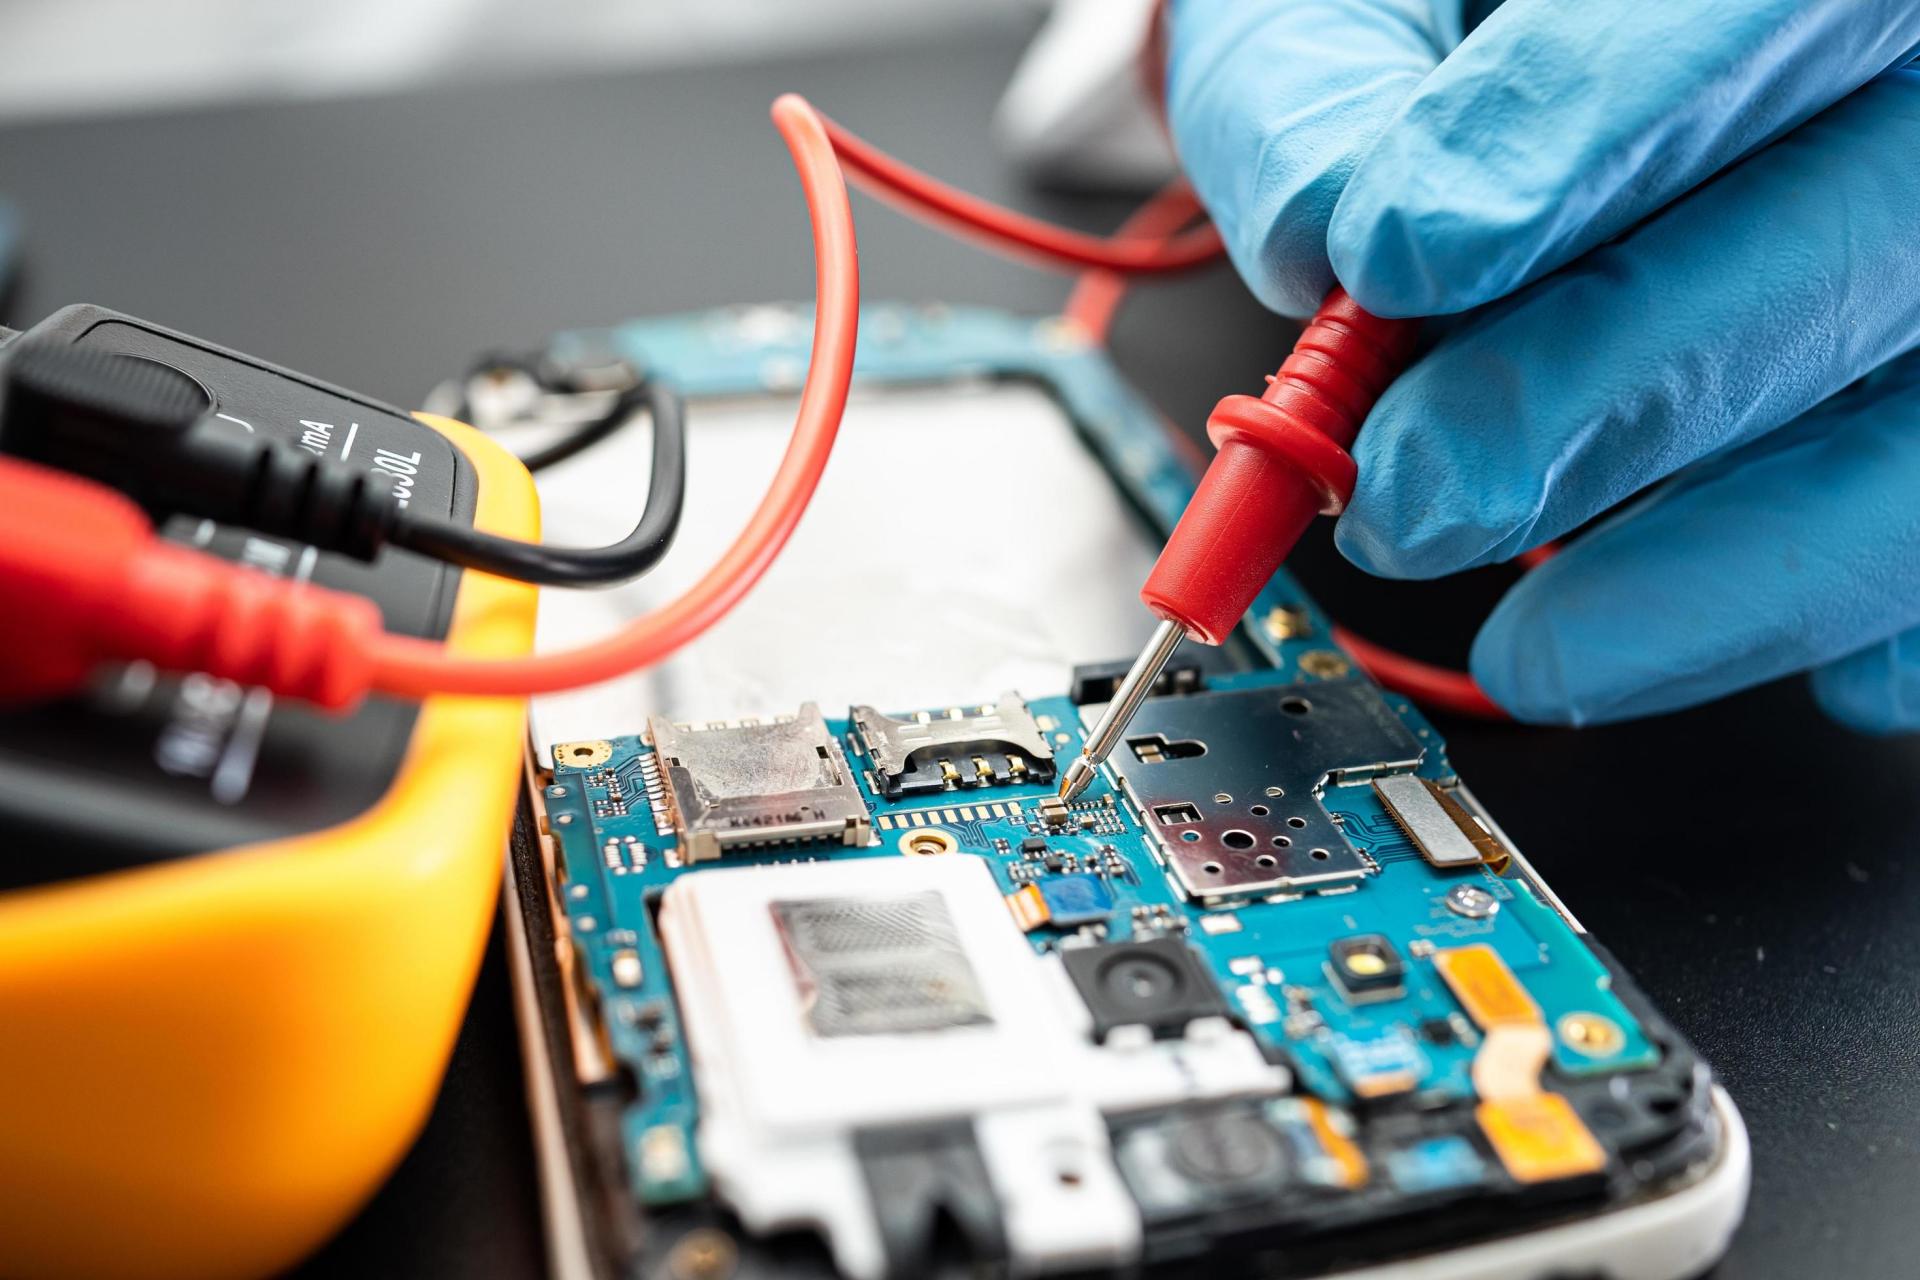
    When to Stop DIY Hardware Repair

    Some repairs are unsafe for beginners:

    • Replacing charging IC
    • Fixing motherboard shorts
    • Microsoldering
    • Replacing display IC
    • Heating motherboard components

    If cleaning and reconnecting don’t solve the problem, take it to a trained technician.


    3. Software Faults: Issues Caused by System or Apps

    Software faults are extremely common today because smartphones depend heavily on apps and operating systems. These problems are easier to fix compared to hardware repairs.

    Common software issues:

    • Phone hanging
    • Freezing during calls
    • Apps crashing
    • Automatic restart
    • Stuck at boot logo
    • Slow phone performance
    • Touch lag
    • System glitches
    • Overheating due to apps

    Step-by-Step Software Repair Guide


    Step 1: Restart

    Simple but effective.


    Step 2: Free Up Storage Space

    Low storage is the #1 reason for lag.

    Delete:

    • Large videos
    • Old WhatsApp media
    • Unused apps
    • Duplicate photos

    Aim to keep at least 20–30% free storage.


    Step 3: Clear Cache of Heavy Apps

    Apps like YouTube, Instagram, Facebook, browser apps store large cache files.

    Go to:

    Settings → Apps → Select App → Storage → Clear Cache

    This improves speed instantly.


    Step 4: Update Apps and System Software

    Updates include bug fixes and performance improvements.


    Step 5: Reset Settings

    Restores stable system behavior. If its a feature phone, it will ask for security code. Enter default security code if the code has not been changed. Your problem should get solved. If you are not lucky, you will have to format (factory reset) or flash your handset.


    Step 6: Factory Reset

    Removes deeper issues like:

    • Virus infections
    • Corrupted files
    • Boot loop errors
    • Slow performance

    Backup your data first.


    Step 7: Flash or Update Firmware

    If the phone still has issues:

    • Flash the stock firmware
    • Install updated OS package
    • Restore original system files

    This requires tools, firmware files, and basic understanding. If you want to know more about flashing, read what is flashing and how to flash a mobile phone.

    Beginners should attempt only with proper guidance, otherwise consult a technician.


    Bonus: Common Mistakes to Avoid During DIY Repair

    • Not backing up data
    • Using excessive heat on the phone
    • Applying force while opening
    • Using metal tools that cause short circuits
    • Mixing up screws
    • Touching motherboard circuits with fingers
    • Skipping battery disconnection

    A careful, patient approach always gives better results.


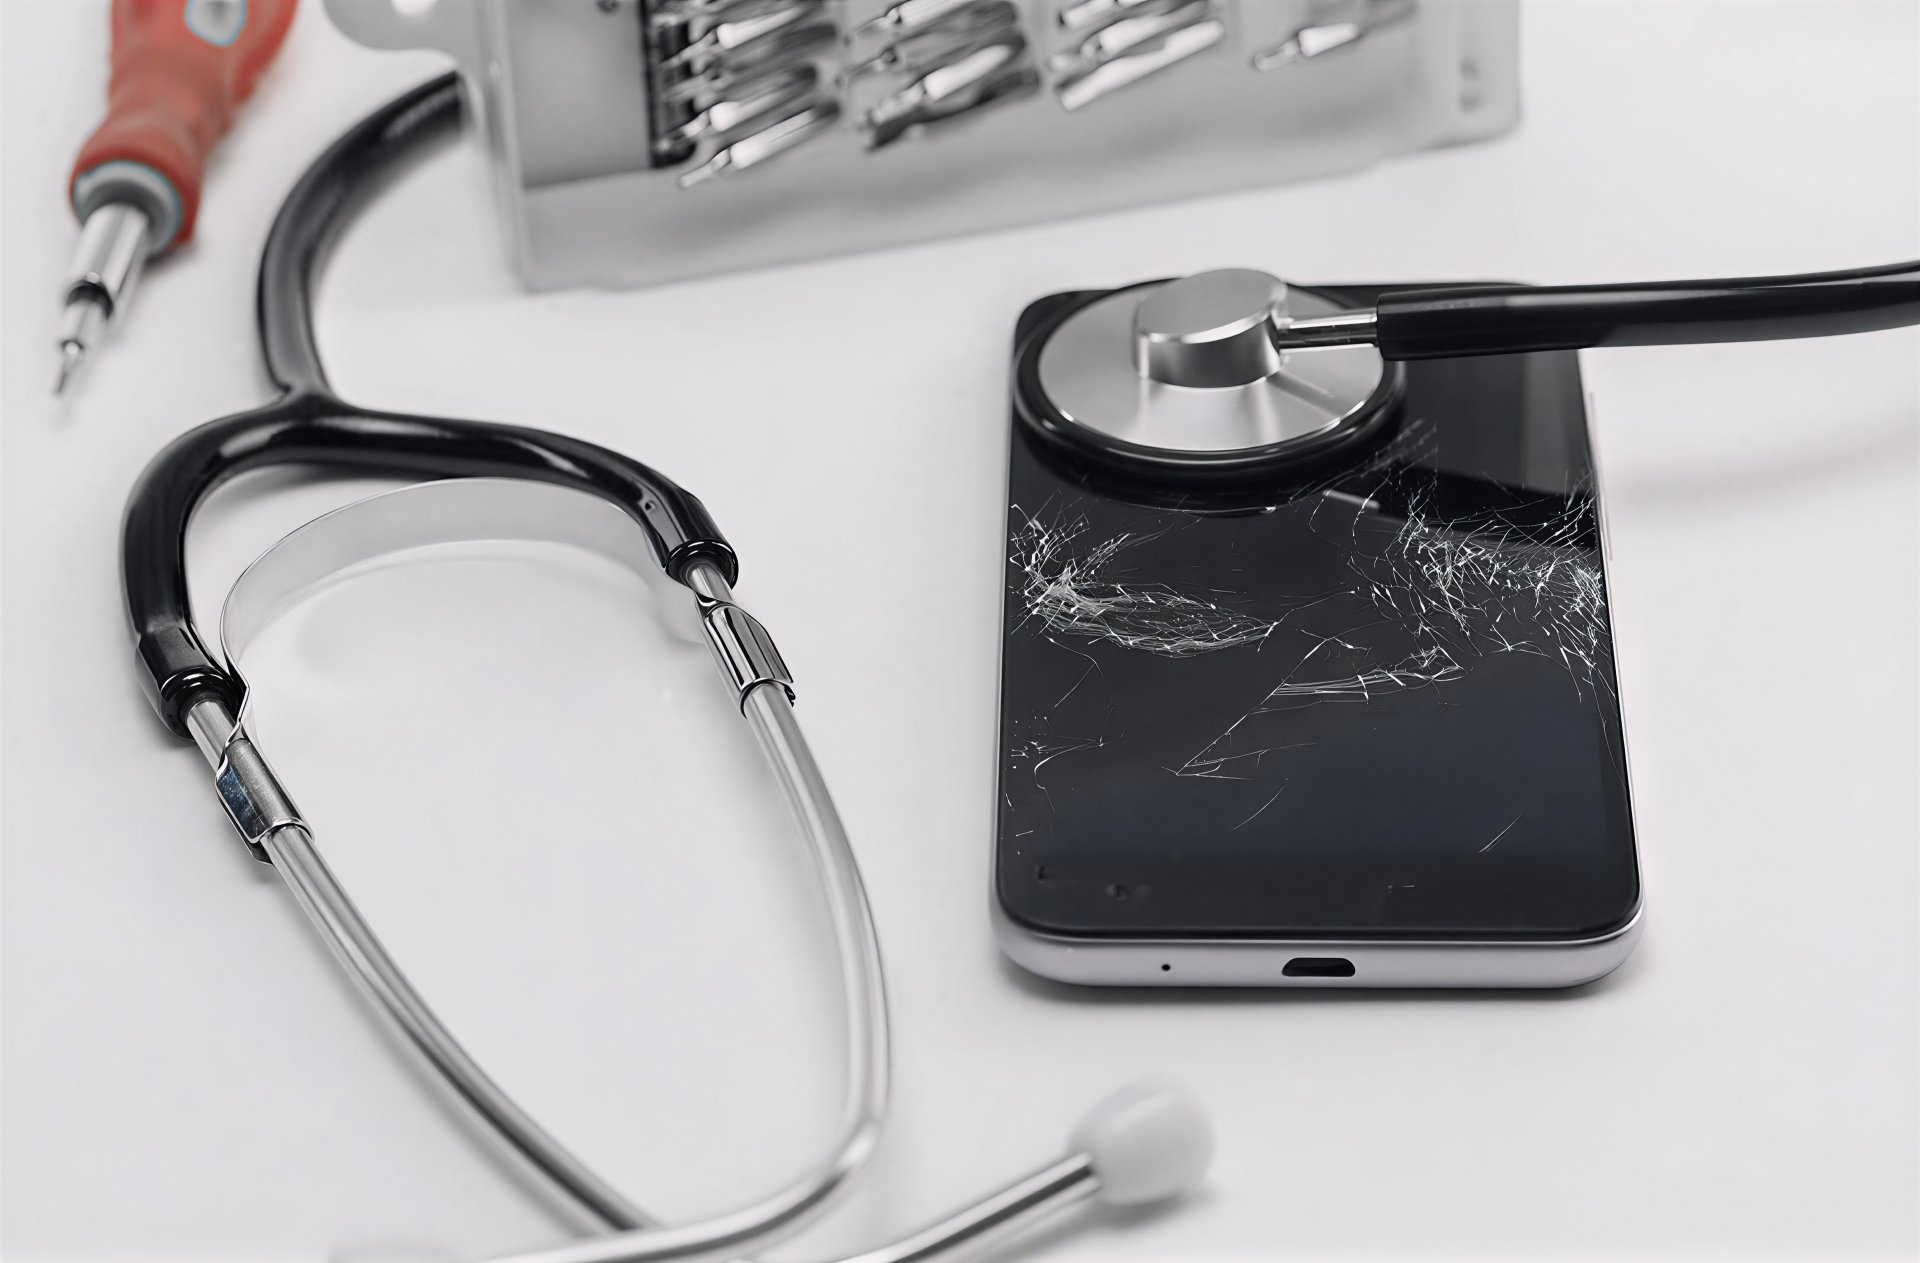
    When Should You Not Repair the Phone Yourself?

    DIY repair is great—but not for everything.

    Avoid DIY if:

    • The screen is cracked badly
    • Motherboard has water damage
    • Phone has no power at all
    • Components require soldering
    • Burning smell or smoke is present
    • Device repeatedly gets hot even when idle

    In such cases, DIY attempts may worsen the damage.

    If you wish to build a career in mobile phone repairing, selecting the right institute is the first step. This curated list of Mumbai’s best mobile repairing course institutes can help you start on the right path.


    Real-Life Example: A Simple Problem Made Complicated

    A user complained that their phone wasn’t charging. They assumed the motherboard was damaged and tried to open the device. In reality, the charging port was filled with lint from the pocket. Once cleaned carefully, the phone worked perfectly.

    Lesson:
    Not every problem is serious. Sometimes, a simple cleaning saves time and money.


    Final Tips for Safe DIY Phone Repair

    • Work slowly
    • Keep tools organized
    • Watch tutorials for your exact model
    • Always disconnect the battery first
    • Replace parts only when necessary
    • Maintain backups regularly
    • Don’t panic—phones are simpler than they appear

    As one technician says, “You fix a phone with patience before tools.”


    Conclusion

    Repairing your phone yourself is completely possible. Most issues—whether settings, software, or hardware—can be fixed using simple steps that require no advanced skill. By understanding the type of problem, applying the right method, and following safety precautions, you can save money and avoid unnecessary service center visits.

    However, know your limits. When repairs involve motherboard components, soldering, or severe hardware damage, it’s better to leave the job to professionals.

    DIY phone repair is empowering, practical, and surprisingly easy once you understand the basics. Start small, follow the right steps, and your confidence and skill will grow naturally.

  • How To Increase The Life Of Cell Phone Battery: Simple Tips

    How To Increase The Life Of Cell Phone Battery: Simple Tips

    Your smartphone battery is the silent engine that keeps everything running. Without it, even the most advanced device becomes useless. A healthy battery means fewer interruptions, better performance, and a device that lasts longer before needing replacement. Yet most people unknowingly use habits that weaken battery health over time.

    Understanding battery care is essential today because phones are thinner, more powerful, and often contain non-removable batteries. You cannot simply replace them easily. Learning to maintain battery health isn’t just cost-saving—it protects your device’s overall lifespan.

    As one repair expert says, “A battery doesn’t die in a day. It dies a little every day—how you use it decides how fast.”

    This guide explains everything you need to know about extending your battery’s life, using updated science, practical habits, and easy-to-apply tips.


    Understanding Modern Smartphone Batteries

    Most smartphones today use lithium-ion or lithium-polymer batteries. These batteries are powerful, lightweight, and support fast charging. However, they also have natural limitations.

    Key facts you should know:

    • Every battery has a fixed lifespan, measured in cycles.
    • One cycle = using a total of 100% of battery capacity (not necessarily in one go).
    • Most phone batteries last 300–500 cycles before noticeable degradation.
    • Batteries age faster when exposed to heat, deep discharge, and constant full charging.

    To increase battery life, your goal is simple:

    Reduce battery stress and avoid behaviors that shorten its health.

    This article teaches you exactly how to do that in the simplest, most practical way.


    Does This Article Help the Battery Last Longer Per Charge?

    No. This guide focuses on extending your battery’s lifespan, not increasing daily screen time.
    If you want tips to make each charge last longer, you would follow a separate guide.

    Here, we focus on how to make your battery stay healthy for months and years—not die early.

    how to improve cell phone battery life?

    Do’s and Don’ts to Extend Smartphone Battery Life

    These habits are the foundation of long-term battery health. Follow them consistently and you will see measurable improvement in your battery’s lifespan.


    1. Do Not Charge Your Battery Frequently

    Many people plug in their phone multiple times a day, even when their battery is above 50% or 70%. While this seems harmless, it consumes charging cycles faster.

    Every full recharge adds up. Frequent unnecessary charging means your phone completes more cycles sooner, reducing its lifespan.

    Important Tip:
    Let the battery drop naturally before charging.
    Avoid plugging in every time it hits 60–70%.


    2. Charge Only When Battery Falls to 5–10%

    This tip from your original content remains relevant today, with slight modern refinement.

    Lithium batteries do not like being:

    • Fully drained
    • Charged too frequently

    Let your phone discharge to about 10–20%, then charge it.

    Do NOT wait until it reaches 0% unless you are recalibrating your battery occasionally.

    Regularly draining to 0% puts strain on the battery chemistry and shortens its lifespan.


    3. Avoid Charging to 100% Every Time

    This is an updated scientific recommendation.

    Keeping a lithium battery at full charge for long periods increases chemical stress.

    The ideal charge range is:

    • 20% to 80% for maximum long-term health

    Charging to 100% occasionally is fine—just avoid keeping it at 100% constantly, especially overnight.

    Many modern phones now include:

    • Optimized charging
    • Adaptive charging
    • Slow overnight charging

    Enable these settings to protect battery health.


    4. Avoid Heat: The Number One Battery Killer

    Heat destroys battery cells faster than anything else.

    Your phone can heat up due to:

    • Gaming for long hours
    • Fast charging
    • Using the phone while charging
    • Keeping it under sunlight
    • Running heavy apps
    • Using poor-quality chargers
    • High ambient temperatures

    When your phone is hot, stop charging immediately.

    Important:
    Never leave your phone inside a parked car, under a pillow, or on top of a laptop exhaust.


    5. Do Not Directly Plug Your Phone into a Car Charger

    Your original content mentioned this point and it is still extremely useful today.

    Car chargers deliver unstable voltage, especially when:

    • AC is turned on
    • Engine starts or stops
    • Vehicle power fluctuates

    This fluctuation can damage:

    • Charging IC
    • Battery
    • Charge port
    • Motherboard

    Instead, use:

    • A branded car charger with surge protection
    • A USB PD (Power Delivery) supported accessory
    • A converter where power is regulated

    Cheap car chargers cause more damage than benefit.


    6. Turn Off Unnecessary Services

    Certain features constantly consume battery even when you’re not actively using them. They also increase heat, which directly weakens battery quality.

    Turn off features like:

    • GPS
    • Bluetooth
    • WiFi
    • Hotspot
    • NFC
    • Auto-sync
    • Background data for non-essential apps
    • Constant notifications

    You don’t need these services running 24/7.

    Tip:
    Use quick settings to toggle them ON only when required.


    7. Switch Off or Use Airplane Mode When Not in Use

    Your original content mentioned this — and it’s still valid.

    When you are:

    • Sleeping
    • Driving
    • In meetings
    • Working offline
    • In areas with weak network

    Switching to Airplane Mode or simply turning the device off reduces battery stress and preserves long-term health.

    Phones consume more power searching for networks in weak-signal areas. This accelerates wear.


    8. Avoid Using the Phone While Charging

    Using the phone during charging generates heat. The battery experiences two pressures:

    • Charging
    • Discharging due to usage

    This damages the chemical structure of the battery.

    Avoid especially:

    • Gaming while charging
    • Watching videos
    • Using heavy apps
    • Using social media for long durations

    If you must use it, keep usage minimal. Also learn What to Do if Phone Battery Drains Fast Even When Idle


    9. Use Only Quality Chargers and Cables

    Poor-quality or off-brand chargers can:

    • Deliver unstable current
    • Damage the charging IC
    • Cause overheating
    • Shorten battery life

    Always use:

    • Original charger
    • Trusted brands
    • Certified fast chargers

    Cheap accessories may save money today but damage your battery tomorrow.


    10. Don’t Leave Your Phone Charging Overnight

    Overnight charging keeps your battery at 100% for many hours.
    This leads to:

    • Heat buildup
    • Chemical stress
    • Faster aging

    Although modern phones stop charging once full, trickle charging continues, holding the battery at its maximum level.

    Use features like:

    • Adaptive charging
    • Scheduled charging
    • Optimized charging

    These help your phone reach 100% only when you wake up. Also learn How To Make Your Smartphone Battery Charge Last Longer


    11. Keep Your Software Updated

    Software updates include:

    • Battery optimization
    • Bug fixes
    • Power-saving improvements

    A well-optimized system puts less stress on the battery.


    12. Avoid Heavy Cases That Trap Heat

    Thick or poor-quality cases prevent heat from escaping. Since heat is the enemy of battery health, choose:

    • Slim cases
    • Heat-dissipating materials
    • Cases with ventilation patterns

    Remove the case while charging if your phone heats up frequently.


    13. Reduce Screen Brightness and Use Auto-Brightness

    High screen brightness increases heat and drains power.
    Auto-brightness reduces strain by adjusting light based on your environment.

    Also consider:

    • Dark mode
    • Shorter screen timeout
    • Lower refresh rate if available (e.g., 60Hz instead of 120Hz)

    These not only save power but also reduce wear on the battery.


    14. Avoid Keeping Many Apps Running in Background

    Apps running in the background consume:

    • CPU
    • RAM
    • Battery

    Close unnecessary apps, especially:

    • Social media apps
    • Browser tabs
    • Maps
    • Streaming apps

    Use your device’s battery usage menu to identify power-hungry apps.


    15. Store Your Phone Properly When Not Using for Long Periods

    If you will not use your phone for many days or weeks:

    • Charge it to around 50%
    • Switch it off
    • Store in a cool, dry place

    Storing at 0% or 100% damages the battery permanently.


    Real-Life Example: A Small Habit That Saved a Battery

    A user was charging his phone three times a day, often using it while charging. The phone heated up, and within months, the battery health dropped drastically.

    After switching to:

    • One full charge daily
    • Avoiding heat
    • Letting it drop to 15% before charging
    • Not using while charging

    The battery health stabilized and stopped declining rapidly.

    Small changes create big effects.


    16. Use Battery Saver Mode When Needed

    Battery saver reduces:

    • Background activity
    • Animations
    • Location scanning
    • Sync services

    This reduces both daily battery usage and long-term chemical stress.


    17. Understand That Fast Charging Has a Cost

    Fast charging is convenient, but it generates heat.
    Heat drives battery aging.

    Use fast charging when:

    • You need quick top-up

    Use slow or normal charging when:

    • You’re at home
    • Overnight (with optimized charging enabled)
    • You are not in a hurry

    Balance convenience with long-term battery health.


    18. Monitor Battery Health Regularly

    Some phones provide built-in battery health indicators.
    For others, use authorized service center diagnostics.

    Monitoring helps you:

    • Detect abnormal decline
    • Identify heating patterns
    • Replace battery before damage spreads

    Common Battery Charging Myths You Should Stop Believing

    Many people follow old charging habits that no longer apply to modern lithium-ion batteries. These myths not only create confusion but can also reduce battery health over time. Understanding the truth helps you charge your phone smarter and keep the battery healthy for longer.

    Here are the most common myths — and the facts behind them.


    Myth 1: “You must charge your phone to 100% every time.”

    Most users still believe a full charge is good for the battery. But lithium-ion batteries actually prefer staying between 20% and 80% during regular use.

    The Truth:

    Charging to 100% occasionally is fine, but doing it daily increases battery stress. Short, frequent top-ups are healthier than deep charging cycles.


    Myth 2: “You should always let your battery drain to 0%.”

    Older nickel batteries needed full discharge to maintain calibration. Modern smartphone batteries do not work this way.

    The Truth:

    Letting your battery reach 0% frequently reduces its lifespan. Only do a full drain if you need to recalibrate battery percentage — and even that is rarely required.


    Myth 3: “Fast charging damages your battery immediately.”

    Fast chargers generate more heat, which worries many users. But phones today are designed with advanced temperature management and charging controls.

    The Truth:

    Fast charging is safe on supported devices. The phone automatically slows down charging if heat increases. What harms the battery is excess heat, not the fast charging technology itself.


    Myth 4: “Using your phone while charging is dangerous.”

    Some people think using a phone while charging causes battery explosions or long-term damage.

    The Truth:

    Using the phone while charging is safe as long as you are using original or certified chargers. However, heavy gaming or video editing can increase heat, which may slow down charging or affect long-term battery health.


    Myth 5: “Third-party chargers always damage the battery.”

    Not all non-original chargers are bad. The real concern is low-quality, uncertified chargers.

    The Truth:

    A good-quality, certified charger works as safely as the original. Avoid cheap, unbranded chargers because they may lack voltage protection and overheat the battery.


    Myth 6: “Closing all apps improves battery life dramatically.”

    People often force-stop apps thinking it reduces battery usage.

    The Truth:

    Constantly closing and reopening apps uses more battery. Modern operating systems manage background apps efficiently. Only stop apps that are stuck or misbehaving.


    Myth 7: “Charging overnight always ruins the battery.”

    Phones stay plugged in for hours at night, and many users worry that the battery keeps ‘overcharging.’

    The Truth:

    Phones stop charging once they reach 100%. They do not continuously keep pushing current into the battery. Overnight charging is safe, but heat build-up under pillows, cases, or bedsheets can be harmful. Good ventilation is key.


    Myth 8: “Battery-saving apps significantly improve battery life.”

    Many apps promise to extend battery life by killing background processes.

    The Truth:

    Most battery-saving apps do little to improve performance and may even drain more power. Built-in battery optimization from your phone manufacturer is far more effective.


    Myth 9: “Keeping Wi-Fi, Bluetooth, or GPS ON drains your battery heavily.”

    This was true many years ago, but not today.

    The Truth:

    Modern phones use very little power for Wi-Fi and Bluetooth when idle. GPS drains battery only when an app actively uses location in the background.


    Myth 10: “Higher mAh always means better battery life.”

    Many users assume a big battery capacity automatically equals great performance.

    The Truth:

    Battery life depends on many factors — software optimization, processor efficiency, screen type, refresh rate, and user habits. A well-optimized phone with lower mAh can last longer than a poorly optimized one with a bigger battery.


    Conclusion

    Your smartphone battery is designed to last long, but only if you treat it right. By following simple, science-backed habits like avoiding heat, charging smarter, using quality accessories, and reducing unnecessary strain, you significantly extend your battery’s lifespan.

    Battery care is not complicated. It’s about forming better habits. A healthy battery means a reliable phone, fewer repairs, and a better user experience every day.

    Always remember: “Take care of your battery, and your phone will take care of you.”

  • How to Use a Multimeter for Mobile Phone Repair (Guide)

    How to Use a Multimeter for Mobile Phone Repair (Guide)

    A multimeter is one of the most essential tools in mobile phone repairing. Whether you are troubleshooting power issues, tracking short circuits, or testing tiny components on the motherboard, this tool helps you diagnose faults with accuracy.

    Understanding how to use a multimeter not only makes your work easier but also improves the chances of repairing a device correctly on the first attempt.

    “Good tools make you skilled. Understanding those tools makes you unstoppable.”

    This guide explains everything in a clean, simple manner — what a multimeter does, how to use it in phone repair, the meaning of each mode, real-life examples, and practical tips from repair experience. Even if you’re a complete beginner, you’ll feel confident using a multimeter by the end of this article.


    What Is a Multimeter and Why Is It Important in Mobile Repair?

    A multimeter is a measuring instrument used to test voltage, resistance, continuity, and electronic components. In mobile phone repair, it helps technicians to:

    • Check whether the battery or charging section is working
    • Detect short circuits on the motherboard
    • Measure voltage output from charging points
    • Test components like resistors, capacitors, speakers, ringers, and microphones
    • Verify if tracks and connections are intact
    • Diagnose dead or non-booting devices

    The multimeter acts like the eyes of a technician. Without it, you are guessing. With it, you know exactly what is happening inside the phone.

    “Electronics don’t fail without a reason — a multimeter helps you find that reason.”


    Types of Multimeters: Which One Should You Use?

    There are two major types:

    1. Digital Multimeter (DMM)

    This is the most widely used multimeter today. It shows readings in numerical form on a screen and gives faster, more accurate results.

    digital multimeter

    Benefits:

    • Easy to read
    • More accurate
    • Compact and lightweight
    • Ideal for delicate smartphone components
    • Has built-in functions like auto-range in advanced models

    2. Analog Multimeter

    This multimeter uses a needle and scale to show readings. It is old, retro type used by a very few old and senior technicians only.

    Older technicians still like it because:

    • It shows variations smoothly
    • It works well for some deep testing scenarios
    Analog Multimeter

    However, for mobile repair, digital models are preferred because the components are very small and require precise measurement.


    Understanding Probes and Ports

    Every multimeter comes with two probes:

    • Red probe = Positive (+)
    • Black probe = Negative (–)
    using a multimeter in mobile repairing

    On the meter, you’ll see port labels such as:

    • COM → Common port (black probe goes here)
    • VΩmA → Voltage/Resistance port (red probe goes here)
    • 10A/20A → High current port (not used in mobile repair)

    For mobile phone diagnostics, you only use COM and ports. Insert black probe in COM port and the black probe in the VΩmA port

    Incorrectly inserting probes into the high-current port can damage both the meter and the phone, so handle carefully.


    Important Multimeter Settings Used in Mobile Repair

    A multimeter has several settings, but mobile technicians mainly use these 3 settings only:

    how to use a multimeter in cell phone repairs

    1. DC Voltage Mode (V⎓)

    This mode is used to measure the voltage of:

    • Batteries
    • Battery connectors
    • Charging input
    • Power rails on the motherboard
    • Boost converters and regulators

    How to Use DC Voltage Mode

    1. Turn the dial to DC voltage (symbol: V with straight line and dots).
    2. Connect the black probe to ground (battery negative or metal shielding).
    3. Touch the red probe to the point you want to measure.
    4. Read the voltage displayed on the screen.

    Use Cases in Mobile Repair

    • Checking if the battery has proper voltage
    • Testing whether the charging port is supplying power
    • Verifying voltage at PMIC output lines
    • Checking if the phone is getting power when the ON button is pressed

    Example

    A healthy Li-ion mobile battery normally shows around 3.7V–4.3V depending on charge level.

    If the battery connector shows 0V, the device will not power ON — a sign of a charging IC or power rail issue. Learn how to check a smartphone battery with a multimeter in details


    2. Resistance Mode (Ω)

    Resistance mode helps measure:

    • Resistors
    • Coils
    • Internal lines
    • Microphone types
    • Faulty components in the network section

    How to Use Resistance Mode

    1. Set the multimeter to Ω.
    2. Touch the probes to both ends of the component.
    3. Compare the reading with standard values or schematic diagrams.

    Use Cases in Mobile Repair

    • Testing resistors and their values
    • Checking if a coil is open
    • Identifying high-resistance lines causing signal issues
    • Testing electret microphones (older devices)
    • Checking component failure after water damage

    If a resistor reads or extremely high Ω beyond its rated value, it is faulty.


    3. Continuity Mode (Beep Mode / Diode Mode)

    This is one of the most used settings in phone repair.

    What It Does

    When you touch two points that are connected internally, the multimeter:

    • Beep sound (in most models)
    • Or shows a continuity reading (in some models)

    This mode helps you check if a track, line, or component connection is complete.

    How to Use Continuity Mode

    1. Set the dial to the continuity or diode symbol.
    2. Touch the two probes together — you should hear a beep.
    3. Now touch the probes to the two points you want to test.

    Use Cases

    • Checking broken PCB tracks
    • Checking jumpers
    • Testing speaker terminals
    • Testing ringer and vibrator motor
    • Checking whether the motherboard has a short circuit
    • Testing battery connector polarity

    Detecting a Short Circuit

    Shorting is a common issue in dead or overheating phones.

    To test:

    1. Place probes on the battery connector terminals.
    2. Check in one direction.
    3. Reverse the probes and check again.

    Results:

    • Beep both ways → Motherboard is short
    • Beep only once → Normal
    • Very low diode reading both ways → Short
    • One side shows value, other side shows 1 (open) → Normal

    Different phones show different readings, so rely on pattern recognition and experience.


    Testing Common Components Using a Multimeter

    Below is a practical guide for checking the most common parts in a mobile phone.


    1. Testing a Speaker

    Speakers usually show a resistance between 8Ω–32Ω.

    Steps:

    1. Set the meter to continuity or resistance.
    2. Touch probes to speaker terminals.
    3. Beep or a stable resistance value = good speaker.
    4. No response = speaker damaged.

    2. Testing a Microphone

    Modern smartphones use digital microphones, which require dedicated testing tools. However, older devices had electret mics that can still be tested.

    Steps for older mic types:

    1. Use the resistance mode.
    2. Check for reading within specified range.

    If readings are unstable, the mic may be faulty.


    3. Testing a Ringer / Buzzer

    Buzzers behave like speakers.

    Steps:

    1. Use continuity mode.
    2. Beep or small resistance = working.
    3. No beep = faulty.

    4. Testing Charging Connector

    A multimeter helps detect:

    • Loose connector
    • Faulty pins
    • No output voltage from the charger

    Steps:

    1. Use DC voltage mode.
    2. Connect charger.
    3. Check pins for output (usually 5V).

    If voltage is missing or fluctuating, the charging section needs repair.


    5. Testing Battery Health

    A battery is considered functional if it holds sufficient voltage.

    Typical values:

    • Fully charged: 4.2V
    • Normal state: 3.7V–3.9V
    • Deep discharge: below 3.0V

    Batteries below 3.0V might not charge and may need boosting.


    How to Check Short Circuits on the Motherboard

    Short circuits are one of the most common causes of dead phones.

    Steps:

    1. Set the meter to continuity or diode mode.
    2. Place probes on battery positive and negative.
    3. Listen for the beep.

    Beep in both directions = Short circuit.
    Beep only one way = Normal.

    Once a short is confirmed, technicians begin isolating sections such as:

    • Charging IC
    • PMIC
    • Capacitors
    • CPU/SoC lines

    Most shorts are caused by tiny capacitors near the battery line.

    Read in detail how to check shorting in mobile phones.


    Best Practices for Using a Multimeter in Mobile Repair

    Using a multimeter correctly not only gives accurate results but also protects sensitive components.

    ✔️ Always use the correct mode

    Using the wrong mode, especially AC voltage, can damage your motherboard.

    ✔️ Keep probes steady

    Shaking hands can touch multiple lines and cause further damage.

    ✔️ Understand ground points

    The metal shield, screw areas, and negative terminal all serve as ground.

    ✔️ Use sharp probes

    Sharp tips help test tiny SMD components.

    ✔️ Avoid cheap multimeters

    They give inaccurate readings that can lead to wrong diagnosis.

    ✔️ Compare readings with another working board

    This is the best way to train your understanding.


    Real-Life Repair Scenarios Using a Multimeter

    Below are common examples from practical repair work.


    Scenario 1: Phone Not Powering On

    Steps:

    1. Test battery voltage (DC mode).
    2. Test battery connector output.
    3. Check continuity between power button line and ground.

    This identifies whether the issue is with the battery, connector, or power IC.


    Scenario 2: Phone Overheating

    Overheating often indicates a short.

    Use continuity mode to test major power rails. If the meter beeps both ways, the line is short.


    Scenario 3: Not Charging

    Use DC voltage mode to:

    • Check voltage at charging port
    • Test input at charging IC
    • Verify voltage reaching battery terminal

    This helps pinpoint whether the problem is mechanical or motherboard-level.


    Common Multimeter Mistakes Technicians Should Avoid

    • Using multimeter on wrong mode
    • Touching components with excessive pressure
    • Testing on wet motherboards
    • Not removing the battery while testing resistance
    • Assuming all beeps indicate a short
    • Using low-quality probes

    Even experienced technicians occasionally make these mistakes, so awareness is important.


    Conclusion

    A multimeter is one of the smartest investments you can make as a mobile repair technician. With this single tool, you can diagnose power issues, find shorts, test components, and understand the health of the motherboard.

    More importantly, it builds your confidence.

    A technician who knows how to use a multimeter can solve almost any hardware-level problem.

    “Master your tools, and your tools will master every fault you face.”

  • How to Find A Lost Cell Phone: Easy Tracking Guide

    How to Find A Lost Cell Phone: Easy Tracking Guide

    Losing a phone is one of the most stressful experiences in today’s digital world. Your device holds your contacts, memories, banking apps, personal data, and everyday tools. Misplacing it — even for a few minutes — can create panic. But the good news is that most lost phones can be found if you take the right steps immediately.

    “A lost phone is only lost when you stop trying to find it.”

    This guide explains simple, practical, and effective methods to track, locate, and recover your missing mobile. Whether you misplaced it at home, left it at work, or fear it was stolen, you’ll learn exactly what to do — calmly, confidently, and step by step.

    We’ll cover everything from calling your device to using advanced tracking systems like Google Find My Device and Apple’s Find My network, plus what to do if your phone has no internet or is switched off.


    Why Losing a Phone Feels So Stressful

    Your phone today is more than just a gadget. It is:

    • Your communication tool
    • Your camera
    • Your digital wallet
    • Your authentication device
    • Your navigation assistant
    • Your identity and security hub

    Misplacing it feels like losing a part of your daily life. But most phones leave digital footprints that help you track them down — if you know how to use the right tools.


    First Steps: Simple Methods to Recover a Missing Phone

    Before using tracking apps or reporting theft, try these straightforward methods.


    1. Call Your Phone

    This is the fastest and simplest way to locate a misplaced mobile.

    • If it’s ringing, follow the sound.
    • If it’s vibrating, move slowly around the room to sense the vibration.
    • If someone finds it, they may answer and return it.

    Important Tip:
    If your phone is on silent, many modern Android and iPhone tools allow you to force it to ring remotely. We will cover that later.

    lost your cell phone somewhere

    2. Retrace Your Steps

    Think about where you last used your device. Then search:

    • Your desk
    • Couch or bed
    • Kitchen counter
    • Car seat or dashboard
    • Pockets or bags
    • Restaurant or shop where you visited recently

    Often, the phone is hiding in obvious places.


    3. Ask People Around You

    Don’t feel embarrassed. Simply ask:

    • Family members
    • Friends
    • Colleagues
    • Neighbors

    Sometimes someone picks it up for safekeeping and forgets to inform you.


    4. Send a Text Message to Your Phone

    If you suspect someone might find your lost phone, send a message like:

    “This phone is lost. Please call me at [your number]. Reward if returned.”

    Honest people often respond quickly.


    5. Use a Secondary Device to Check Recent Locations

    If you have another phone, tablet, or laptop connected to the same Google or Apple ID, you may be able to see your last location history even before launching a tracking tool.


    Using Technology to Track Your Lost Phone

    This is the most important part of the guide. Modern smartphones come with built-in tracking systems that work even if the device is silent, lost indoors, outdoors, or connected to a network.

    We’ll start with Android, then move to iPhone.


    🟢 How to Find a Lost Android Phone Using Google Find My Device

    Google’s Find My Device is one of the most powerful tracking tools available. It can:

    • Show your phone’s location on a map
    • Force the phone to ring
    • Lock your phone remotely
    • Display a custom message
    • Erase your data
    • Show last known location
    • Track nearby devices using Google’s crowdsourced Find My Device network

    To use this tool, your phone must have:

    • A Google account logged in
    • Location services ON
    • Internet or Bluetooth nearby device detection

    Even if the phone is offline, the last known position will be shown.


    Step-by-Step Guide: Track Your Android Phone

    Step 1: Visit the Find My Device website

    Go to: google.com/android/find
    (Or use the Find My Device app on another device.)

    Step 2: Sign in to your Google account

    Use the same Google ID linked to your missing phone.

    Step 3: Select your device

    Your phone’s approximate or exact location will appear on the map.

    Step 4: Choose an action

    1. Play Sound

    Your phone rings at full volume for 5 minutes — even in silent mode.

    2. Secure Device

    You can lock the phone and display a message like:
    “Phone lost. Please call 98xxxxxxx.”

    3. Erase Device

    If stolen and unrecoverable, you can erase all data remotely.
    (Note: Once erased, you cannot track the device.)


    Tracking an Offline Android Device

    Google’s modern Find My Device network uses Bluetooth signals from nearby Android devices to help locate your lost phone — even if:

    • It has no internet
    • It’s switched off
    • The SIM card is removed

    The moment a nearby device detects it, the location updates automatically.


    Track a Lost Android Phone Through Google Maps Timeline

    If Find My Device doesn’t show the phone, try this method.

    Steps:

    1. Open Google Maps on another device.
    2. Tap your profile → Your Timeline.
    3. Check location history for your last movements.

    This is useful for tracking lost or stolen phones after the battery dies.


    🔵 How to Find a Lost iPhone Using Apple Find My

    Apple’s Find My network is extremely powerful and works through:

    • GPS
    • Wi-Fi
    • Bluetooth
    • Nearby Apple devices detecting your missing phone

    It can track your phone even:

    • When it’s offline
    • When turned off
    • Without SIM
    • Without active internet

    This network is connected to millions of Apple devices worldwide.


    Step-by-Step Guide: Track Your iPhone

    Step 1: Open iCloud.com/find

    Or use the Find My app on another Apple device.

    Step 2: Sign in with your Apple ID

    Use the ID linked to your missing iPhone.

    Step 3: Select your iPhone

    Your device location appears on the map.


    Actions You Can Take

    1. Play Sound

    Forces the iPhone to ring, even on silent.

    2. Lost Mode

    This locks your phone and shows a custom message such as:
    “Lost iPhone. Please contact me.”

    It also disables Apple Pay for your safety.

    3. Erase iPhone

    Use only if you’re sure the device cannot be recovered.


    🟣 Advanced Tracking Features for Apple Devices

    Apple’s Find My network can:

    ✔ Track your phone even when switched off

    Recent models send Bluetooth signals even in shut-down mode.

    ✔ Track via nearby devices

    Any Apple device passing near your phone can anonymously update the location for you.

    ✔ Show location of AirPods, Apple Watch, and items attached to AirTag

    Useful if they are connected to your phone.


    If Your Phone Is Switched Off or Has No Signal

    A turned-off phone is not the end. You can still:

    • See its last known location
    • Check location history
    • Get updates when it switches ON
    • Track via Bluetooth-based Find My networks (Android & Apple)

    If stolen, do not confront the thief — let authorities handle it.


    What to Do If Your Phone Is Stolen

    If you believe the phone was taken:

    1. Lock the device immediately

    Use Find My Device or Find My iPhone.

    2. Display a message on the lock screen

    Offer a safe number for contact.

    3. Track the movement

    Do not approach dangerous locations.

    4. Report to the police

    Provide:

    • IMEI number
    • Last location
    • Purchase bill

    IMEI allows authorities to request telecom assistance.

    5. Inform your mobile operator

    They can block the SIM to prevent misuse.


    How to Get Your IMEI Number When the Phone Is Missing

    Look in:

    • Your phone’s retail box
    • Purchase invoice
    • Email receipts
    • Google account device list
    • Apple ID device list

    IMEI helps in filing police complaints.


    Useful Tips to Prevent Losing Your Phone Again

    Prevention is better than searching later. Here’s how to avoid future problems.


    1. Enable Tracking Services Immediately

    • Turn ON Google Find My Device (Android)
    • Turn ON Apple Find My (iPhone)
    • Allow location access
    • Keep Bluetooth ON if using the Find My network

    2. Use a Smart Tracker or Tag

    Attach tags like:

    • Bluetooth trackers
    • AirTag (iPhone)
    • SmartTag

    If your phone is attached to your bag, keys, or wallet, these tags can help track everything together.


    3. Keep Your Phone in the Same Place Every Day

    Create a habit:

    • A specific pocket
    • Bag compartment
    • Drawer
    • Desk area

    Consistency reduces misplacements.


    4. Use Lock Screen Information

    Add your alternate number to the lock screen.
    This allows honest people to contact you instantly.


    5. Avoid Keeping Your Phone on Silent All the Time

    Silent mode makes finding the phone harder.
    Use vibration + ring, or enable “Find My” ring override.


    What Not to Do When Your Phone Is Lost

    Avoid these mistakes:

    • Do not panic
    • Do not try to track a thief alone
    • Do not erase the phone unless necessary
    • Do not delay contacting authorities
    • Do not share your tracking dashboard with strangers

    Staying calm helps you think clearly.


    Conclusion

    Losing a phone can be frustrating, but modern smartphones are built with powerful recovery tools. Whether you use an Android or an iPhone, you can track your device, force it to ring, secure it remotely, or even erase your data if needed.

    With the right steps, your chances of recovering your phone increase dramatically.

    “It’s not about how fast you react — it’s about knowing the right steps to take.”

    Most importantly, enable tracking features before something goes wrong. A few minutes of setup today can save hours of stress later.

  • Common Cell Phone Problems: Full List of Faults Explained

    Common Cell Phone Problems: Full List of Faults Explained

    Cell phones have become our closest companions. They wake us up, connect us, entertain us, and store our memories — so when a phone stops working, even a small fault can disrupt our entire routine. For repair technicians, understanding these issues is essential. For users, knowing the common problems helps you stay prepared and identify faults early.

    “Every problem has a root cause — the real skill lies in finding it.”

    This guide explains all major mobile phone faults, how they occur, what they mean, and how technicians typically diagnose them. The goal is to give you a clear, updated, and practical understanding of today’s smartphone issues — in simple language.


    Types of Mobile Phone Faults

    All phone problems fall into three broad categories:

    1. Settings-Related Faults

    These occur due to wrong configurations, disabled features, changed options, or simple mistakes made by the user.

    2. Software Faults

    These involve the phone’s operating system, apps, corrupt files, firmware crashes, or update failures.

    3. Hardware Faults

    These are physical failures such as broken displays, damaged charging ports, faulty motherboards, or non-working components.

    Understanding which category the issue belongs to helps technicians diagnose faster and more accurately.


    Full List of Modern Mobile Phone Faults (Updated)

    Below is an expanded and updated list of all common smartphone faults, including newly emerging issues found in today’s touchscreen devices.
    Obsolete or outdated faults (from keypad-era phones) have been removed, updated, or rewritten.


    1. Dead Phone (Not Powering On)

    A phone that doesn’t turn on, doesn’t vibrate, and shows no charging sign is considered dead.
    Causes may include:

    • Battery failure
    • Water damage
    • Short circuit
    • Faulty power IC (PMIC)
    • Damaged charging port

    Technicians diagnose this using power supply tools and multimeters.


    2. SIM Card Not Detected

    The phone shows “No SIM” or “Insert SIM Card” even when the SIM is inserted.
    Usually caused by:

    • Dirty or bent SIM pins
    • Damaged SIM slot
    • Software conflict
    • Network IC failure

    Modern eSIM phones may show activation issues instead.


    3. Hanging / Freezing / Lagging

    The cell phone becomes unresponsive or slow.
    Causes include:

    • Low storage
    • Heavy apps
    • Overheating
    • Corrupted firmware
    • Faulty RAM or CPU chip

    A common sign of deeper software damage.


    4. Network Issues (No Signal / Low Signal / Dropping Calls)

    This includes:

    • No network
    • Weak signal
    • “Emergency calls only”
    • Calls dropping automatically

    Reasons:

    • Damaged antenna
    • SIM issues
    • Firmware bugs
    • Network IC failure

    5. Microphone Not Working

    People cannot hear you during calls or voice recordings.

    Common reasons:

    • Dust in MIC hole
    • Water damage
    • Damaged MIC module
    • Firmware glitch
    • Noise cancellation mic fault

    Modern phones have multiple microphones, so diagnosis requires precision.


    6. Speaker Issues (No Sound During Calls)

    The earpiece speaker stops working, making you unable to hear the caller.

    Usually caused by:

    • Dust buildup
    • Flex cable damage
    • Moisture
    • Faulty earpiece speaker

    7. Loudspeaker / Media Speaker Fault

    No ringtone, music, notifications, or hands-free audio.

    Reasons:

    • Faulty loudspeaker unit
    • Software audio routing issue
    • Audio IC failure

    8. Vibration Not Working

    Vibration motor (haptic motor) stops functioning.

    Common causes:

    • Motor wear-out
    • Loose connection
    • Board damage

    9. Display / Screen Faults

    This includes:

    • Blank screen
    • Broken or cracked display
    • Flickering issue
    • Green/pink lines
    • Black spots
    • No backlight
    • Touch working but no display
    • Display working but touch not responding

    Modern OLED screens also face:

    • Burn-in
    • Ghosting
    • Color shifts

    10. Auto Power Off

    Phone switches off randomly without user action.

    Reasons:

    • Overheating
    • Battery failure
    • Power IC malfunction
    • Corrupt firmware

    11. Auto Restart (Bootloop)

    The phone continuously restarts or gets stuck on the logo.
    Causes:

    • System update failure
    • Damaged OS
    • Application conflict
    • Hardware shorting
    • Damaged booting IC

    Bootloops are common after failed software updates.


    12. Call Drops / Call Disconnecting

    The call ends abruptly.
    This may be due to:

    • Weak network
    • Software bugs
    • Damaged antenna
    • Faulty baseband IC

    13. Charging Problems

    One of the most common faults today. Includes:

    • Not charging
    • Slow charging
    • Intermittent charging
    • Overheating while charging
    • Charger connected but not increasing battery percentage

    Reasons:

    • Faulty cable or adapter
    • Broken charging port
    • Charging IC damage
    • Battery swelling
    • Dirt inside port

    14. Charging Port Damage (USB Port Faults)

    When the port becomes loose, bent, corroded, or physically damaged.
    Symptoms:

    • Cable must be held at an angle
    • Charging stops when moved
    • No data transfer

    15. Touchscreen Problems

    Touch issues are very common today.

    Includes:

    • Touch not working
    • Touch responding on its own (ghost touch)
    • Slow or delayed touch
    • Touch working only in some areas

    Causes:

    • Damaged touch panel
    • Faulty display connector
    • Software glitch

    16. Battery Draining Fast

    Battery percentage drops quickly even with light usage.
    Reasons:

    • Battery health degraded
    • Power-hungry apps
    • Background processes
    • Network fluctuations
    • Faulty charging IC
    • Swollen battery

    Technicians use software and multimeter tools to confirm battery health.


    17. Overheating Problems

    Phone becomes hot during use, charging, or even idle.

    Causes:

    • Heavy gaming
    • Faulty CPU
    • Short circuit
    • Damaged battery
    • Poor ventilation
    • Malware apps

    If the phone overheats too much, it may shut down automatically.


    18. Bluetooth Not Working

    Bluetooth won’t connect, keeps disconnecting, or doesn’t turn on.

    Reasons:

    • Corrupted Bluetooth firmware
    • Radio frequency interference
    • Damaged Wi-Fi/Bluetooth IC

    19. Wi-Fi Not Connecting

    Wi-Fi may show:

    • No connection
    • Authentication error
    • Frequent disconnection

    Possible causes:

    • Router conflict
    • Software bugs
    • Wi-Fi IC damage

    20. Mobile Data Not Working

    Internet does not work even though network bars are visible.

    Causes include:

    • APN settings wrong
    • Corrupt OS
    • Network provider issue
    • Baseband malfunction

    21. Camera Problems

    Modern camera modules face several faults:

    • Camera not opening
    • “Camera failed” error
    • Blurry pictures
    • Black screen when switching lenses
    • Ultrawide/macro lens not detecting
    • Front camera not working
    • Portrait mode failure
    • Video stabilization not working

    Some premium phones also face OIS motor failure.


    22. Fingerprint Sensor Not Working

    Includes:

    • No fingerprint detection
    • Slow recognition
    • Error in setup
    • In-display fingerprint failure

    Usually caused by:

    • Damaged sensor
    • Moisture
    • Software conflicts

    23. Face Unlock Not Working

    Face ID or Face Unlock may stop working due to:

    • Dirty front camera
    • Low light
    • Damaged sensors
    • Software update issues
    • TrueDepth camera failure (iPhone)

    24. Memory Card Not Detected

    For phones with SD card slots.

    Reasons:

    • Corrupted SD card
    • Dirty contacts
    • Damaged slot
    • Unsupported file format

    25. Proximity Sensor Issue

    Screen does not turn off during calls or turns off at the wrong time.

    Causes:

    • Screen guard blocking sensor
    • Sensor misalignment
    • Calibration error

    26. GPS / Location Problems

    Navigation becomes inaccurate or fails to track position.

    Reasons:

    • Weak GPS antenna
    • Software bugs
    • Location services turned off
    • Corrupted system files

    27. App Crashing / App Not Opening

    Apps force-close due to:

    • Outdated version
    • Low RAM
    • OS conflict
    • Corrupted data

    28. Storage Full Even When Not Used

    A common issue in modern phones.

    Reasons:

    • System cache
    • Duplicate files
    • Hidden media
    • Malware apps
    • Defective memory chip (EMMC/UFS)

    Technicians check using special memory analysis tools.


    29. Phone Not Detecting on Computer (USB Data Failure)

    Includes:

    • PC not recognizing phone
    • No file transfer
    • Only charging but no MTP mode

    Reasons:

    • Faulty USB driver
    • Cable issues
    • Data pins damaged
    • Motherboard fault

    30. Notification Problems

    User does not receive notifications on time.

    Occurs due to:

    • Battery optimization restrictions
    • Disabled app permissions
    • Software bugs

    31. Liquid Damage Faults

    Water damage causes unpredictable issues such as:

    • Touch not working
    • Speaker distortion
    • Charging short
    • No power
    • Corrosion on connectors

    Liquid damage requires deep cleaning and board-level diagnosis.


    32. Software Update Issues

    Phones may face:

    • Update stuck
    • Update failure
    • Feature missing
    • Battery draining after update

    Some updates introduce bugs that require patch fixes.


    33. Bootloader / FRP / Account Lock Issues

    Phones sometimes get locked due to:

    • Forgot password
    • Factory reset protection (FRP)
    • Carrier lock
    • Bootloader relocking

    Technicians use specialized software tools to resolve these cases (lawfully).


    34. Audio IC Failure (Common in Certain Models)

    Symptoms:

    • No sound
    • Voice not recorded
    • Speaker disabled
    • Microphone not detecting
    • Call drops when enabling loudspeaker

    This is a common board-level hardware problem.


    35. Backlight Failure

    Screen is ON but completely dark unless viewed under direct light.

    Causes include:

    • LED backlight strip damage
    • Backlight driver IC failure
    • Blown backlight filter

    Learn how to troubleshoot the most common cell phone faults by reading How To Repair Your Cell Phone Yourself


    Conclusion

    Mobile phones may look simple from the outside, but they contain hundreds of delicate components inside. Knowing the different types of faults helps technicians diagnose issues faster and gives users a better understanding of what might be wrong with their device.

    “A fault diagnosed well is already half repaired.”

    If you want to learn how to fix many of these problems yourself, always start with simple checks before attempting advanced repairs.

  • How to Use Your iPhone as a Portable Storage Drive

    How to Use Your iPhone as a Portable Storage Drive

    Your iPhone is more powerful than you think. Apart from capturing photos, browsing the web, or staying connected, it can also work as a portable storage drive — a secure, convenient way to carry your important files without needing an external hard disk or USB drive.

    Today’s iPhones offer fast processors, generous storage options, advanced file management, and built-in tools that make them perfect for storing documents, videos, music, work files, and more.

    “Your iPhone is a tool — and it becomes even more useful when you learn how to use it like one.”

    This guide explains every modern way to use an iPhone as a portable drive, including USB transfers, the Files app, Wi-Fi sharing, AirDrop, external drive support, and third-party apps. Everything is written in simple language with practical steps.


    Why Use Your iPhone as a Portable Drive?

    Here are the biggest advantages:

    • You don’t need to carry an extra USB drive
    • Your data stays with you at all times
    • Files remain secure inside Apple’s ecosystem
    • Sharing files becomes extremely easy
    • You can organize everything using the Files app
    • Most tasks can be done wirelessly
    a portable hard disk drive

    And unlike traditional storage devices, your iPhone offers encryption, password protection, and cloud backup as added safety layers.


    Method 1: Using USB Cable to Access iPhone Storage on Windows & Mac

    This is the simplest and fastest way to use your iPhone as a portable storage device. Modern systems no longer require iTunes for basic file transfer.


    Using Your iPhone as Storage on Windows (File Explorer)

    Step-by-step guide:

    1. Connect your iPhone to the PC using a USB-to-Lightning or USB-C cable.
    2. Unlock your iPhone.
    3. Tap “Allow” when your phone asks to trust the computer.
    4. Open File Explorer on Windows.
    5. You will see Apple iPhone listed under Devices.
    6. Open it and access DCIM (Photos & Videos).
    7. You can now copy media files between the phone and PC.

    Important Note:

    Windows allows full access only to the Media folder (DCIM) because of iOS sandboxing.
    But you can still use third-party apps to create custom folders — explained later.


    Using USB Transfer on Mac (Finder Integration)

    Mac users have an even easier method:

    1. Connect the iPhone via USB.
    2. Open Finder (replaces iTunes for file management).
    3. Select your iPhone from the sidebar.
    4. Navigate to Files section.
    5. Drag & drop files into apps like:
      • Files
      • VLC
      • Documents by Readdle
      • Adobe Acrobat
      • Any file-handling app

    You can create folders, import documents, export files, and manage everything smoothly.


    Method 2: Using the Files App — The Heart of iPhone Storage

    The Files app is what truly allows your iPhone to act as a portable storage drive.

    Think of it as the iPhone’s internal hard drive, where you can:

    • Create folders
    • Store documents
    • Save downloads
    • Import files from PC
    • Manage offline media
    • View PDFs, videos, audio, and images
    • Organize files just like on a computer

    How to Store Files Locally (Offline Storage)

    1. Open the Files app.
    2. Tap BrowseOn My iPhone.
    3. Create your folders.
    4. Add files using:
      • Share → “Save to Files”
      • Drag & drop (on iPad or Mac)
      • Downloads from Safari
      • USB transfer
      • Third-party apps

    Everything you store in On My iPhone stays offline, just like a portable hard drive.


    Using Third-Party Apps to Expand Storage Ability

    Apps like:

    • Documents by Readdle
    • VLC Media Player
    • Adobe Acrobat
    • FE File Explorer
    • FileBrowser Pro

    They allow:

    • Custom folders
    • Wireless transfers
    • FTP/SFTP connection
    • Private encrypted folders
    • ZIP/RAR extraction

    This greatly expands what your iPhone can do as a storage device.


    Method 3: Using AirDrop for Quick Wireless File Transfer

    AirDrop is one of the fastest and most secure wireless transfer methods in the world.

    It allows instant sharing between:

    • iPhone → Mac
    • iPhone → iPhone
    • iPhone → iPad

    No cables, no apps, no internet required.


    How to Use AirDrop (iPhone to Mac or iPhone to iPhone)

    1. Turn ON Bluetooth and Wi-Fi on both devices.
    2. Open Control Center → long-press the connectivity box.
    3. Tap AirDrop → choose Everyone or Contacts Only.
    4. Select the file → tap ShareAirDrop.
    5. Choose the receiving device.

    Files transfer instantly and appear in the correct location automatically.


    Method 4: Using Wi-Fi Transfer Tools (Browser & Network Sharing)

    Many apps offer local Wi-Fi sharing without cables.

    These include:

    • Documents by Readdle
    • FE File Explorer
    • VLC
    • SendAnywhere
    • Snapdrop (browser-based AirDrop alternative)

    How Wi-Fi Transfer Works

    1. Connect both devices to the same Wi-Fi network.
    2. Open your transfer app.
    3. Enable Wi-Fi Transfer.
    4. You will see an IP address like:
      http://192.168.1.10:8080
    5. Open that address from your PC’s browser.
    6. Upload or download files wirelessly.

    This makes your iPhone behave like a wireless external drive.


    Method 5: Using External USB Drives with iPhone (OTG Support)

    Modern iPhones support external storage directly using:

    • USB-C flash drives
    • Lightning flash drives with dual connectors
    • Portable SSDs (Samsung T7, SanDisk Extreme, etc.)
    • Hard disks (with extra power)

    Apple introduced native support for external drives in the Files app, making it incredibly easy to move files between:

    iPhone ↔ USB drive ↔ Computer


    How to Use an External Drive with iPhone

    1. Connect your storage device to the iPhone using:
      • USB-C cable (for newer iPhones)
      • Lightning-to-USB camera adapter (older models)
    2. Open the Files App.
    3. Your drive appears under Locations.
    4. Drag and drop files between iPhone and the drive.

    Important Tip:

    Some hard drives need extra power, so use a USB hub or external power source.


    Method 6: Cloud Sync + Offline Storage (Hybrid Method)

    You can also combine cloud storage with offline iPhone storage.

    Supported services:

    • iCloud Drive
    • Google Drive
    • Dropbox
    • OneDrive
    • Mega
    • pCloud

    Benefits:

    • Keeps files synced across devices
    • Lets you download files for offline use
    • Reduces physical storage usage

    Not a replacement for a physical hard drive, but extremely convenient.


    Limitations of Using iPhone as a Storage Drive

    To remain honest, here are real-world restrictions:

    1. iPhone doesn’t expose full root storage like Android or USB disks.
    2. Apps operate in sandboxed folders, meaning each app has its own storage.
    3. Windows access is limited mostly to media folders unless you use apps.
    4. Large file transfers may require modern cables (USB-C is much faster).
    5. DRM-protected media cannot be moved freely.

    But with external drives, advanced apps, and the Files app, you can still use your iPhone almost exactly like a portable hard drive.


    Best Practices for Using iPhone as Portable Storage

    • Create organized folders in the Files app.
    • Use USB-C cables where possible for faster transfer speeds.
    • Back up important files to cloud to avoid accidental loss.
    • Use password protection for sensitive data.
    • Clean up old downloads regularly to save space.
    • Use external drives for large video files.

    “Storage is only useful when it’s organized and secure.”


    Who Benefits Most from Using iPhone as a Portable Drive?

    This method is useful for:

    • Students carrying notes and PDF books
    • Travelers storing passport scans, tickets, and offline maps
    • Business users keeping presentations and work files
    • Video creators managing clips and drafts
    • Teachers with class materials
    • Anyone who prefers not to carry extra gadgets

    Your iPhone becomes a safe, reliable digital companion.


    Conclusion

    Using an iPhone as a portable storage drive is easier today than ever before. With the Files app, USB connectivity, Wi-Fi transfer, AirDrop, and external drive support, your phone becomes a powerful, flexible storage tool that fits in your pocket.

    Whether you need to carry documents for work, store offline videos, manage project files, or back up important data, your iPhone can do it all with minimal effort.

    Once you learn these methods, you’ll never feel the need to carry a separate hard drive again.

  • Things To Check Before Buying A Used Or Second-Hand Cell Phone

    Things To Check Before Buying A Used Or Second-Hand Cell Phone

    Buying a used or second-hand phone can save a lot of money, but it can also turn into a costly mistake if you don’t check the device properly. A pre-owned smartphone may look good from the outside yet hide internal faults that appear only after you take it home. That is why careful inspection is essential.

    Whether you’re buying from a shop, an online marketplace, or an individual seller, this guide will help you understand exactly what to check before making the purchase. It also benefits people running a used phone business, and those who buy refurbished devices in bulk.

    “A smart purchase is not about the price you pay — it’s about the problems you avoid.”

    In this comprehensive guide, we’ll walk through authenticity checks, hardware tests, safety verification, performance evaluation, and pricing strategy. You’ll also find a helpful checklist table to make the process simpler.


    Why You Must Inspect a Used Phone Carefully

    Used phones typically come with:

    • No warranty
    • No exchange policy
    • No guarantee of condition
    • Hidden hardware or software problems
    • Limited support from the seller

    Because of this, you must take responsibility for the inspection. One mistake can result in:

    • Locked devices
    • Blacklisted IMEI
    • Faulty batteries
    • Broken motherboards
    • High repair charges
    • Data security issues
    how to check a used second phone smartphone

    Fortunately, most problems are easy to detect if you follow a structured approach like the one below.


    1. Check Authenticity and Ownership

    The first and most important step is verifying that the phone is not stolen. Buying a stolen phone can lead to police issues and the device may get disabled later.

    How to Check Authenticity

    • Ask for the original bill, purchase receipt, or retail invoice.
    • Check the IMEI number on the box, SIM tray, and device settings. All three must match.
    • Cross-check IMEI on trusted websites like:
    • Ask whether the phone is carrier unlocked or SIM-locked.
    • For iPhones, check Activation Lock status using:
      • Apple Support
    • For Android devices, look for OEM unlock status and Google account removal confirmation.

    If anything feels suspicious, do not buy the phone.

    “A good deal is only good if it’s real.”


    2. Check Warranty and Service Eligibility

    A used phone with some warranty left is always a safer buy.

    What to verify:

    • Remaining warranty through the brand website:
      • Apple Check Coverage
      • Samsung Warranty Checker
      • Xiaomi, Oppo, Vivo, OnePlus support pages
    • Whether the phone is eligible for future repairs
    • Check if extended warranty or insurance was purchased
    • Confirm that the phone has not been previously tampered with

    Phones that have undergone unauthorized repairs may be refused by official service centres.


    3. Check the Physical Condition Thoroughly

    The phone must be inspected from every angle.

    Look for:

    • Cracks on the screen
    • Dead pixels, color patches, or burn-in marks
    • Bent frame
    • Loose back panel
    • Dust inside lenses
    • Dents near the charging port (often indicate drops)
    • Damaged speaker grills
    • Loose buttons

    Remember: A phone that shows heavy external damage may have deeper internal damage.


    4. Check Working Condition and All Internal Functions

    This is where most buyers make mistakes — they check only the screen and camera.
    You must check everything.

    Critical Hardware Tests

    ✔ Microphone – Record a voice note
    ✔ Earpiece speaker – Make a call
    ✔ Loudspeaker – Play music
    ✔ Vibration motor – Test vibration settings
    ✔ Cameras – Switch between all lenses
    ✔ Flashlight – Turn ON/OFF
    ✔ SIM detection – Try inserting a SIM
    ✔ Memory card detection – If applicable
    ✔ Charging port – Check alignment & charging speed
    ✔ USB data transfer – Connect to PC
    ✔ Wi-Fi, mobile data & hotspot
    ✔ Bluetooth pairing
    ✔ GPS accuracy
    ✔ Face unlock / fingerprint sensor
    ✔ Proximity sensor during calls
    ✔ Volume buttons & power button
    ✔ Battery health (in iPhone)
    ✔ Thermal behavior (phone shouldn’t overheat during testing)


    Checklist Table for Easy Verification

    Use this table when inspecting any second-hand phone:

    Item to CheckWhy It MattersWhat to Look For
    IMEI MatchConfirms authenticityBox IMEI = Phone IMEI = Settings IMEI
    iCloud/Google LockPrevents activation issuesEnsure accounts are removed
    DisplayMost expensive part to repairLines, spots, dead pixels, touch accuracy
    Battery HealthDetermines long-term usageiPhone: 85%+ recommended
    Charging PortCommon failure pointLoose connection or slow charging
    Speakers & MicEssential for callsTest call quality
    Network & Wi-FiFor connectivityCheck stability & speed
    CameraImportant for valueTest all lenses & focus
    StoragePrevents future issuesEnsure available space matches claim
    ButtonsHardware durabilityPower + volume buttons must click properly
    Body ConditionReveals drop or damageDents, cracks, bent frame
    SensorsFor daily use & appsTest proximity, gyro, light sensor

    5. Check Battery Condition and Charging

    Battery aging is a major issue in used phones.

    For iPhones:

    • Go to Settings → Battery → Battery Health
    • Anything above 85% is acceptable
    • Below 80% usually requires a replacement

    For Android:

    Battery health varies by brand.
    Use the dial code (if available) or the brand’s device care feature.

    Check charging behavior:

    • Does it charge fast or slow?
    • Does the device heat up unusually?
    • Does the battery drain quickly after charging?

    A swollen battery is a major red flag.


    6. Confirm Performance and Speed

    Even if the phone turns on, it may lag or freeze due to internal issues.

    Test performance by:

    • Opening multiple apps
    • Browsing
    • Playing a short video
    • Switching between apps quickly
    • Running a simple game

    If the phone starts overheating or lagging, skip the device.


    7. Ensure There Are No Software Issues

    Software problems can make even a perfect phone frustrating to use.

    Check for:

    • Frequent app crashes
    • Random restarts
    • Boot loop
    • System update issues
    • Malware or suspicious apps
    • Screen freezing
    • Factory reset failure

    Always check if the phone can be reset to factory settings.
    A phone that cannot be reset may have security locks or corrupted software.


    8. Check Storage Capacity and File System

    Some sellers advertise incorrect storage.

    To verify:

    • Go to Settings → About / Storage
    • Ensure listed storage matches what they claim
    • Check system usage
    • Look for signs of faulty storage such as:
      • Apps opening slowly
      • Files disappearing
      • “Storage full” errors even when empty

    Damaged storage chips (UFS/EMMC) are expensive to repair.


    9. Check Connectivity Features

    A modern smartphone must have properly working connectivity.

    Test:

    • Wi-Fi – Connect to a network
    • Mobile Data – Check speed
    • Bluetooth – Pair with speakers/earphones
    • NFC – Make a quick tap test if possible
    • Hotspot – Turn ON/OFF
    • GPS – Check Maps accuracy

    These features are essential for daily use.


    10. Inspect Camera Quality Carefully

    Don’t just click one photo and move on.

    Test all camera modes:

    • Front & rear cameras
    • Wide-angle lens
    • Macro lens
    • Optical zoom
    • Portrait mode
    • Video stabilization
    • Night mode
    • Autofocus

    Dirt inside the lens or a shaky OIS motor can ruin photos.


    11. Check Accessories and Packaging

    Ask for:

    • Original box
    • Charger
    • Cable
    • Earbuds (if included originally)
    • Bill
    • Warranty card

    If accessories are missing, adjust the price.


    12. Check Market Demand Before Buying

    Some brands or models are easy to sell later, while others have almost no resale value.

    A good used phone should:

    • Belong to a well-known brand
    • Have easily available spare parts
    • Have stable software support
    • Have strong demand in your area

    Before buying, check online pricing on:

    • Amazon
    • Flipkart
    • OLX
    • Cashify
    • Your local marketplace apps

    This gives you an idea of the actual value.


    13. Negotiate the Price Smartly

    Keep these points in mind:

    • Electronics lose value every few months
    • Older models drop in price faster
    • Damaged or repaired phones must be priced much lower
    • If you are buying in bulk, negotiate aggressively

    Price should be based on:

    • Condition
    • Age
    • Warranty
    • Battery health
    • Model demand

    If the seller refuses repairs before sale, offer a much lower price because you are taking the risk.


    14. Where to Check Specifications of Any Model

    Use these trusted websites:

    • GSMArena.com – Specifications, comparisons, user feedback
    • PhoneArena.com – Reviews and hardware details
    • Manufacturer websites – Official specs

    Authoritative websites help confirm whether the device matches what the seller claims.

    “A good phone is not about being new — it’s about being reliable.”


    Conclusion

    Buying a second-hand phone is a smart way to save money — but only if you know how to check it properly. A few minutes of careful inspection can protect you from hidden faults, blacklisted devices, poor battery life, and expensive repairs later.

    Once you learn what to check, you can confidently evaluate any used smartphone and pick the right one at the right price.

  • Most Common Phone Issues and How to Fix Them Easily

    Most Common Phone Issues and How to Fix Them Easily

    Smartphones have become an essential part of our daily lives. We rely on them for communication, entertainment, work, payments, navigation, and even security. But like all electronics, phones develop problems—sometimes due to usage habits, sometimes because of apps or software glitches, and often because of accidental damage.

    The good news is that most phone issues are easy to fix if you understand what causes them and take quick action. Whether you’re using an iPhone, Samsung, Xiaomi, Vivo, Oppo, Motorola, OnePlus, or any other brand, the types of problems you face are often similar.

    “Every problem has a solution—what matters is knowing where to look.”

    This guide explains the most common smartphone issues and provides simple, practical solutions anyone can follow. It’s written for both everyday users and those learning mobile repair.


    1. Cracked or Broken Display

    A cracked screen is one of the most common smartphone problems. Modern phones use glass displays for clarity and touch responsiveness, but this also makes them fragile.

    Common Causes

    • Accidental drops
    • Pressure on the pocket
    • Falling off the bed or table
    • Sharp objects inside bags

    Solutions

    • If the crack is minor, apply a tempered glass to prevent it from spreading.
    • If touch stops working or lines appear, replace the display.
    • Choose original or premium-grade compatible screens for long-term use.
    • Use a shock-absorbing case and a screen protector to prevent future damage.

    Important Tip:
    Display replacement costs vary widely between brands. Check pricing before purchasing a phone or spare part.


    2. Charging Port Problems

    Charging port issues are extremely common because the port is used daily and exposed to dust, lint, and frequent pressure.

    Symptoms

    • Phone charges only when the cable is moved
    • Slow charging
    • Intermittent charging
    • No charging at all

    Causes

    • Dust or lint inside the port
    • Worn-out pins
    • Faulty cable or adapter
    • Water or moisture damage

    Solutions

    • Clean the charging port with a soft brush or wooden toothpick (never use metal).
    • Try a different cable and adapter.
    • Check for loose or wobbly ports, which require port replacement.
    • Use high-quality original or certified accessories.

    Preventive Tip

    Avoid using the phone while charging. This puts extra pressure on the port and loosens it over time.


    3. Battery Draining Fast

    Modern lithium-ion batteries degrade naturally over time, but fast battery drain may indicate deeper problems.

    Common Causes

    • Too many apps running in the background
    • Screen brightness set too high
    • Weak network coverage
    • Background syncing
    • Aging battery
    • Heavy gaming or streaming
    • Battery-intensive apps

    Solutions

    • Enable Battery Saver or Low Power Mode.
    • Keep brightness on auto or reduce manual brightness.
    • Turn off Bluetooth, GPS, or Wi-Fi when not needed.
    • Remove apps that drain battery excessively.
    • Replace the battery if it is worn out.

    Modern Battery Care Facts (Updated)

    To extend battery life:

    • Avoid letting your phone drop below 20% frequently.
    • Avoid charging to 100% all the time—80% is healthier for long-term battery life.
    • Enable Optimized Battery Charging (iPhone/Samsung/OnePlus).
    • Avoid fast charging continuously; mix between normal and fast charging.

    4. Freezing or Hanging Issues

    A phone that freezes or becomes unresponsive can be frustrating.

    Causes

    • Low storage
    • Unoptimized apps
    • Outdated software
    • RAM overload
    • Malware

    Solutions

    • Restart the phone once a day.
    • Clear app cache (Android).
    • Uninstall unnecessary apps.
    • Update apps and system software.
    • Check storage—keep at least 20% free space.
    • Use antivirus or malware scanners if needed.

    If the device still hangs, it may require a factory reset or software flashing.


    5. Slow Performance

    Slow phones are extremely common, especially as devices age.

    Common Causes

    • Too many apps installed
    • Background processes
    • Low internal storage
    • Failing storage chip (EMMC/UFS)

    Solutions

    • Clear cache regularly.
    • Delete duplicate files and heavy media.
    • Move photos/videos to cloud or external storage.
    • Restore factory settings if slowing becomes severe.

    Note:
    Avoid using memory cleaning apps that promise speed boosts—they often make performance worse.


    6. Overheating Problems

    Phones heat up naturally under heavy use, but excessive heat needs attention.

    Causes

    • Intense gaming
    • Video streaming
    • Weak network
    • Background apps running
    • Charging while using
    • Poor ventilation

    Solutions

    • Give the phone short breaks during heavy use.
    • Remove the cover while charging.
    • Avoid using fast charging continuously.
    • Update apps—poor coding may cause heat.
    • Reset or replace battery if overheating persists.

    Important:
    Severe overheating can damage internal components like the motherboard, display, and battery.


    7. Network and Signal Issues

    Weak or fluctuating network is a common issue in many locations.

    Causes

    • SIM card problems
    • Faulty network bands
    • Physical damage to antenna
    • Software bugs

    Solutions

    • Remove and clean the SIM card.
    • Try the SIM in another phone.
    • Reset network settings.
    • Update system software.
    • Contact your network provider for coverage issues.

    If none of these work, the antenna or baseband IC might need repair.


    8. Wi-Fi or Bluetooth Not Working

    Wireless connectivity issues often occur due to software glitches or hardware damage.

    Solutions

    • Restart the device and router.
    • Forget and reconnect to networks.
    • Reset network settings.
    • Toggle Airplane Mode.
    • Remove recently installed apps that may interfere.

    If both Wi-Fi and Bluetooth fail together, the network IC may be damaged.


    9. Touchscreen Not Responding

    Touchscreen problems range from partial to complete unresponsiveness.

    Causes

    • Screen damage
    • Moisture
    • Dust
    • Software glitches
    • Ghost touch (input without touching)

    Solutions

    • Clean the screen surface.
    • Restart the device.
    • Remove screen protectors (sometimes block sensors).
    • Replace the display if the touch layer is damaged.
    • Update firmware—ghost touch is sometimes software-related.

    10. App Crashes or Not Opening

    Apps may stop working suddenly due to corrupt data, updates, or compatibility issues.

    Solutions

    • Update the app
    • Clear cache (Android)
    • Reinstall the app
    • Restart phone
    • Check for OS updates
    • Ensure enough free storage

    If system apps crash frequently, the operating system may need flashing.


    11. Camera Not Working Properly

    Camera issues are common, especially after physical impact.

    Symptoms

    • Blurry photos
    • Camera not opening
    • “Camera failed” message
    • Black screen
    • Focus not working
    • Lens shaking or buzzing

    Solutions

    • Clean the lens
    • Restart the phone
    • Remove case blocking the lens
    • Update camera app and OS
    • Reset settings
    • Replace the camera module if hardware is damaged

    12. Audio Problems (Speaker, Earpiece, Microphone)

    Sound issues can occur due to:

    • Dust
    • Wear and tear
    • Moisture
    • Damaged ICs

    Solutions

    • Clean speaker grills
    • Test with earphones
    • Restart phone
    • Check if phone is in Silent mode
    • Replace speaker or mic module if needed

    13. Phone Restarting Automatically

    A phone that restarts by itself may have:

    • Battery issues
    • Software crashes
    • Hardware faults
    • Moisture in motherboard

    Solutions

    • Update software
    • Remove recently installed apps
    • Reset the device
    • Replace battery
    • Check motherboard for corrosion

    14. Storage Full Even When You Deleted Files

    This happens due to:

    • System cache
    • Hidden folders
    • WhatsApp media buildup
    • Corrupt storage

    Solutions

    • Clear cached data
    • Delete duplicated media
    • Upload files to cloud storage
    • Move media to SD card (if supported)
    • Reset phone if storage is corrupted

    15. Phone Not Turning On

    A dead phone is usually due to:

    • Drained battery
    • Faulty power IC
    • Short circuit
    • Software crash
    • Damaged charging port

    Solutions

    • Charge for at least 20 minutes
    • Try another cable and adapter
    • Force restart
    • Connect to a computer to detect the device
    • Seek technician help if hardware is damaged

    “When your phone stops responding, stay calm—most solutions begin with a simple reset.”


    16. Proximity Sensor Not Working

    This causes the screen to stay ON during calls, leading to accidental touches.

    Solutions

    • Remove thick screen protectors
    • Test sensor using phone dial codes
    • Update software
    • Replace broken sensor module

    17. Fingerprint or Face Unlock Not Responding

    Causes

    • Dirty sensor
    • Moisture
    • Scratches on the sensor area
    • Software bugs
    • Hardware wear

    Solutions

    • Clean the sensor
    • Remove and re-add fingerprints or face data
    • Update software
    • Replace faulty sensor module
    • Check for original display—many third-party screens affect fingerprint accuracy

    18. Slow Charging or Not Charging Properly

    Solutions

    • Use original or certified fast chargers
    • Clean the port
    • Replace cable
    • Check adapter wattage
    • Disable background apps while charging
    • Avoid charging in hot environments

    Conclusion

    Smartphones may develop various problems over time, but most issues are simple to fix once you understand the causes. With the right maintenance, careful usage, and timely troubleshooting, you can extend the life of your device and avoid unnecessary repair costs.

    “A well-maintained phone performs better and lasts longer—treat it with care, and it will serve you well.”

    If a problem persists even after trying the solutions, it may require professional repair. Acting early often prevents bigger issues like motherboard damage or complete device failure.

  • How to Check Shorting in Mobile Phones (Guide)

    How to Check Shorting in Mobile Phones (Guide)

    Short circuits are among the most common reasons for mobile phones to turn dead, overheat, restart, drain battery fast, or stop functioning suddenly. Every technician, whether beginner or experienced, must know how to diagnose shorting accurately before attempting any repair.

    A shorted motherboard requires careful handling and systematic testing. If diagnosed incorrectly, it may lead to further component damage. Fortunately, with the right tools and the right approach, finding a short circuit becomes simple and methodical.

    “A technician’s real skill lies not in replacing parts, but in identifying the root cause with precision.”

    This guide explains how to check shorting in mobile phones using two reliable methods:

    1. Continuity testing with a multimeter
    2. Current draw testing with a DC Power Supply (Battery Eliminator / Jhatka Machine)

    It also covers why shorting happens, how tracks work, and early symptoms of a short circuit.


    What Is Shorting in Mobile Phones?

    In simple terms, shorting happens when two electrically separate paths unintentionally touch each other, causing current to flow where it should not.

    Open Circuit

    • When a track breaks and current cannot flow
    • Example: cracked PCB or broken connection

    Short Circuit

    • When two separate tracks or components touch
    • Causes excessive current flow
    • Leads to heat, failure, or complete shutdown

    Shorting is one of the most damaging faults on a motherboard.


    Common Reasons for Shorting in Mobile Phones

    Short circuits do not happen randomly. They usually have specific causes:

    1. Water Damage

    The number one cause.
    Moisture creates conductive paths between tracks.

    2. Overheating

    Excessive heat melts solder joints and causes bridging.

    3. Using Faulty or Non-Compatible Chargers

    Cheap or fake chargers cause voltage spikes and component burns.

    4. Electrical Shock or Sparks Inside the Motherboard

    Can occur due to damaged components or loose connections.

    5. Physical Damage

    Drops or bends deform internal layers of the PCB.

    6. Manufacturing Defects

    Though rare, improper soldering from factory can cause short circuits later.


    Symptoms of a Shorted Motherboard

    Before testing the phone, technicians should look for signs:

    ✔ Phone completely dead

    ✔ No charging indication

    ✔ Phone heats up without powering on

    ✔ Auto-restart or shutdown

    ✔ Battery draining unusually fast

    ✔ DC Power Supply showing high current draw

    ✔ Burning smell or spark from inside

    ✔ Fast heating of a particular component

    These symptoms help narrow down the diagnosis.


    Understanding Tracks on a Mobile Motherboard

    Phones do not use wires internally. Instead, they use microscopic tracks on the PCB.

    Tracks carry different types of signals:

    • VBAT Tracks → Battery voltage
    • GND Tracks → Ground
    • RX/TX Tracks → Communication
    • I2C/SPI Tracks → Control signals
    • LDO Lines → Regulated power lines

    A short circuit happens when VBAT touches GND or any other unintended line.


    ⚠️ Very Important Safety Warning Before Testing

    Since this article is technician-level:

    • Do NOT use DC Power Supply without training
    • Do NOT touch exposed components during power tests
    • Always remove the battery before board testing
    • Avoid testing on a wet or unclean board
    • Wear anti-static protection when possible

    “A moment of care saves hours of repair.”


    METHOD 1: How to Check Shorting With a Multimeter (Continuity / Diode Mode)

    This is the fastest and safest method.


    Step 1: Set Multimeter Correctly

    • On digital multimeter → Continuity Mode / Diode Mode
    • On analog multimeter → Ohms (×10) Mode

    In diode mode:

    • A beep sound = electrical connection
    • No beep = open circuit

    Step 2: Identify Battery Connector Pins

    Most phone batteries have these pins:

    • VBAT (+) → Battery positive
    • GND (–) → Battery negative
    • BSI / ID → Battery status communication pin
    • BTEMP → Temperature sensor pin (varies by model)

    For shorting test, we focus on:

    • VBAT
    • GND

    Step 3: Position the Probes Correctly

    For multimeter short testing:

    ✔ Touch RED probe (+) to GND

    ✔ Touch BLACK probe (–) to VBAT

    Why this reverse connection?
    It creates a safe current path for testing without damaging components.


    Step 4: Read the Multimeter Response

    Case 1: Continuous Beep / Reading Shows Values

    This confirms:

    ➡ The motherboard is short.

    Case 2: No Beep / No Reading

    This confirms:

    ➡ The board is NOT short.


    Understanding Readings in Diode Mode

    If you test both ways:

    • If readings appear both timesShort circuit confirmed
    • If reading appears only onceNormal behavior

    Some motherboards may show numeric values (e.g., 254, 302, 1000).
    If values appear in both directions = shorting.


    Extra Checks With Multimeter

    ✔ Check heat

    Touch the board lightly to see if any component heats up during tests.
    (This should be done quickly and carefully.)

    ✔ Check for ground short near connectors

    Test charging IC, backlight section, power IC, audio IC, etc.


    METHOD 2: How to Check Shorting Using DC Power Supply (Jhatka Machine)

    This method is more advanced and must be done only by trained technicians.

    DC Power Supply is also called:

    • Battery Eliminator
    • Jhatka Machine
    • DC Regulator

    It supplies stable DC voltage for motherboard testing. Use a high quality, high precision DC Power Supply of 5 Amperes


    Step 1: Set Correct Voltage

    • Most mobile batteries operate at 3.7V – 4.4V
    • Set DC Supply to 4.0V for safe testing

    Never test above safe voltage levels.


    Step 2: Connect the Probes

    • Red Clip → VBAT Pin
    • Black Clip → GND Pin

    Do NOT touch other components during testing.


    Step 3: Read the Current Draw

    The current reading tells you a lot.

    Scenario 1: Current jumps instantly (0.5A – 2A)

    Short circuit confirmed.

    This means the power line is connected to ground.

    Scenario 2: Current remains at 0.00A

    No shorting.

    Scenario 3: Current slowly rises even without pressing power key

    Half short or leakage.
    This requires component-level diagnosis.


    Step 4: Identify Heating Component

    The fastest way to find a shorted component is:

    • Drop a little coolant spray
    • Apply DC Power again
    • See which area melts first (that’s the faulty part)

    Or use:

    • Thermal camera
    • Alcohol method (evaporates quickly at heating spot)

    Common Components That May Short

    • Power IC (PMIC)
    • Charging IC
    • Backlight IC
    • Audio IC
    • CPU caps
    • RAM/CPU solder joints
    • WIFI/Network IC
    • Filter capacitors (most common)
    • Diodes and coils

    90% of short circuits happen because of a single capacitor failure.


    Fixing Shorting in Mobile Phones

    After identifying the short, the repair steps include:

    ✔ Removing shorted capacitors

    ✔ Replacing faulty ICs

    ✔ Cleaning corrosion from water damage

    ✔ Reworking solder joints

    ✔ Checking line voltage again after removal

    Technicians must ensure the short is completely cleared before applying battery.


    Preventing Short Circuits in Mobile Phones

    Your customers can prevent shorting by:

    • Avoiding cheap chargers
    • Keeping phones away from water
    • Not using the phone while charging
    • Avoiding extreme heat
    • Using protective back covers
    • Getting phones serviced after water exposure

    “Prevention costs nothing—repairs cost time, money, and sometimes trust.”


    Conclusion

    Short circuits are one of the most serious faults in mobile phones. But with the right tools, techniques, and a systematic approach, diagnosing shorting becomes straightforward and safe.

    Technicians must always begin any dead phone repair by checking for shorting, because a shorted board cannot boot, charge, or function normally until the short is removed.

    Learning to test shorting using a multimeter and DC power supply gives you a strong foundation in mobile hardware repair, helping you diagnose faults confidently and accurately.

  • How to Remove Shorting in Mobile Phones (Guide)

    How to Remove Shorting in Mobile Phones (Guide)

    Short circuits—often called “shorting”—are among the most challenging hardware faults in mobile phone repair. A shorted phone may not turn on, may restart repeatedly, may drain the battery quickly, or may heat up even when idle. For technicians, removing shorting correctly is essential to restoring the phone to working condition without damaging other components.

    Today’s mobile phones use complex multilayer PCBs, advanced PMIC structures, and highly integrated systems. As a result, removing shorting requires a structured, safe, and methodical approach.

    “In mobile repair, knowledge saves the board. Guesswork destroys it.”

    This guide explains how to remove shorting in mobile phones using modern professional methods, including:

    • Main-line (VBAT) short removal
    • Sub-line short diagnosis
    • Voltage injection safe technique
    • Thermal camera and freeze spray heat spotting
    • IPA evaporation method
    • Component isolation
    • PMIC and CPU short precautions
    • Ultrasonic cleaning
    • Safe board handling

    This is a professional technician-level guide, written in simple language so students and beginners can follow easily.


    1. What Is Shorting in a Mobile Phone?

    A short circuit occurs when two points that should not touch each other become electrically connected. This creates an abnormal current path, leading to:

    • Heating
    • Phone not powering on
    • Battery draining fast
    • Overcurrent damage
    • Component burnout

    In a mobile motherboard, shorting usually occurs in either:

    Main Power Line (VBAT Rail)

    Or

    Secondary Power Rails

    (1.0V, 1.2V, 1.8V, 2.8V, 3.0V, 4.2V, etc.)

    A main-line short is typically caused by:

    • Shorted capacitor
    • Blown diode
    • Damaged PMIC
    • Water damage
    • Physical force bending PCB layers

    A sub-line short usually involves:

    • LDO regulator lines
    • Specific IC supply lines
    • Camera/Display/Charging sections

    Understanding which type you are dealing with helps you remove the short safely.


    2. Common Reasons for Shorting

    Shorting rarely happens without cause. The most common triggers include:

    1. Liquid Exposure

    Water or moisture bridges tracks, causing instant VBAT-to-ground short.

    2. Overheating or Thermal Stress

    Leads to solder cracks and component bridging.

    3. Faulty Chargers or Power Surge

    Cheap chargers can blow PMIC, CPU regulators, or filter capacitors.

    4. Physical Damage

    Drops bend internal layers of the PCB or crack micro-lines.

    5. Manufacturing Defects

    Can cause premature component failure.

    6. Aging Components

    Old motherboards may develop carbon residue or internal breakdown.

    short circuit i.e shorting due to water damage

    3. Symptoms That Indicate Shorting

    Common signs include:

    • Phone completely dead
    • No charging
    • Overheating without being powered
    • Battery drops rapidly
    • DC Power Supply shows high current draw
    • Phone restarts automatically
    • Component-level heating
    • Burning smell

    Once these symptoms appear, the technician must begin short-diagnosis immediately.

    “A shorted phone speaks through its symptoms—listen carefully.”


    4. Tools Required for Safe Short Removal

    Modern shorting repair requires proper tools:

    ✔ Multimeter (Diode/Continuity Mode)

    ✔ DC Power Supply (0–5A, 0–5V range)

    ✔ Hot Air Rework Station

    ✔ Soldering Iron

    ✔ Ultrasonic Cleaner (for water-damaged boards)

    ✔ 99% IPA (Isopropyl Alcohol)

    ✔ Thermal Camera (optional but ideal)

    ✔ Freeze Spray (or coolant spray)

    ✔ Microscope (recommended)

    ✔ Tweezers and board brushes

    Using the correct tools reduces repair time and prevents motherboard damage.


    5. Step-by-Step Procedure to Remove Shorting in Mobile Phones

    Below is the modern and safe workflow followed by advanced technicians:


    STEP 1: Visual Inspection

    Before touching the board with any tool:

    Look for:

    • Burn marks
    • Corrosion
    • Broken components
    • Missing components
    • Bent PCB

    If the phone fell in water, corrosion under ICs may be a major cause of the short.


    STEP 2: Clean the PCB Properly

    Use 99% IPA or professional PCB cleaner.

    Cleaning steps:

    1. Remove all flexes, shields, and detachable modules.
    2. Brush the PCB with IPA to remove dirt and corrosion.
    3. Use an ultrasonic cleaner for water-damaged boards (8–12 minutes).
    4. Dry the board completely using hot air at a safe temperature (no overheating).

    If the short disappears after cleaning, the cause was internal corrosion or conductive debris.


    STEP 3: Check Main-Line Shorting Using Multimeter

    Use diode mode:

    1. Place RED probe on GND.
    2. Place BLACK probe on VBAT.

    Readings:

    • Beep or value in both directions → Main-line short
    • Value in only one direction → Normal

    If the main line is short, proceed to Step 5.


    STEP 4: Check Sub-Line Shorting (Advanced)

    Sub-lines include:

    • 1.8V
    • 2.8V
    • 3.0V
    • 4.2V
    • Camera lines
    • Display lines
    • RF power lines

    Check each coil output line:

    • If a coil output line has low resistance in both directions → sub-line short.
    • Trace that line to the connected IC or capacitor group.

    This helps you identify which section is affected.


    STEP 5: Voltage Injection to Locate Heating Component (Safe Method)

    This is one of the most effective modern techniques.

    Steps:

    1. Set DC Power Supply to 1V and 2A current limit.
    2. Connect:
      • Red clip → VBAT line
      • Black clip → GND
    3. Switch ON the power supply.

    Observe current behavior:

    • High current (1–2A instantly) → Hard short
    • Slow rise in current (0.2–0.4A) → Soft short or leakage

    Now identify the heating component using:


    STEP 6: Heat Detection Methods (Choose Any)

    Method A: Thermal Camera (Best Method)

    Component heating appears instantly on screen.

    Method B: Freeze Spray

    Spray the entire affected area →
    When power is applied, the faulty part melts first.

    Method C: IPA Evaporation (Popular Technique)

    Pour a few drops of IPA on PCB →
    The part that evaporates fastest is the shorted component.


    STEP 7: Remove the Faulty Component

    Once the heating component is identified, remove it safely:

    • Use hot-air rework station
    • Do not overheat nearby ICs
    • Remove gently with tweezers

    Most common short-causing components:

    • Filter capacitors (90% of cases)
    • Protection diodes
    • Charging IC
    • PMIC (Power Management IC)
    • Backlight IC
    • RF ICs

    After removal, test VBAT line again:

    • If short is gone → Replace component
    • If still short → Continue diagnosis

    STEP 8: Check PMIC and CPU Short Precautions (Critical)

    If heating is found under:

    ✔ PMIC

    ✔ CPU

    ✔ RAM

    ✔ Storage IC

    Then:

    • These are risky to remove
    • Many require reballing, not replacement
    • Underfill on CPUs makes removal complicated

    In most cases:

    • CPU short → Board is beyond economical repair
    • PMIC short → Replace PMIC only if technician is skilled

    STEP 9: Re-Test VBAT and Sub-Lines

    After removing components:

    1. Test multimeter readings again.
    2. Ensure VBAT shows no short.
    3. Ensure sub-lines have normal diode readings.

    This confirms the short is successfully removed.


    STEP 10: Reassemble and Power On

    Once the board is stable:

    • Attach battery
    • Power on phone
    • Check charging
    • Check temperature
    • Test network, camera, display, sound

    Why Most Shorting Happens in Capacitors

    In modern smartphones, capacitors act as filters and stabilizers. They sit across VBAT and ground.

    If a capacitor breaks internally:

    • Positive and negative plates touch → direct short
    • Battery drains instantly
    • Motherboard draws high current

    This is why capacitors are the main cause of mobile shorting.


    Tips to Prevent Shorting in Mobile Phones

    You can advise customers to:

    • Avoid cheap chargers
    • Keep phone away from water
    • Use protective cases
    • Avoid exposing phone to direct heat
    • Get phone serviced immediately after water damage
    • Replace aging batteries

    Conclusion

    Removing shorting in mobile phones is a technical skill that improves with experience. The key is to diagnose the short correctly and follow a systematic workflow.

    “When you follow the right process, the board reveals the fault on its own.”

    With modern techniques like voltage injection, thermal imaging, and ultrasonic cleaning, short removal is now safer and faster than ever before.

    This guide gives you the complete professional workflow — from identifying main-line and sub-line shorts to safely removing faulty components and restoring the device back to life.