Tag: tips

  • Things To Check Before Buying A Used Or Second-Hand Cell Phone

    Things To Check Before Buying A Used Or Second-Hand Cell Phone

    Buying a used or second-hand phone can save a lot of money, but it can also turn into a costly mistake if you don’t check the device properly. A pre-owned smartphone may look good from the outside yet hide internal faults that appear only after you take it home. That is why careful inspection is essential.

    Whether you’re buying from a shop, an online marketplace, or an individual seller, this guide will help you understand exactly what to check before making the purchase. It also benefits people running a used phone business, and those who buy refurbished devices in bulk.

    “A smart purchase is not about the price you pay — it’s about the problems you avoid.”

    In this comprehensive guide, we’ll walk through authenticity checks, hardware tests, safety verification, performance evaluation, and pricing strategy. You’ll also find a helpful checklist table to make the process simpler.


    Why You Must Inspect a Used Phone Carefully

    Used phones typically come with:

    • No warranty
    • No exchange policy
    • No guarantee of condition
    • Hidden hardware or software problems
    • Limited support from the seller

    Because of this, you must take responsibility for the inspection. One mistake can result in:

    • Locked devices
    • Blacklisted IMEI
    • Faulty batteries
    • Broken motherboards
    • High repair charges
    • Data security issues
    how to check a used second phone smartphone

    Fortunately, most problems are easy to detect if you follow a structured approach like the one below.


    1. Check Authenticity and Ownership

    The first and most important step is verifying that the phone is not stolen. Buying a stolen phone can lead to police issues and the device may get disabled later.

    How to Check Authenticity

    • Ask for the original bill, purchase receipt, or retail invoice.
    • Check the IMEI number on the box, SIM tray, and device settings. All three must match.
    • Cross-check IMEI on trusted websites like:
    • Ask whether the phone is carrier unlocked or SIM-locked.
    • For iPhones, check Activation Lock status using:
      • Apple Support
    • For Android devices, look for OEM unlock status and Google account removal confirmation.

    If anything feels suspicious, do not buy the phone.

    “A good deal is only good if it’s real.”


    2. Check Warranty and Service Eligibility

    A used phone with some warranty left is always a safer buy.

    What to verify:

    • Remaining warranty through the brand website:
      • Apple Check Coverage
      • Samsung Warranty Checker
      • Xiaomi, Oppo, Vivo, OnePlus support pages
    • Whether the phone is eligible for future repairs
    • Check if extended warranty or insurance was purchased
    • Confirm that the phone has not been previously tampered with

    Phones that have undergone unauthorized repairs may be refused by official service centres.


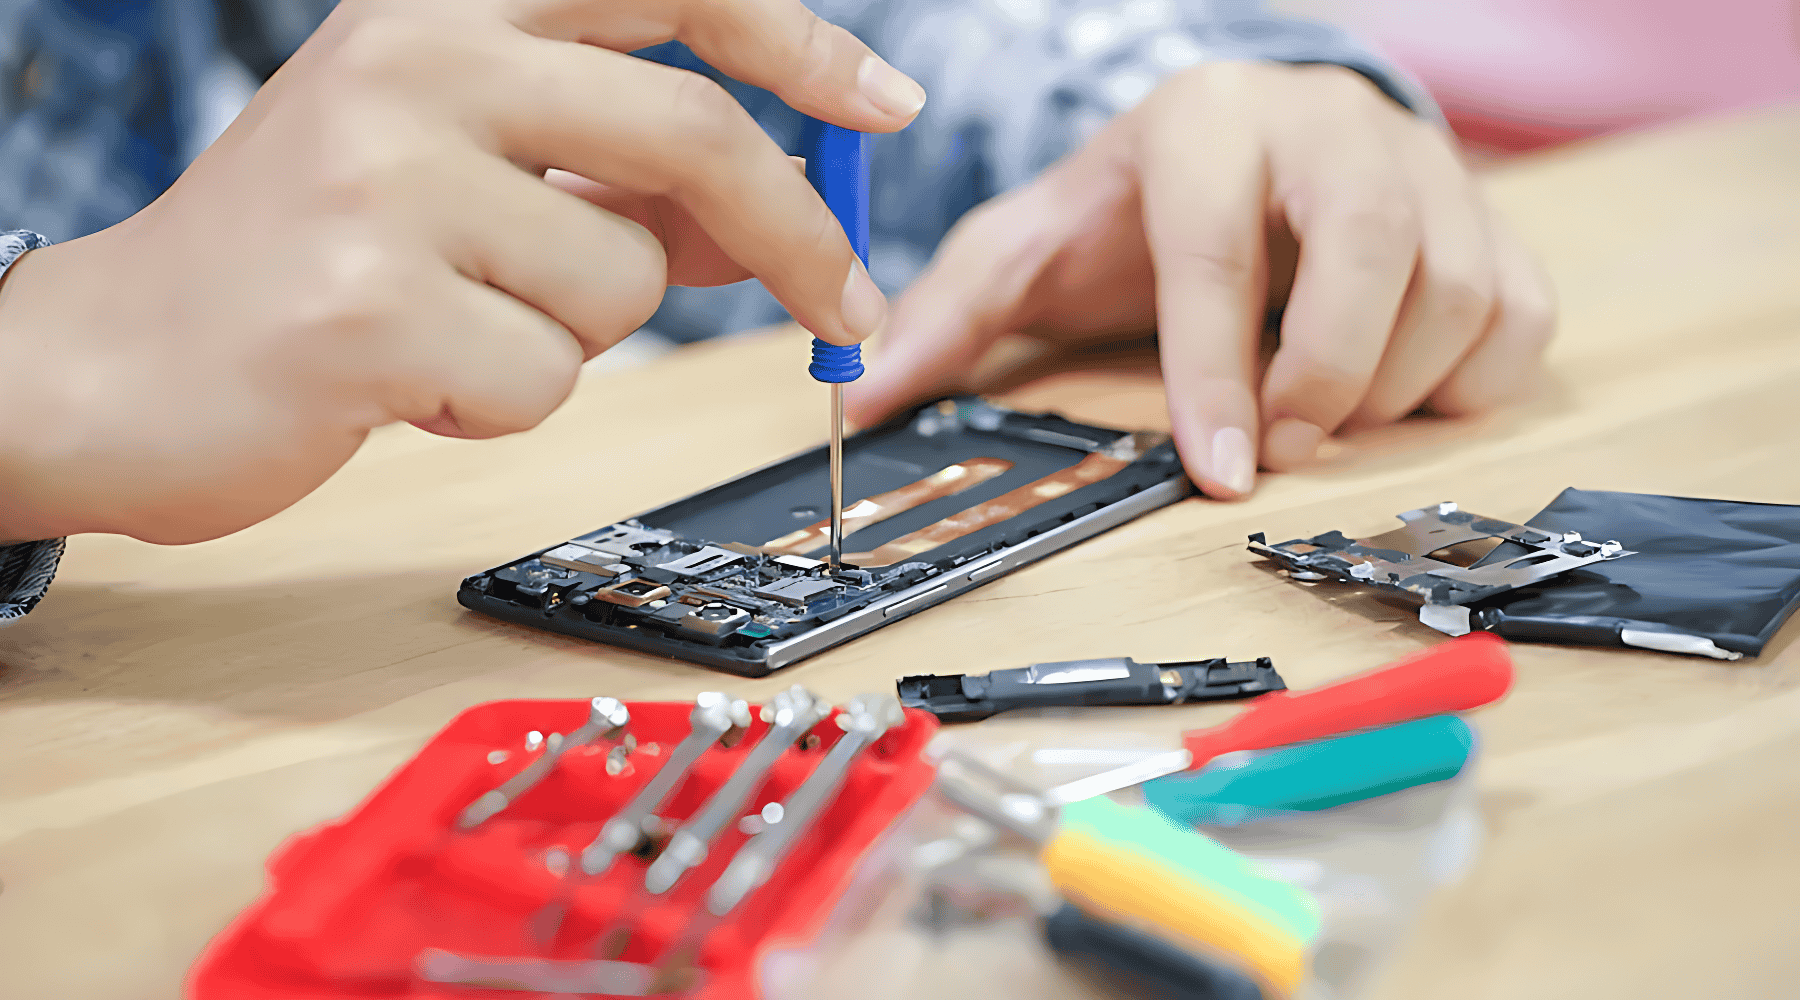
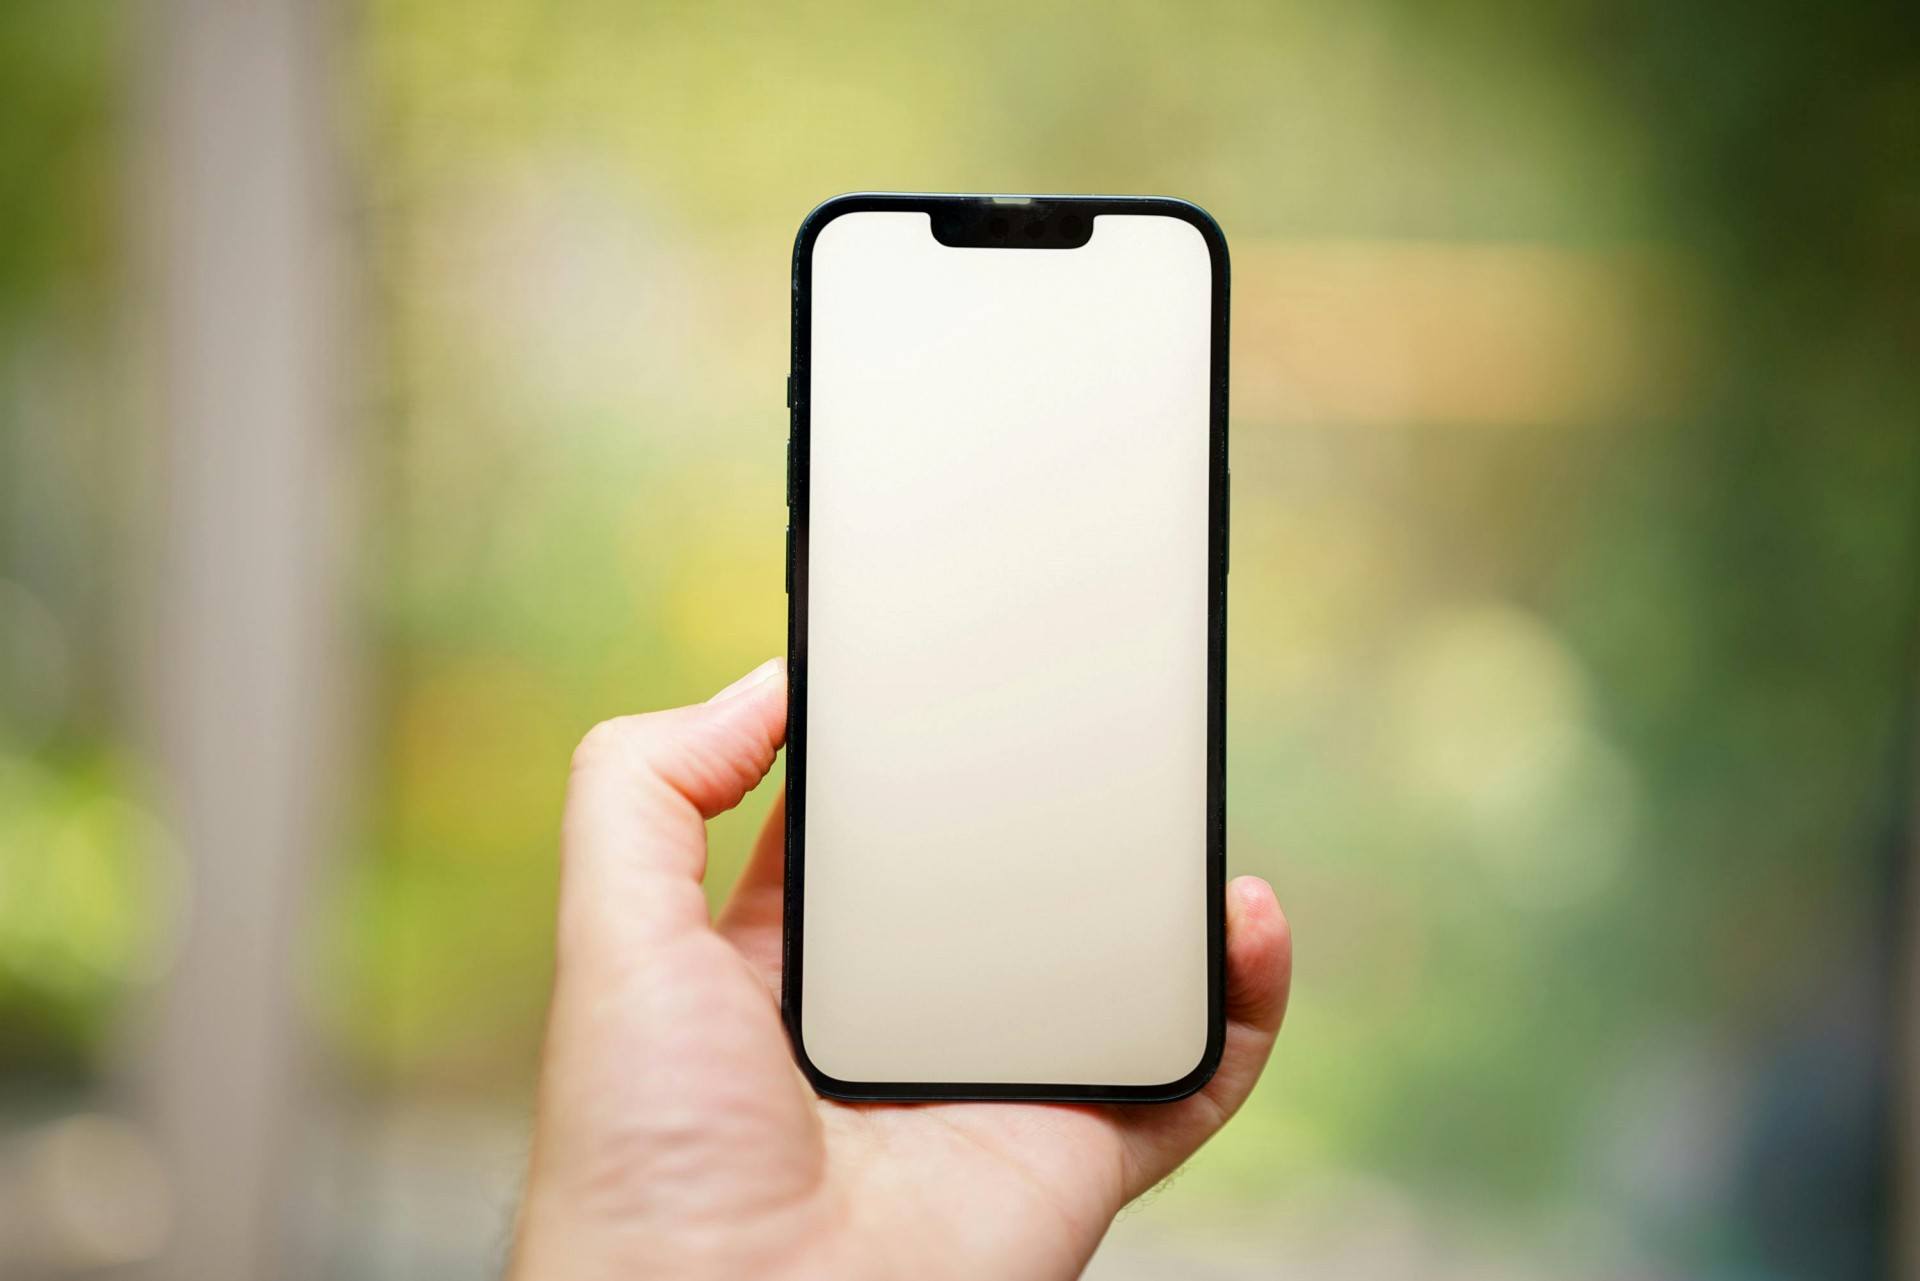
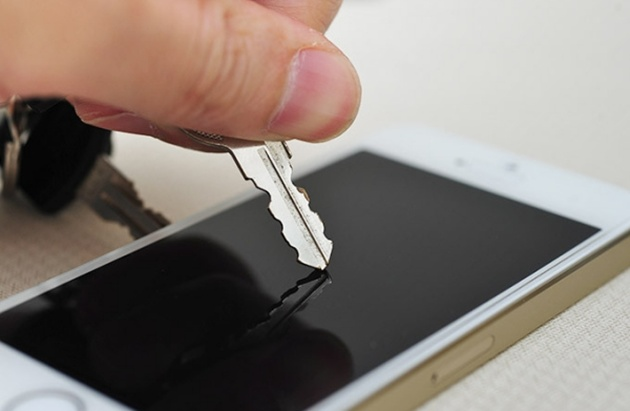
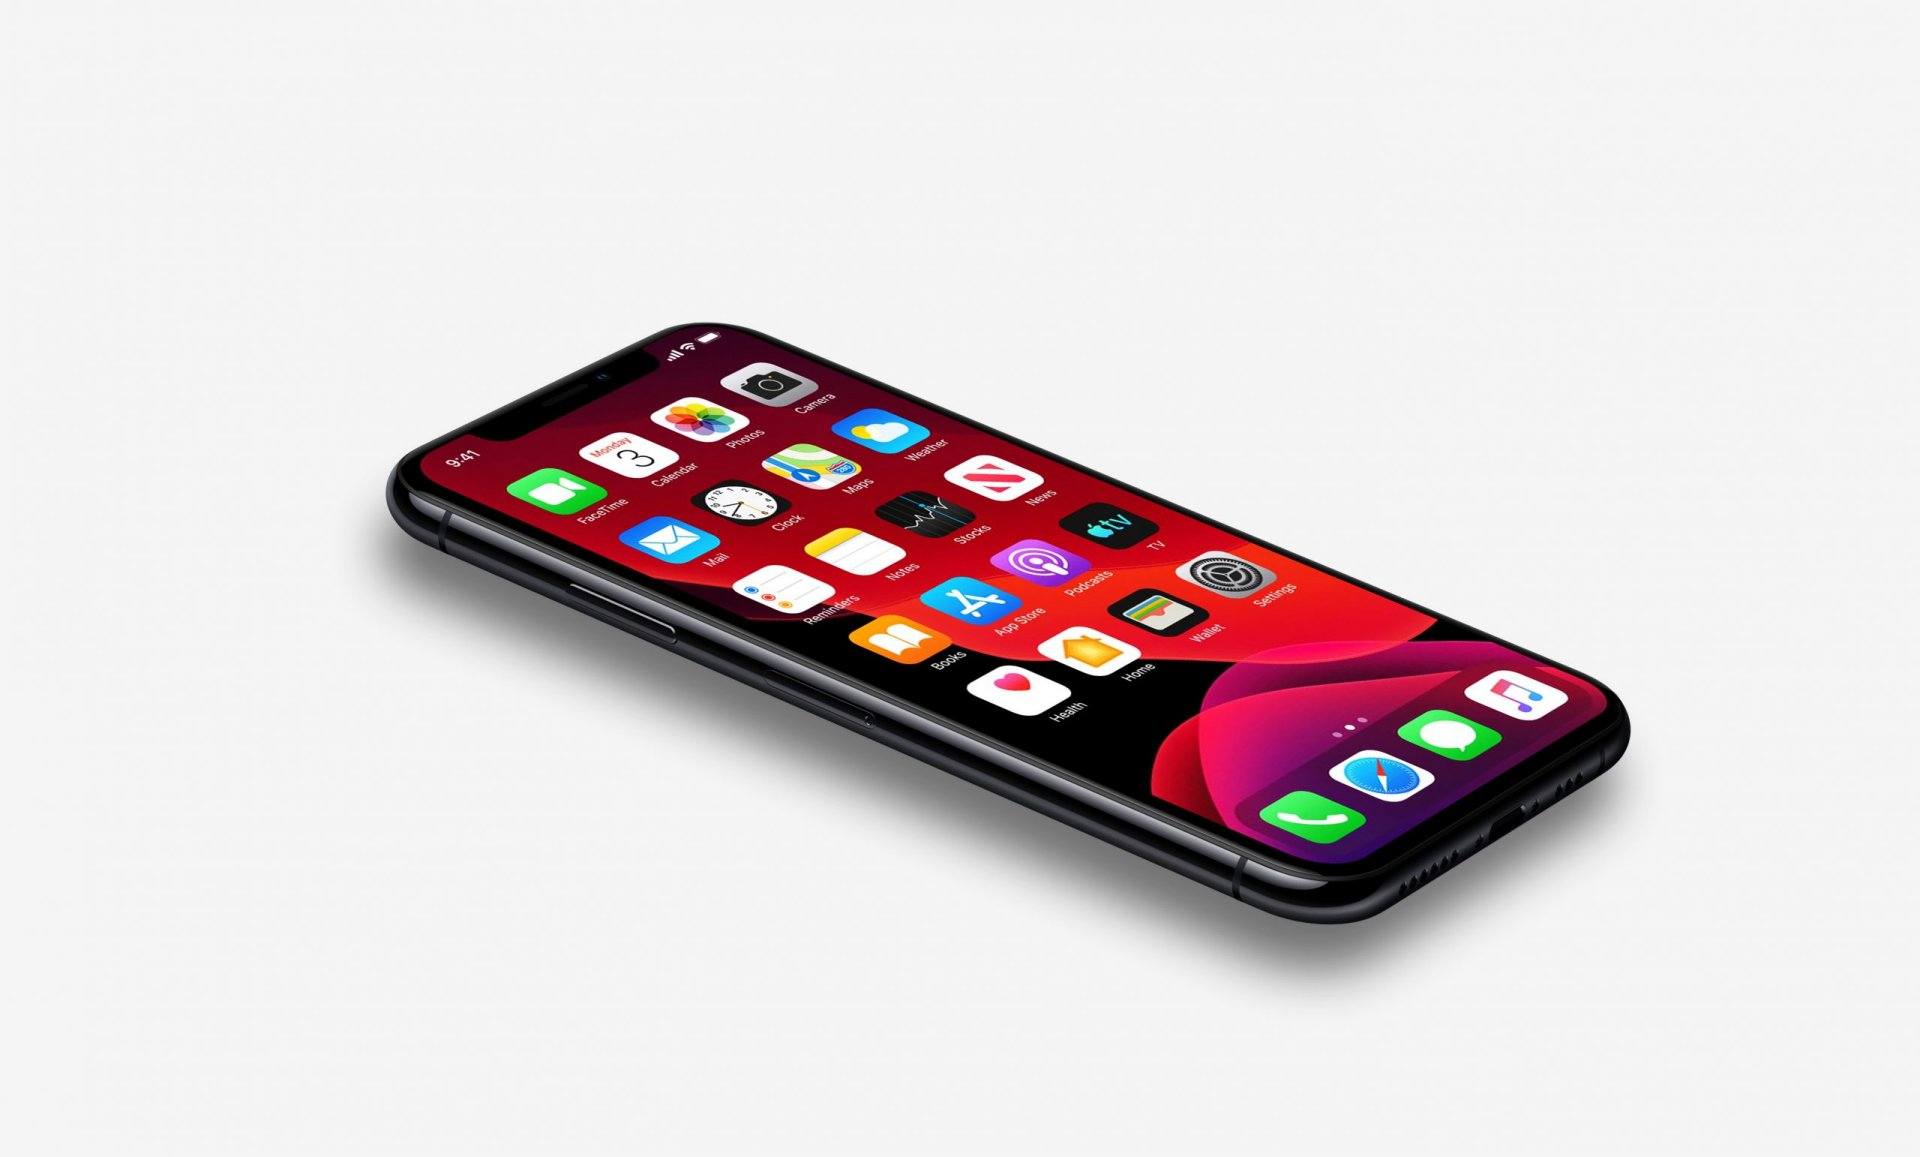
    3. Check the Physical Condition Thoroughly

    The phone must be inspected from every angle.

    Look for:

    • Cracks on the screen
    • Dead pixels, color patches, or burn-in marks
    • Bent frame
    • Loose back panel
    • Dust inside lenses
    • Dents near the charging port (often indicate drops)
    • Damaged speaker grills
    • Loose buttons

    Remember: A phone that shows heavy external damage may have deeper internal damage.


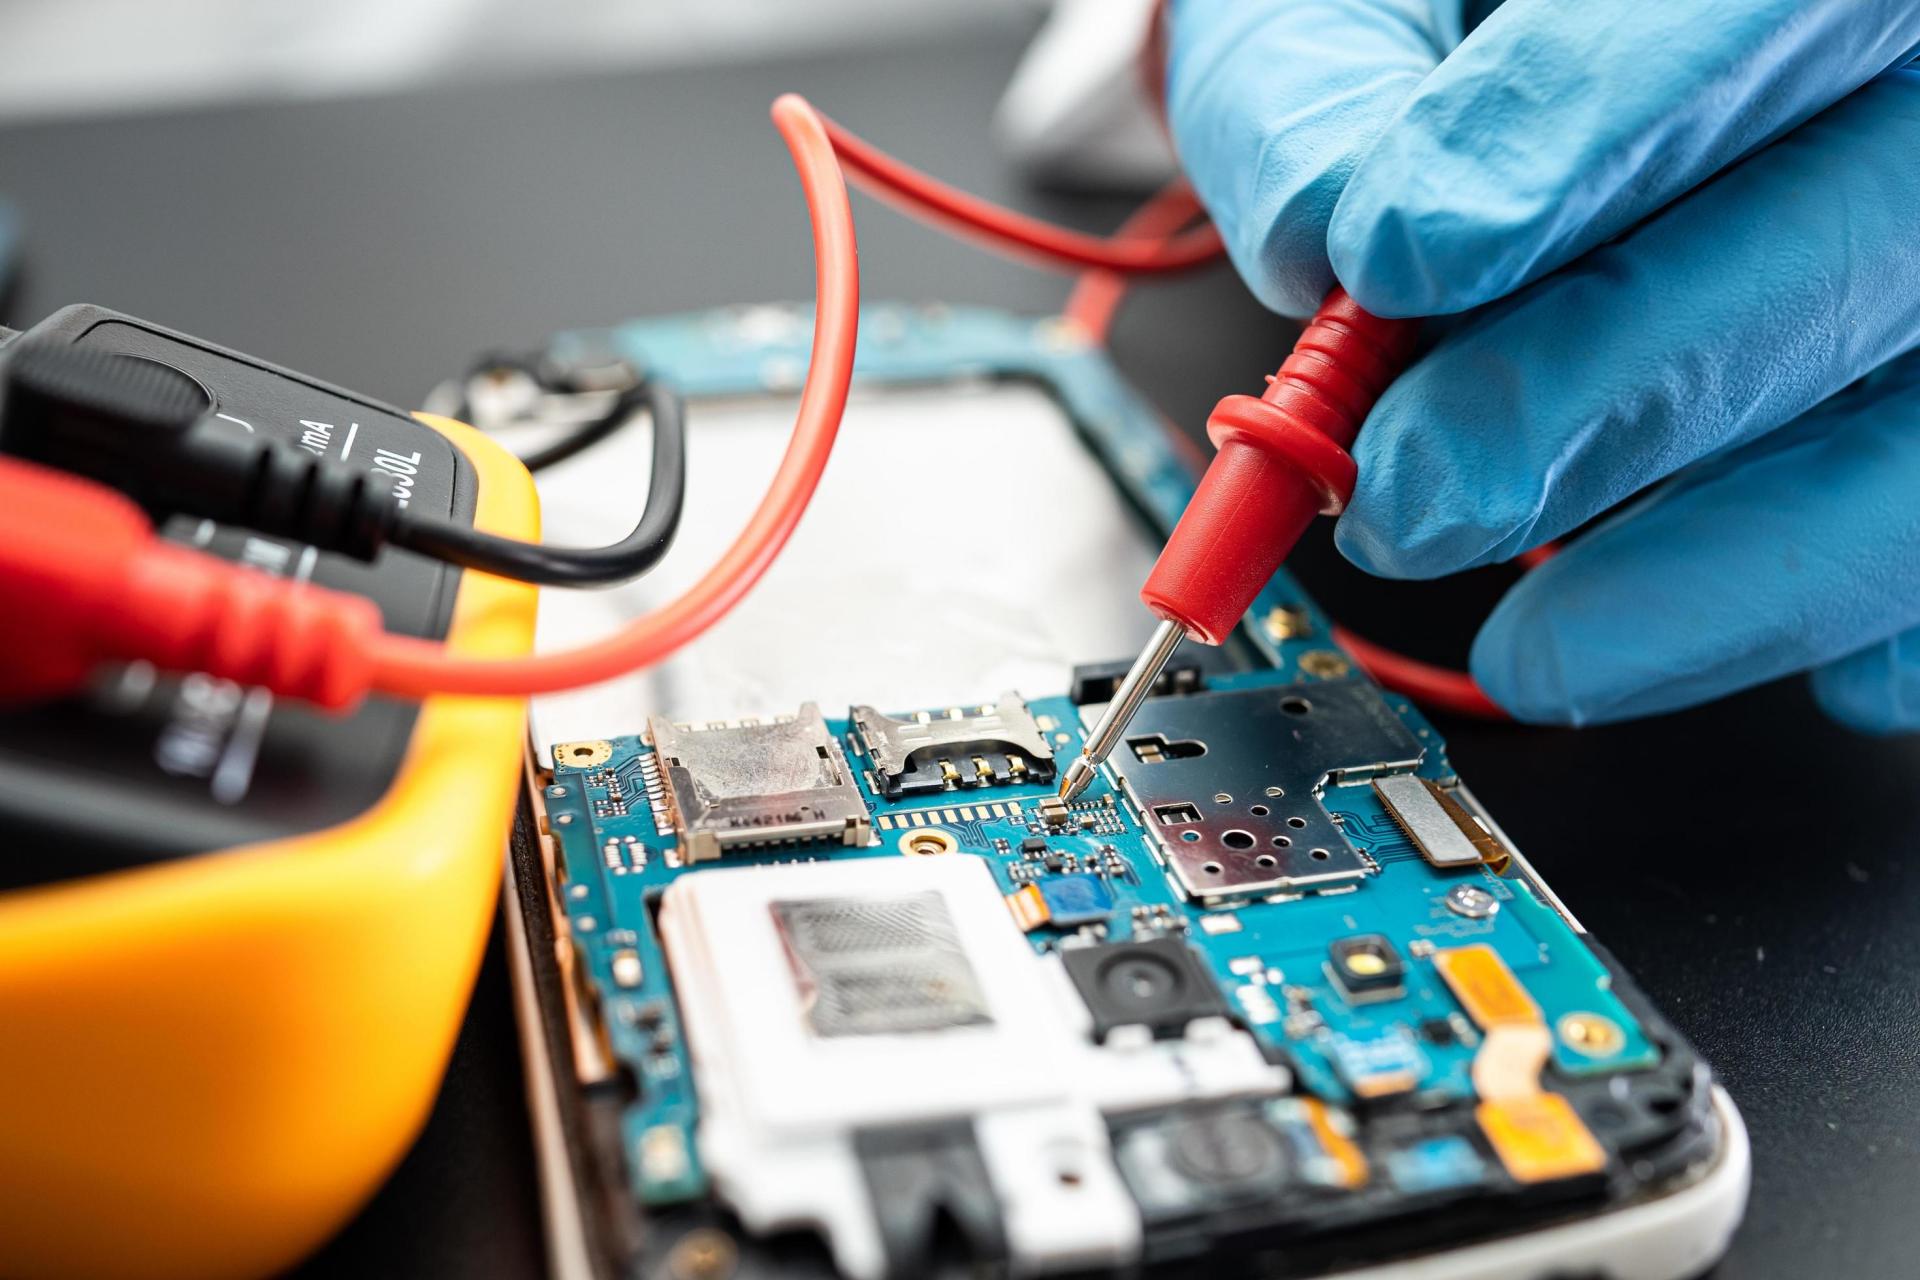
    4. Check Working Condition and All Internal Functions

    This is where most buyers make mistakes — they check only the screen and camera.
    You must check everything.

    Critical Hardware Tests

    ✔ Microphone – Record a voice note
    ✔ Earpiece speaker – Make a call
    ✔ Loudspeaker – Play music
    ✔ Vibration motor – Test vibration settings
    ✔ Cameras – Switch between all lenses
    ✔ Flashlight – Turn ON/OFF
    ✔ SIM detection – Try inserting a SIM
    ✔ Memory card detection – If applicable
    ✔ Charging port – Check alignment & charging speed
    ✔ USB data transfer – Connect to PC
    ✔ Wi-Fi, mobile data & hotspot
    ✔ Bluetooth pairing
    ✔ GPS accuracy
    ✔ Face unlock / fingerprint sensor
    ✔ Proximity sensor during calls
    ✔ Volume buttons & power button
    ✔ Battery health (in iPhone)
    ✔ Thermal behavior (phone shouldn’t overheat during testing)


    Checklist Table for Easy Verification

    Use this table when inspecting any second-hand phone:

    Item to CheckWhy It MattersWhat to Look For
    IMEI MatchConfirms authenticityBox IMEI = Phone IMEI = Settings IMEI
    iCloud/Google LockPrevents activation issuesEnsure accounts are removed
    DisplayMost expensive part to repairLines, spots, dead pixels, touch accuracy
    Battery HealthDetermines long-term usageiPhone: 85%+ recommended
    Charging PortCommon failure pointLoose connection or slow charging
    Speakers & MicEssential for callsTest call quality
    Network & Wi-FiFor connectivityCheck stability & speed
    CameraImportant for valueTest all lenses & focus
    StoragePrevents future issuesEnsure available space matches claim
    ButtonsHardware durabilityPower + volume buttons must click properly
    Body ConditionReveals drop or damageDents, cracks, bent frame
    SensorsFor daily use & appsTest proximity, gyro, light sensor

    5. Check Battery Condition and Charging

    Battery aging is a major issue in used phones.

    For iPhones:

    • Go to Settings → Battery → Battery Health
    • Anything above 85% is acceptable
    • Below 80% usually requires a replacement

    For Android:

    Battery health varies by brand.
    Use the dial code (if available) or the brand’s device care feature.

    Check charging behavior:

    • Does it charge fast or slow?
    • Does the device heat up unusually?
    • Does the battery drain quickly after charging?

    A swollen battery is a major red flag.


    6. Confirm Performance and Speed

    Even if the phone turns on, it may lag or freeze due to internal issues.

    Test performance by:

    • Opening multiple apps
    • Browsing
    • Playing a short video
    • Switching between apps quickly
    • Running a simple game

    If the phone starts overheating or lagging, skip the device.


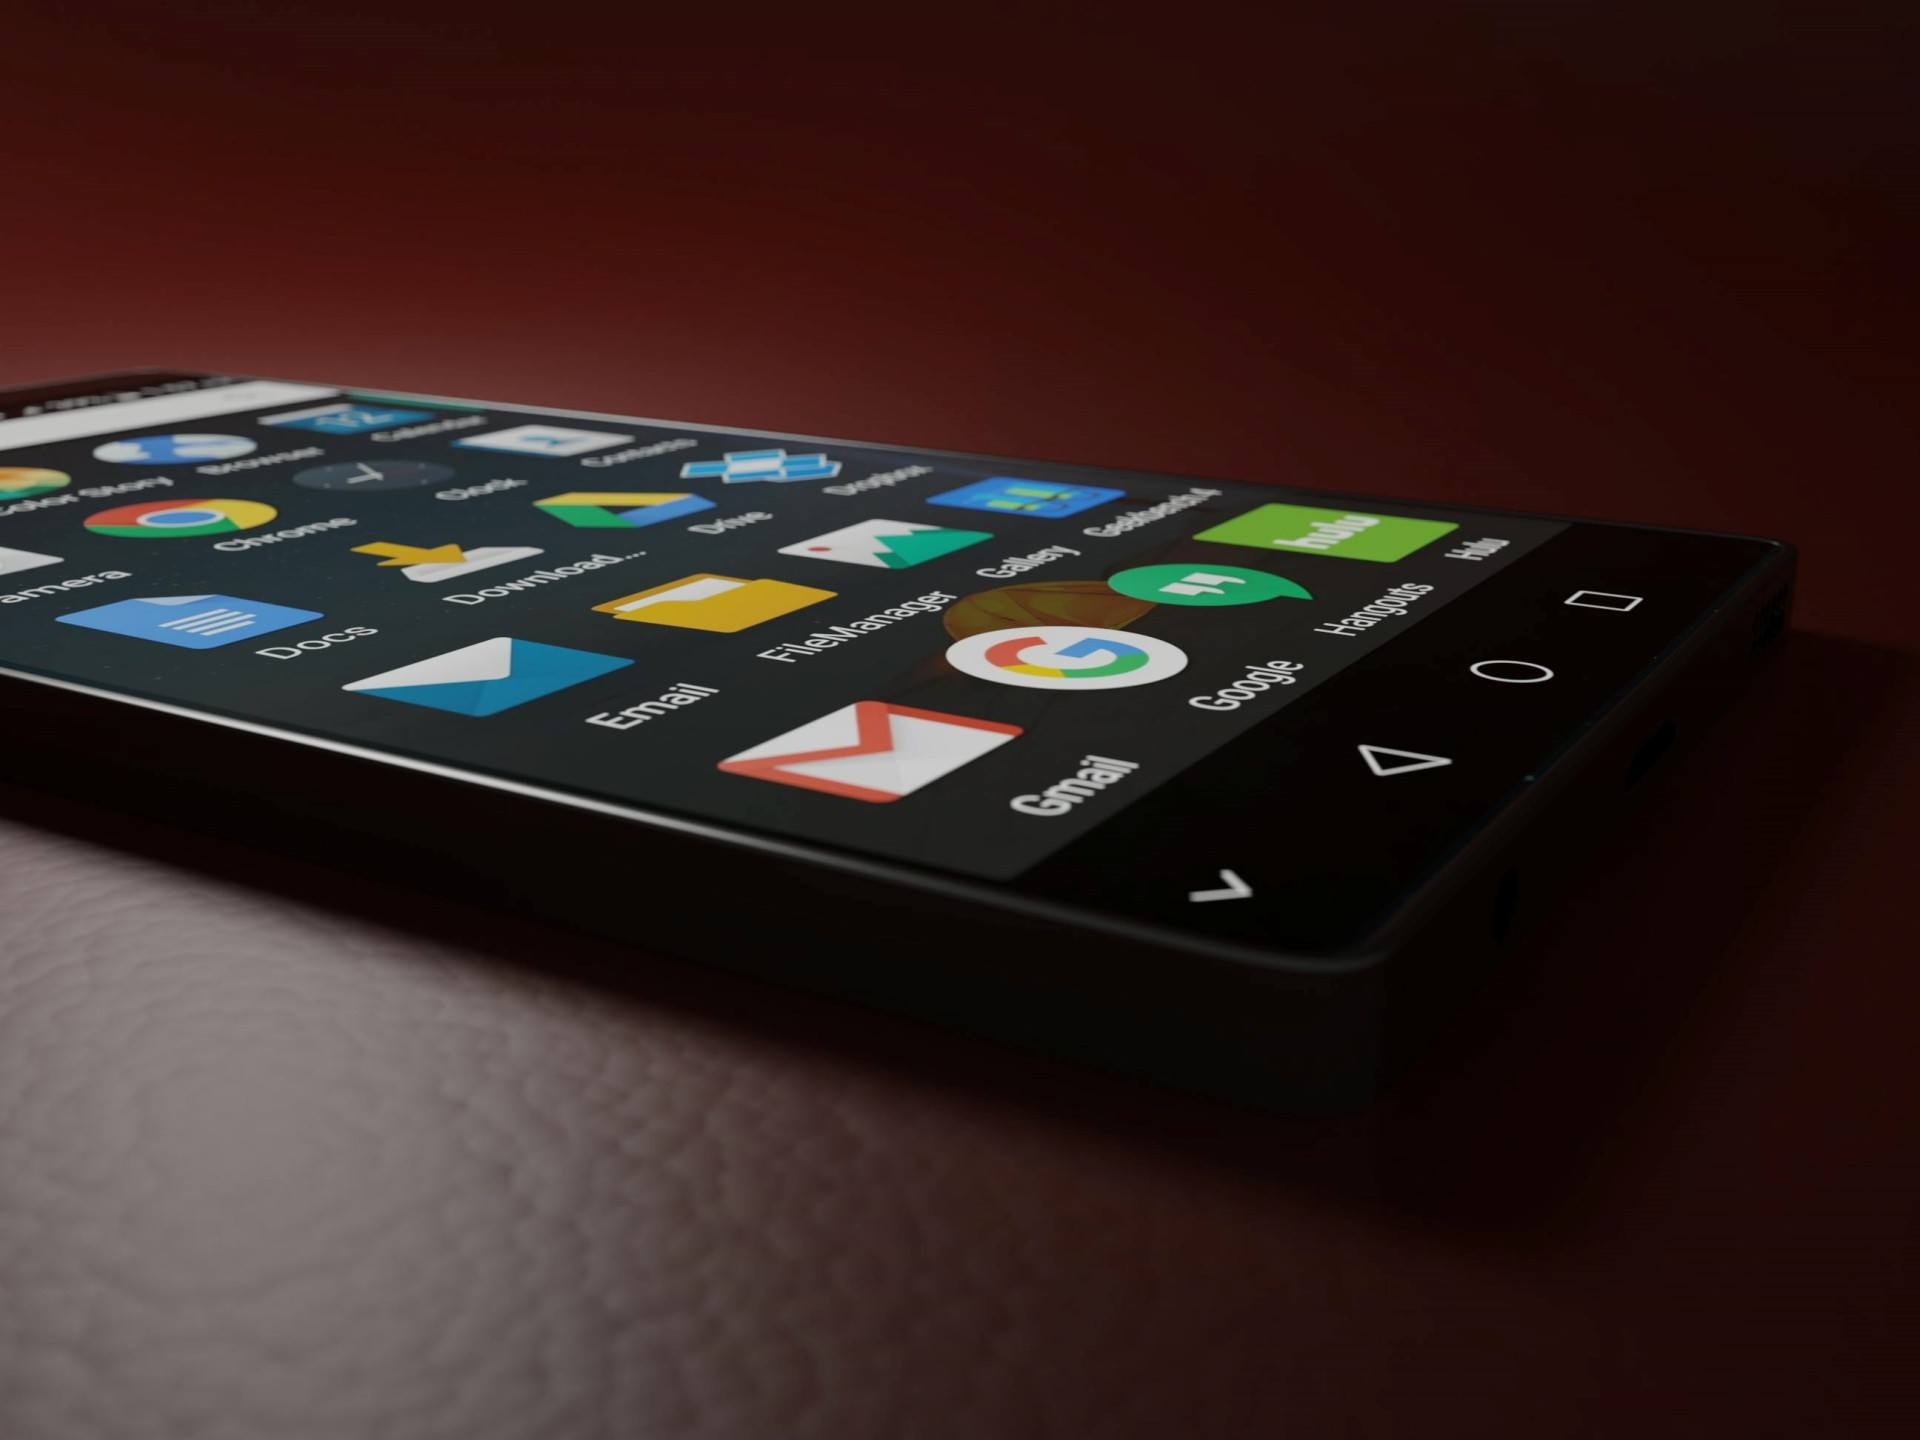
    7. Ensure There Are No Software Issues

    Software problems can make even a perfect phone frustrating to use.

    Check for:

    • Frequent app crashes
    • Random restarts
    • Boot loop
    • System update issues
    • Malware or suspicious apps
    • Screen freezing
    • Factory reset failure

    Always check if the phone can be reset to factory settings.
    A phone that cannot be reset may have security locks or corrupted software.


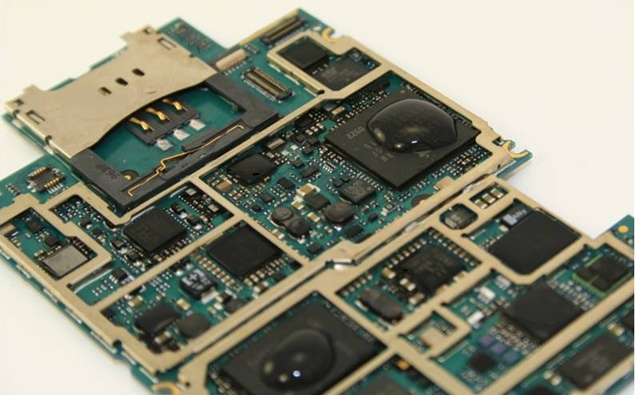
    8. Check Storage Capacity and File System

    Some sellers advertise incorrect storage.

    To verify:

    • Go to Settings → About / Storage
    • Ensure listed storage matches what they claim
    • Check system usage
    • Look for signs of faulty storage such as:
      • Apps opening slowly
      • Files disappearing
      • “Storage full” errors even when empty

    Damaged storage chips (UFS/EMMC) are expensive to repair.


    9. Check Connectivity Features

    A modern smartphone must have properly working connectivity.

    Test:

    • Wi-Fi – Connect to a network
    • Mobile Data – Check speed
    • Bluetooth – Pair with speakers/earphones
    • NFC – Make a quick tap test if possible
    • Hotspot – Turn ON/OFF
    • GPS – Check Maps accuracy

    These features are essential for daily use.


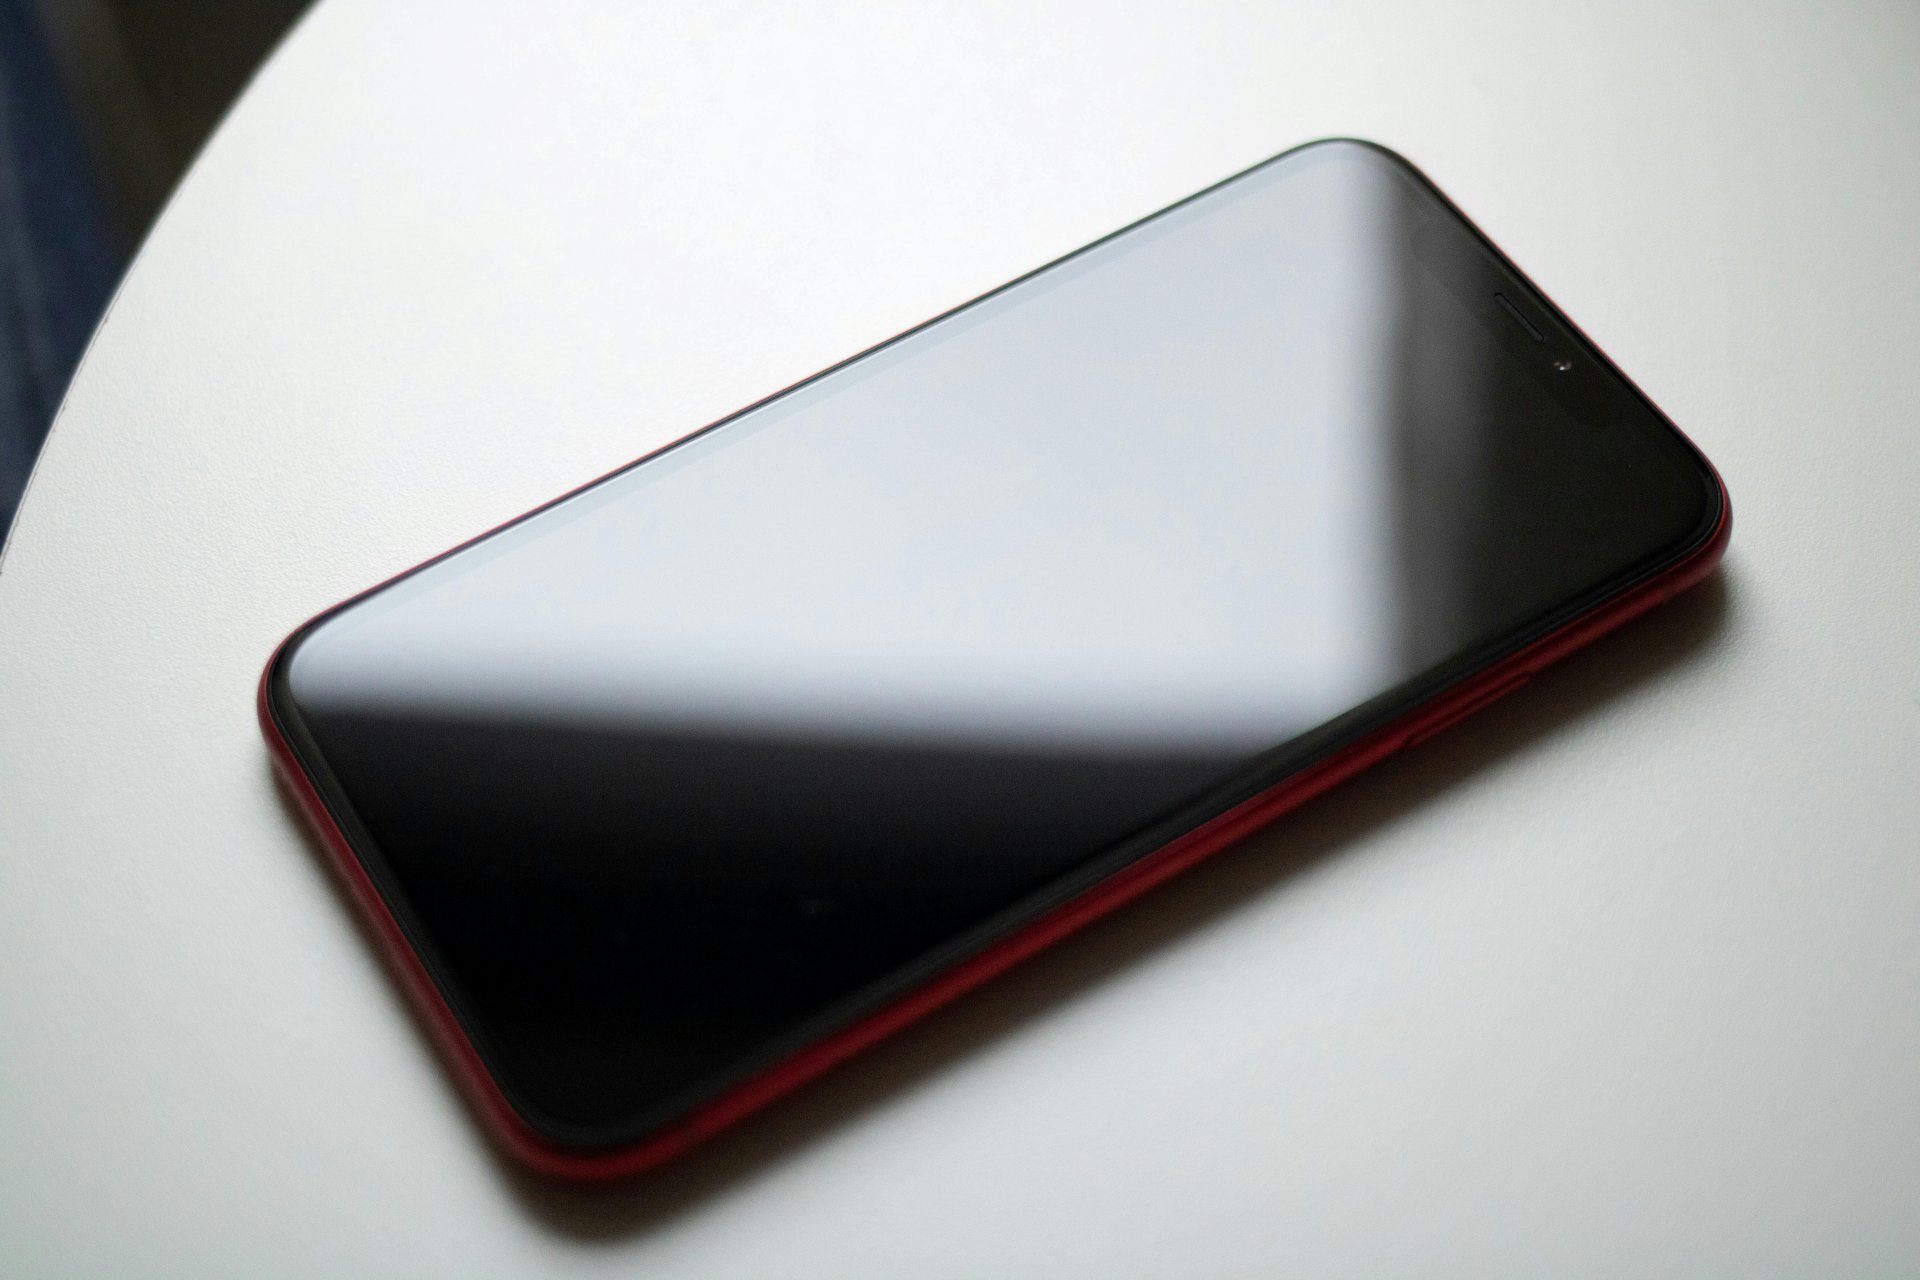
    10. Inspect Camera Quality Carefully

    Don’t just click one photo and move on.

    Test all camera modes:

    • Front & rear cameras
    • Wide-angle lens
    • Macro lens
    • Optical zoom
    • Portrait mode
    • Video stabilization
    • Night mode
    • Autofocus

    Dirt inside the lens or a shaky OIS motor can ruin photos.


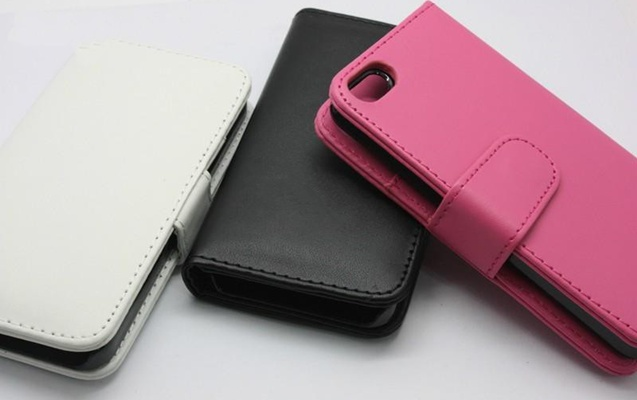
    11. Check Accessories and Packaging

    Ask for:

    • Original box
    • Charger
    • Cable
    • Earbuds (if included originally)
    • Bill
    • Warranty card

    If accessories are missing, adjust the price.


    12. Check Market Demand Before Buying

    Some brands or models are easy to sell later, while others have almost no resale value.

    A good used phone should:

    • Belong to a well-known brand
    • Have easily available spare parts
    • Have stable software support
    • Have strong demand in your area

    Before buying, check online pricing on:

    • Amazon
    • Flipkart
    • OLX
    • Cashify
    • Your local marketplace apps

    This gives you an idea of the actual value.


    13. Negotiate the Price Smartly

    Keep these points in mind:

    • Electronics lose value every few months
    • Older models drop in price faster
    • Damaged or repaired phones must be priced much lower
    • If you are buying in bulk, negotiate aggressively

    Price should be based on:

    • Condition
    • Age
    • Warranty
    • Battery health
    • Model demand

    If the seller refuses repairs before sale, offer a much lower price because you are taking the risk.


    14. Where to Check Specifications of Any Model

    Use these trusted websites:

    • GSMArena.com – Specifications, comparisons, user feedback
    • PhoneArena.com – Reviews and hardware details
    • Manufacturer websites – Official specs

    Authoritative websites help confirm whether the device matches what the seller claims.

    “A good phone is not about being new — it’s about being reliable.”


    Conclusion

    Buying a second-hand phone is a smart way to save money — but only if you know how to check it properly. A few minutes of careful inspection can protect you from hidden faults, blacklisted devices, poor battery life, and expensive repairs later.

    Once you learn what to check, you can confidently evaluate any used smartphone and pick the right one at the right price.

  • Most Common Phone Issues and How to Fix Them Easily

    Most Common Phone Issues and How to Fix Them Easily

    Smartphones have become an essential part of our daily lives. We rely on them for communication, entertainment, work, payments, navigation, and even security. But like all electronics, phones develop problems—sometimes due to usage habits, sometimes because of apps or software glitches, and often because of accidental damage.

    The good news is that most phone issues are easy to fix if you understand what causes them and take quick action. Whether you’re using an iPhone, Samsung, Xiaomi, Vivo, Oppo, Motorola, OnePlus, or any other brand, the types of problems you face are often similar.

    “Every problem has a solution—what matters is knowing where to look.”

    This guide explains the most common smartphone issues and provides simple, practical solutions anyone can follow. It’s written for both everyday users and those learning mobile repair.


    1. Cracked or Broken Display

    A cracked screen is one of the most common smartphone problems. Modern phones use glass displays for clarity and touch responsiveness, but this also makes them fragile.

    Common Causes

    • Accidental drops
    • Pressure on the pocket
    • Falling off the bed or table
    • Sharp objects inside bags

    Solutions

    • If the crack is minor, apply a tempered glass to prevent it from spreading.
    • If touch stops working or lines appear, replace the display.
    • Choose original or premium-grade compatible screens for long-term use.
    • Use a shock-absorbing case and a screen protector to prevent future damage.

    Important Tip:
    Display replacement costs vary widely between brands. Check pricing before purchasing a phone or spare part.


    2. Charging Port Problems

    Charging port issues are extremely common because the port is used daily and exposed to dust, lint, and frequent pressure.

    Symptoms

    • Phone charges only when the cable is moved
    • Slow charging
    • Intermittent charging
    • No charging at all

    Causes

    • Dust or lint inside the port
    • Worn-out pins
    • Faulty cable or adapter
    • Water or moisture damage

    Solutions

    • Clean the charging port with a soft brush or wooden toothpick (never use metal).
    • Try a different cable and adapter.
    • Check for loose or wobbly ports, which require port replacement.
    • Use high-quality original or certified accessories.

    Preventive Tip

    Avoid using the phone while charging. This puts extra pressure on the port and loosens it over time.


    3. Battery Draining Fast

    Modern lithium-ion batteries degrade naturally over time, but fast battery drain may indicate deeper problems.

    Common Causes

    • Too many apps running in the background
    • Screen brightness set too high
    • Weak network coverage
    • Background syncing
    • Aging battery
    • Heavy gaming or streaming
    • Battery-intensive apps

    Solutions

    • Enable Battery Saver or Low Power Mode.
    • Keep brightness on auto or reduce manual brightness.
    • Turn off Bluetooth, GPS, or Wi-Fi when not needed.
    • Remove apps that drain battery excessively.
    • Replace the battery if it is worn out.

    Modern Battery Care Facts (Updated)

    To extend battery life:

    • Avoid letting your phone drop below 20% frequently.
    • Avoid charging to 100% all the time—80% is healthier for long-term battery life.
    • Enable Optimized Battery Charging (iPhone/Samsung/OnePlus).
    • Avoid fast charging continuously; mix between normal and fast charging.

    4. Freezing or Hanging Issues

    A phone that freezes or becomes unresponsive can be frustrating.

    Causes

    • Low storage
    • Unoptimized apps
    • Outdated software
    • RAM overload
    • Malware

    Solutions

    • Restart the phone once a day.
    • Clear app cache (Android).
    • Uninstall unnecessary apps.
    • Update apps and system software.
    • Check storage—keep at least 20% free space.
    • Use antivirus or malware scanners if needed.

    If the device still hangs, it may require a factory reset or software flashing.


    5. Slow Performance

    Slow phones are extremely common, especially as devices age.

    Common Causes

    • Too many apps installed
    • Background processes
    • Low internal storage
    • Failing storage chip (EMMC/UFS)

    Solutions

    • Clear cache regularly.
    • Delete duplicate files and heavy media.
    • Move photos/videos to cloud or external storage.
    • Restore factory settings if slowing becomes severe.

    Note:
    Avoid using memory cleaning apps that promise speed boosts—they often make performance worse.


    6. Overheating Problems

    Phones heat up naturally under heavy use, but excessive heat needs attention.

    Causes

    • Intense gaming
    • Video streaming
    • Weak network
    • Background apps running
    • Charging while using
    • Poor ventilation

    Solutions

    • Give the phone short breaks during heavy use.
    • Remove the cover while charging.
    • Avoid using fast charging continuously.
    • Update apps—poor coding may cause heat.
    • Reset or replace battery if overheating persists.

    Important:
    Severe overheating can damage internal components like the motherboard, display, and battery.


    7. Network and Signal Issues

    Weak or fluctuating network is a common issue in many locations.

    Causes

    • SIM card problems
    • Faulty network bands
    • Physical damage to antenna
    • Software bugs

    Solutions

    • Remove and clean the SIM card.
    • Try the SIM in another phone.
    • Reset network settings.
    • Update system software.
    • Contact your network provider for coverage issues.

    If none of these work, the antenna or baseband IC might need repair.


    8. Wi-Fi or Bluetooth Not Working

    Wireless connectivity issues often occur due to software glitches or hardware damage.

    Solutions

    • Restart the device and router.
    • Forget and reconnect to networks.
    • Reset network settings.
    • Toggle Airplane Mode.
    • Remove recently installed apps that may interfere.

    If both Wi-Fi and Bluetooth fail together, the network IC may be damaged.


    9. Touchscreen Not Responding

    Touchscreen problems range from partial to complete unresponsiveness.

    Causes

    • Screen damage
    • Moisture
    • Dust
    • Software glitches
    • Ghost touch (input without touching)

    Solutions

    • Clean the screen surface.
    • Restart the device.
    • Remove screen protectors (sometimes block sensors).
    • Replace the display if the touch layer is damaged.
    • Update firmware—ghost touch is sometimes software-related.

    10. App Crashes or Not Opening

    Apps may stop working suddenly due to corrupt data, updates, or compatibility issues.

    Solutions

    • Update the app
    • Clear cache (Android)
    • Reinstall the app
    • Restart phone
    • Check for OS updates
    • Ensure enough free storage

    If system apps crash frequently, the operating system may need flashing.


    11. Camera Not Working Properly

    Camera issues are common, especially after physical impact.

    Symptoms

    • Blurry photos
    • Camera not opening
    • “Camera failed” message
    • Black screen
    • Focus not working
    • Lens shaking or buzzing

    Solutions

    • Clean the lens
    • Restart the phone
    • Remove case blocking the lens
    • Update camera app and OS
    • Reset settings
    • Replace the camera module if hardware is damaged

    12. Audio Problems (Speaker, Earpiece, Microphone)

    Sound issues can occur due to:

    • Dust
    • Wear and tear
    • Moisture
    • Damaged ICs

    Solutions

    • Clean speaker grills
    • Test with earphones
    • Restart phone
    • Check if phone is in Silent mode
    • Replace speaker or mic module if needed

    13. Phone Restarting Automatically

    A phone that restarts by itself may have:

    • Battery issues
    • Software crashes
    • Hardware faults
    • Moisture in motherboard

    Solutions

    • Update software
    • Remove recently installed apps
    • Reset the device
    • Replace battery
    • Check motherboard for corrosion

    14. Storage Full Even When You Deleted Files

    This happens due to:

    • System cache
    • Hidden folders
    • WhatsApp media buildup
    • Corrupt storage

    Solutions

    • Clear cached data
    • Delete duplicated media
    • Upload files to cloud storage
    • Move media to SD card (if supported)
    • Reset phone if storage is corrupted

    15. Phone Not Turning On

    A dead phone is usually due to:

    • Drained battery
    • Faulty power IC
    • Short circuit
    • Software crash
    • Damaged charging port

    Solutions

    • Charge for at least 20 minutes
    • Try another cable and adapter
    • Force restart
    • Connect to a computer to detect the device
    • Seek technician help if hardware is damaged

    “When your phone stops responding, stay calm—most solutions begin with a simple reset.”


    16. Proximity Sensor Not Working

    This causes the screen to stay ON during calls, leading to accidental touches.

    Solutions

    • Remove thick screen protectors
    • Test sensor using phone dial codes
    • Update software
    • Replace broken sensor module

    17. Fingerprint or Face Unlock Not Responding

    Causes

    • Dirty sensor
    • Moisture
    • Scratches on the sensor area
    • Software bugs
    • Hardware wear

    Solutions

    • Clean the sensor
    • Remove and re-add fingerprints or face data
    • Update software
    • Replace faulty sensor module
    • Check for original display—many third-party screens affect fingerprint accuracy

    18. Slow Charging or Not Charging Properly

    Solutions

    • Use original or certified fast chargers
    • Clean the port
    • Replace cable
    • Check adapter wattage
    • Disable background apps while charging
    • Avoid charging in hot environments

    Conclusion

    Smartphones may develop various problems over time, but most issues are simple to fix once you understand the causes. With the right maintenance, careful usage, and timely troubleshooting, you can extend the life of your device and avoid unnecessary repair costs.

    “A well-maintained phone performs better and lasts longer—treat it with care, and it will serve you well.”

    If a problem persists even after trying the solutions, it may require professional repair. Acting early often prevents bigger issues like motherboard damage or complete device failure.

  • How to Remove Shorting in Mobile Phones (Guide)

    How to Remove Shorting in Mobile Phones (Guide)

    Short circuits—often called “shorting”—are among the most challenging hardware faults in mobile phone repair. A shorted phone may not turn on, may restart repeatedly, may drain the battery quickly, or may heat up even when idle. For technicians, removing shorting correctly is essential to restoring the phone to working condition without damaging other components.

    Today’s mobile phones use complex multilayer PCBs, advanced PMIC structures, and highly integrated systems. As a result, removing shorting requires a structured, safe, and methodical approach.

    “In mobile repair, knowledge saves the board. Guesswork destroys it.”

    This guide explains how to remove shorting in mobile phones using modern professional methods, including:

    • Main-line (VBAT) short removal
    • Sub-line short diagnosis
    • Voltage injection safe technique
    • Thermal camera and freeze spray heat spotting
    • IPA evaporation method
    • Component isolation
    • PMIC and CPU short precautions
    • Ultrasonic cleaning
    • Safe board handling

    This is a professional technician-level guide, written in simple language so students and beginners can follow easily.


    1. What Is Shorting in a Mobile Phone?

    A short circuit occurs when two points that should not touch each other become electrically connected. This creates an abnormal current path, leading to:

    • Heating
    • Phone not powering on
    • Battery draining fast
    • Overcurrent damage
    • Component burnout

    In a mobile motherboard, shorting usually occurs in either:

    Main Power Line (VBAT Rail)

    Or

    Secondary Power Rails

    (1.0V, 1.2V, 1.8V, 2.8V, 3.0V, 4.2V, etc.)

    A main-line short is typically caused by:

    • Shorted capacitor
    • Blown diode
    • Damaged PMIC
    • Water damage
    • Physical force bending PCB layers

    A sub-line short usually involves:

    • LDO regulator lines
    • Specific IC supply lines
    • Camera/Display/Charging sections

    Understanding which type you are dealing with helps you remove the short safely.


    2. Common Reasons for Shorting

    Shorting rarely happens without cause. The most common triggers include:

    1. Liquid Exposure

    Water or moisture bridges tracks, causing instant VBAT-to-ground short.

    2. Overheating or Thermal Stress

    Leads to solder cracks and component bridging.

    3. Faulty Chargers or Power Surge

    Cheap chargers can blow PMIC, CPU regulators, or filter capacitors.

    4. Physical Damage

    Drops bend internal layers of the PCB or crack micro-lines.

    5. Manufacturing Defects

    Can cause premature component failure.

    6. Aging Components

    Old motherboards may develop carbon residue or internal breakdown.

    short circuit i.e shorting due to water damage

    3. Symptoms That Indicate Shorting

    Common signs include:

    • Phone completely dead
    • No charging
    • Overheating without being powered
    • Battery drops rapidly
    • DC Power Supply shows high current draw
    • Phone restarts automatically
    • Component-level heating
    • Burning smell

    Once these symptoms appear, the technician must begin short-diagnosis immediately.

    “A shorted phone speaks through its symptoms—listen carefully.”


    4. Tools Required for Safe Short Removal

    Modern shorting repair requires proper tools:

    ✔ Multimeter (Diode/Continuity Mode)

    ✔ DC Power Supply (0–5A, 0–5V range)

    ✔ Hot Air Rework Station

    ✔ Soldering Iron

    ✔ Ultrasonic Cleaner (for water-damaged boards)

    ✔ 99% IPA (Isopropyl Alcohol)

    ✔ Thermal Camera (optional but ideal)

    ✔ Freeze Spray (or coolant spray)

    ✔ Microscope (recommended)

    ✔ Tweezers and board brushes

    Using the correct tools reduces repair time and prevents motherboard damage.


    5. Step-by-Step Procedure to Remove Shorting in Mobile Phones

    Below is the modern and safe workflow followed by advanced technicians:


    STEP 1: Visual Inspection

    Before touching the board with any tool:

    Look for:

    • Burn marks
    • Corrosion
    • Broken components
    • Missing components
    • Bent PCB

    If the phone fell in water, corrosion under ICs may be a major cause of the short.


    STEP 2: Clean the PCB Properly

    Use 99% IPA or professional PCB cleaner.

    Cleaning steps:

    1. Remove all flexes, shields, and detachable modules.
    2. Brush the PCB with IPA to remove dirt and corrosion.
    3. Use an ultrasonic cleaner for water-damaged boards (8–12 minutes).
    4. Dry the board completely using hot air at a safe temperature (no overheating).

    If the short disappears after cleaning, the cause was internal corrosion or conductive debris.


    STEP 3: Check Main-Line Shorting Using Multimeter

    Use diode mode:

    1. Place RED probe on GND.
    2. Place BLACK probe on VBAT.

    Readings:

    • Beep or value in both directions → Main-line short
    • Value in only one direction → Normal

    If the main line is short, proceed to Step 5.


    STEP 4: Check Sub-Line Shorting (Advanced)

    Sub-lines include:

    • 1.8V
    • 2.8V
    • 3.0V
    • 4.2V
    • Camera lines
    • Display lines
    • RF power lines

    Check each coil output line:

    • If a coil output line has low resistance in both directions → sub-line short.
    • Trace that line to the connected IC or capacitor group.

    This helps you identify which section is affected.


    STEP 5: Voltage Injection to Locate Heating Component (Safe Method)

    This is one of the most effective modern techniques.

    Steps:

    1. Set DC Power Supply to 1V and 2A current limit.
    2. Connect:
      • Red clip → VBAT line
      • Black clip → GND
    3. Switch ON the power supply.

    Observe current behavior:

    • High current (1–2A instantly) → Hard short
    • Slow rise in current (0.2–0.4A) → Soft short or leakage

    Now identify the heating component using:


    STEP 6: Heat Detection Methods (Choose Any)

    Method A: Thermal Camera (Best Method)

    Component heating appears instantly on screen.

    Method B: Freeze Spray

    Spray the entire affected area →
    When power is applied, the faulty part melts first.

    Method C: IPA Evaporation (Popular Technique)

    Pour a few drops of IPA on PCB →
    The part that evaporates fastest is the shorted component.


    STEP 7: Remove the Faulty Component

    Once the heating component is identified, remove it safely:

    • Use hot-air rework station
    • Do not overheat nearby ICs
    • Remove gently with tweezers

    Most common short-causing components:

    • Filter capacitors (90% of cases)
    • Protection diodes
    • Charging IC
    • PMIC (Power Management IC)
    • Backlight IC
    • RF ICs

    After removal, test VBAT line again:

    • If short is gone → Replace component
    • If still short → Continue diagnosis

    STEP 8: Check PMIC and CPU Short Precautions (Critical)

    If heating is found under:

    ✔ PMIC

    ✔ CPU

    ✔ RAM

    ✔ Storage IC

    Then:

    • These are risky to remove
    • Many require reballing, not replacement
    • Underfill on CPUs makes removal complicated

    In most cases:

    • CPU short → Board is beyond economical repair
    • PMIC short → Replace PMIC only if technician is skilled

    STEP 9: Re-Test VBAT and Sub-Lines

    After removing components:

    1. Test multimeter readings again.
    2. Ensure VBAT shows no short.
    3. Ensure sub-lines have normal diode readings.

    This confirms the short is successfully removed.


    STEP 10: Reassemble and Power On

    Once the board is stable:

    • Attach battery
    • Power on phone
    • Check charging
    • Check temperature
    • Test network, camera, display, sound

    Why Most Shorting Happens in Capacitors

    In modern smartphones, capacitors act as filters and stabilizers. They sit across VBAT and ground.

    If a capacitor breaks internally:

    • Positive and negative plates touch → direct short
    • Battery drains instantly
    • Motherboard draws high current

    This is why capacitors are the main cause of mobile shorting.


    Tips to Prevent Shorting in Mobile Phones

    You can advise customers to:

    • Avoid cheap chargers
    • Keep phone away from water
    • Use protective cases
    • Avoid exposing phone to direct heat
    • Get phone serviced immediately after water damage
    • Replace aging batteries

    Conclusion

    Removing shorting in mobile phones is a technical skill that improves with experience. The key is to diagnose the short correctly and follow a systematic workflow.

    “When you follow the right process, the board reveals the fault on its own.”

    With modern techniques like voltage injection, thermal imaging, and ultrasonic cleaning, short removal is now safer and faster than ever before.

    This guide gives you the complete professional workflow — from identifying main-line and sub-line shorts to safely removing faulty components and restoring the device back to life.

  • How to Clean and Service Your Cell Phone Safely (Guide)

    How to Clean and Service Your Cell Phone Safely (Guide)

    Your phone goes everywhere with you—your home, office, gym, market, public transport, and sometimes even the bathroom. It touches dozens of surfaces daily, comes into contact with your hands, face, pockets, and bags, and collects dust, oils, sweat, germs, and environmental pollutants. Cleaning your device is not only about hygiene—it also helps your phone run smoother and last longer.

    Many people clean only the screen, ignoring the ports, speakers, microphone holes, and tiny spaces where dirt accumulates and slowly affects performance. A clean phone charges better, stays cooler, lasts longer, and looks more presentable.

    “A little care every week keeps your phone healthy for years—maintenance is cheaper than repair.”

    This guide explains how to clean and service your cell phone safely using modern and trustworthy methods. Whether you use an iPhone, Samsung Galaxy, Xiaomi, Realme, OnePlus, Motorola, Vivo, Oppo, or any other brand, these steps apply to all.


    Why You Should Clean Your Cell Phone Regularly

    Cleaning is not only for looks. It helps improve:

    ✔ Hygiene

    Your phone can carry more bacteria than public surfaces if not cleaned properly.

    ✔ Touchscreen responsiveness

    Oil, dust, and residues reduce touch accuracy.

    ✔ Charging performance

    A dusty charging port causes slow or inconsistent charging.

    ✔ Call quality

    Dust in microphone or speaker grill reduces clarity.

    ✔ Heat management

    Dirt blocks ventilation and increases temperature.

    ✔ Component life

    Clean hardware lasts longer because it avoids corrosion and moisture buildup.

    Regular cleaning gives you a healthier device—and a better user experience.

    “Your phone works hard for you every day. Treat it with a little respect, and it will return that care through reliable performance.”


    Before You Begin: Safety Steps

    Always follow these precautions before cleaning or servicing:

    • Turn off the phone completely.
    • Unplug the charger and remove accessories.
    • Remove the case and screen guard if needed.
    • Remove the SIM tray.
    • If your phone has a removable battery, take it out—but never attempt to remove batteries in sealed phones unless you are trained.
    • Never spray liquids directly on your phone.
    • Avoid using household cleaners, bleach, or strong chemicals.

    These steps protect your phone from accidental damage.


    Tools and Materials You Should Use

    Use only safe, phone-friendly cleaning items:

    ✔ Microfiber cloth

    Lint-free and gentle on screens.

    ✔ Soft brush (paintbrush or anti-static brush)

    For cleaning ports and corners.

    ✔ 70–99% Isopropyl Alcohol (IPA)

    Safe for electronics. Evaporates quickly.

    ✔ Compressed air can (optional)

    Helps remove dust from tiny holes.

    ✔ Toothpicks or SIM ejector pin

    For cleaning edges (very gently).

    ✔ Cotton swabs (dry or lightly moistened)

    Useful for small areas.

    ✔ UV or disinfecting wipes approved for phones

    Safe for daily sanitizing.

    ✔ Ultrasonic cleaner (for technicians only)

    For deep cleaning of PCBs.

    Avoid harmful items such as glass cleaners, perfumes, hand sanitizers, paper towels, metal tools, or excessive water.


    STEP 1: Clean the Phone Exterior

    This includes the body, edges, buttons, and back panel.

    1. Use a microfiber cloth

    • Lightly moisten it with water or IPA.
    • Wipe in straight strokes, not circles.
    • Remove smudges, sweat, makeup, and dust.

    2. Clean buttons and seams

    Use a soft brush or cotton swab to remove dirt from:

    • Volume buttons
    • Power button
    • Frame edges
    • Speaker grill
    • Microphone holes

    Avoid using too much liquid—moisture can seep inside.

    3. Clean the back panel

    Especially if you use a polycarbonate or glass-backed phone.


    STEP 2: Clean the Display Safely

    The screen is the most frequently touched part and attracts fingerprints, dust, and bacteria.

    ✔ Recommended Method

    • Use a microfiber cloth slightly dampened with distilled water or IPA.
    • Wipe gently in horizontal or vertical lines.
    • Do not press hard—this may damage the display or touch sensors.

    ✔ To remove sticky stains

    • Use 70% IPA—strong enough to clean, mild enough for coatings.

    ✔ Do NOT use:

    • Cleaning sprays meant for glass windows
    • Baby wipes
    • Alcohol with fragrances
    • Hand sanitizer

    These can damage the oleophobic coating.

    Optional: Reapply oleophobic coating

    After long-term use, the coating fades. High-quality coating kits are available, but apply them only if comfortable following instructions.


    STEP 3: Clean the Charging Port (Important)

    A dirty charging port is one of the most common reasons for:

    • Slow charging
    • Loose connection
    • Phone not charging
    • Cable not fitting properly

    ✔ Clean using:

    • Soft brush
    • Compressed air
    • Wooden toothpick (very gently)

    Steps:

    1. Turn the phone off.
    2. Insert the toothpick gently and move it side-to-side.
    3. Remove lint or compacted dust.
    4. Blow compressed air to clear remaining particles.

    Never use metal pins, needles, or water.


    STEP 4: Clean Speakers and Microphone Holes

    Dust often blocks sound pathways.

    ✔ Use a soft brush

    Brush gently in one direction.

    ✔ Use adhesive putty

    Roll it lightly over speaker grills to lift dirt.

    ✔ Use compressed air

    Short bursts only; too much pressure can damage membranes.


    STEP 5: Clean Phone Cases and Accessories

    Your phone case collects more germs than the phone itself.

    ✔ Silicone Cases

    • Wash with warm soapy water.
    • Let them dry completely.

    ✔ Hard Plastic Cases

    • Wipe with IPA.

    ✔ Leather Cases

    • Use leather-safe cleaners.

    ✔ Screen Protectors

    If the protector is scratched, lifting, or yellowing—replace it.


    STEP 6: Service Your Phone Internally (Technician-Level)

    Only perform these steps if you’re trained or experienced.
    If not, leave these to a professional technician.

    ✔ Remove Back Panel

    Some phones allow safe removal; others do not.

    ✔ Inspect for Dust or Corrosion

    Use a magnifying glass or microscope.

    ✔ Clean Internal Components

    Use:

    • 99% IPA
    • Soft brush
    • Compressed air

    ✔ Ultrasonic Cleaning (Advanced)

    Professionals use an ultrasonic cleaner to deep-clean PCBs, especially in cases of liquid damage. This removes corrosion and contaminants safely.

    ✔ Check for Loose Screws or Connectors

    Loose connections can cause:

    • No display
    • Touch malfunction
    • Battery drop
    • Network issues

    Gently reseat flex cables if required.

    ✔ Do NOT

    • Remove batteries from sealed phones
    • Pry forcefully
    • Use water or soap inside

    Internal servicing must be done only with correct tools and experience.


    STEP 7: Clean SIM Tray and Slots

    A dusty SIM slot can cause:

    • SIM card not detected
    • Weak network
    • Call drop issues

    ✔ Steps

    • Use a dry brush to clean the tray.
    • Use compressed air to clear the slot.
    • Avoid inserting liquids or cotton inside the slot.

    STEP 8: Sanitize Your Phone (Final Step)

    After cleaning, sanitize to kill germs.

    ✔ Use approved disinfectant wipes

    Apple, Samsung, and other brands allow alcohol-based wipes for sanitizing.

    ✔ Do NOT use

    • Bleach
    • Excess water
    • Vinegar
    • Strong surface cleaners

    These damage coatings and internal components.


    How Often Should You Clean Your Phone?

    ✔ Light wiping: Daily

    ✔ Full cleaning: Weekly

    ✔ Deep cleaning/service: Every 2–3 months

    ✔ Professional servicing: Every 6–12 months

    Regular maintenance improves hygiene, performance, and lifespan.


    Signs Your Phone Needs Cleaning or Servicing

    • Charging is slow or intermittent
    • Touchscreen feels less responsive
    • Sound is muffled
    • Phone overheats
    • Buttons feel sticky
    • Screen has smudges or oily spots
    • Dust around camera or speaker grills
    • SIM not detected randomly
    • Phone looks dull or dirty

    If you notice any of these, clean your device following the steps above.


    Advanced Servicing Benefits (Performed by Technicians)

    Professional servicing includes:

    • Deep PCB cleaning
    • Port replacement if needed
    • Battery health assessment
    • Thermal paste reapplication (only in advanced repairs)
    • Speaker and mic dust removal
    • Rechecking board connections
    • Power and charging diagnostics

    These services help keep your phone running smoothly.


    Conclusion

    Cleaning and servicing your cell phone is simple, safe, and highly beneficial when done correctly. A clean phone performs better, stays healthier, and lasts longer. With regular care, you reduce the chances of overheating, slow charging, sound issues, and even hardware failure.

    “Good maintenance isn’t just about protecting your device—it’s about protecting the investment you carry every day in your pocket.”

    Take a few minutes every week to clean your phone, and enjoy a device that looks great, feels fresh, and works flawlessly.

  • Top Benefits of Refurbishing Your Cell Phone (Guide)

    Top Benefits of Refurbishing Your Cell Phone (Guide)

    A cell phone today isn’t just a device—it’s a personal companion that stays with us through almost every moment of the day. It holds our photos, contacts, conversations, memories, reminders, and even work essentials. Because of this attachment, most people find it difficult to replace their phones the moment something goes wrong.

    Sometimes, the device gets scratched, the battery drains too fast, the screen cracks, or the performance slows down. At that point, the big question comes in: Should you buy a new phone or refurbish the one you already have?

    Many users assume buying a new phone is the easiest solution. But with rising prices, tighter budgets, and sustainability becoming more important, refurbishing has become a smarter and more practical choice.

    In this guide, you’ll learn why refurbishing your cell phone is both a smart and beneficial decision, when you should consider it, what refurbishing includes, and how it can significantly extend the life of your device.


    What Does Refurbishing a Cell Phone Really Mean?

    Refurbishing is much more than just repairing a single fault. It is a complete restoration process that improves both the external appearance and internal performance of the device.

    A refurbished phone may include:

    • Replacement of outer body or casing
    • New display or touch panel
    • Battery replacement or calibration
    • Cleaning or repairing charging port
    • Software reinstall or optimization
    • Motherboard cleaning
    • Speaker/mic servicing
    • Camera cleaning or replacement
    • Internal dust removal

    The goal is simple: make the phone look and perform as close to new as possible.


    Why People Choose Refurbishing Over Replacement

    People choose refurbishing for many personal, financial, and practical reasons. Some of the most common are:

    ✔ They love their current phone model

    Some users prefer the design, size, or features of their existing device.

    ✔ The same model is no longer sold

    Brands discontinue models frequently, making replacement difficult.

    ✔ Upgrading is expensive

    Not everyone wants or needs the latest phone.

    ✔ They prefer familiar features

    Learning a new interface or system can be unnecessary when the current phone works well after refurbishment.

    ✔ Sentimental attachment

    Some users want to keep a device that carries memories or was gifted by someone special.

    “A repaired phone doesn’t lose value—what matters is how well it serves you every day.”


    Top Benefits of Refurbishing Your Cell Phone

    Below is a detailed and updated explanation of the biggest advantages of refurbishing your phone.


    1. You Save a Significant Amount of Money

    Replacing a modern smartphone can be costly. Premium devices can be equivalent to a month’s salary in many regions. In contrast, refurbishing usually costs a small fraction of buying a new phone.

    Refurbishing helps you save money because:

    • Repairing one or two parts is cheaper than replacing the whole device.
    • You can avoid unnecessary upgrades.
    • Many refurbishing centers offer budget-friendly part replacements.
    • Batteries, screens, and back panels are significantly cheaper than entire phones.

    For most people, cost-saving is the number one reason they choose to refurbish.


    2. Your Phone Looks and Feels Brand New Again

    One of the biggest misconceptions is that old phones can never look fresh again. That’s not true. With modern refurbishing techniques, you can:

    • Replace the entire casing
    • Install a new display
    • Polish or replace metal frames
    • Clean internal components
    • Replace scratched camera glass
    • Install a new battery

    The result is a device that looks nearly new and feels premium again.

    “Refurbishing gives old phones a new life—and gives you the feeling of holding a new device without the new-device price.”


    3. You Avoid the Learning Curve of a New Device

    Switching to a new phone means:

    • Reinstalling apps
    • Learning new features
    • Adjusting to new UI changes
    • Transferring data
    • Re-setting passwords and preferences

    This can take hours and sometimes days before you feel comfortable again.

    Refurbishing allows you to enjoy improved performance without switching models, avoiding the hassle completely.


    4. It Extends the Lifespan of Your Device

    Most phones don’t die—they simply need servicing.

    A frozen phone, slow performance, fast battery drain, or random restarts may be caused by:

    • Dust inside the motherboard
    • Loose connections
    • Old battery
    • Corrupted software
    • Faulty charging port
    • Worn-out buttons
    • Damaged speaker or mic

    When these faults are repaired, the phone can last for years more.

    Common refurbishing actions that improve lifespan:

    • Internal cleaning reduces overheating
    • Battery replacement restores backup
    • New charging port fixes inconsistent charging
    • Software reinstall boosts performance

    Refurbishing is the best way to get more years out of the device you already own.


    5. It Greatly Improves Battery Performance

    Most people think they need a new phone just because the battery drains fast. In reality, battery health naturally decreases with time.

    Refurbishing fixes battery issues by:

    • Replacing old battery cells
    • Cleaning power IC area
    • Fixing charging port
    • Updating software
    • Removing unnecessary background apps

    A refurbished phone often regains its original standby time, making it feel like new again.


    6. Better for the Environment (Eco-Friendly Choice)

    E-waste is one of the world’s fastest-growing problems. Throwing away a phone contributes to:

    • Toxic waste
    • Metal and plastic pollution
    • Increased manufacturing demand

    Refurbishing reduces environmental impact by extending the life of your device.

    Eco-friendly benefits:

    • Reduces electronic waste
    • Saves natural resources
    • Cuts down on manufacturing emissions
    • Encourages sustainable consumer habits

    Repairing instead of replacing is a small but meaningful way to protect the planet.


    7. You Maintain Your Data Safely

    Even if you transfer data to a new phone, there is always a risk of:

    • Missing files
    • Broken chats or incomplete backups
    • Lost contacts
    • App data errors

    Keeping your current device eliminates these problems.

    Refurbishing keeps your data safe because:

    • You continue using the same phone
    • No migration errors
    • No compatibility issues
    • Less risk of data loss

    When sensitive information matters, refurbishing is the safest option.


    8. You Can Upgrade Individual Parts Instead of Replacing Everything

    Modern phones are modular to an extent. Many components can be replaced independently:

    • Display
    • Battery
    • Charging port
    • Back panel
    • Loudspeaker
    • Buttons
    • Camera lens
    • Vibration motor

    This makes refurbishing flexible and customizable.

    For example:

    • If only the camera is damaged, replace just that.
    • If the back glass is cracked, change only the glass.
    • If battery capacity decreases, replace the battery.

    This saves both money and time.


    9. It Increases the Resale Value if You Decide to Sell Later

    A phone that looks good and performs well sells for a better price.

    Refurbishing boosts resale value by:

    • Improving appearance
    • Fixing internal issues
    • Enhancing performance
    • Replacing old parts
    • Adding new casing or screen

    A small investment in refurbishing can give a much better return later.


    10. Perfect Option for Budget-Conscious Users

    Not everyone wants a new high-end phone every year. Some individuals prefer functionality over fashion. For students, small business owners, parents, or those with limited budgets, refurbishing is the smartest choice.


    Common Scenarios Where Refurbishing Is the Best Option

    ✔ Cracked screen

    ✔ Poor battery life

    ✔ Slow performance

    ✔ Water damage (minor to moderate)

    ✔ Faulty buttons

    ✔ Speaker/Mic problems

    ✔ Damaged charging port

    ✔ Overheating due to dust

    In all these situations, refurbishing restores the phone effectively at a much lower cost.


    When You Should Consider Replacing Instead of Refurbishing

    To remain honest and transparent (trustworthiness), here are cases where replacement might be better:

    • Severe motherboard damage
    • Device no longer receives security updates
    • Multiple hardware issues at once
    • Cost of refurbishing is too close to cost of new device
    • You need major camera or performance upgrades

    A good technician will always guide you honestly.


    How to Ensure a Good Refurbishing Experience

    Here are expert-backed tips:

    ✔ Choose a reputable repair center

    Look for experienced technicians and original or high-quality parts.

    ✔ Ask for diagnosis first

    A clear estimate avoids surprise costs.

    ✔ Request old parts back

    Ensures genuine replacements were made.

    ✔ Ask for warranty on repairs

    Even 15–30 days adds peace of mind.

    ✔ Clean your data or take backup

    Always backup important information.

    ✔ Test everything before leaving

    Check speaker, mic, camera, network, touch, charging, and buttons.

    By following this checklist, you ensure the refurbishing process is safe, effective, and worth your money.

    FAQs – Refurbishing Your Cell Phone

    1. What does refurbishing a phone include?

    Refurbishing usually includes replacing worn-out parts, cleaning the internal components, updating software, and restoring the phone’s exterior to look and work like new.

    2. Is refurbishing cheaper than buying a new phone?

    Yes. Refurbishing typically costs a small fraction of a new device and offers excellent value if your phone still meets your needs.

    3. Does refurbishing improve battery life?

    Yes. Battery replacement or recalibration is part of refurbishing and restores backup and performance.

    4. Will my phone look new after refurbishing?

    In most cases, yes. Replacing the casing, screen, and back panel can make the phone look almost brand new.

    5. Is refurbishing safe for my data?

    Yes. You continue using the same device, so your apps and files remain intact unless you choose to reset the phone.

    6. Can any phone be refurbished?

    Most phones can be refurbished unless there is severe motherboard damage or the repair cost is too close to the price of a new device.

    7. How long does refurbishing take?

    Minor refurbishing may take 30 minutes to a few hours; full restoration may take a day, depending on parts availability.

    8. Will refurbishing increase resale value?

    Absolutely. A clean, fully functional phone always sells at a higher price than a damaged or slow one.

    9. Is refurbishing good for the environment?

    Yes. It reduces electronic waste and decreases the demand for new manufacturing, making it an eco-friendly choice.

    10. Should I refurbish or replace my old phone?

    Refurbish if the problems are minor—like screen, battery, or port issues. Replace only when the motherboard is severely damaged or when you need major feature upgrades.


    Conclusion

    Refurbishing your cell phone is one of the smartest decisions you can make—financially, practically, and environmentally. You save money, extend your device’s life, avoid the hassle of learning a new model, and reduce electronic waste. Whether your phone has a cracked screen, poor battery backup, or minor performance issues, refurbishing can bring it back to life and restore its full usability.

    “The best phone isn’t always the newest one—it’s the one that works perfectly in your hands.”

    If your device still has potential, refurbishing gives you the chance to keep a phone you love while keeping your budget intact.

  • How to Protect Your Phone Screen and LCD from Damage

    How to Protect Your Phone Screen and LCD from Damage

    Your phone is one of the most used, most touched, and most valuable items you carry every day. It goes wherever you go—your office, home, gym, market, bus, train, and sometimes even your bed. With so much daily use, it’s no surprise that the screen is the part most likely to get damaged.

    In modern smartphones, the display is also one of the most expensive components to repair or replace. A cracked LCD or touchscreen not only looks bad but can also affect usability, touch response, and even safety.

    “A single moment of carelessness can break a screen, but consistent care can protect it for years.”

    This guide explains how to protect your phone screen and LCD from damage using simple, proven, and up-to-date methods. Whether you’re using an iPhone, Samsung, Xiaomi, OnePlus, Vivo, Oppo, Motorola, or any other brand, the principles remain the same.


    Why Phone Screens Need Extra Protection

    Smartphone screens today use high-quality, sensitive materials for better viewing and touch response. Technologies like Gorilla Glass, Ceramic Shield, and AMOLED panels offer durability, but no display is completely unbreakable.

    Common causes of screen damage:

    • Accidental drops
    • Keys or coins scratching the screen
    • Pressure inside pockets or bags
    • Sitting on the phone
    • Screen hitting corners or edges
    • Lack of a protective case or screen guard
    • Temperature changes
    • Moisture exposure

    Even with toughened glass, the display can crack from a minor fall at the wrong angle.

    That’s why protecting your phone screen is not just recommended—it’s essential.

    protect cell phones properly

    Understanding Your Phone’s Screen: What Makes It Vulnerable

    Most modern screens are multi-layered, consisting of:

    • Glass or protective layer
    • Touch digitizer
    • Display panel (LCD, OLED, or AMOLED)

    When a phone falls:

    • The glass may crack
    • The digitizer may lose touch sensitivity
    • The LCD may show black spots, lines, or no display

    Even a hairline crack can spread over time. A small impact today can lead to a major break tomorrow.

    Knowing these vulnerabilities helps you take preventive steps proactively.

    “Screens are strong, but they’re not invincible. Protecting them is protecting your entire device.”


    1. Use a High-Quality Case: Your First Line of Defense

    A protective case absorbs impact and reduces the force reaching the screen.

    Types of cases that offer strong screen protection:

    Rugged or shockproof cases

    Ideal for people who drop their phones often.

    TPU (soft rubber) cases

    Affordable, flexible, and good for daily use.

    Hybrid cases (TPU + hard shell)

    Balance between durability and comfort.

    Wallet or flip cases

    Protects both front and back.

    MagSafe or magnetic cases (for compatible models)

    Convenient and secure.

    Why cases matter:

    • Reduce screen-shattering on impact
    • Protect phone corners (the weakest impact point)
    • Offer grip to prevent accidental slips
    • Prevent scratches from surfaces

    A case is cheaper than a screen replacement—and can protect your phone for years.


    2. Use a Screen Protector (Tempered Glass or Hydrogel)

    Screen guards are essential for protecting against scratches, scuffs, cracks, and impact.

    Types of screen protectors:

    Tempered Glass

    • Most widely used
    • Excellent protection against drops
    • Scratch-resistant
    • Affordable

    Hydrogel Film

    • Soft, flexible
    • Self-healing properties
    • Ideal for curved screens

    Privacy Screen Protectors

    • Reduces viewing angles
    • Protects screen and privacy

    Matte Screen Protectors

    • Reduces glare
    • Prevents fingerprints

    A good screen guard can absorb impact and break instead of your actual screen—saving you thousands in repairs.


    3. Avoid Keeping Your Phone in Pockets with Sharp Objects

    Keys, coins, pens, and other metal items can scratch the glass, even if it’s toughened.

    Always use separate pockets for your phone.

    If you’re carrying a bag:

    • Use a dedicated phone compartment
    • Avoid tight pockets with pressure

    This reduces both scratches and bending pressure on the screen.


    4. Clean Your Screen Properly and Regularly

    Dust, dirt, sand particles, and oils from your hands can wear down protective coatings and cause micro-scratches.

    Clean safely using:

    • Microfiber cloth
    • Screen cleaning spray (phone-safe)
    • Slightly damp cloth with distilled water
    • Isopropyl alcohol (70% or lower for screens)

    Do NOT use:

    • Tissue paper (abrasive)
    • Household cleaners
    • Sanitizer
    • Perfumes or deodorants
    • Paper towels

    Proper cleaning maintains clarity and prolongs the life of the display’s protective layer.


    5. Handle Your Phone Mindfully

    Small habits make a big difference.

    Avoid:

    • Using your phone while walking on stairs
    • Holding it loosely with one hand
    • Placing it near edges of tables
    • Keeping it on your lap (easy to forget and drop)
    • Using it while your hands are wet

    Adopt:

    • Using both hands when possible
    • Secure grip while talking
    • Keeping the phone on stable surfaces

    Mindful handling can reduce drops by over 70%.


    6. Keep Your Phone Away from Heat and Direct Sunlight

    High temperature weakens display adhesives and increases the risk of cracks.

    Heat sources to avoid:

    • Car dashboards
    • Direct sunlight
    • Hot surfaces
    • Gaming while charging (overheating)

    Excessive heat also affects touchscreen responsiveness and LCD health.


    7. Avoid Exposing Your Phone to Moisture

    Even water-resistant phones are not waterproof. Moisture can enter through:

    • Charging port
    • Earpiece
    • Speaker grill
    • Side buttons

    This can cause:

    • Display fogging
    • Touch malfunction
    • LCD discoloration

    Keep your phone away from:

    • Steam
    • Showers
    • Rain
    • Wet surfaces

    Moisture + screen = long-term damage.


    8. Do Not Apply Too Much Pressure on the Screen

    Common pressure risks include:

    • Keeping the phone in the back pocket and sitting on it
    • Sleeping on the phone
    • Storing it under heavy books
    • Pressing too hard on the touch panel

    This can damage:

    • LCD layers
    • Digitizer
    • Display adhesives

    Use gentle touches; modern screens are sensitive enough.


    9. Protect the Screen with a Proper Pouch or Sleeve

    This traditional method is still effective.

    Benefits:

    • Prevents dust
    • Cushions accidental bumps
    • Protects from scratches inside bags

    Choose padded, soft-touch pouches for maximum safety.


    10. Use Mobile Holders and Stands to Prevent Drops

    Using stands reduces accidental falls when:

    • Watching videos
    • Making video calls
    • Using GPS

    Even a small drop from a table can crack a screen if it hits the wrong angle.


    11. Be Careful When Charging Your Phone

    Dropping the phone while charging is one of the most common causes of cracked screens.

    Tips:

    • Avoid using the phone while charging
    • Keep the cable untangled
    • Ensure the charging port area is stable

    A simple fall from bed height can break the display.


    12. Invest in a Quality Phone Insurance or Screen Replacement Plan

    Many brands and carriers offer:

    • Accidental damage protection
    • Screen replacement coverage
    • Low-cost repair plans

    This reduces the financial impact if the screen ever cracks.


    13. Keep a Good Grip: Use a PopSocket or Grip Ring

    These accessories:

    • Reduce accidental drops
    • Provide better one-hand operation
    • Help during photography

    Better grip = fewer falls = longer screen life.


    14. Understand That Corner Impacts Are the Most Dangerous

    Screens rarely break from flat-faced impacts.
    They break when the phone hits corners or edges.

    That’s why:

    • Cases with raised edges
    • Screen protectors
    • Shock-absorbing bumpers

    are so important.


    15. Replace a Damaged Screen Protector Immediately

    A cracked tempered glass still offers less protection.
    Replace it as soon as it breaks, even lightly.

    This ensures your real screen stays protected.


    16. Don’t Ignore Small Cracks or Chips

    A tiny crack can spread due to:

    • Heat
    • Pressure
    • Moisture
    • Daily usage

    Repairing early prevents bigger damage.


    Internal Linking Suggestions

    (Include these at the end of the article, not inside the content)

    • Also read: How to Clean and Service Your Cell Phone
    • Also read: Common Mobile Phone Faults and How to Avoid Them
    • Also read: How to Protect Your Phone Battery Life

    Conclusion

    Protecting your phone screen is about combining the right accessories with good habits. Cases, screen protectors, and mindful handling go a long way in preventing screen cracks. Proper cleaning, temperature control, and safe storage add further protection. A well-maintained screen not only avoids expensive repairs—it keeps your phone looking new, working smoothly, and lasting longer.

    “Your phone’s screen is the window to everything it can do—protect it, and it will serve you without interruption.”

    Taking small steps today prevents costly repairs tomorrow.

  • 7 Easy Ways to Remove Scratches From a Mobile Screen

    7 Easy Ways to Remove Scratches From a Mobile Screen

    It is easy to take our phones for granted. We use them everywhere—while walking, working, chatting, eating, traveling, or even resting. In the middle of this busy routine, we often forget how delicate a phone’s display actually is. A quick slide into a pocket with keys, a moment of carelessness while placing it face-down, or a minor slip from the hand is enough to leave your device with annoying scratches.

    Even small marks can make the screen look old and dull, reduce clarity, and sometimes interfere with touch response. The good news? Most light scratches can be reduced or hidden using safe, modern methods. Today’s screens are stronger, coated with oleophobic layers, and designed to resist everyday wear—but they are not completely scratch-proof.

    This guide explains updated, tested, expert-approved ways to fix or reduce phone screen scratches without damaging your device. You will also learn when DIY methods are safe—and when professional repair is the smarter choice.

    One simple reminder that fits perfectly here:

    “Take care of your devices, and they will take care of your daily life.”


    Understanding Phone Scratches Before You Start

    Not every scratch is the same. Correct identification helps you choose the right solution.

    1. Hairline Scratches

    Very light marks visible only under strong light.
    Good news: These can often be reduced significantly with simple polishing or screen protection.

    2. Surface-Level Scuffs

    Visible marks caused by coins, minor abrasions, or rough surfaces.
    Can be treated: With plastic-safe polish or a tempered glass protector.

    3. Deep Scratches

    Easily visible, felt with a fingernail, and sometimes affecting touch.
    Cannot be repaired at home: Professional repair may be needed.

    4. Cracks or Spiderweb Damage

    These are structural damages.
    Do not attempt DIY fixes: Screen replacement is the only solution.

    Before knowing how to remove scratches, it is important to know how to protect cell phone screen from damage and scratches. Knowing the difference saves time and prevents further damage.


    Important Safety Warning

    Older home remedies like toothpaste, baking soda, nail polish, spirit, or abrasive powders are no longer safe for modern smartphones.
    They can:

    • Damage the oleophobic coating
    • Increase the size of scratches
    • Cause screen discoloration
    • Affect touch sensitivity

    The steps below use safe and updated solutions that match current screen technologies.

    remove scratches from cell phone lcd and screen

    7 Modern & Safe Ways to Remove Scratches From a Mobile Screen


    1. Clean the Screen Properly Before Any Treatment

    Before attempting any fix, always start with a clean surface. Dust or dirt can cause further micro-scratches during the process.

    How to clean safely:

    • Turn off your device
    • Use a soft microfiber cloth (same as used for spectacles)
    • Slightly dampen it with screen-safe cleaning spray or distilled water
    • Wipe gently in straight motions

    Avoid circular scrubbing, harsh cloths, paper tissues, or alcohol-based cleaners.

    A clean screen helps you see the true depth of scratches and prevents worsening them.


    2. Use a High-Quality Tempered Glass Screen Protector to Hide Scratches

    This is one of the most effective and low-risk ways to improve the appearance of your phone.

    Why this works:
    Tempered glass has a uniform thickness and coating. When applied, it fills minor gaps, making light scratches almost invisible. It also prevents new scratches.

    Steps:

    1. Clean the screen thoroughly
    2. Align the tempered glass
    3. Apply slowly to avoid bubbles
    4. Press down to seal edges

    If your scratches are minor, you will see an instant improvement.


    3. Use a Plastic Polish or Display-Polishing Compound

    For phones with plastic screens—mainly older models, budget devices, or some foldable phones—light scratches can be reduced with special-purpose polish.

    Use only phone-safe polishing compounds, such as:

    • PlastX
    • PolyWatch (plastic polish version)

    These products contain micro-abrasives designed to gently level the scratched surface.

    How to use:

    • Apply a small drop on the scratch
    • Use a microfiber cloth to rub gently in a controlled direction
    • Polish for 10–20 seconds
    • Wipe clean and inspect

    Do NOT use plastic polish on glass screens.


    4. Use Cerium Oxide for Glass Screen Scratch Reduction

    For glass displays, the safest professional-grade solution is cerium oxide, a polishing compound used for glass restoration.

    While it won’t remove deep scratches, it can visibly reduce light marks.

    Usage tips:

    • Mix cerium oxide powder with a few drops of water to make a thin paste
    • Apply with a microfiber cloth
    • Polish lightly for 20–30 seconds
    • Clean and check the improvement

    This method requires patience, but it gives the best DIY result for glass screens.


    5. Apply a Liquid Screen Protector as a Scratch Filler

    Liquid screen protectors are made of silica-based nanolayers that bond to the screen surface.
    They do not remove scratches, but they can reduce visibility and add a protective coat.

    Benefits:

    • Helps hide micro-scratches
    • Enhances smoothness
    • Adds a thin protective layer

    How to apply:

    • Clean the screen
    • Apply liquid evenly
    • Let it cure for the recommended time
    • Buff gently with a microfiber cloth

    This is ideal for very fine hairline scratches.


    6. Install a Hydrogel Screen Protector for Flexible Scratch Coverage

    Hydrogel protectors have become popular because they self-heal minor scratches. The material is flexible and restores itself with heat or pressure.

    Why hydrogel works well:

    • Self-healing properties
    • Covers and hides small scratches
    • Excellent touch sensitivity

    Steps to apply:

    • Clean the screen
    • Align and place the hydrogel sheet
    • Use the squeegee to smooth out the material
    • Allow it to “heal” over the next 24–48 hours

    Perfect for curved screens, foldable phones, and devices with minor marks.


    7. Choose Professional Polishing or Screen Replacement for Deep Scratches

    If the scratch is deep enough to feel with a nail, DIY methods won’t fix it. Professional technicians use controlled glass polishing machines and compounds safe for laminated displays.

    Professional services may include:

    • Oleophobic coating reapplication
    • Controlled glass micro-polishing
    • Full display replacement

    When the scratch affects display performance or touch, replacement is the only long-term solution.

    As people often say:
    “Not everything needs fixing at home—some repairs deserve expert hands.”


    Practical Tips to Prevent Future Scratches

    Once you fix your screen, protect it from new marks by following a few simple habits.

    1. Use a high-quality screen protector

    Choose between tempered glass, hydrogel, or nano-coating for the best protection.

    2. Keep your phone away from sharp objects

    Avoid storing your phone in pockets with keys or coins.

    3. Clean your screen regularly

    Dust particles act like sandpaper over time.

    4. Use a protective case

    Raised edges prevent the screen from touching surfaces.

    5. Avoid keeping your phone face-down

    Especially on rough or dusty surfaces.

    6. Handle your phone with care outdoors

    A small fall on concrete can instantly damage the display.

    These small habits help maintain screen clarity and prolong the lifespan of your device.


    When Should You Not Attempt Any DIY Scratch Repairs?

    Avoid DIY methods in the following cases:

    • Your phone has cracks or spiderweb patterns
    • Scratches affect the touch response
    • The scratch lies near edges or corners
    • Liquid has entered the phone previously
    • You feel unsure or uncomfortable performing repairs

    In these cases, choose a professional repair service to avoid worsening the damage.


    Common Myths About Fixing Phone Screen Scratches

    Let’s clear up some misconceptions:

    ❌ Toothpaste removes scratches

    Fact: Toothpaste is abrasive and damages coatings.

    ❌ Baking soda works like polish

    Fact: It can worsen the scratch and dull the screen.

    ❌ Nail polish fills deep scratches

    Fact: It ruins the oleophobic coating and is impossible to clean completely.

    ❌ Alcohol removes marks

    Fact: Strong alcohol dissolves the protective layer.

    Sticking to safe, modern methods ensures your phone stays in good condition.


    Summary

    Scratches on a mobile screen are frustrating, but they don’t always require expensive repairs. With modern solutions like tempered glass protectors, hydrogel films, liquid coatings, and safe polishing compounds, you can reduce or hide many light marks.

    Remember:

    • Light scratches → Can be polished or hidden
    • Surface-level scuffs → Tempered glass or hydrogel works well
    • Deep scratches → Only professional repair or replacement

    Stay gentle, stay patient, and avoid outdated remedies that can harm modern screens.

  • How to Start A Cell Phone Repair Shop – Step By Step Business Guide

    How to Start A Cell Phone Repair Shop – Step By Step Business Guide

    Mobile phones have become an essential part of everyday life. People depend on them for work, communication, banking, entertainment, navigation, and even identity verification. With this level of dependency, one thing is certain: when a phone stops working, people need fast and reliable repair services.

    This is why the mobile repair industry continues to grow. Whether it’s a broken screen, dead battery, water damage, software issue, or faulty charging port—users seek quick solutions. What makes this business attractive is that demand never stops, and repairs are often more affordable than buying new devices.

    Many successful repair shop owners today started with a simple toolkit and a small workspace. With patience, skill, and the right strategy, they built profitable businesses. Like one expert said:
    “Every big repair center you see today began with one tool, one table, and one person willing to learn.”

    If you want to start your own cell phone repair shop, this complete guide will show you the exact steps—from skills to setup, tools, pricing, marketing, and running operations smoothly.


    1. Understand the Mobile Repair Industry

    Before you start, it’s important to understand the market. The mobile repair business includes:

    • Hardware repairs
    • Software troubleshooting
    • Chip-level and board-level repairs
    • Data recovery
    • Phone unlocking and configuration
    • Accessory sales

    The market is strong because:

    • Smartphones are expensive, so people prefer repair over replacement.
    • Even new models face issues like cracked screens or charging faults.
    • Customers want quick service, often within the same day.
    • A repair shop can operate with small investment and grow over time.

    To succeed, you must focus on quality, speed, transparency, and trust. Customers return when they feel safe handing over their device.


    2. Learn the Required Repair Skills

    You cannot run this business effectively without understanding repairs. Even if you plan to hire technicians, you must know the basics so you can manage quality, pricing, and customer expectations.

    Learn both hardware and software repairs:

    • Screen replacement
    • Battery replacement
    • Charging port repair
    • Speaker/mic repairs
    • Water damage treatment
    • Camera issues
    • Motherboard diagnosis
    • Soldering and micro-soldering for board components
    • Software flashing, unlocking, and device reset
    • IMEI and network configuration (within legal limits)

    You can learn from:

    • A professional mobile repair training institute
    • Online courses
    • YouTube for basic techniques
    • Forums and communities
    • Practice on old or faulty phones

    Tip: Start by mastering basic repairs, then progress to chip-level repairs as your skills grow. You can also join a self-study online cell phone repair course at Prizm institute to get yourself trained.


    3. Decide the Type of Repair Business You Want to Start

    There are multiple models depending on investment:

    A. Home-based Repair Service

    • Lowest startup cost
    • Flexible working hours
    • Best for beginners

    B. Small Shop / Kiosk

    • Moderate cost
    • High visibility
    • Good for walk-in customers

    C. Full-Service Repair Store

    • Higher investment
    • Can offer advanced services
    • Suitable for major markets

    D. On-Site / Doorstep Repair Service

    • Growing trend
    • Customers love single-visit repairs
    • Requires skilled technician and portable tools

    Choose a model based on your budget, skills, and area demand.

    small cell phone repair shop

    4. Register Your Business and Legal Setup

    Every serious repair shop should complete basic legal steps. It builds trust with customers and prevents future issues.

    Key formalities:

    • Register your business
    • Set up GST (or local tax registration)
    • Create a service invoice format
    • Open a business bank account
    • Maintain proper billing records

    Customers often trust shops that appear professional and organized.


    5. Choose the Right Location

    Location plays a big role in success.

    Best places:

    • Near markets
    • Near colleges or schools
    • Inside commercial complexes
    • Near bus stations or railway stations
    • High-footfall residential areas

    Choose a place that:

    • Has good visibility
    • Is easy to find
    • Has enough space for customers and repair work
    • Is affordable

    Remember the saying:
    “A great location can reduce your marketing cost by half.”


    6. Set Up Your Repair Workspace

    Your shop must look professional, clean, and trustworthy.

    Components of an ideal shop:

    • Workbench with bright lighting
    • Anti-static mat
    • Organized tool storage
    • Display counter for accessories
    • Waiting area for customers
    • CCTV for security and trust
    • Computer for billing and diagnosis
    • Clean and clutter-free environment

    Customers judge your skills by the cleanliness of your shop.


    7. Essential Tools and Equipment You Need

    To start a repair shop, invest in reliable tools. Avoid the cheapest kits because accuracy and safety depend on the quality of tools. You can excellent tools from rewa tools and union repair.

    Basic tools:

    • Screwdrivers and bit sets
    • Tweezer set
    • Pry tools and opening picks
    • Suction cup
    • Magnetic mat
    • Multimeter

    Advanced tools for professional repairs:

    • Hot air rework station
    • Soldering station
    • Microscope for chip repair
    • Separator machine for screen removal
    • OCA machine (optional for big shops)
    • Battery tester
    • Power supply for board testing
    • Ultrasonic cleaner

    Software tools:

    • Flashing tools
    • Data recovery software
    • Unlocking tools (only legal methods)

    Start small and upgrade tools as your business grows.


    8. Build Relationships With Spare Parts Suppliers

    Reliable suppliers are essential for fast repairs. Look for suppliers who provide:

    • High-quality spare parts
    • Warranty on screens and batteries
    • Bulk price discounts
    • Consistent stock availability
    • Fast delivery

    Keep 2–3 suppliers for safety. Compare prices, quality, and delivery time.


    9. Hire Skilled Technicians (optional)

    If you plan to scale, hire skilled staff.

    Qualities to look for:

    • Good technical knowledge
    • Honest and reliable
    • Quick and careful
    • Friendly with customers
    • Willing to learn new techniques

    Create a clear job role:

    • Repairing
    • Inventory management
    • Customer updates
    • Quality check

    You can also hire a receptionist if your footfall increases.


    10. Offer the Right Services

    The best repair shops offer a mix of fast services and profitable add-ons.

    Core repair services:

    • Screen replacement
    • Battery replacement
    • Charging port repair
    • Camera replacement
    • Speaker and mic repair
    • Liquid damage treatment
    • Software installation
    • Data recovery
    • Motherboard repair (high-profit)

    Additional income sources:

    • Selling accessories
    • Selling refurbished phones
    • Buying old phones
    • Selling new phones (optional)
    • Tempered glass installation
    • Phone cleaning service
    • Doorstep repair

    Offering multiple services increases customer value and generates more income.


    11. Pricing Your Repair Services

    Your pricing must cover:

    • Spare parts cost
    • Technician labor
    • Shop rent
    • Tools and equipment
    • Your profit margin

    Common pricing method:

    Cost of part + service charge + margin

    Offer transparent pricing. Customers appreciate honesty.


    12. Create a Strong Brand Identity

    Branding makes you different from your competitors.

    Branding elements:

    • Logo
    • Shop name
    • Staff uniforms
    • Printed invoices
    • Professional signage
    • Branded packing for repaired phones

    A strong brand builds trust.


    13. Online Presence and Digital Marketing

    A repair shop cannot grow without online visibility.

    Must-have online assets:

    • Google Business Profile
    • WhatsApp Business
    • Instagram page
    • Facebook page
    • Simple website (optional)

    Promote your business with:

    • Before/After repair photos
    • Customer reviews
    • Short repair videos
    • Offers and discounts
    • Location posts

    Local SEO matters:

    When people search “mobile repair near me”, your shop must appear on top.

    Encourage customers to leave reviews. More reviews = more walk-ins.


    14. Offline Marketing Methods That Still Work

    Some traditional methods still attract customers:

    • Flyers in nearby buildings
    • Posters in colleges
    • Business cards
    • Referral discounts
    • Partnerships with shops like gadget stores, photo studios, etc.

    Word-of-mouth remains one of the strongest marketing tools in this business.


    15. Customer Service – The Secret to Long-Term Success

    Your repair skills may attract customers once.
    Your service quality will bring them back again and again.

    Focus on:

    • Clear communication
    • Honest diagnosis
    • Upfront pricing
    • Timely updates
    • Quality checks before delivery
    • Polite behavior

    Customers trust shops that are transparent and friendly.


    16. Managing Inventory and Spare Parts

    Keep track of:

    • Screens
    • Batteries
    • Charging ports
    • Cameras
    • Cases
    • Tempered glass

    Use a simple Excel sheet or POS software to manage stock.


    17. Maintain Repair Records and Customer Data

    Record:

    • Customer name
    • Model
    • Problem
    • IMEI number
    • Parts replaced
    • Warranty given

    This protects you from disputes and improves customer trust.


    18. Avoid Common Mistakes New Repair Shops Make

    • Using cheap spare parts
    • Overpromising and underdelivering
    • Not giving receipts
    • Not learning advanced repairs
    • Ignoring online presence
    • Working with outdated tools
    • Poor communication
    • No clear warranty policy

    Avoid these mistakes to grow faster.


    19. Expand Your Business Step-by-Step

    As your business grows:

    • Add more technicians
    • Offer chip-level repair
    • Introduce doorstep service
    • Start selling accessories
    • Sell refurbished phones
    • Open a second branch

    Growth comes from consistency and quality.


    Conclusion

    Starting a cell phone repair shop is one of the most practical business opportunities today. You can begin with small investment, grow gradually, and achieve consistent income if you focus on skills, quality service, transparency, and modern marketing.

    This industry rewards those who keep learning and treating customers well.
    Remember the quote:
    “A repair shop doesn’t just fix devices—it fixes someone’s day.”

    If you follow this step-by-step guide, you will be much better prepared to launch a successful and profitable repair business.

  • How to Use an Ultrasonic Cleaner for Mobile Repair Safely (Guide)

    How to Use an Ultrasonic Cleaner for Mobile Repair Safely (Guide)

    Motherboards are the heart of every mobile device. Even a small amount of moisture, corrosion, or hidden dust can disrupt the flow of current and create faults that are difficult to diagnose. Technicians often face issues where a phone appears dead, restarts randomly, heats up, or shows network problems—only to discover that the root cause was residue or corrosion under the components.

    Simple cleaning solutions like isopropyl alcohol (IPA) or circuit cleaner work for light contamination. But when the motherboard has moisture, water damage, rust, flux buildup, or microscopic debris lodged beneath ICs, you need a deeper cleaning process.

    That’s where an ultrasonic cleaner becomes essential.

    Ultrasonic cleaning is one of the safest and most effective methods to restore faulty phone PCBs without aggressive chemicals or scraping. As many technicians say:
    “A clean motherboard solves faults that tools can’t detect.”

    This guide will teach you exactly how ultrasonic cleaning works, how to use the machine properly, plus common mistakes and safety tips every technician must know.


    1. What an Ultrasonic Cleaner Does in Mobile Repair

    An ultrasonic cleaner uses high-frequency sound waves (typically 20–40 kHz) to create microscopic bubbles in a cleaning liquid. These bubbles collapse instantly, producing a scrubbing effect strong enough to remove:

    • Dust
    • Corrosion
    • Oxidation
    • Flux residue
    • Salts from water damage
    • Oil and stickiness
    • Micro-debris trapped under ICs and components

    This process is called cavitation, and it reaches areas where hand cleaning cannot.

    Why technicians rely on ultrasonic cleaning:

    • It restores dead or partially working motherboards affected by liquid damage.
    • It removes hidden contamination that causes heating, short circuits, and poor performance.
    • It is safer than scraping or brushing delicate components.
    • It offers consistent results and reduces repeat failures.
    ultrasonic cleaner for cell phone repair

    Many experienced repair experts consider it an essential tool in every professional workshop.


    2. When to Use an Ultrasonic Cleaner in Mobile Repair

    You should use ultrasonic cleaning when:

    ✔ The motherboard has signs of corrosion

    Especially when exposed to water, humidity, sweat, or liquid chemicals.

    ✔ The phone is dead after liquid damage

    Ultrasonic cleaning can dissolve corrosive salts lodged under ICs.

    ✔ There is no visible fault, but the phone behaves abnormally

    Issues like:

    • Random restarts
    • Touch failure
    • Camera not working
    • Network instability
    • Heating

    often come from contamination.

    ✔ You see sticky residue

    Flux, old glue, or oil deposits can block circuits.

    ✔ After board-level or chip-level repairs

    Cleaning removes leftover flux and ensures stability.

    Important:
    Ultrasonic cleaning is not for every issue. It should be used only when needed, not routinely.


    3. Understanding How Ultrasonic Cleaning Works

    Ultrasonic machines work using cavitation bubbles that scrub without damaging the board.

    Key elements involved:

    • Frequency (20–40 kHz) — lower frequencies clean more aggressively; higher frequencies are gentler.
    • Cleaning solution — mild, non-corrosive solutions like Elma or PCB-safe detergents.
    • Heat — some machines gently warm the solution to increase effectiveness.
    • Time — the cleaning cycle usually lasts 3–6 minutes for mobile PCBs.

    Ultrasonic cleaning is used across industries: jewellery, surgical tools, watches, automotive parts, and optical components. Its reliability and depth make it ideal for modern motherboards.


    4. Preparing the Motherboard for Ultrasonic Cleaning

    Before putting a PCB into the machine, proper preparation is critical.

    A. Remove all detachable parts

    Detach:

    • Battery
    • Display
    • Cameras
    • Speakers
    • Vibrator motor
    • Antenna lines
    • SIM tray
    • Memory card
    • Charging cable connectors

    These components cannot be submerged.

    B. Remove fragile connectors or shields if needed

    If a connector is already damaged, remove or protect it.

    C. Inspect the board

    Look for:

    • Burn marks
    • Broken ICs
    • Missing components
    • Heavy corrosion areas

    D. Pre-clean with IPA

    Gently brush away loose dirt and dust.
    This ensures the ultrasonic process works more efficiently.


    5. Choosing the Right Cleaning Solution

    Using the correct solution is essential. Do not use harsh chemicals or strong acids.

    Recommended solutions:

    • Elma PCB Cleaning Solution
    • Mild detergent (phone-safe)
    • Commercial ultrasonic PCB cleaner liquids

    Do NOT use:

    • Petrol
    • Kerosene
    • Alcohol mixed with water
    • Acidic cleaners
    • Vinegar
    • Any corrosive liquid

    Using the wrong liquid can damage ICs, connectors, and the entire board.


    6. Step-by-Step Procedure: How to Use an Ultrasonic Cleaner for Mobile Repair

    Below is the updated, safe, modern method technicians follow:


    Step 1: Fill the Ultrasonic Machine

    Pour your cleaning solution into the tank.

    Important:
    Ensure the PCB can be submerged fully without touching the bottom surface directly. Some technicians use a metal mesh tray.


    Step 2: Remove Delicate Components

    Detach:

    • Cameras
    • Front/back sensor units
    • Switch flexes
    • Fingerprint sensor
    • Any removable shields

    These parts should never be dipped.


    Step 3: Place the PCB Into the Solution

    Dip only the mainboard. Keep flex cables or partially attached modules out of the liquid.

    Position it horizontally to allow even cleaning.


    Step 4: Switch On the Ultrasonic Cleaner

    Set the timer between 3 to 6 minutes depending on corrosion level.

    You will see slight movement in the liquid—this is the cavitation effect.

    Do NOT exceed recommended time, as excessive exposure may cause:

    • Delamination
    • Pad lifting
    • Weakening of solder joints

    Step 5: Remove the Board and Inspect

    After the cycle:

    • Take out the PCB
    • Inspect for remaining deposits
    • Repeat for 1–2 minutes if needed (not longer)

    Step 6: Rinse With IPA or Circuit Cleaner

    This is a crucial step.

    Ultrasonic cleaning liquid leaves micro residues. Rinsing with IPA:

    • Removes leftover chemicals
    • Helps quick evaporation
    • Adds a protective layer

    Step 7: Dry the PCB Completely

    Drying is the MOST important step.

    Any remaining droplet can cause short-circuit.

    Use:

    • Hot air gun (low heat)
    • Blower
    • PCB preheater at safe temperature
    • Sunlight in emergency (not preferred for professionals)

    Dry until absolutely no moisture remains under ICs.


    Step 8: Test the Motherboard

    After drying:

    • Reassemble the essential components
    • Test with DC power supply or battery
    • Observe current reading
    • Check booting, charging, and basic functions

    7. Safety Tips for Using Ultrasonic Cleaning Machines

    Using the machine without precautions can damage the board.
    Below are the most important safety rules every technician must follow.

    ✔ Do not use high temperature

    Excess heat can warp the board or loosen solder.

    ✔ Do not keep the PCB for too long

    Long exposure weakens joints.

    ✔ Never dip the display, battery, or cameras

    Even a few seconds of submersion can destroy them.

    ✔ Use only PCB-safe solutions

    Avoid household liquids.

    ✔ Ensure proper drying

    This is the biggest cause of post-cleaning short circuits.

    ✔ Use a clean tank

    Dirty solution can contaminate the board further.


    8. What Problems Can Ultrasonic Cleaning Solve?

    Technicians often recover boards with issues like:

    1. Dead phones after liquid damage

    Cleaning removes corrosive salts causing shorts.

    2. Touchscreen not working

    Moisture under touch ICs affects signals.

    3. Heating issues

    Contamination around power ICs causes excessive current.

    4. Charging problems

    Corrosion on charging ICs or filters leads to poor performance.

    5. Network failure

    Rust near RF ICs can disrupt communication.

    6. Camera or sensor errors

    Moisture around ICs causes disconnection.

    7. Boot loop and restart issues

    Short circuits caused by hidden corrosion are resolved.

    Ultrasonic cleaning solves faults that are invisible to the naked eye.


    9. Common Mistakes Technicians Must Avoid

    Even experienced technicians sometimes make errors. Avoiding the following mistakes prevents motherboard damage:

    ❌ Using the machine with water only

    Water alone cannot clean effectively.

    ❌ Overheating the board

    High temperature harms ICs and solder.

    ❌ Running the machine for 10–20 minutes

    Strong cavitation can break solder joints.

    ❌ Not rinsing with IPA

    Residue from solutions can cause issues later.

    ❌ Using poor-quality chemicals

    Cheap detergents leave deposits.

    ❌ Not drying properly

    Even one droplet trapped under ICs can kill the board.

    Make sure the PCB is completely dry before connecting a battery or power supply. Even a tiny drop of water can hide under ICs and components, and this invisible moisture can cause a short circuit. Always dry the board thoroughly after cleaning to avoid damage.


    10. Advanced Tips for Better Ultrasonic Cleaning Results

    Professionals use a few additional techniques:

    ✔ Preheat the solution slightly

    Warm liquid cleans better (but never too hot).

    ✔ Use an ultrasonic cleaner with frequency adjustment

    Higher frequency = gentle cleaning
    Lower frequency = stronger cleaning

    ✔ Clean the tank regularly

    Clean liquid ensures consistent results.

    ✔ Use a mesh tray

    Prevents the board touching the tank floor.

    ✔ Clean again after chip-level repair

    Removes flux and improves stability.


    11. When You Should NOT Use an Ultrasonic Cleaner

    Avoid ultrasonic cleaning in these cases:

    ❌ The board has burnt ICs

    Fire-damaged boards may disintegrate.

    ❌ The board has loose components

    Cavitation may detach them.

    ❌ Phones with glued components that cannot be removed

    Damage risk increases.

    ❌ If you cannot dry the board fully

    Improper drying leads to returns or permanent damage.


    12. Alternate Cleaning Method (Not as Effective but Useful)

    If you don’t have an ultrasonic machine: If you don’t have an ultrasonic cleaner, you can use a basic manual cleaning method.
    Simply submerge the PCB in a mild cleaning solution like Elma or a gentle soap mixture for 1–2 hours. After soaking, take out the board and scrub it carefully with a soft brush to remove dirt and corrosion. Once done, rinse the PCB with IPA or circuit cleaner to remove any leftover residue, and then dry it completely using warm air.

    This method works, but it’s not as powerful as ultrasonic cleaning, because it cannot remove dirt trapped under ICs and tiny components.

    Manual soaking method:

    1. Submerge PCB in mild cleaning solution
    2. Leave for 1–2 hours
    3. Brush thoroughly
    4. Rinse with IPA
    5. Dry completely

    However, this method cannot clean under ICs, which is why ultrasonic cleaning remains superior.


    13. Result Expectations After Ultrasonic Cleaning

    In many cases, ultrasonic cleaning:

    • Restores dead boards
    • Removes corrosion
    • Fixes short circuits
    • Improves performance

    However:

    • Some boards may need soldering or IC replacement
    • Corrosion may have already eaten tracks permanently
    • Water damage can be unpredictable

    Be transparent with customers. Honesty builds trust in your repair business.


    Conclusion

    Ultrasonic cleaning is one of the most effective ways to remove corrosion and restore faulty phone motherboards. It reaches areas that no brush or IPA can clean manually. When used correctly—with the right solution, time, and drying methods—it can revive devices that seem completely dead.

    But remember:
    A motherboard cleaned well is a motherboard repaired half.”

    With the steps and safety tips in this guide, you can use an ultrasonic cleaner confidently and professionally. Mastering this process not only improves repair success rates but also builds your reputation as a reliable technician.

  • What’s the Difference Between Soft Reset and Hard Reset on iPhone?

    What’s the Difference Between Soft Reset and Hard Reset on iPhone?

    iPhones are known for their stability, smooth performance, and secure operating system. Still, like any electronic device, they can freeze, lag, become unresponsive, or behave differently from normal. Apps may crash, the touch screen may stop responding, or the device may not react to any button.

    When that happens, many users panic. But in most cases, a simple reset is all you need.

    There are two main types of resets on an iPhone:

    • Soft Reset
    • Hard Reset (also called factory reset or full restore)

    Both serve different purposes and produce very different results. Understanding the difference helps you solve issues safely without losing important data.

    A useful reminder is:
    “Not every problem needs a factory reset—sometimes all your iPhone needs is a simple restart.”

    This guide explains each method in detail, how they work, how to perform them on modern iPhones, and when to use which reset.


    1. What Is a Soft Reset on an iPhone?

    A soft reset means restarting your iPhone. It does not delete data and is completely safe.

    Think of it as:

    • Refreshing the system
    • Clearing temporary glitches
    • Fixing minor app issues

    A soft reset is the first thing you should try when:

    • The screen freezes
    • Apps stop responding
    • The phone becomes slow
    • Buttons don’t react
    • The device feels stuck

    It is safe, quick, and effective for light system disturbances.


    2. How to Perform a Soft Reset (Modern iPhones)

    The method depends on whether the iPhone has a Home button or not.


    A. For iPhones With Face ID (no Home button)

    • Press and hold Volume Up + Side Button
    • A slider appears: “Slide to power off”
    • Slide it to turn the phone off
    • Wait a few seconds
    • Hold the Side Button to turn it back on

    B. For iPhones With a Home Button

    • Press and hold the Power/Side Button
    • Slide to power off
    • Restart by long-pressing the same button

    When To Use a Soft Reset

    Use this when:

    • The phone is slow
    • The screen freezes occasionally
    • An app crashes
    • Performance feels unstable
    • You just updated software and it feels glitchy

    A soft reset never deletes photos, apps, settings, or personal data.

    what is soft-reset and hard-rest -n iPhone?

    3. What Is a Hard Reset on an iPhone?

    A hard reset is a deeper process.
    It force-restarts the device or restores it to factory settings—depending on the method used.

    There are two meanings of “hard reset,” and many users confuse them:


    Meaning 1: Force Restart (No Data Loss)

    A stronger form of soft reset used when:

    • The screen is completely unresponsive
    • Buttons don’t work
    • The iPhone is stuck on the Apple logo
    • The touch screen is frozen

    Force restart is safe and does not erase data.


    Meaning 2: Factory Reset (Data Is Erased)

    This is the true hard reset.
    It restores the phone to original settings:

    • All data is wiped
    • All apps are removed
    • Settings return to default
    • The device becomes like new

    This process is used when:

    • Software problems are severe
    • The phone has frequent freezes
    • You are selling or giving away the device
    • You need a fresh installation
    • Malware or corrupted software is present

    Important:
    A factory reset deletes everything unless you have a backup.


    4. How to Force Restart (Hard Reset Without Data Loss)

    This method varies by model.


    A. iPhones With Face ID (most recent models)

    1. Press Volume Up quickly
    2. Press Volume Down quickly
    3. Hold the Side Button until the Apple logo appears

    B. iPhones With Home Button

    • Hold Home Button + Power Button
    • Keep holding until the Apple logo appears

    This is useful for:

    • Black screen issues
    • Frozen display
    • Apps that cause full system lock
    • Boot loop attempts
    • Touchscreen not responding

    A force restart simply forces the phone to shut down and reboot.
    It does not erase anything.


    5. How to Perform a Factory Reset (Hard Reset With Data Erase)

    A factory reset wipes all data. Make sure you back up your phone first.

    Here are updated methods used today.


    Method 1: Reset From iPhone Settings

    The easiest method:

    1. Open Settings
    2. Go to General
    3. Tap Transfer or Reset iPhone
    4. Select Erase All Content and Settings
    5. Enter passcode
    6. Confirm

    The iPhone will erase everything and restart fresh.


    Method 2: Reset Using a Computer (Mac or Windows)

    This method is used when:

    • The phone doesn’t boot
    • You forget your passcode
    • The screen is damaged

    Steps:

    1. Connect your iPhone to a Mac or Windows PC
    2. Open Finder (Mac) or iTunes (Windows)
    3. Select your iPhone
    4. Click Restore
    5. Download firmware and restore the device

    This installs a fresh version of iOS, removing all data.


    Method 3: Reset Through Recovery Mode

    Used for serious issues like:

    • Boot loops
    • Software corruption
    • Failed updates

    Steps (Face ID models):

    1. Press Volume Up
    2. Press Volume Down
    3. Hold Side Button
    4. Connect to computer when recovery screen appears
    5. Choose Restore

    Recovery restores iOS completely.


    6. Key Differences Between Soft Reset and Hard Reset

    Below is a clear, simple comparison for quick understanding:

    FeatureSoft ResetHard Reset (Force Restart)Hard Reset (Factory Reset)
    Data LossNoNoYes, everything is erased
    Use CaseMinor issuesFrozen or unresponsive phoneSevere problems / selling device
    Time RequiredSecondsSeconds5–20 minutes
    Tools NeededNoneNoneDevice or computer
    Risk LevelSafeSafeHigh (data wipe)
    Restores Factory Settings?NoNoYes
    Fixes System Corruption?PartiallySome issuesMost issues

    This table satisfies the primary user intent: understanding the difference quickly.


    7. When Should You Use Soft Reset vs Hard Reset?

    Use Soft Reset When:

    • The phone is slow
    • Apps freeze
    • You updated software recently
    • Touch stops responding sometimes
    • The device feels glitchy

    Use Force Restart (Non-erasing Hard Reset) When:

    • The display is completely frozen
    • The phone doesn’t turn off
    • Buttons don’t respond
    • iPhone is stuck on Apple logo
    • The screen is black but phone is on

    Use Factory Reset (Full Hard Reset) When:

    • The iPhone freezes frequently
    • Software is corrupted
    • You want to start fresh
    • You’re selling or giving away the device
    • Malware or configuration errors exist
    • System settings are completely messed up

    A useful reminder here:
    “Reset only what you need to reset—never erase more than the problem demands.”


    8. What Happens After a Factory Reset?

    Once the reset completes, your iPhone will:

    • Restart as a new device
    • Show the “Hello” setup screen
    • No longer contain your data
    • Require Apple ID login during setup

    You must restore your backup to get your photos, contacts, and apps back.

    Options for backup recovery:

    • iCloud backup
    • Computer backup
    • Transfer from another device

    Without a backup, data cannot be recovered after a full reset.


    9. Important Precautions Before Hard Resetting an iPhone

    A hard reset is powerful, so follow these precautions:

    ✔ Backup your data

    Use iCloud or a computer.

    ✔ Sign out of Apple ID

    Prevents activation issues when selling.

    ✔ Charge battery above 50%

    Avoid unexpected shutdown.

    ✔ Disable “Find My iPhone”

    Only when selling or giving away the device.

    ✔ Know your Apple ID password

    You will need it after reset.

    ✔ Avoid factory reset just for minor issues

    A soft reset usually solves them.


    10. Common Mistakes Users Make (and How to Avoid Them)

    ❌ Mistake 1: Confusing force restart with factory reset

    Many think holding buttons wipes data.
    It does not—only factory reset erases data.

    ❌ Mistake 2: Resetting the phone without backup

    This leads to permanent data loss.

    ❌ Mistake 3: Doing a factory reset for minor problems

    Most issues are solved with a soft reset.

    ❌ Mistake 4: Using iTunes on old instructions

    Modern iPhones rely mainly on Finder or updated Windows tools.

    ❌ Mistake 5: Hard resetting to remove iCloud lock

    This does not work and is not permitted.


    11. Tips to Keep Your iPhone From Freezing Again

    After resetting, prevent future problems by following these tips:

    ✔ Update iOS regularly

    Fixes bugs and improves stability.

    ✔ Avoid installing too many background apps

    They consume memory and slow down the device.

    ✔ Clear storage

    Keep at least 10–20% space free.

    ✔ Restart your phone once or twice a week

    Prevents small glitches from building up.

    ✔ Replace battery if the health is low

    Poor battery performance causes random shutdowns.

    ✔ Avoid overheating

    Heavy gaming or charging in hot environments causes lag.

    Good maintenance reduces the need for resets.


    Conclusion

    Soft reset and hard reset are two powerful tools for fixing iPhone performance issues.
    A soft reset simply restarts the phone and fixes light glitches.
    A hard reset goes deeper—either force restarting an unresponsive phone or performing a full factory reset that wipes everything.

    Use the correct method depending on the severity of the problem. Start simple, try safe solutions first, and only perform a factory reset when absolutely necessary.

    Resets are not just troubleshooting tools—they are ways of refreshing your device and starting clean when needed.