Tag: guides

  • How to Find A Lost Cell Phone: Easy Tracking Guide

    How to Find A Lost Cell Phone: Easy Tracking Guide

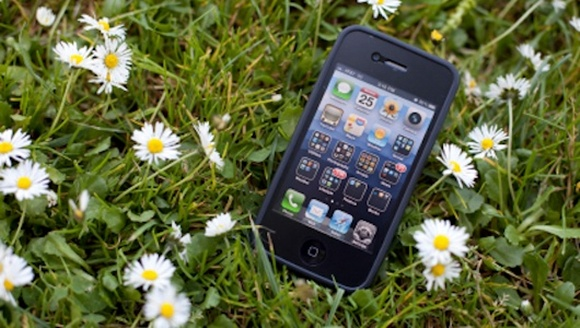
    Losing a phone is one of the most stressful experiences in today’s digital world. Your device holds your contacts, memories, banking apps, personal data, and everyday tools. Misplacing it — even for a few minutes — can create panic. But the good news is that most lost phones can be found if you take the right steps immediately.

    “A lost phone is only lost when you stop trying to find it.”

    This guide explains simple, practical, and effective methods to track, locate, and recover your missing mobile. Whether you misplaced it at home, left it at work, or fear it was stolen, you’ll learn exactly what to do — calmly, confidently, and step by step.

    We’ll cover everything from calling your device to using advanced tracking systems like Google Find My Device and Apple’s Find My network, plus what to do if your phone has no internet or is switched off.


    Why Losing a Phone Feels So Stressful

    Your phone today is more than just a gadget. It is:

    • Your communication tool
    • Your camera
    • Your digital wallet
    • Your authentication device
    • Your navigation assistant
    • Your identity and security hub

    Misplacing it feels like losing a part of your daily life. But most phones leave digital footprints that help you track them down — if you know how to use the right tools.


    First Steps: Simple Methods to Recover a Missing Phone

    Before using tracking apps or reporting theft, try these straightforward methods.


    1. Call Your Phone

    This is the fastest and simplest way to locate a misplaced mobile.

    • If it’s ringing, follow the sound.
    • If it’s vibrating, move slowly around the room to sense the vibration.
    • If someone finds it, they may answer and return it.

    Important Tip:
    If your phone is on silent, many modern Android and iPhone tools allow you to force it to ring remotely. We will cover that later.

    lost your cell phone somewhere

    2. Retrace Your Steps

    Think about where you last used your device. Then search:

    • Your desk
    • Couch or bed
    • Kitchen counter
    • Car seat or dashboard
    • Pockets or bags
    • Restaurant or shop where you visited recently

    Often, the phone is hiding in obvious places.


    3. Ask People Around You

    Don’t feel embarrassed. Simply ask:

    • Family members
    • Friends
    • Colleagues
    • Neighbors

    Sometimes someone picks it up for safekeeping and forgets to inform you.


    4. Send a Text Message to Your Phone

    If you suspect someone might find your lost phone, send a message like:

    “This phone is lost. Please call me at [your number]. Reward if returned.”

    Honest people often respond quickly.


    5. Use a Secondary Device to Check Recent Locations

    If you have another phone, tablet, or laptop connected to the same Google or Apple ID, you may be able to see your last location history even before launching a tracking tool.


    Using Technology to Track Your Lost Phone

    This is the most important part of the guide. Modern smartphones come with built-in tracking systems that work even if the device is silent, lost indoors, outdoors, or connected to a network.

    We’ll start with Android, then move to iPhone.


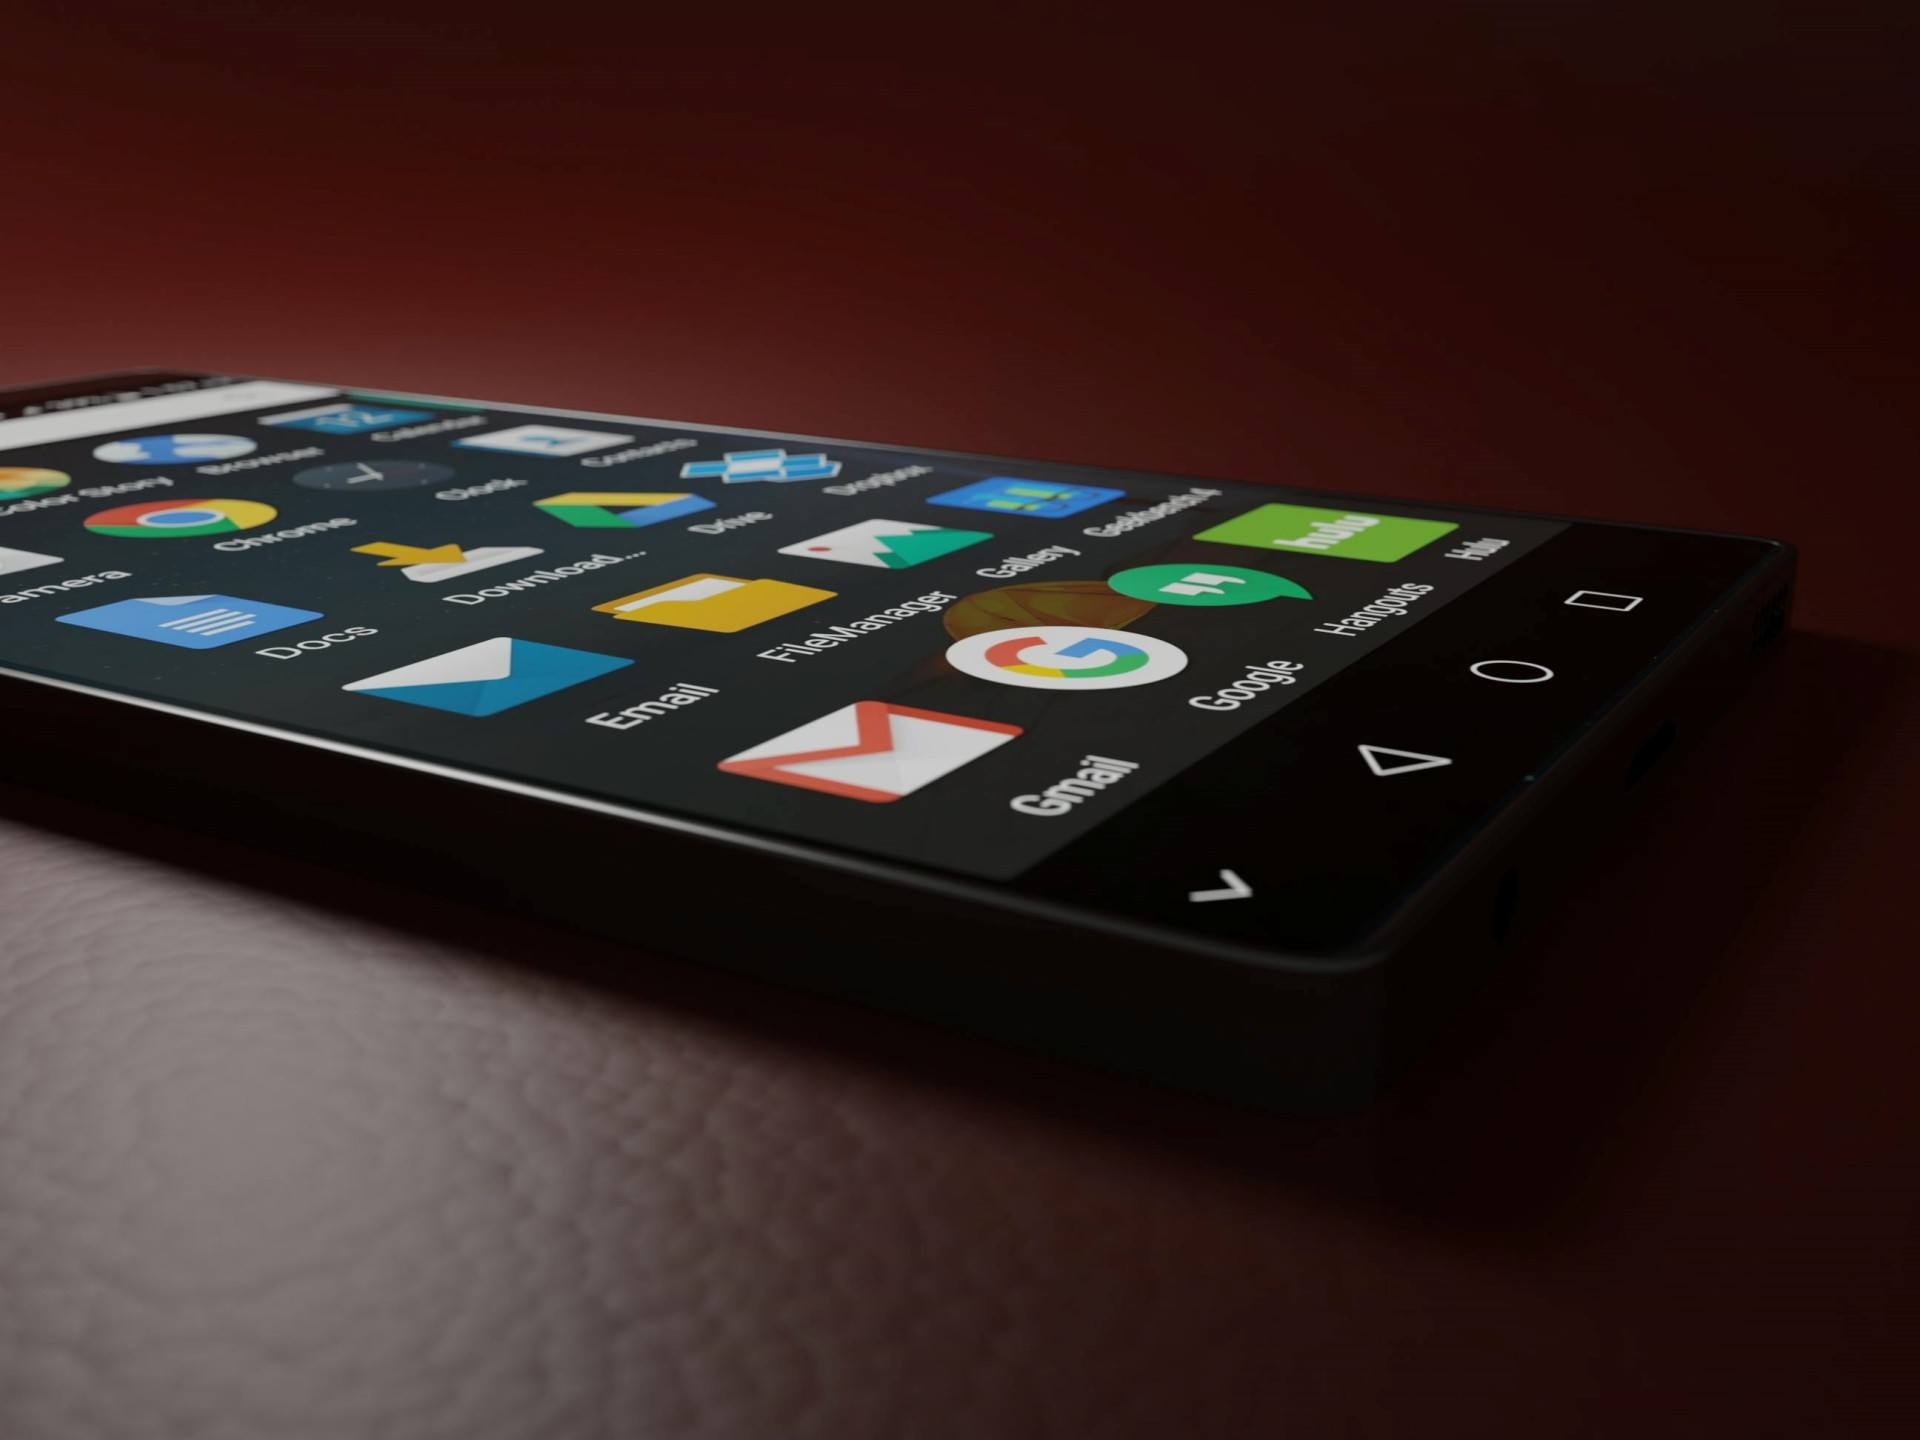
    🟢 How to Find a Lost Android Phone Using Google Find My Device

    Google’s Find My Device is one of the most powerful tracking tools available. It can:

    • Show your phone’s location on a map
    • Force the phone to ring
    • Lock your phone remotely
    • Display a custom message
    • Erase your data
    • Show last known location
    • Track nearby devices using Google’s crowdsourced Find My Device network

    To use this tool, your phone must have:

    • A Google account logged in
    • Location services ON
    • Internet or Bluetooth nearby device detection

    Even if the phone is offline, the last known position will be shown.


    Step-by-Step Guide: Track Your Android Phone

    Step 1: Visit the Find My Device website

    Go to: google.com/android/find
    (Or use the Find My Device app on another device.)

    Step 2: Sign in to your Google account

    Use the same Google ID linked to your missing phone.

    Step 3: Select your device

    Your phone’s approximate or exact location will appear on the map.

    Step 4: Choose an action

    1. Play Sound

    Your phone rings at full volume for 5 minutes — even in silent mode.

    2. Secure Device

    You can lock the phone and display a message like:
    “Phone lost. Please call 98xxxxxxx.”

    3. Erase Device

    If stolen and unrecoverable, you can erase all data remotely.
    (Note: Once erased, you cannot track the device.)


    Tracking an Offline Android Device

    Google’s modern Find My Device network uses Bluetooth signals from nearby Android devices to help locate your lost phone — even if:

    • It has no internet
    • It’s switched off
    • The SIM card is removed

    The moment a nearby device detects it, the location updates automatically.


    Track a Lost Android Phone Through Google Maps Timeline

    If Find My Device doesn’t show the phone, try this method.

    Steps:

    1. Open Google Maps on another device.
    2. Tap your profile → Your Timeline.
    3. Check location history for your last movements.

    This is useful for tracking lost or stolen phones after the battery dies.


    🔵 How to Find a Lost iPhone Using Apple Find My

    Apple’s Find My network is extremely powerful and works through:

    • GPS
    • Wi-Fi
    • Bluetooth
    • Nearby Apple devices detecting your missing phone

    It can track your phone even:

    • When it’s offline
    • When turned off
    • Without SIM
    • Without active internet

    This network is connected to millions of Apple devices worldwide.


    Step-by-Step Guide: Track Your iPhone

    Step 1: Open iCloud.com/find

    Or use the Find My app on another Apple device.

    Step 2: Sign in with your Apple ID

    Use the ID linked to your missing iPhone.

    Step 3: Select your iPhone

    Your device location appears on the map.


    Actions You Can Take

    1. Play Sound

    Forces the iPhone to ring, even on silent.

    2. Lost Mode

    This locks your phone and shows a custom message such as:
    “Lost iPhone. Please contact me.”

    It also disables Apple Pay for your safety.

    3. Erase iPhone

    Use only if you’re sure the device cannot be recovered.


    🟣 Advanced Tracking Features for Apple Devices

    Apple’s Find My network can:

    ✔ Track your phone even when switched off

    Recent models send Bluetooth signals even in shut-down mode.

    ✔ Track via nearby devices

    Any Apple device passing near your phone can anonymously update the location for you.

    ✔ Show location of AirPods, Apple Watch, and items attached to AirTag

    Useful if they are connected to your phone.


    If Your Phone Is Switched Off or Has No Signal

    A turned-off phone is not the end. You can still:

    • See its last known location
    • Check location history
    • Get updates when it switches ON
    • Track via Bluetooth-based Find My networks (Android & Apple)

    If stolen, do not confront the thief — let authorities handle it.


    What to Do If Your Phone Is Stolen

    If you believe the phone was taken:

    1. Lock the device immediately

    Use Find My Device or Find My iPhone.

    2. Display a message on the lock screen

    Offer a safe number for contact.

    3. Track the movement

    Do not approach dangerous locations.

    4. Report to the police

    Provide:

    • IMEI number
    • Last location
    • Purchase bill

    IMEI allows authorities to request telecom assistance.

    5. Inform your mobile operator

    They can block the SIM to prevent misuse.


    How to Get Your IMEI Number When the Phone Is Missing

    Look in:

    • Your phone’s retail box
    • Purchase invoice
    • Email receipts
    • Google account device list
    • Apple ID device list

    IMEI helps in filing police complaints.


    Useful Tips to Prevent Losing Your Phone Again

    Prevention is better than searching later. Here’s how to avoid future problems.


    1. Enable Tracking Services Immediately

    • Turn ON Google Find My Device (Android)
    • Turn ON Apple Find My (iPhone)
    • Allow location access
    • Keep Bluetooth ON if using the Find My network

    2. Use a Smart Tracker or Tag

    Attach tags like:

    • Bluetooth trackers
    • AirTag (iPhone)
    • SmartTag

    If your phone is attached to your bag, keys, or wallet, these tags can help track everything together.


    3. Keep Your Phone in the Same Place Every Day

    Create a habit:

    • A specific pocket
    • Bag compartment
    • Drawer
    • Desk area

    Consistency reduces misplacements.


    4. Use Lock Screen Information

    Add your alternate number to the lock screen.
    This allows honest people to contact you instantly.


    5. Avoid Keeping Your Phone on Silent All the Time

    Silent mode makes finding the phone harder.
    Use vibration + ring, or enable “Find My” ring override.


    What Not to Do When Your Phone Is Lost

    Avoid these mistakes:

    • Do not panic
    • Do not try to track a thief alone
    • Do not erase the phone unless necessary
    • Do not delay contacting authorities
    • Do not share your tracking dashboard with strangers

    Staying calm helps you think clearly.


    Conclusion

    Losing a phone can be frustrating, but modern smartphones are built with powerful recovery tools. Whether you use an Android or an iPhone, you can track your device, force it to ring, secure it remotely, or even erase your data if needed.

    With the right steps, your chances of recovering your phone increase dramatically.

    “It’s not about how fast you react — it’s about knowing the right steps to take.”

    Most importantly, enable tracking features before something goes wrong. A few minutes of setup today can save hours of stress later.

  • Common Cell Phone Problems: Full List of Faults Explained

    Common Cell Phone Problems: Full List of Faults Explained

    Cell phones have become our closest companions. They wake us up, connect us, entertain us, and store our memories — so when a phone stops working, even a small fault can disrupt our entire routine. For repair technicians, understanding these issues is essential. For users, knowing the common problems helps you stay prepared and identify faults early.

    “Every problem has a root cause — the real skill lies in finding it.”

    This guide explains all major mobile phone faults, how they occur, what they mean, and how technicians typically diagnose them. The goal is to give you a clear, updated, and practical understanding of today’s smartphone issues — in simple language.


    Types of Mobile Phone Faults

    All phone problems fall into three broad categories:

    1. Settings-Related Faults

    These occur due to wrong configurations, disabled features, changed options, or simple mistakes made by the user.

    2. Software Faults

    These involve the phone’s operating system, apps, corrupt files, firmware crashes, or update failures.

    3. Hardware Faults

    These are physical failures such as broken displays, damaged charging ports, faulty motherboards, or non-working components.

    Understanding which category the issue belongs to helps technicians diagnose faster and more accurately.


    Full List of Modern Mobile Phone Faults (Updated)

    Below is an expanded and updated list of all common smartphone faults, including newly emerging issues found in today’s touchscreen devices.
    Obsolete or outdated faults (from keypad-era phones) have been removed, updated, or rewritten.


    1. Dead Phone (Not Powering On)

    A phone that doesn’t turn on, doesn’t vibrate, and shows no charging sign is considered dead.
    Causes may include:

    • Battery failure
    • Water damage
    • Short circuit
    • Faulty power IC (PMIC)
    • Damaged charging port

    Technicians diagnose this using power supply tools and multimeters.


    2. SIM Card Not Detected

    The phone shows “No SIM” or “Insert SIM Card” even when the SIM is inserted.
    Usually caused by:

    • Dirty or bent SIM pins
    • Damaged SIM slot
    • Software conflict
    • Network IC failure

    Modern eSIM phones may show activation issues instead.


    3. Hanging / Freezing / Lagging

    The cell phone becomes unresponsive or slow.
    Causes include:

    • Low storage
    • Heavy apps
    • Overheating
    • Corrupted firmware
    • Faulty RAM or CPU chip

    A common sign of deeper software damage.


    4. Network Issues (No Signal / Low Signal / Dropping Calls)

    This includes:

    • No network
    • Weak signal
    • “Emergency calls only”
    • Calls dropping automatically

    Reasons:

    • Damaged antenna
    • SIM issues
    • Firmware bugs
    • Network IC failure

    5. Microphone Not Working

    People cannot hear you during calls or voice recordings.

    Common reasons:

    • Dust in MIC hole
    • Water damage
    • Damaged MIC module
    • Firmware glitch
    • Noise cancellation mic fault

    Modern phones have multiple microphones, so diagnosis requires precision.


    6. Speaker Issues (No Sound During Calls)

    The earpiece speaker stops working, making you unable to hear the caller.

    Usually caused by:

    • Dust buildup
    • Flex cable damage
    • Moisture
    • Faulty earpiece speaker

    7. Loudspeaker / Media Speaker Fault

    No ringtone, music, notifications, or hands-free audio.

    Reasons:

    • Faulty loudspeaker unit
    • Software audio routing issue
    • Audio IC failure

    8. Vibration Not Working

    Vibration motor (haptic motor) stops functioning.

    Common causes:

    • Motor wear-out
    • Loose connection
    • Board damage

    9. Display / Screen Faults

    This includes:

    • Blank screen
    • Broken or cracked display
    • Flickering issue
    • Green/pink lines
    • Black spots
    • No backlight
    • Touch working but no display
    • Display working but touch not responding

    Modern OLED screens also face:

    • Burn-in
    • Ghosting
    • Color shifts

    10. Auto Power Off

    Phone switches off randomly without user action.

    Reasons:

    • Overheating
    • Battery failure
    • Power IC malfunction
    • Corrupt firmware

    11. Auto Restart (Bootloop)

    The phone continuously restarts or gets stuck on the logo.
    Causes:

    • System update failure
    • Damaged OS
    • Application conflict
    • Hardware shorting
    • Damaged booting IC

    Bootloops are common after failed software updates.


    12. Call Drops / Call Disconnecting

    The call ends abruptly.
    This may be due to:

    • Weak network
    • Software bugs
    • Damaged antenna
    • Faulty baseband IC

    13. Charging Problems

    One of the most common faults today. Includes:

    • Not charging
    • Slow charging
    • Intermittent charging
    • Overheating while charging
    • Charger connected but not increasing battery percentage

    Reasons:

    • Faulty cable or adapter
    • Broken charging port
    • Charging IC damage
    • Battery swelling
    • Dirt inside port

    14. Charging Port Damage (USB Port Faults)

    When the port becomes loose, bent, corroded, or physically damaged.
    Symptoms:

    • Cable must be held at an angle
    • Charging stops when moved
    • No data transfer

    15. Touchscreen Problems

    Touch issues are very common today.

    Includes:

    • Touch not working
    • Touch responding on its own (ghost touch)
    • Slow or delayed touch
    • Touch working only in some areas

    Causes:

    • Damaged touch panel
    • Faulty display connector
    • Software glitch

    16. Battery Draining Fast

    Battery percentage drops quickly even with light usage.
    Reasons:

    • Battery health degraded
    • Power-hungry apps
    • Background processes
    • Network fluctuations
    • Faulty charging IC
    • Swollen battery

    Technicians use software and multimeter tools to confirm battery health.


    17. Overheating Problems

    Phone becomes hot during use, charging, or even idle.

    Causes:

    • Heavy gaming
    • Faulty CPU
    • Short circuit
    • Damaged battery
    • Poor ventilation
    • Malware apps

    If the phone overheats too much, it may shut down automatically.


    18. Bluetooth Not Working

    Bluetooth won’t connect, keeps disconnecting, or doesn’t turn on.

    Reasons:

    • Corrupted Bluetooth firmware
    • Radio frequency interference
    • Damaged Wi-Fi/Bluetooth IC

    19. Wi-Fi Not Connecting

    Wi-Fi may show:

    • No connection
    • Authentication error
    • Frequent disconnection

    Possible causes:

    • Router conflict
    • Software bugs
    • Wi-Fi IC damage

    20. Mobile Data Not Working

    Internet does not work even though network bars are visible.

    Causes include:

    • APN settings wrong
    • Corrupt OS
    • Network provider issue
    • Baseband malfunction

    21. Camera Problems

    Modern camera modules face several faults:

    • Camera not opening
    • “Camera failed” error
    • Blurry pictures
    • Black screen when switching lenses
    • Ultrawide/macro lens not detecting
    • Front camera not working
    • Portrait mode failure
    • Video stabilization not working

    Some premium phones also face OIS motor failure.


    22. Fingerprint Sensor Not Working

    Includes:

    • No fingerprint detection
    • Slow recognition
    • Error in setup
    • In-display fingerprint failure

    Usually caused by:

    • Damaged sensor
    • Moisture
    • Software conflicts

    23. Face Unlock Not Working

    Face ID or Face Unlock may stop working due to:

    • Dirty front camera
    • Low light
    • Damaged sensors
    • Software update issues
    • TrueDepth camera failure (iPhone)

    24. Memory Card Not Detected

    For phones with SD card slots.

    Reasons:

    • Corrupted SD card
    • Dirty contacts
    • Damaged slot
    • Unsupported file format

    25. Proximity Sensor Issue

    Screen does not turn off during calls or turns off at the wrong time.

    Causes:

    • Screen guard blocking sensor
    • Sensor misalignment
    • Calibration error

    26. GPS / Location Problems

    Navigation becomes inaccurate or fails to track position.

    Reasons:

    • Weak GPS antenna
    • Software bugs
    • Location services turned off
    • Corrupted system files

    27. App Crashing / App Not Opening

    Apps force-close due to:

    • Outdated version
    • Low RAM
    • OS conflict
    • Corrupted data

    28. Storage Full Even When Not Used

    A common issue in modern phones.

    Reasons:

    • System cache
    • Duplicate files
    • Hidden media
    • Malware apps
    • Defective memory chip (EMMC/UFS)

    Technicians check using special memory analysis tools.


    29. Phone Not Detecting on Computer (USB Data Failure)

    Includes:

    • PC not recognizing phone
    • No file transfer
    • Only charging but no MTP mode

    Reasons:

    • Faulty USB driver
    • Cable issues
    • Data pins damaged
    • Motherboard fault

    30. Notification Problems

    User does not receive notifications on time.

    Occurs due to:

    • Battery optimization restrictions
    • Disabled app permissions
    • Software bugs

    31. Liquid Damage Faults

    Water damage causes unpredictable issues such as:

    • Touch not working
    • Speaker distortion
    • Charging short
    • No power
    • Corrosion on connectors

    Liquid damage requires deep cleaning and board-level diagnosis.


    32. Software Update Issues

    Phones may face:

    • Update stuck
    • Update failure
    • Feature missing
    • Battery draining after update

    Some updates introduce bugs that require patch fixes.


    33. Bootloader / FRP / Account Lock Issues

    Phones sometimes get locked due to:

    • Forgot password
    • Factory reset protection (FRP)
    • Carrier lock
    • Bootloader relocking

    Technicians use specialized software tools to resolve these cases (lawfully).


    34. Audio IC Failure (Common in Certain Models)

    Symptoms:

    • No sound
    • Voice not recorded
    • Speaker disabled
    • Microphone not detecting
    • Call drops when enabling loudspeaker

    This is a common board-level hardware problem.


    35. Backlight Failure

    Screen is ON but completely dark unless viewed under direct light.

    Causes include:

    • LED backlight strip damage
    • Backlight driver IC failure
    • Blown backlight filter

    Learn how to troubleshoot the most common cell phone faults by reading How To Repair Your Cell Phone Yourself


    Conclusion

    Mobile phones may look simple from the outside, but they contain hundreds of delicate components inside. Knowing the different types of faults helps technicians diagnose issues faster and gives users a better understanding of what might be wrong with their device.

    “A fault diagnosed well is already half repaired.”

    If you want to learn how to fix many of these problems yourself, always start with simple checks before attempting advanced repairs.

  • How to Use Your iPhone as a Portable Storage Drive

    How to Use Your iPhone as a Portable Storage Drive

    Your iPhone is more powerful than you think. Apart from capturing photos, browsing the web, or staying connected, it can also work as a portable storage drive — a secure, convenient way to carry your important files without needing an external hard disk or USB drive.

    Today’s iPhones offer fast processors, generous storage options, advanced file management, and built-in tools that make them perfect for storing documents, videos, music, work files, and more.

    “Your iPhone is a tool — and it becomes even more useful when you learn how to use it like one.”

    This guide explains every modern way to use an iPhone as a portable drive, including USB transfers, the Files app, Wi-Fi sharing, AirDrop, external drive support, and third-party apps. Everything is written in simple language with practical steps.


    Why Use Your iPhone as a Portable Drive?

    Here are the biggest advantages:

    • You don’t need to carry an extra USB drive
    • Your data stays with you at all times
    • Files remain secure inside Apple’s ecosystem
    • Sharing files becomes extremely easy
    • You can organize everything using the Files app
    • Most tasks can be done wirelessly
    a portable hard disk drive

    And unlike traditional storage devices, your iPhone offers encryption, password protection, and cloud backup as added safety layers.


    Method 1: Using USB Cable to Access iPhone Storage on Windows & Mac

    This is the simplest and fastest way to use your iPhone as a portable storage device. Modern systems no longer require iTunes for basic file transfer.


    Using Your iPhone as Storage on Windows (File Explorer)

    Step-by-step guide:

    1. Connect your iPhone to the PC using a USB-to-Lightning or USB-C cable.
    2. Unlock your iPhone.
    3. Tap “Allow” when your phone asks to trust the computer.
    4. Open File Explorer on Windows.
    5. You will see Apple iPhone listed under Devices.
    6. Open it and access DCIM (Photos & Videos).
    7. You can now copy media files between the phone and PC.

    Important Note:

    Windows allows full access only to the Media folder (DCIM) because of iOS sandboxing.
    But you can still use third-party apps to create custom folders — explained later.


    Using USB Transfer on Mac (Finder Integration)

    Mac users have an even easier method:

    1. Connect the iPhone via USB.
    2. Open Finder (replaces iTunes for file management).
    3. Select your iPhone from the sidebar.
    4. Navigate to Files section.
    5. Drag & drop files into apps like:
      • Files
      • VLC
      • Documents by Readdle
      • Adobe Acrobat
      • Any file-handling app

    You can create folders, import documents, export files, and manage everything smoothly.


    Method 2: Using the Files App — The Heart of iPhone Storage

    The Files app is what truly allows your iPhone to act as a portable storage drive.

    Think of it as the iPhone’s internal hard drive, where you can:

    • Create folders
    • Store documents
    • Save downloads
    • Import files from PC
    • Manage offline media
    • View PDFs, videos, audio, and images
    • Organize files just like on a computer

    How to Store Files Locally (Offline Storage)

    1. Open the Files app.
    2. Tap BrowseOn My iPhone.
    3. Create your folders.
    4. Add files using:
      • Share → “Save to Files”
      • Drag & drop (on iPad or Mac)
      • Downloads from Safari
      • USB transfer
      • Third-party apps

    Everything you store in On My iPhone stays offline, just like a portable hard drive.


    Using Third-Party Apps to Expand Storage Ability

    Apps like:

    • Documents by Readdle
    • VLC Media Player
    • Adobe Acrobat
    • FE File Explorer
    • FileBrowser Pro

    They allow:

    • Custom folders
    • Wireless transfers
    • FTP/SFTP connection
    • Private encrypted folders
    • ZIP/RAR extraction

    This greatly expands what your iPhone can do as a storage device.


    Method 3: Using AirDrop for Quick Wireless File Transfer

    AirDrop is one of the fastest and most secure wireless transfer methods in the world.

    It allows instant sharing between:

    • iPhone → Mac
    • iPhone → iPhone
    • iPhone → iPad

    No cables, no apps, no internet required.


    How to Use AirDrop (iPhone to Mac or iPhone to iPhone)

    1. Turn ON Bluetooth and Wi-Fi on both devices.
    2. Open Control Center → long-press the connectivity box.
    3. Tap AirDrop → choose Everyone or Contacts Only.
    4. Select the file → tap ShareAirDrop.
    5. Choose the receiving device.

    Files transfer instantly and appear in the correct location automatically.


    Method 4: Using Wi-Fi Transfer Tools (Browser & Network Sharing)

    Many apps offer local Wi-Fi sharing without cables.

    These include:

    • Documents by Readdle
    • FE File Explorer
    • VLC
    • SendAnywhere
    • Snapdrop (browser-based AirDrop alternative)

    How Wi-Fi Transfer Works

    1. Connect both devices to the same Wi-Fi network.
    2. Open your transfer app.
    3. Enable Wi-Fi Transfer.
    4. You will see an IP address like:
      http://192.168.1.10:8080
    5. Open that address from your PC’s browser.
    6. Upload or download files wirelessly.

    This makes your iPhone behave like a wireless external drive.


    Method 5: Using External USB Drives with iPhone (OTG Support)

    Modern iPhones support external storage directly using:

    • USB-C flash drives
    • Lightning flash drives with dual connectors
    • Portable SSDs (Samsung T7, SanDisk Extreme, etc.)
    • Hard disks (with extra power)

    Apple introduced native support for external drives in the Files app, making it incredibly easy to move files between:

    iPhone ↔ USB drive ↔ Computer


    How to Use an External Drive with iPhone

    1. Connect your storage device to the iPhone using:
      • USB-C cable (for newer iPhones)
      • Lightning-to-USB camera adapter (older models)
    2. Open the Files App.
    3. Your drive appears under Locations.
    4. Drag and drop files between iPhone and the drive.

    Important Tip:

    Some hard drives need extra power, so use a USB hub or external power source.


    Method 6: Cloud Sync + Offline Storage (Hybrid Method)

    You can also combine cloud storage with offline iPhone storage.

    Supported services:

    • iCloud Drive
    • Google Drive
    • Dropbox
    • OneDrive
    • Mega
    • pCloud

    Benefits:

    • Keeps files synced across devices
    • Lets you download files for offline use
    • Reduces physical storage usage

    Not a replacement for a physical hard drive, but extremely convenient.


    Limitations of Using iPhone as a Storage Drive

    To remain honest, here are real-world restrictions:

    1. iPhone doesn’t expose full root storage like Android or USB disks.
    2. Apps operate in sandboxed folders, meaning each app has its own storage.
    3. Windows access is limited mostly to media folders unless you use apps.
    4. Large file transfers may require modern cables (USB-C is much faster).
    5. DRM-protected media cannot be moved freely.

    But with external drives, advanced apps, and the Files app, you can still use your iPhone almost exactly like a portable hard drive.


    Best Practices for Using iPhone as Portable Storage

    • Create organized folders in the Files app.
    • Use USB-C cables where possible for faster transfer speeds.
    • Back up important files to cloud to avoid accidental loss.
    • Use password protection for sensitive data.
    • Clean up old downloads regularly to save space.
    • Use external drives for large video files.

    “Storage is only useful when it’s organized and secure.”


    Who Benefits Most from Using iPhone as a Portable Drive?

    This method is useful for:

    • Students carrying notes and PDF books
    • Travelers storing passport scans, tickets, and offline maps
    • Business users keeping presentations and work files
    • Video creators managing clips and drafts
    • Teachers with class materials
    • Anyone who prefers not to carry extra gadgets

    Your iPhone becomes a safe, reliable digital companion.


    Conclusion

    Using an iPhone as a portable storage drive is easier today than ever before. With the Files app, USB connectivity, Wi-Fi transfer, AirDrop, and external drive support, your phone becomes a powerful, flexible storage tool that fits in your pocket.

    Whether you need to carry documents for work, store offline videos, manage project files, or back up important data, your iPhone can do it all with minimal effort.

    Once you learn these methods, you’ll never feel the need to carry a separate hard drive again.

  • Things To Check Before Buying A Used Or Second-Hand Cell Phone

    Things To Check Before Buying A Used Or Second-Hand Cell Phone

    Buying a used or second-hand phone can save a lot of money, but it can also turn into a costly mistake if you don’t check the device properly. A pre-owned smartphone may look good from the outside yet hide internal faults that appear only after you take it home. That is why careful inspection is essential.

    Whether you’re buying from a shop, an online marketplace, or an individual seller, this guide will help you understand exactly what to check before making the purchase. It also benefits people running a used phone business, and those who buy refurbished devices in bulk.

    “A smart purchase is not about the price you pay — it’s about the problems you avoid.”

    In this comprehensive guide, we’ll walk through authenticity checks, hardware tests, safety verification, performance evaluation, and pricing strategy. You’ll also find a helpful checklist table to make the process simpler.


    Why You Must Inspect a Used Phone Carefully

    Used phones typically come with:

    • No warranty
    • No exchange policy
    • No guarantee of condition
    • Hidden hardware or software problems
    • Limited support from the seller

    Because of this, you must take responsibility for the inspection. One mistake can result in:

    • Locked devices
    • Blacklisted IMEI
    • Faulty batteries
    • Broken motherboards
    • High repair charges
    • Data security issues
    how to check a used second phone smartphone

    Fortunately, most problems are easy to detect if you follow a structured approach like the one below.


    1. Check Authenticity and Ownership

    The first and most important step is verifying that the phone is not stolen. Buying a stolen phone can lead to police issues and the device may get disabled later.

    How to Check Authenticity

    • Ask for the original bill, purchase receipt, or retail invoice.
    • Check the IMEI number on the box, SIM tray, and device settings. All three must match.
    • Cross-check IMEI on trusted websites like:
    • Ask whether the phone is carrier unlocked or SIM-locked.
    • For iPhones, check Activation Lock status using:
      • Apple Support
    • For Android devices, look for OEM unlock status and Google account removal confirmation.

    If anything feels suspicious, do not buy the phone.

    “A good deal is only good if it’s real.”


    2. Check Warranty and Service Eligibility

    A used phone with some warranty left is always a safer buy.

    What to verify:

    • Remaining warranty through the brand website:
      • Apple Check Coverage
      • Samsung Warranty Checker
      • Xiaomi, Oppo, Vivo, OnePlus support pages
    • Whether the phone is eligible for future repairs
    • Check if extended warranty or insurance was purchased
    • Confirm that the phone has not been previously tampered with

    Phones that have undergone unauthorized repairs may be refused by official service centres.


    3. Check the Physical Condition Thoroughly

    The phone must be inspected from every angle.

    Look for:

    • Cracks on the screen
    • Dead pixels, color patches, or burn-in marks
    • Bent frame
    • Loose back panel
    • Dust inside lenses
    • Dents near the charging port (often indicate drops)
    • Damaged speaker grills
    • Loose buttons

    Remember: A phone that shows heavy external damage may have deeper internal damage.


    4. Check Working Condition and All Internal Functions

    This is where most buyers make mistakes — they check only the screen and camera.
    You must check everything.

    Critical Hardware Tests

    ✔ Microphone – Record a voice note
    ✔ Earpiece speaker – Make a call
    ✔ Loudspeaker – Play music
    ✔ Vibration motor – Test vibration settings
    ✔ Cameras – Switch between all lenses
    ✔ Flashlight – Turn ON/OFF
    ✔ SIM detection – Try inserting a SIM
    ✔ Memory card detection – If applicable
    ✔ Charging port – Check alignment & charging speed
    ✔ USB data transfer – Connect to PC
    ✔ Wi-Fi, mobile data & hotspot
    ✔ Bluetooth pairing
    ✔ GPS accuracy
    ✔ Face unlock / fingerprint sensor
    ✔ Proximity sensor during calls
    ✔ Volume buttons & power button
    ✔ Battery health (in iPhone)
    ✔ Thermal behavior (phone shouldn’t overheat during testing)


    Checklist Table for Easy Verification

    Use this table when inspecting any second-hand phone:

    Item to CheckWhy It MattersWhat to Look For
    IMEI MatchConfirms authenticityBox IMEI = Phone IMEI = Settings IMEI
    iCloud/Google LockPrevents activation issuesEnsure accounts are removed
    DisplayMost expensive part to repairLines, spots, dead pixels, touch accuracy
    Battery HealthDetermines long-term usageiPhone: 85%+ recommended
    Charging PortCommon failure pointLoose connection or slow charging
    Speakers & MicEssential for callsTest call quality
    Network & Wi-FiFor connectivityCheck stability & speed
    CameraImportant for valueTest all lenses & focus
    StoragePrevents future issuesEnsure available space matches claim
    ButtonsHardware durabilityPower + volume buttons must click properly
    Body ConditionReveals drop or damageDents, cracks, bent frame
    SensorsFor daily use & appsTest proximity, gyro, light sensor

    5. Check Battery Condition and Charging

    Battery aging is a major issue in used phones.

    For iPhones:

    • Go to Settings → Battery → Battery Health
    • Anything above 85% is acceptable
    • Below 80% usually requires a replacement

    For Android:

    Battery health varies by brand.
    Use the dial code (if available) or the brand’s device care feature.

    Check charging behavior:

    • Does it charge fast or slow?
    • Does the device heat up unusually?
    • Does the battery drain quickly after charging?

    A swollen battery is a major red flag.


    6. Confirm Performance and Speed

    Even if the phone turns on, it may lag or freeze due to internal issues.

    Test performance by:

    • Opening multiple apps
    • Browsing
    • Playing a short video
    • Switching between apps quickly
    • Running a simple game

    If the phone starts overheating or lagging, skip the device.


    7. Ensure There Are No Software Issues

    Software problems can make even a perfect phone frustrating to use.

    Check for:

    • Frequent app crashes
    • Random restarts
    • Boot loop
    • System update issues
    • Malware or suspicious apps
    • Screen freezing
    • Factory reset failure

    Always check if the phone can be reset to factory settings.
    A phone that cannot be reset may have security locks or corrupted software.


    8. Check Storage Capacity and File System

    Some sellers advertise incorrect storage.

    To verify:

    • Go to Settings → About / Storage
    • Ensure listed storage matches what they claim
    • Check system usage
    • Look for signs of faulty storage such as:
      • Apps opening slowly
      • Files disappearing
      • “Storage full” errors even when empty

    Damaged storage chips (UFS/EMMC) are expensive to repair.


    9. Check Connectivity Features

    A modern smartphone must have properly working connectivity.

    Test:

    • Wi-Fi – Connect to a network
    • Mobile Data – Check speed
    • Bluetooth – Pair with speakers/earphones
    • NFC – Make a quick tap test if possible
    • Hotspot – Turn ON/OFF
    • GPS – Check Maps accuracy

    These features are essential for daily use.


    10. Inspect Camera Quality Carefully

    Don’t just click one photo and move on.

    Test all camera modes:

    • Front & rear cameras
    • Wide-angle lens
    • Macro lens
    • Optical zoom
    • Portrait mode
    • Video stabilization
    • Night mode
    • Autofocus

    Dirt inside the lens or a shaky OIS motor can ruin photos.


    11. Check Accessories and Packaging

    Ask for:

    • Original box
    • Charger
    • Cable
    • Earbuds (if included originally)
    • Bill
    • Warranty card

    If accessories are missing, adjust the price.


    12. Check Market Demand Before Buying

    Some brands or models are easy to sell later, while others have almost no resale value.

    A good used phone should:

    • Belong to a well-known brand
    • Have easily available spare parts
    • Have stable software support
    • Have strong demand in your area

    Before buying, check online pricing on:

    • Amazon
    • Flipkart
    • OLX
    • Cashify
    • Your local marketplace apps

    This gives you an idea of the actual value.


    13. Negotiate the Price Smartly

    Keep these points in mind:

    • Electronics lose value every few months
    • Older models drop in price faster
    • Damaged or repaired phones must be priced much lower
    • If you are buying in bulk, negotiate aggressively

    Price should be based on:

    • Condition
    • Age
    • Warranty
    • Battery health
    • Model demand

    If the seller refuses repairs before sale, offer a much lower price because you are taking the risk.


    14. Where to Check Specifications of Any Model

    Use these trusted websites:

    • GSMArena.com – Specifications, comparisons, user feedback
    • PhoneArena.com – Reviews and hardware details
    • Manufacturer websites – Official specs

    Authoritative websites help confirm whether the device matches what the seller claims.

    “A good phone is not about being new — it’s about being reliable.”


    Conclusion

    Buying a second-hand phone is a smart way to save money — but only if you know how to check it properly. A few minutes of careful inspection can protect you from hidden faults, blacklisted devices, poor battery life, and expensive repairs later.

    Once you learn what to check, you can confidently evaluate any used smartphone and pick the right one at the right price.

  • Most Common Phone Issues and How to Fix Them Easily

    Most Common Phone Issues and How to Fix Them Easily

    Smartphones have become an essential part of our daily lives. We rely on them for communication, entertainment, work, payments, navigation, and even security. But like all electronics, phones develop problems—sometimes due to usage habits, sometimes because of apps or software glitches, and often because of accidental damage.

    The good news is that most phone issues are easy to fix if you understand what causes them and take quick action. Whether you’re using an iPhone, Samsung, Xiaomi, Vivo, Oppo, Motorola, OnePlus, or any other brand, the types of problems you face are often similar.

    “Every problem has a solution—what matters is knowing where to look.”

    This guide explains the most common smartphone issues and provides simple, practical solutions anyone can follow. It’s written for both everyday users and those learning mobile repair.


    1. Cracked or Broken Display

    A cracked screen is one of the most common smartphone problems. Modern phones use glass displays for clarity and touch responsiveness, but this also makes them fragile.

    Common Causes

    • Accidental drops
    • Pressure on the pocket
    • Falling off the bed or table
    • Sharp objects inside bags

    Solutions

    • If the crack is minor, apply a tempered glass to prevent it from spreading.
    • If touch stops working or lines appear, replace the display.
    • Choose original or premium-grade compatible screens for long-term use.
    • Use a shock-absorbing case and a screen protector to prevent future damage.

    Important Tip:
    Display replacement costs vary widely between brands. Check pricing before purchasing a phone or spare part.


    2. Charging Port Problems

    Charging port issues are extremely common because the port is used daily and exposed to dust, lint, and frequent pressure.

    Symptoms

    • Phone charges only when the cable is moved
    • Slow charging
    • Intermittent charging
    • No charging at all

    Causes

    • Dust or lint inside the port
    • Worn-out pins
    • Faulty cable or adapter
    • Water or moisture damage

    Solutions

    • Clean the charging port with a soft brush or wooden toothpick (never use metal).
    • Try a different cable and adapter.
    • Check for loose or wobbly ports, which require port replacement.
    • Use high-quality original or certified accessories.

    Preventive Tip

    Avoid using the phone while charging. This puts extra pressure on the port and loosens it over time.


    3. Battery Draining Fast

    Modern lithium-ion batteries degrade naturally over time, but fast battery drain may indicate deeper problems.

    Common Causes

    • Too many apps running in the background
    • Screen brightness set too high
    • Weak network coverage
    • Background syncing
    • Aging battery
    • Heavy gaming or streaming
    • Battery-intensive apps

    Solutions

    • Enable Battery Saver or Low Power Mode.
    • Keep brightness on auto or reduce manual brightness.
    • Turn off Bluetooth, GPS, or Wi-Fi when not needed.
    • Remove apps that drain battery excessively.
    • Replace the battery if it is worn out.

    Modern Battery Care Facts (Updated)

    To extend battery life:

    • Avoid letting your phone drop below 20% frequently.
    • Avoid charging to 100% all the time—80% is healthier for long-term battery life.
    • Enable Optimized Battery Charging (iPhone/Samsung/OnePlus).
    • Avoid fast charging continuously; mix between normal and fast charging.

    4. Freezing or Hanging Issues

    A phone that freezes or becomes unresponsive can be frustrating.

    Causes

    • Low storage
    • Unoptimized apps
    • Outdated software
    • RAM overload
    • Malware

    Solutions

    • Restart the phone once a day.
    • Clear app cache (Android).
    • Uninstall unnecessary apps.
    • Update apps and system software.
    • Check storage—keep at least 20% free space.
    • Use antivirus or malware scanners if needed.

    If the device still hangs, it may require a factory reset or software flashing.


    5. Slow Performance

    Slow phones are extremely common, especially as devices age.

    Common Causes

    • Too many apps installed
    • Background processes
    • Low internal storage
    • Failing storage chip (EMMC/UFS)

    Solutions

    • Clear cache regularly.
    • Delete duplicate files and heavy media.
    • Move photos/videos to cloud or external storage.
    • Restore factory settings if slowing becomes severe.

    Note:
    Avoid using memory cleaning apps that promise speed boosts—they often make performance worse.


    6. Overheating Problems

    Phones heat up naturally under heavy use, but excessive heat needs attention.

    Causes

    • Intense gaming
    • Video streaming
    • Weak network
    • Background apps running
    • Charging while using
    • Poor ventilation

    Solutions

    • Give the phone short breaks during heavy use.
    • Remove the cover while charging.
    • Avoid using fast charging continuously.
    • Update apps—poor coding may cause heat.
    • Reset or replace battery if overheating persists.

    Important:
    Severe overheating can damage internal components like the motherboard, display, and battery.


    7. Network and Signal Issues

    Weak or fluctuating network is a common issue in many locations.

    Causes

    • SIM card problems
    • Faulty network bands
    • Physical damage to antenna
    • Software bugs

    Solutions

    • Remove and clean the SIM card.
    • Try the SIM in another phone.
    • Reset network settings.
    • Update system software.
    • Contact your network provider for coverage issues.

    If none of these work, the antenna or baseband IC might need repair.


    8. Wi-Fi or Bluetooth Not Working

    Wireless connectivity issues often occur due to software glitches or hardware damage.

    Solutions

    • Restart the device and router.
    • Forget and reconnect to networks.
    • Reset network settings.
    • Toggle Airplane Mode.
    • Remove recently installed apps that may interfere.

    If both Wi-Fi and Bluetooth fail together, the network IC may be damaged.


    9. Touchscreen Not Responding

    Touchscreen problems range from partial to complete unresponsiveness.

    Causes

    • Screen damage
    • Moisture
    • Dust
    • Software glitches
    • Ghost touch (input without touching)

    Solutions

    • Clean the screen surface.
    • Restart the device.
    • Remove screen protectors (sometimes block sensors).
    • Replace the display if the touch layer is damaged.
    • Update firmware—ghost touch is sometimes software-related.

    10. App Crashes or Not Opening

    Apps may stop working suddenly due to corrupt data, updates, or compatibility issues.

    Solutions

    • Update the app
    • Clear cache (Android)
    • Reinstall the app
    • Restart phone
    • Check for OS updates
    • Ensure enough free storage

    If system apps crash frequently, the operating system may need flashing.


    11. Camera Not Working Properly

    Camera issues are common, especially after physical impact.

    Symptoms

    • Blurry photos
    • Camera not opening
    • “Camera failed” message
    • Black screen
    • Focus not working
    • Lens shaking or buzzing

    Solutions

    • Clean the lens
    • Restart the phone
    • Remove case blocking the lens
    • Update camera app and OS
    • Reset settings
    • Replace the camera module if hardware is damaged

    12. Audio Problems (Speaker, Earpiece, Microphone)

    Sound issues can occur due to:

    • Dust
    • Wear and tear
    • Moisture
    • Damaged ICs

    Solutions

    • Clean speaker grills
    • Test with earphones
    • Restart phone
    • Check if phone is in Silent mode
    • Replace speaker or mic module if needed

    13. Phone Restarting Automatically

    A phone that restarts by itself may have:

    • Battery issues
    • Software crashes
    • Hardware faults
    • Moisture in motherboard

    Solutions

    • Update software
    • Remove recently installed apps
    • Reset the device
    • Replace battery
    • Check motherboard for corrosion

    14. Storage Full Even When You Deleted Files

    This happens due to:

    • System cache
    • Hidden folders
    • WhatsApp media buildup
    • Corrupt storage

    Solutions

    • Clear cached data
    • Delete duplicated media
    • Upload files to cloud storage
    • Move media to SD card (if supported)
    • Reset phone if storage is corrupted

    15. Phone Not Turning On

    A dead phone is usually due to:

    • Drained battery
    • Faulty power IC
    • Short circuit
    • Software crash
    • Damaged charging port

    Solutions

    • Charge for at least 20 minutes
    • Try another cable and adapter
    • Force restart
    • Connect to a computer to detect the device
    • Seek technician help if hardware is damaged

    “When your phone stops responding, stay calm—most solutions begin with a simple reset.”


    16. Proximity Sensor Not Working

    This causes the screen to stay ON during calls, leading to accidental touches.

    Solutions

    • Remove thick screen protectors
    • Test sensor using phone dial codes
    • Update software
    • Replace broken sensor module

    17. Fingerprint or Face Unlock Not Responding

    Causes

    • Dirty sensor
    • Moisture
    • Scratches on the sensor area
    • Software bugs
    • Hardware wear

    Solutions

    • Clean the sensor
    • Remove and re-add fingerprints or face data
    • Update software
    • Replace faulty sensor module
    • Check for original display—many third-party screens affect fingerprint accuracy

    18. Slow Charging or Not Charging Properly

    Solutions

    • Use original or certified fast chargers
    • Clean the port
    • Replace cable
    • Check adapter wattage
    • Disable background apps while charging
    • Avoid charging in hot environments

    Conclusion

    Smartphones may develop various problems over time, but most issues are simple to fix once you understand the causes. With the right maintenance, careful usage, and timely troubleshooting, you can extend the life of your device and avoid unnecessary repair costs.

    “A well-maintained phone performs better and lasts longer—treat it with care, and it will serve you well.”

    If a problem persists even after trying the solutions, it may require professional repair. Acting early often prevents bigger issues like motherboard damage or complete device failure.

  • How to Check Shorting in Mobile Phones (Guide)

    How to Check Shorting in Mobile Phones (Guide)

    Short circuits are among the most common reasons for mobile phones to turn dead, overheat, restart, drain battery fast, or stop functioning suddenly. Every technician, whether beginner or experienced, must know how to diagnose shorting accurately before attempting any repair.

    A shorted motherboard requires careful handling and systematic testing. If diagnosed incorrectly, it may lead to further component damage. Fortunately, with the right tools and the right approach, finding a short circuit becomes simple and methodical.

    “A technician’s real skill lies not in replacing parts, but in identifying the root cause with precision.”

    This guide explains how to check shorting in mobile phones using two reliable methods:

    1. Continuity testing with a multimeter
    2. Current draw testing with a DC Power Supply (Battery Eliminator / Jhatka Machine)

    It also covers why shorting happens, how tracks work, and early symptoms of a short circuit.


    What Is Shorting in Mobile Phones?

    In simple terms, shorting happens when two electrically separate paths unintentionally touch each other, causing current to flow where it should not.

    Open Circuit

    • When a track breaks and current cannot flow
    • Example: cracked PCB or broken connection

    Short Circuit

    • When two separate tracks or components touch
    • Causes excessive current flow
    • Leads to heat, failure, or complete shutdown

    Shorting is one of the most damaging faults on a motherboard.


    Common Reasons for Shorting in Mobile Phones

    Short circuits do not happen randomly. They usually have specific causes:

    1. Water Damage

    The number one cause.
    Moisture creates conductive paths between tracks.

    2. Overheating

    Excessive heat melts solder joints and causes bridging.

    3. Using Faulty or Non-Compatible Chargers

    Cheap or fake chargers cause voltage spikes and component burns.

    4. Electrical Shock or Sparks Inside the Motherboard

    Can occur due to damaged components or loose connections.

    5. Physical Damage

    Drops or bends deform internal layers of the PCB.

    6. Manufacturing Defects

    Though rare, improper soldering from factory can cause short circuits later.


    Symptoms of a Shorted Motherboard

    Before testing the phone, technicians should look for signs:

    ✔ Phone completely dead

    ✔ No charging indication

    ✔ Phone heats up without powering on

    ✔ Auto-restart or shutdown

    ✔ Battery draining unusually fast

    ✔ DC Power Supply showing high current draw

    ✔ Burning smell or spark from inside

    ✔ Fast heating of a particular component

    These symptoms help narrow down the diagnosis.


    Understanding Tracks on a Mobile Motherboard

    Phones do not use wires internally. Instead, they use microscopic tracks on the PCB.

    Tracks carry different types of signals:

    • VBAT Tracks → Battery voltage
    • GND Tracks → Ground
    • RX/TX Tracks → Communication
    • I2C/SPI Tracks → Control signals
    • LDO Lines → Regulated power lines

    A short circuit happens when VBAT touches GND or any other unintended line.


    ⚠️ Very Important Safety Warning Before Testing

    Since this article is technician-level:

    • Do NOT use DC Power Supply without training
    • Do NOT touch exposed components during power tests
    • Always remove the battery before board testing
    • Avoid testing on a wet or unclean board
    • Wear anti-static protection when possible

    “A moment of care saves hours of repair.”


    METHOD 1: How to Check Shorting With a Multimeter (Continuity / Diode Mode)

    This is the fastest and safest method.


    Step 1: Set Multimeter Correctly

    • On digital multimeter → Continuity Mode / Diode Mode
    • On analog multimeter → Ohms (×10) Mode

    In diode mode:

    • A beep sound = electrical connection
    • No beep = open circuit

    Step 2: Identify Battery Connector Pins

    Most phone batteries have these pins:

    • VBAT (+) → Battery positive
    • GND (–) → Battery negative
    • BSI / ID → Battery status communication pin
    • BTEMP → Temperature sensor pin (varies by model)

    For shorting test, we focus on:

    • VBAT
    • GND

    Step 3: Position the Probes Correctly

    For multimeter short testing:

    ✔ Touch RED probe (+) to GND

    ✔ Touch BLACK probe (–) to VBAT

    Why this reverse connection?
    It creates a safe current path for testing without damaging components.


    Step 4: Read the Multimeter Response

    Case 1: Continuous Beep / Reading Shows Values

    This confirms:

    ➡ The motherboard is short.

    Case 2: No Beep / No Reading

    This confirms:

    ➡ The board is NOT short.


    Understanding Readings in Diode Mode

    If you test both ways:

    • If readings appear both timesShort circuit confirmed
    • If reading appears only onceNormal behavior

    Some motherboards may show numeric values (e.g., 254, 302, 1000).
    If values appear in both directions = shorting.


    Extra Checks With Multimeter

    ✔ Check heat

    Touch the board lightly to see if any component heats up during tests.
    (This should be done quickly and carefully.)

    ✔ Check for ground short near connectors

    Test charging IC, backlight section, power IC, audio IC, etc.


    METHOD 2: How to Check Shorting Using DC Power Supply (Jhatka Machine)

    This method is more advanced and must be done only by trained technicians.

    DC Power Supply is also called:

    • Battery Eliminator
    • Jhatka Machine
    • DC Regulator

    It supplies stable DC voltage for motherboard testing. Use a high quality, high precision DC Power Supply of 5 Amperes


    Step 1: Set Correct Voltage

    • Most mobile batteries operate at 3.7V – 4.4V
    • Set DC Supply to 4.0V for safe testing

    Never test above safe voltage levels.


    Step 2: Connect the Probes

    • Red Clip → VBAT Pin
    • Black Clip → GND Pin

    Do NOT touch other components during testing.


    Step 3: Read the Current Draw

    The current reading tells you a lot.

    Scenario 1: Current jumps instantly (0.5A – 2A)

    Short circuit confirmed.

    This means the power line is connected to ground.

    Scenario 2: Current remains at 0.00A

    No shorting.

    Scenario 3: Current slowly rises even without pressing power key

    Half short or leakage.
    This requires component-level diagnosis.


    Step 4: Identify Heating Component

    The fastest way to find a shorted component is:

    • Drop a little coolant spray
    • Apply DC Power again
    • See which area melts first (that’s the faulty part)

    Or use:

    • Thermal camera
    • Alcohol method (evaporates quickly at heating spot)

    Common Components That May Short

    • Power IC (PMIC)
    • Charging IC
    • Backlight IC
    • Audio IC
    • CPU caps
    • RAM/CPU solder joints
    • WIFI/Network IC
    • Filter capacitors (most common)
    • Diodes and coils

    90% of short circuits happen because of a single capacitor failure.


    Fixing Shorting in Mobile Phones

    After identifying the short, the repair steps include:

    ✔ Removing shorted capacitors

    ✔ Replacing faulty ICs

    ✔ Cleaning corrosion from water damage

    ✔ Reworking solder joints

    ✔ Checking line voltage again after removal

    Technicians must ensure the short is completely cleared before applying battery.


    Preventing Short Circuits in Mobile Phones

    Your customers can prevent shorting by:

    • Avoiding cheap chargers
    • Keeping phones away from water
    • Not using the phone while charging
    • Avoiding extreme heat
    • Using protective back covers
    • Getting phones serviced after water exposure

    “Prevention costs nothing—repairs cost time, money, and sometimes trust.”


    Conclusion

    Short circuits are one of the most serious faults in mobile phones. But with the right tools, techniques, and a systematic approach, diagnosing shorting becomes straightforward and safe.

    Technicians must always begin any dead phone repair by checking for shorting, because a shorted board cannot boot, charge, or function normally until the short is removed.

    Learning to test shorting using a multimeter and DC power supply gives you a strong foundation in mobile hardware repair, helping you diagnose faults confidently and accurately.

  • How to Remove Shorting in Mobile Phones (Guide)

    How to Remove Shorting in Mobile Phones (Guide)

    Short circuits—often called “shorting”—are among the most challenging hardware faults in mobile phone repair. A shorted phone may not turn on, may restart repeatedly, may drain the battery quickly, or may heat up even when idle. For technicians, removing shorting correctly is essential to restoring the phone to working condition without damaging other components.

    Today’s mobile phones use complex multilayer PCBs, advanced PMIC structures, and highly integrated systems. As a result, removing shorting requires a structured, safe, and methodical approach.

    “In mobile repair, knowledge saves the board. Guesswork destroys it.”

    This guide explains how to remove shorting in mobile phones using modern professional methods, including:

    • Main-line (VBAT) short removal
    • Sub-line short diagnosis
    • Voltage injection safe technique
    • Thermal camera and freeze spray heat spotting
    • IPA evaporation method
    • Component isolation
    • PMIC and CPU short precautions
    • Ultrasonic cleaning
    • Safe board handling

    This is a professional technician-level guide, written in simple language so students and beginners can follow easily.


    1. What Is Shorting in a Mobile Phone?

    A short circuit occurs when two points that should not touch each other become electrically connected. This creates an abnormal current path, leading to:

    • Heating
    • Phone not powering on
    • Battery draining fast
    • Overcurrent damage
    • Component burnout

    In a mobile motherboard, shorting usually occurs in either:

    Main Power Line (VBAT Rail)

    Or

    Secondary Power Rails

    (1.0V, 1.2V, 1.8V, 2.8V, 3.0V, 4.2V, etc.)

    A main-line short is typically caused by:

    • Shorted capacitor
    • Blown diode
    • Damaged PMIC
    • Water damage
    • Physical force bending PCB layers

    A sub-line short usually involves:

    • LDO regulator lines
    • Specific IC supply lines
    • Camera/Display/Charging sections

    Understanding which type you are dealing with helps you remove the short safely.


    2. Common Reasons for Shorting

    Shorting rarely happens without cause. The most common triggers include:

    1. Liquid Exposure

    Water or moisture bridges tracks, causing instant VBAT-to-ground short.

    2. Overheating or Thermal Stress

    Leads to solder cracks and component bridging.

    3. Faulty Chargers or Power Surge

    Cheap chargers can blow PMIC, CPU regulators, or filter capacitors.

    4. Physical Damage

    Drops bend internal layers of the PCB or crack micro-lines.

    5. Manufacturing Defects

    Can cause premature component failure.

    6. Aging Components

    Old motherboards may develop carbon residue or internal breakdown.

    short circuit i.e shorting due to water damage

    3. Symptoms That Indicate Shorting

    Common signs include:

    • Phone completely dead
    • No charging
    • Overheating without being powered
    • Battery drops rapidly
    • DC Power Supply shows high current draw
    • Phone restarts automatically
    • Component-level heating
    • Burning smell

    Once these symptoms appear, the technician must begin short-diagnosis immediately.

    “A shorted phone speaks through its symptoms—listen carefully.”


    4. Tools Required for Safe Short Removal

    Modern shorting repair requires proper tools:

    ✔ Multimeter (Diode/Continuity Mode)

    ✔ DC Power Supply (0–5A, 0–5V range)

    ✔ Hot Air Rework Station

    ✔ Soldering Iron

    ✔ Ultrasonic Cleaner (for water-damaged boards)

    ✔ 99% IPA (Isopropyl Alcohol)

    ✔ Thermal Camera (optional but ideal)

    ✔ Freeze Spray (or coolant spray)

    ✔ Microscope (recommended)

    ✔ Tweezers and board brushes

    Using the correct tools reduces repair time and prevents motherboard damage.


    5. Step-by-Step Procedure to Remove Shorting in Mobile Phones

    Below is the modern and safe workflow followed by advanced technicians:


    STEP 1: Visual Inspection

    Before touching the board with any tool:

    Look for:

    • Burn marks
    • Corrosion
    • Broken components
    • Missing components
    • Bent PCB

    If the phone fell in water, corrosion under ICs may be a major cause of the short.


    STEP 2: Clean the PCB Properly

    Use 99% IPA or professional PCB cleaner.

    Cleaning steps:

    1. Remove all flexes, shields, and detachable modules.
    2. Brush the PCB with IPA to remove dirt and corrosion.
    3. Use an ultrasonic cleaner for water-damaged boards (8–12 minutes).
    4. Dry the board completely using hot air at a safe temperature (no overheating).

    If the short disappears after cleaning, the cause was internal corrosion or conductive debris.


    STEP 3: Check Main-Line Shorting Using Multimeter

    Use diode mode:

    1. Place RED probe on GND.
    2. Place BLACK probe on VBAT.

    Readings:

    • Beep or value in both directions → Main-line short
    • Value in only one direction → Normal

    If the main line is short, proceed to Step 5.


    STEP 4: Check Sub-Line Shorting (Advanced)

    Sub-lines include:

    • 1.8V
    • 2.8V
    • 3.0V
    • 4.2V
    • Camera lines
    • Display lines
    • RF power lines

    Check each coil output line:

    • If a coil output line has low resistance in both directions → sub-line short.
    • Trace that line to the connected IC or capacitor group.

    This helps you identify which section is affected.


    STEP 5: Voltage Injection to Locate Heating Component (Safe Method)

    This is one of the most effective modern techniques.

    Steps:

    1. Set DC Power Supply to 1V and 2A current limit.
    2. Connect:
      • Red clip → VBAT line
      • Black clip → GND
    3. Switch ON the power supply.

    Observe current behavior:

    • High current (1–2A instantly) → Hard short
    • Slow rise in current (0.2–0.4A) → Soft short or leakage

    Now identify the heating component using:


    STEP 6: Heat Detection Methods (Choose Any)

    Method A: Thermal Camera (Best Method)

    Component heating appears instantly on screen.

    Method B: Freeze Spray

    Spray the entire affected area →
    When power is applied, the faulty part melts first.

    Method C: IPA Evaporation (Popular Technique)

    Pour a few drops of IPA on PCB →
    The part that evaporates fastest is the shorted component.


    STEP 7: Remove the Faulty Component

    Once the heating component is identified, remove it safely:

    • Use hot-air rework station
    • Do not overheat nearby ICs
    • Remove gently with tweezers

    Most common short-causing components:

    • Filter capacitors (90% of cases)
    • Protection diodes
    • Charging IC
    • PMIC (Power Management IC)
    • Backlight IC
    • RF ICs

    After removal, test VBAT line again:

    • If short is gone → Replace component
    • If still short → Continue diagnosis

    STEP 8: Check PMIC and CPU Short Precautions (Critical)

    If heating is found under:

    ✔ PMIC

    ✔ CPU

    ✔ RAM

    ✔ Storage IC

    Then:

    • These are risky to remove
    • Many require reballing, not replacement
    • Underfill on CPUs makes removal complicated

    In most cases:

    • CPU short → Board is beyond economical repair
    • PMIC short → Replace PMIC only if technician is skilled

    STEP 9: Re-Test VBAT and Sub-Lines

    After removing components:

    1. Test multimeter readings again.
    2. Ensure VBAT shows no short.
    3. Ensure sub-lines have normal diode readings.

    This confirms the short is successfully removed.


    STEP 10: Reassemble and Power On

    Once the board is stable:

    • Attach battery
    • Power on phone
    • Check charging
    • Check temperature
    • Test network, camera, display, sound

    Why Most Shorting Happens in Capacitors

    In modern smartphones, capacitors act as filters and stabilizers. They sit across VBAT and ground.

    If a capacitor breaks internally:

    • Positive and negative plates touch → direct short
    • Battery drains instantly
    • Motherboard draws high current

    This is why capacitors are the main cause of mobile shorting.


    Tips to Prevent Shorting in Mobile Phones

    You can advise customers to:

    • Avoid cheap chargers
    • Keep phone away from water
    • Use protective cases
    • Avoid exposing phone to direct heat
    • Get phone serviced immediately after water damage
    • Replace aging batteries

    Conclusion

    Removing shorting in mobile phones is a technical skill that improves with experience. The key is to diagnose the short correctly and follow a systematic workflow.

    “When you follow the right process, the board reveals the fault on its own.”

    With modern techniques like voltage injection, thermal imaging, and ultrasonic cleaning, short removal is now safer and faster than ever before.

    This guide gives you the complete professional workflow — from identifying main-line and sub-line shorts to safely removing faulty components and restoring the device back to life.

  • How to Clean and Service Your Cell Phone Safely (Guide)

    How to Clean and Service Your Cell Phone Safely (Guide)

    Your phone goes everywhere with you—your home, office, gym, market, public transport, and sometimes even the bathroom. It touches dozens of surfaces daily, comes into contact with your hands, face, pockets, and bags, and collects dust, oils, sweat, germs, and environmental pollutants. Cleaning your device is not only about hygiene—it also helps your phone run smoother and last longer.

    Many people clean only the screen, ignoring the ports, speakers, microphone holes, and tiny spaces where dirt accumulates and slowly affects performance. A clean phone charges better, stays cooler, lasts longer, and looks more presentable.

    “A little care every week keeps your phone healthy for years—maintenance is cheaper than repair.”

    This guide explains how to clean and service your cell phone safely using modern and trustworthy methods. Whether you use an iPhone, Samsung Galaxy, Xiaomi, Realme, OnePlus, Motorola, Vivo, Oppo, or any other brand, these steps apply to all.


    Why You Should Clean Your Cell Phone Regularly

    Cleaning is not only for looks. It helps improve:

    ✔ Hygiene

    Your phone can carry more bacteria than public surfaces if not cleaned properly.

    ✔ Touchscreen responsiveness

    Oil, dust, and residues reduce touch accuracy.

    ✔ Charging performance

    A dusty charging port causes slow or inconsistent charging.

    ✔ Call quality

    Dust in microphone or speaker grill reduces clarity.

    ✔ Heat management

    Dirt blocks ventilation and increases temperature.

    ✔ Component life

    Clean hardware lasts longer because it avoids corrosion and moisture buildup.

    Regular cleaning gives you a healthier device—and a better user experience.

    “Your phone works hard for you every day. Treat it with a little respect, and it will return that care through reliable performance.”


    Before You Begin: Safety Steps

    Always follow these precautions before cleaning or servicing:

    • Turn off the phone completely.
    • Unplug the charger and remove accessories.
    • Remove the case and screen guard if needed.
    • Remove the SIM tray.
    • If your phone has a removable battery, take it out—but never attempt to remove batteries in sealed phones unless you are trained.
    • Never spray liquids directly on your phone.
    • Avoid using household cleaners, bleach, or strong chemicals.

    These steps protect your phone from accidental damage.


    Tools and Materials You Should Use

    Use only safe, phone-friendly cleaning items:

    ✔ Microfiber cloth

    Lint-free and gentle on screens.

    ✔ Soft brush (paintbrush or anti-static brush)

    For cleaning ports and corners.

    ✔ 70–99% Isopropyl Alcohol (IPA)

    Safe for electronics. Evaporates quickly.

    ✔ Compressed air can (optional)

    Helps remove dust from tiny holes.

    ✔ Toothpicks or SIM ejector pin

    For cleaning edges (very gently).

    ✔ Cotton swabs (dry or lightly moistened)

    Useful for small areas.

    ✔ UV or disinfecting wipes approved for phones

    Safe for daily sanitizing.

    ✔ Ultrasonic cleaner (for technicians only)

    For deep cleaning of PCBs.

    Avoid harmful items such as glass cleaners, perfumes, hand sanitizers, paper towels, metal tools, or excessive water.


    STEP 1: Clean the Phone Exterior

    This includes the body, edges, buttons, and back panel.

    1. Use a microfiber cloth

    • Lightly moisten it with water or IPA.
    • Wipe in straight strokes, not circles.
    • Remove smudges, sweat, makeup, and dust.

    2. Clean buttons and seams

    Use a soft brush or cotton swab to remove dirt from:

    • Volume buttons
    • Power button
    • Frame edges
    • Speaker grill
    • Microphone holes

    Avoid using too much liquid—moisture can seep inside.

    3. Clean the back panel

    Especially if you use a polycarbonate or glass-backed phone.


    STEP 2: Clean the Display Safely

    The screen is the most frequently touched part and attracts fingerprints, dust, and bacteria.

    ✔ Recommended Method

    • Use a microfiber cloth slightly dampened with distilled water or IPA.
    • Wipe gently in horizontal or vertical lines.
    • Do not press hard—this may damage the display or touch sensors.

    ✔ To remove sticky stains

    • Use 70% IPA—strong enough to clean, mild enough for coatings.

    ✔ Do NOT use:

    • Cleaning sprays meant for glass windows
    • Baby wipes
    • Alcohol with fragrances
    • Hand sanitizer

    These can damage the oleophobic coating.

    Optional: Reapply oleophobic coating

    After long-term use, the coating fades. High-quality coating kits are available, but apply them only if comfortable following instructions.


    STEP 3: Clean the Charging Port (Important)

    A dirty charging port is one of the most common reasons for:

    • Slow charging
    • Loose connection
    • Phone not charging
    • Cable not fitting properly

    ✔ Clean using:

    • Soft brush
    • Compressed air
    • Wooden toothpick (very gently)

    Steps:

    1. Turn the phone off.
    2. Insert the toothpick gently and move it side-to-side.
    3. Remove lint or compacted dust.
    4. Blow compressed air to clear remaining particles.

    Never use metal pins, needles, or water.


    STEP 4: Clean Speakers and Microphone Holes

    Dust often blocks sound pathways.

    ✔ Use a soft brush

    Brush gently in one direction.

    ✔ Use adhesive putty

    Roll it lightly over speaker grills to lift dirt.

    ✔ Use compressed air

    Short bursts only; too much pressure can damage membranes.


    STEP 5: Clean Phone Cases and Accessories

    Your phone case collects more germs than the phone itself.

    ✔ Silicone Cases

    • Wash with warm soapy water.
    • Let them dry completely.

    ✔ Hard Plastic Cases

    • Wipe with IPA.

    ✔ Leather Cases

    • Use leather-safe cleaners.

    ✔ Screen Protectors

    If the protector is scratched, lifting, or yellowing—replace it.


    STEP 6: Service Your Phone Internally (Technician-Level)

    Only perform these steps if you’re trained or experienced.
    If not, leave these to a professional technician.

    ✔ Remove Back Panel

    Some phones allow safe removal; others do not.

    ✔ Inspect for Dust or Corrosion

    Use a magnifying glass or microscope.

    ✔ Clean Internal Components

    Use:

    • 99% IPA
    • Soft brush
    • Compressed air

    ✔ Ultrasonic Cleaning (Advanced)

    Professionals use an ultrasonic cleaner to deep-clean PCBs, especially in cases of liquid damage. This removes corrosion and contaminants safely.

    ✔ Check for Loose Screws or Connectors

    Loose connections can cause:

    • No display
    • Touch malfunction
    • Battery drop
    • Network issues

    Gently reseat flex cables if required.

    ✔ Do NOT

    • Remove batteries from sealed phones
    • Pry forcefully
    • Use water or soap inside

    Internal servicing must be done only with correct tools and experience.


    STEP 7: Clean SIM Tray and Slots

    A dusty SIM slot can cause:

    • SIM card not detected
    • Weak network
    • Call drop issues

    ✔ Steps

    • Use a dry brush to clean the tray.
    • Use compressed air to clear the slot.
    • Avoid inserting liquids or cotton inside the slot.

    STEP 8: Sanitize Your Phone (Final Step)

    After cleaning, sanitize to kill germs.

    ✔ Use approved disinfectant wipes

    Apple, Samsung, and other brands allow alcohol-based wipes for sanitizing.

    ✔ Do NOT use

    • Bleach
    • Excess water
    • Vinegar
    • Strong surface cleaners

    These damage coatings and internal components.


    How Often Should You Clean Your Phone?

    ✔ Light wiping: Daily

    ✔ Full cleaning: Weekly

    ✔ Deep cleaning/service: Every 2–3 months

    ✔ Professional servicing: Every 6–12 months

    Regular maintenance improves hygiene, performance, and lifespan.


    Signs Your Phone Needs Cleaning or Servicing

    • Charging is slow or intermittent
    • Touchscreen feels less responsive
    • Sound is muffled
    • Phone overheats
    • Buttons feel sticky
    • Screen has smudges or oily spots
    • Dust around camera or speaker grills
    • SIM not detected randomly
    • Phone looks dull or dirty

    If you notice any of these, clean your device following the steps above.


    Advanced Servicing Benefits (Performed by Technicians)

    Professional servicing includes:

    • Deep PCB cleaning
    • Port replacement if needed
    • Battery health assessment
    • Thermal paste reapplication (only in advanced repairs)
    • Speaker and mic dust removal
    • Rechecking board connections
    • Power and charging diagnostics

    These services help keep your phone running smoothly.


    Conclusion

    Cleaning and servicing your cell phone is simple, safe, and highly beneficial when done correctly. A clean phone performs better, stays healthier, and lasts longer. With regular care, you reduce the chances of overheating, slow charging, sound issues, and even hardware failure.

    “Good maintenance isn’t just about protecting your device—it’s about protecting the investment you carry every day in your pocket.”

    Take a few minutes every week to clean your phone, and enjoy a device that looks great, feels fresh, and works flawlessly.

  • Top Benefits of Refurbishing Your Cell Phone (Guide)

    Top Benefits of Refurbishing Your Cell Phone (Guide)

    A cell phone today isn’t just a device—it’s a personal companion that stays with us through almost every moment of the day. It holds our photos, contacts, conversations, memories, reminders, and even work essentials. Because of this attachment, most people find it difficult to replace their phones the moment something goes wrong.

    Sometimes, the device gets scratched, the battery drains too fast, the screen cracks, or the performance slows down. At that point, the big question comes in: Should you buy a new phone or refurbish the one you already have?

    Many users assume buying a new phone is the easiest solution. But with rising prices, tighter budgets, and sustainability becoming more important, refurbishing has become a smarter and more practical choice.

    In this guide, you’ll learn why refurbishing your cell phone is both a smart and beneficial decision, when you should consider it, what refurbishing includes, and how it can significantly extend the life of your device.


    What Does Refurbishing a Cell Phone Really Mean?

    Refurbishing is much more than just repairing a single fault. It is a complete restoration process that improves both the external appearance and internal performance of the device.

    A refurbished phone may include:

    • Replacement of outer body or casing
    • New display or touch panel
    • Battery replacement or calibration
    • Cleaning or repairing charging port
    • Software reinstall or optimization
    • Motherboard cleaning
    • Speaker/mic servicing
    • Camera cleaning or replacement
    • Internal dust removal

    The goal is simple: make the phone look and perform as close to new as possible.


    Why People Choose Refurbishing Over Replacement

    People choose refurbishing for many personal, financial, and practical reasons. Some of the most common are:

    ✔ They love their current phone model

    Some users prefer the design, size, or features of their existing device.

    ✔ The same model is no longer sold

    Brands discontinue models frequently, making replacement difficult.

    ✔ Upgrading is expensive

    Not everyone wants or needs the latest phone.

    ✔ They prefer familiar features

    Learning a new interface or system can be unnecessary when the current phone works well after refurbishment.

    ✔ Sentimental attachment

    Some users want to keep a device that carries memories or was gifted by someone special.

    “A repaired phone doesn’t lose value—what matters is how well it serves you every day.”


    Top Benefits of Refurbishing Your Cell Phone

    Below is a detailed and updated explanation of the biggest advantages of refurbishing your phone.


    1. You Save a Significant Amount of Money

    Replacing a modern smartphone can be costly. Premium devices can be equivalent to a month’s salary in many regions. In contrast, refurbishing usually costs a small fraction of buying a new phone.

    Refurbishing helps you save money because:

    • Repairing one or two parts is cheaper than replacing the whole device.
    • You can avoid unnecessary upgrades.
    • Many refurbishing centers offer budget-friendly part replacements.
    • Batteries, screens, and back panels are significantly cheaper than entire phones.

    For most people, cost-saving is the number one reason they choose to refurbish.


    2. Your Phone Looks and Feels Brand New Again

    One of the biggest misconceptions is that old phones can never look fresh again. That’s not true. With modern refurbishing techniques, you can:

    • Replace the entire casing
    • Install a new display
    • Polish or replace metal frames
    • Clean internal components
    • Replace scratched camera glass
    • Install a new battery

    The result is a device that looks nearly new and feels premium again.

    “Refurbishing gives old phones a new life—and gives you the feeling of holding a new device without the new-device price.”


    3. You Avoid the Learning Curve of a New Device

    Switching to a new phone means:

    • Reinstalling apps
    • Learning new features
    • Adjusting to new UI changes
    • Transferring data
    • Re-setting passwords and preferences

    This can take hours and sometimes days before you feel comfortable again.

    Refurbishing allows you to enjoy improved performance without switching models, avoiding the hassle completely.


    4. It Extends the Lifespan of Your Device

    Most phones don’t die—they simply need servicing.

    A frozen phone, slow performance, fast battery drain, or random restarts may be caused by:

    • Dust inside the motherboard
    • Loose connections
    • Old battery
    • Corrupted software
    • Faulty charging port
    • Worn-out buttons
    • Damaged speaker or mic

    When these faults are repaired, the phone can last for years more.

    Common refurbishing actions that improve lifespan:

    • Internal cleaning reduces overheating
    • Battery replacement restores backup
    • New charging port fixes inconsistent charging
    • Software reinstall boosts performance

    Refurbishing is the best way to get more years out of the device you already own.


    5. It Greatly Improves Battery Performance

    Most people think they need a new phone just because the battery drains fast. In reality, battery health naturally decreases with time.

    Refurbishing fixes battery issues by:

    • Replacing old battery cells
    • Cleaning power IC area
    • Fixing charging port
    • Updating software
    • Removing unnecessary background apps

    A refurbished phone often regains its original standby time, making it feel like new again.


    6. Better for the Environment (Eco-Friendly Choice)

    E-waste is one of the world’s fastest-growing problems. Throwing away a phone contributes to:

    • Toxic waste
    • Metal and plastic pollution
    • Increased manufacturing demand

    Refurbishing reduces environmental impact by extending the life of your device.

    Eco-friendly benefits:

    • Reduces electronic waste
    • Saves natural resources
    • Cuts down on manufacturing emissions
    • Encourages sustainable consumer habits

    Repairing instead of replacing is a small but meaningful way to protect the planet.


    7. You Maintain Your Data Safely

    Even if you transfer data to a new phone, there is always a risk of:

    • Missing files
    • Broken chats or incomplete backups
    • Lost contacts
    • App data errors

    Keeping your current device eliminates these problems.

    Refurbishing keeps your data safe because:

    • You continue using the same phone
    • No migration errors
    • No compatibility issues
    • Less risk of data loss

    When sensitive information matters, refurbishing is the safest option.


    8. You Can Upgrade Individual Parts Instead of Replacing Everything

    Modern phones are modular to an extent. Many components can be replaced independently:

    • Display
    • Battery
    • Charging port
    • Back panel
    • Loudspeaker
    • Buttons
    • Camera lens
    • Vibration motor

    This makes refurbishing flexible and customizable.

    For example:

    • If only the camera is damaged, replace just that.
    • If the back glass is cracked, change only the glass.
    • If battery capacity decreases, replace the battery.

    This saves both money and time.


    9. It Increases the Resale Value if You Decide to Sell Later

    A phone that looks good and performs well sells for a better price.

    Refurbishing boosts resale value by:

    • Improving appearance
    • Fixing internal issues
    • Enhancing performance
    • Replacing old parts
    • Adding new casing or screen

    A small investment in refurbishing can give a much better return later.


    10. Perfect Option for Budget-Conscious Users

    Not everyone wants a new high-end phone every year. Some individuals prefer functionality over fashion. For students, small business owners, parents, or those with limited budgets, refurbishing is the smartest choice.


    Common Scenarios Where Refurbishing Is the Best Option

    ✔ Cracked screen

    ✔ Poor battery life

    ✔ Slow performance

    ✔ Water damage (minor to moderate)

    ✔ Faulty buttons

    ✔ Speaker/Mic problems

    ✔ Damaged charging port

    ✔ Overheating due to dust

    In all these situations, refurbishing restores the phone effectively at a much lower cost.


    When You Should Consider Replacing Instead of Refurbishing

    To remain honest and transparent (trustworthiness), here are cases where replacement might be better:

    • Severe motherboard damage
    • Device no longer receives security updates
    • Multiple hardware issues at once
    • Cost of refurbishing is too close to cost of new device
    • You need major camera or performance upgrades

    A good technician will always guide you honestly.


    How to Ensure a Good Refurbishing Experience

    Here are expert-backed tips:

    ✔ Choose a reputable repair center

    Look for experienced technicians and original or high-quality parts.

    ✔ Ask for diagnosis first

    A clear estimate avoids surprise costs.

    ✔ Request old parts back

    Ensures genuine replacements were made.

    ✔ Ask for warranty on repairs

    Even 15–30 days adds peace of mind.

    ✔ Clean your data or take backup

    Always backup important information.

    ✔ Test everything before leaving

    Check speaker, mic, camera, network, touch, charging, and buttons.

    By following this checklist, you ensure the refurbishing process is safe, effective, and worth your money.

    FAQs – Refurbishing Your Cell Phone

    1. What does refurbishing a phone include?

    Refurbishing usually includes replacing worn-out parts, cleaning the internal components, updating software, and restoring the phone’s exterior to look and work like new.

    2. Is refurbishing cheaper than buying a new phone?

    Yes. Refurbishing typically costs a small fraction of a new device and offers excellent value if your phone still meets your needs.

    3. Does refurbishing improve battery life?

    Yes. Battery replacement or recalibration is part of refurbishing and restores backup and performance.

    4. Will my phone look new after refurbishing?

    In most cases, yes. Replacing the casing, screen, and back panel can make the phone look almost brand new.

    5. Is refurbishing safe for my data?

    Yes. You continue using the same device, so your apps and files remain intact unless you choose to reset the phone.

    6. Can any phone be refurbished?

    Most phones can be refurbished unless there is severe motherboard damage or the repair cost is too close to the price of a new device.

    7. How long does refurbishing take?

    Minor refurbishing may take 30 minutes to a few hours; full restoration may take a day, depending on parts availability.

    8. Will refurbishing increase resale value?

    Absolutely. A clean, fully functional phone always sells at a higher price than a damaged or slow one.

    9. Is refurbishing good for the environment?

    Yes. It reduces electronic waste and decreases the demand for new manufacturing, making it an eco-friendly choice.

    10. Should I refurbish or replace my old phone?

    Refurbish if the problems are minor—like screen, battery, or port issues. Replace only when the motherboard is severely damaged or when you need major feature upgrades.


    Conclusion

    Refurbishing your cell phone is one of the smartest decisions you can make—financially, practically, and environmentally. You save money, extend your device’s life, avoid the hassle of learning a new model, and reduce electronic waste. Whether your phone has a cracked screen, poor battery backup, or minor performance issues, refurbishing can bring it back to life and restore its full usability.

    “The best phone isn’t always the newest one—it’s the one that works perfectly in your hands.”

    If your device still has potential, refurbishing gives you the chance to keep a phone you love while keeping your budget intact.

  • How to Protect Your Phone Screen and LCD from Damage

    How to Protect Your Phone Screen and LCD from Damage

    Your phone is one of the most used, most touched, and most valuable items you carry every day. It goes wherever you go—your office, home, gym, market, bus, train, and sometimes even your bed. With so much daily use, it’s no surprise that the screen is the part most likely to get damaged.

    In modern smartphones, the display is also one of the most expensive components to repair or replace. A cracked LCD or touchscreen not only looks bad but can also affect usability, touch response, and even safety.

    “A single moment of carelessness can break a screen, but consistent care can protect it for years.”

    This guide explains how to protect your phone screen and LCD from damage using simple, proven, and up-to-date methods. Whether you’re using an iPhone, Samsung, Xiaomi, OnePlus, Vivo, Oppo, Motorola, or any other brand, the principles remain the same.


    Why Phone Screens Need Extra Protection

    Smartphone screens today use high-quality, sensitive materials for better viewing and touch response. Technologies like Gorilla Glass, Ceramic Shield, and AMOLED panels offer durability, but no display is completely unbreakable.

    Common causes of screen damage:

    • Accidental drops
    • Keys or coins scratching the screen
    • Pressure inside pockets or bags
    • Sitting on the phone
    • Screen hitting corners or edges
    • Lack of a protective case or screen guard
    • Temperature changes
    • Moisture exposure

    Even with toughened glass, the display can crack from a minor fall at the wrong angle.

    That’s why protecting your phone screen is not just recommended—it’s essential.

    protect cell phones properly

    Understanding Your Phone’s Screen: What Makes It Vulnerable

    Most modern screens are multi-layered, consisting of:

    • Glass or protective layer
    • Touch digitizer
    • Display panel (LCD, OLED, or AMOLED)

    When a phone falls:

    • The glass may crack
    • The digitizer may lose touch sensitivity
    • The LCD may show black spots, lines, or no display

    Even a hairline crack can spread over time. A small impact today can lead to a major break tomorrow.

    Knowing these vulnerabilities helps you take preventive steps proactively.

    “Screens are strong, but they’re not invincible. Protecting them is protecting your entire device.”


    1. Use a High-Quality Case: Your First Line of Defense

    A protective case absorbs impact and reduces the force reaching the screen.

    Types of cases that offer strong screen protection:

    Rugged or shockproof cases

    Ideal for people who drop their phones often.

    TPU (soft rubber) cases

    Affordable, flexible, and good for daily use.

    Hybrid cases (TPU + hard shell)

    Balance between durability and comfort.

    Wallet or flip cases

    Protects both front and back.

    MagSafe or magnetic cases (for compatible models)

    Convenient and secure.

    Why cases matter:

    • Reduce screen-shattering on impact
    • Protect phone corners (the weakest impact point)
    • Offer grip to prevent accidental slips
    • Prevent scratches from surfaces

    A case is cheaper than a screen replacement—and can protect your phone for years.


    2. Use a Screen Protector (Tempered Glass or Hydrogel)

    Screen guards are essential for protecting against scratches, scuffs, cracks, and impact.

    Types of screen protectors:

    Tempered Glass

    • Most widely used
    • Excellent protection against drops
    • Scratch-resistant
    • Affordable

    Hydrogel Film

    • Soft, flexible
    • Self-healing properties
    • Ideal for curved screens

    Privacy Screen Protectors

    • Reduces viewing angles
    • Protects screen and privacy

    Matte Screen Protectors

    • Reduces glare
    • Prevents fingerprints

    A good screen guard can absorb impact and break instead of your actual screen—saving you thousands in repairs.


    3. Avoid Keeping Your Phone in Pockets with Sharp Objects

    Keys, coins, pens, and other metal items can scratch the glass, even if it’s toughened.

    Always use separate pockets for your phone.

    If you’re carrying a bag:

    • Use a dedicated phone compartment
    • Avoid tight pockets with pressure

    This reduces both scratches and bending pressure on the screen.


    4. Clean Your Screen Properly and Regularly

    Dust, dirt, sand particles, and oils from your hands can wear down protective coatings and cause micro-scratches.

    Clean safely using:

    • Microfiber cloth
    • Screen cleaning spray (phone-safe)
    • Slightly damp cloth with distilled water
    • Isopropyl alcohol (70% or lower for screens)

    Do NOT use:

    • Tissue paper (abrasive)
    • Household cleaners
    • Sanitizer
    • Perfumes or deodorants
    • Paper towels

    Proper cleaning maintains clarity and prolongs the life of the display’s protective layer.


    5. Handle Your Phone Mindfully

    Small habits make a big difference.

    Avoid:

    • Using your phone while walking on stairs
    • Holding it loosely with one hand
    • Placing it near edges of tables
    • Keeping it on your lap (easy to forget and drop)
    • Using it while your hands are wet

    Adopt:

    • Using both hands when possible
    • Secure grip while talking
    • Keeping the phone on stable surfaces

    Mindful handling can reduce drops by over 70%.


    6. Keep Your Phone Away from Heat and Direct Sunlight

    High temperature weakens display adhesives and increases the risk of cracks.

    Heat sources to avoid:

    • Car dashboards
    • Direct sunlight
    • Hot surfaces
    • Gaming while charging (overheating)

    Excessive heat also affects touchscreen responsiveness and LCD health.


    7. Avoid Exposing Your Phone to Moisture

    Even water-resistant phones are not waterproof. Moisture can enter through:

    • Charging port
    • Earpiece
    • Speaker grill
    • Side buttons

    This can cause:

    • Display fogging
    • Touch malfunction
    • LCD discoloration

    Keep your phone away from:

    • Steam
    • Showers
    • Rain
    • Wet surfaces

    Moisture + screen = long-term damage.


    8. Do Not Apply Too Much Pressure on the Screen

    Common pressure risks include:

    • Keeping the phone in the back pocket and sitting on it
    • Sleeping on the phone
    • Storing it under heavy books
    • Pressing too hard on the touch panel

    This can damage:

    • LCD layers
    • Digitizer
    • Display adhesives

    Use gentle touches; modern screens are sensitive enough.


    9. Protect the Screen with a Proper Pouch or Sleeve

    This traditional method is still effective.

    Benefits:

    • Prevents dust
    • Cushions accidental bumps
    • Protects from scratches inside bags

    Choose padded, soft-touch pouches for maximum safety.


    10. Use Mobile Holders and Stands to Prevent Drops

    Using stands reduces accidental falls when:

    • Watching videos
    • Making video calls
    • Using GPS

    Even a small drop from a table can crack a screen if it hits the wrong angle.


    11. Be Careful When Charging Your Phone

    Dropping the phone while charging is one of the most common causes of cracked screens.

    Tips:

    • Avoid using the phone while charging
    • Keep the cable untangled
    • Ensure the charging port area is stable

    A simple fall from bed height can break the display.


    12. Invest in a Quality Phone Insurance or Screen Replacement Plan

    Many brands and carriers offer:

    • Accidental damage protection
    • Screen replacement coverage
    • Low-cost repair plans

    This reduces the financial impact if the screen ever cracks.


    13. Keep a Good Grip: Use a PopSocket or Grip Ring

    These accessories:

    • Reduce accidental drops
    • Provide better one-hand operation
    • Help during photography

    Better grip = fewer falls = longer screen life.


    14. Understand That Corner Impacts Are the Most Dangerous

    Screens rarely break from flat-faced impacts.
    They break when the phone hits corners or edges.

    That’s why:

    • Cases with raised edges
    • Screen protectors
    • Shock-absorbing bumpers

    are so important.


    15. Replace a Damaged Screen Protector Immediately

    A cracked tempered glass still offers less protection.
    Replace it as soon as it breaks, even lightly.

    This ensures your real screen stays protected.


    16. Don’t Ignore Small Cracks or Chips

    A tiny crack can spread due to:

    • Heat
    • Pressure
    • Moisture
    • Daily usage

    Repairing early prevents bigger damage.


    Internal Linking Suggestions

    (Include these at the end of the article, not inside the content)

    • Also read: How to Clean and Service Your Cell Phone
    • Also read: Common Mobile Phone Faults and How to Avoid Them
    • Also read: How to Protect Your Phone Battery Life

    Conclusion

    Protecting your phone screen is about combining the right accessories with good habits. Cases, screen protectors, and mindful handling go a long way in preventing screen cracks. Proper cleaning, temperature control, and safe storage add further protection. A well-maintained screen not only avoids expensive repairs—it keeps your phone looking new, working smoothly, and lasting longer.

    “Your phone’s screen is the window to everything it can do—protect it, and it will serve you without interruption.”

    Taking small steps today prevents costly repairs tomorrow.