Category: Mobile Phone Repair

  • 8 Best Shops To Buy Mobile Phones In Mumbai at Cheapest Rates

    8 Best Shops To Buy Mobile Phones In Mumbai at Cheapest Rates

    Mumbaikar?

    Buying a mobile phone in Mumbai can be both exciting and confusing. Are you planning to buy a new mobile phone or a tablet? Be it Samsung, iPhone, Vivo, Oppo, Realme, OnePlus, or Xiaomi, do you want to know the best places to buy that too at the lowest prices or wholesale?

    The city has everything — premium brand showrooms, local markets offering heavy discounts, refurbished phone hubs, and online-offline hybrid stores. If you know where to look, you can save thousands of rupees on the same smartphone.

    This guide is written to help real buyers. Whether you are looking for a brand-new Android phone, a budget iPhone, or a refurbished smartphone with warranty, this article covers the best places and shops in Mumbai where prices are genuinely competitive.

    Why Mumbai Is One of the Cheapest Cities to Buy Mobile Phones

    Mumbai’s mobile phone market is highly competitive. High demand, bulk sales, and multiple wholesale hubs help keep prices low.

    Key reasons why phones are cheaper in Mumbai:

    • Large wholesale markets supplying retailers
    • High competition among sellers
    • Availability of imported and refurbished devices
    • Frequent festival and clearance discounts
    • Direct distributor-level pricing in some areas

    If you shop smartly, Mumbai can offer better deals than online platforms — especially for offline buyers.

    New vs Refurbished vs Used Phones – What Should You Buy?

    Before choosing a shop, it’s important to understand what you are buying.

    New Mobile Phones

    • Factory-sealed
    • Brand warranty included
    • Higher price but lowest risk

    Refurbished Mobile Phones

    • Professionally tested and repaired
    • Often include 3–12 months warranty
    • Much cheaper than new devices
    • Ideal for budget-conscious buyers

    Used / Second-Hand Phones

    • Cheapest option
    • Warranty may not be available
    • Requires careful checking

    Tip: If you want savings without risk, refurbished phones with warranty are the best balance.

    The Best Mobile Phone Shops In Mumbai With Cheapest Rates

    1. Zoop Collection

    This is the favourite shopping place among most of the people from South Mumbai looking for gadgets like mobile phones, tablets and the like.

    The prices of all the products sold by them are among the lowest and the shopping experience here is worth it!

    Address: Shop No. 2, Mehta Bhavan, Charni Road, Girgaon, Mumbai – 400004.

    Contact No: 022 – 33486109

    Landmark: Near Hinduja College

    2. Alfa Mobile Store

    Alfa mobile store is one of the most famous gadgets store located in the western suburb of Vile Parle. Youngsters from the western part of the city flock here to buy their gadgets, be it cell phones, tablets, laptops or even other home appliances. The huge crowd of buyers here is little bit of a distraction but still people from this part prefer to buy here due to low prices and the huge range of collection of various gadgets.

    Address : 5 & 6, Dadi House, Irla Society Road, Vile Parle (West), Mumbai- 400056, Maharashtra, India.

    Contact No. : (022) 26713459 | (022) 26719696

    Landmark : Near Prime Mall

    Also Read Tips To Select And Buy New Cell Phones

    3. Gunjan Electronics

    Located near Santacruz station on the west side, it is equally famous due to its low prices. It sells mobile phones, tablets, digital cameras, laptops as well as home appliances.

    Address: Shop No 2, Balaji Co Operative Housing Society, Next To Shabri Hotel, Tilak Road, Santacruz West, Mumbai – 400054

    Phone: 022-61634108

    Landmark: Santacruz Station (West).

    4. Sony Collection

    This mobile phone shop is located in Kalina in Santacruz east. It is equally famous due to low and competitive rates of all cell phones sold here.

    Address: Kalina

    Landmark: Near Kalina Mosque

    5. Khazana Collection

    In kalina, there has emerged a mini market for new as well as used phones. There are about 10 to 15 stores near Air India Colony – all of them selling either new or old smartphones. And Khazana collection is the most famous among them.

    Address: Air India Colony, Kalina, Santacruz East

    6. Top 10 Stores

    Recently Top 10 has emerged among the most famous mobile phone retail shop with various stores near most of the railway stations in Mumbai. It is famous for its competitive prices and also wide range of various brands of mobile phones. It has a store in Andheri, Vile Parle, Kandivali, Goregaon, Dahisar, Dadar, Kurla, Ghatkopar, Thane and near many, many more railway stations. They are opening many new stores all over Mumbai and are expanding rapidly.

    7. The Mobile Store

    Run by Essar Group, a multinational India company, it has a pan India presence with stores all over the country. It also has many outlets in Mumbai. Its stores have a large collection of models with good courteous staff. But the pricing being not very competitive compared to its competitors has been an obstacle for it to get more customers.

    Address: You can get locations of its stores at www.themobilestore.in

    8. Manish Market

    It is among the most famous places for grey market electronics goods. No wonder people looking for cheaper cell phones without bill (of course without warranty!) visit it. The problem here is that if you are not alert you may most probably be swindled very easily! Also as there are many salesmen out there who want to make quick money, through unethical means, they have lots of tricks up their sleeves to make you buy a fake and pay for an original. So avoid it if you are not well versed with their dirty tricks!

    Alternatively, many electronics retail chains like Vijay Sales, Croma, Reliance Retail,etc also offer good competitive prices and are worth visiting during shopping seasons due to various attractive offers.

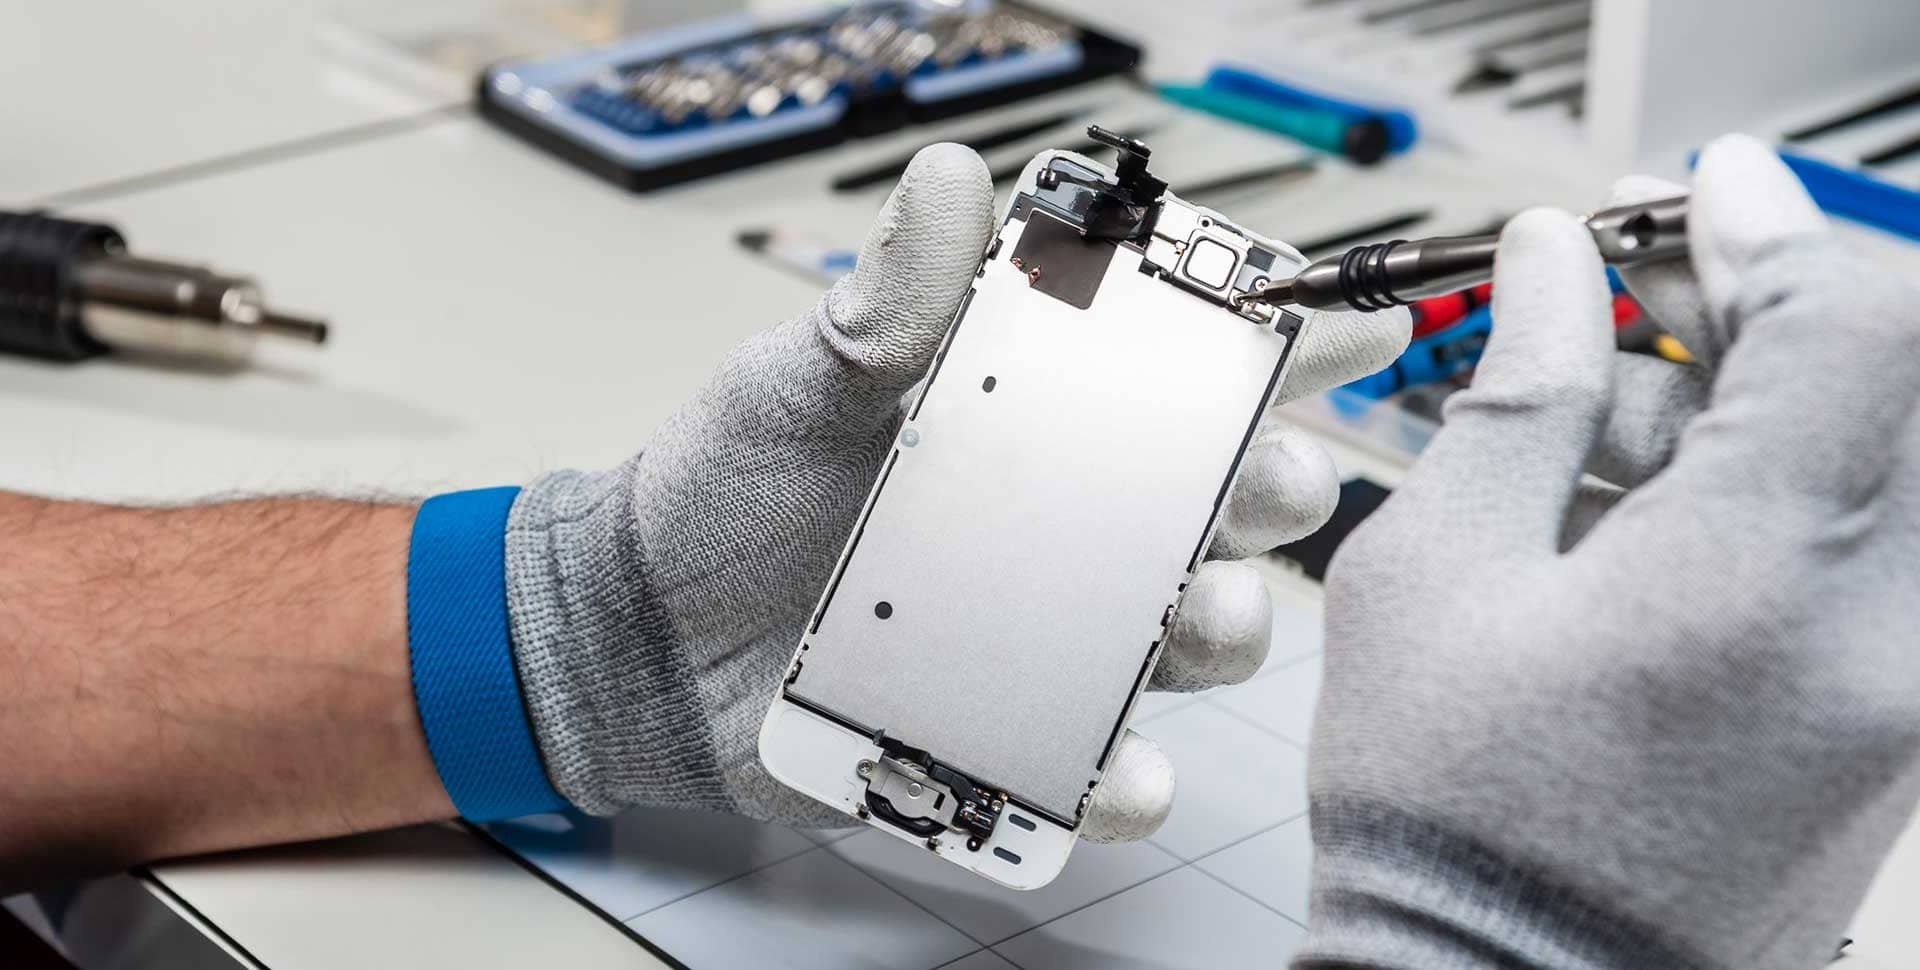
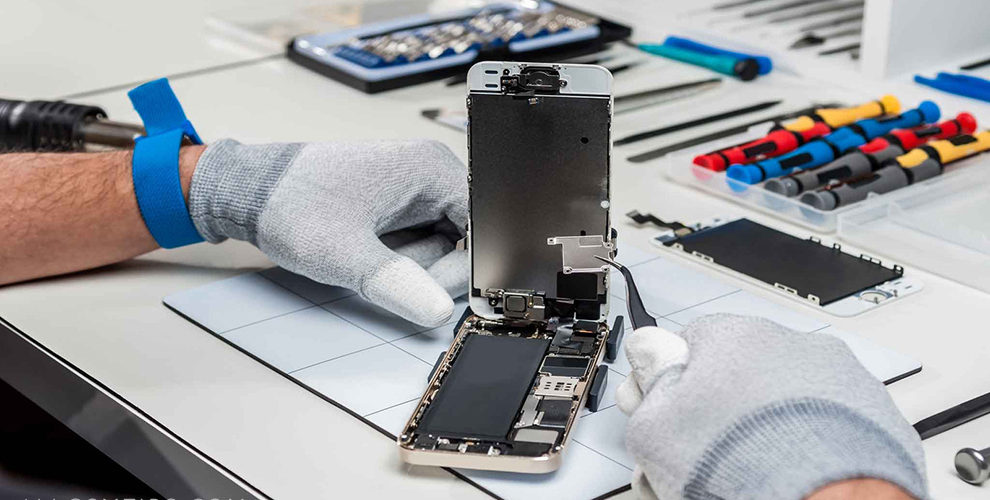
    Read The Best Mobile Phone Repairing Institutes In Mumbai

    How to Get the Cheapest Price When Buying Offline

    Buying from the right shop is only half the job. The rest depends on how you buy.

    Smart Tips to Save More

    • Compare prices at 2–3 shops
    • Ask for final price, not sticker price
    • Negotiate politely
    • Check festival or clearance offers
    • Ask about exchange value
    • Avoid unnecessary accessories bundles

    Always check IMEI on the box and phone before payment.


    Things to Check Before Paying

    Never skip these checks, even if the deal looks amazing.

    Must-Check Points

    • IMEI number verification
    • Factory seal intact (for new phones)
    • Warranty card or invoice
    • Charger and cable authenticity
    • Physical inspection for refurbished phones

    A cheap phone is not a good deal if it turns out to be faulty. While if you need repair services in Mumbai, you can see the best mobile repairing shops and service centres in Mumbai and get excellent services at affordable rates.

    Our suggestion: Before buying a new mobile phone, if there is a considerable difference between various sellers, you can also check the rates and prices online on ecommerce websites like flipkart.com and amazoncom. If there is not much difference in the prices, you can buy it anywhere.

    Offline vs Online – Which Is Cheaper in Mumbai?

    FactorOffline ShopsOnline Platforms
    BargainingYesNo
    Instant deliveryYesNo
    Physical inspectionYesNo
    Exchange flexibilityHighLimited
    Hidden dealsCommonRare

    In many cases, offline Mumbai shops beat online prices, especially for refurbished and mid-range phones.

    Mumbai offers some of the best and cheapest mobile phone buying options in India if you know where to look. From wholesale markets like Lamington Road to trusted local stores in Borivali and Andheri, buyers can save significantly without compromising quality.

    Take your time, compare prices, verify authenticity, and choose a seller with a good reputation. A little effort can easily save you several thousand rupees on your next smartphone purchase.

    Please let us know, if you know any more mobile phone shops and stores in Mumbai with cheaper and competitive prices.

  • How to Factory Reset & Hard Reset Samsung Galaxy S5 (All Methods)

    How to Factory Reset & Hard Reset Samsung Galaxy S5 (All Methods)

    If your Samsung Galaxy S5 is slow, frozen, locked, or behaving strangely, a reset is often the most practical solution. Many common software-related problems can be fixed by restoring the device to its original state. However, resetting a smartphone should always be done with proper understanding, because it permanently removes personal data from the device.

    This detailed guide explains all working methods to factory reset and hard reset the Samsung Galaxy S5, when to use each method, and what precautions you must take before proceeding. The steps are written in simple language so that even beginners can follow them confidently.

    “A reset does not repair hardware, but it often gives new life to a struggling smartphone.”


    Understanding Factory Reset and Hard Reset (Simple Definition)

    A factory reset means restoring a mobile phone to its original software condition, just like it was when first taken out of the box. All user data stored in the phone’s internal memory is erased.

    A hard reset is simply another way of performing a factory reset, usually done using hardware buttons or recovery mode when the phone cannot be accessed normally.

    Both terms are often used interchangeably in mobile repairing and smartphone troubleshooting.

    Important to know:

    • Internal storage data is deleted
    • SIM card data is not affected
    • Memory card data usually remains safe, but removing it is recommended

    About Samsung Galaxy S5 (Quick Overview)

    The Samsung Galaxy S5 is a popular Android smartphone known for features like:

    • Water and dust resistance
    • Fingerprint sensor
    • Private mode
    • Heart rate monitor

    Even though it is an older device, it is still widely used and frequently comes to repair shops for software resets, pattern lock issues, and performance problems.


    When Should You Reset Samsung Galaxy S5?

    A reset is not needed for every problem. It should be used only when basic troubleshooting fails.

    Common situations where reset is helpful:

    • Phone is very slow or lagging
    • Device freezes or hangs frequently
    • Apps keep crashing
    • Forgotten screen lock, PIN, or pattern
    • Phone stuck on logo or boot loop
    • Virus or malware infection
    • Before selling or giving away the phone
    • Major software errors after updates

    If your phone only has a minor glitch, restarting it may be enough.


    Soft Reset vs Hard Reset (Important Difference)

    Before moving to a full reset, always try a soft reset.

    Soft Reset (Simple Reboot)

    A soft reset means restarting the device without deleting data.

    How to do it:

    • Press and hold the Power button
    • Select Restart or Power Off
    • Turn the phone back on

    If the phone is frozen, keep the Power button pressed until it shuts down.

    If the problem is solved after reboot, a hard reset is not required.


    Things to Check Before Performing a Factory Reset

    Before resetting your Galaxy S5, take these precautions seriously.

    Essential pre-reset checklist:

    • Backup important data (contacts, photos, videos, documents)
    • Charge the battery to at least 40–50%
    • Remove memory card if possible
    • Sign out of important accounts if accessible

    Also read: How to Backup and Restore an Android Phone (internal link opportunity)

    “Data loss hurts more than a slow phone. Backup is not optional.”


    What Data Gets Erased After Reset?

    A factory reset will remove:

    • Google account linked to the device
    • Installed applications and app data
    • Contacts stored in phone memory
    • Messages, call logs
    • Photos, videos, audio files
    • System and app settings

    It does not repair hardware faults like broken screens, battery issues, or charging port damage.


    Method 1: Factory Reset Samsung Galaxy S5 Using Settings (Recommended)

    This is the easiest and safest method if you can access the phone menu.

    Steps:

    1. Open the Menu
    2. Go to Settings
    3. Scroll to Backup and Reset
    4. Select Factory Data Reset
    5. Tap Reset Device
    6. Confirm by selecting Erase Everything

    The phone will restart automatically and begin the reset process.

    Factory Reset Samsung Galaxy S5 Using Settings

    Best used when:

    • Phone is working normally
    • Screen lock is known
    • No boot issues

    Method 2: Hard Reset Samsung Galaxy S5 Using Hardware Buttons

    This method is useful when:

    • Phone is locked
    • Touchscreen is not responding
    • Device is stuck on logo
    • Settings menu is inaccessible

    Button Combination Method (Recovery Mode)

    Steps:

    1. Power off the Samsung Galaxy S5
    2. Press and hold:
      • Volume Up
      • Home button
      • Power button
    3. Release all buttons when the Android recovery screen appears
    4. Use Volume Down to navigate to Wipe data / factory reset
    5. Press Power button to select
    6. Choose Yes – delete all user data
    7. After completion, select Reboot system now

    The device will restart with factory settings.

    This is the most commonly used method by mobile repair technicians.

    Hard Reset Samsung Galaxy S5 Using Hardware Buttons

    Method 3: Factory Reset Using Dial Code (Advanced & Risky)

    Samsung devices support a reset code that forces formatting.

    Reset Code:

    *2767*3855#
    

    How it works:

    • Open the phone dialer
    • Enter the code exactly
    • The phone immediately starts resetting

    Important warnings:

    • No confirmation screen
    • No chance to cancel
    • Instant data deletion

    Use this method only if you fully understand the consequences.

    Factory Reset Samsung Galaxy S5 Using Dial Code

    Which Reset Method Should You Choose?

    SituationRecommended Method
    Phone working normallySettings reset
    Forgot pattern or PINButton method
    Phone stuck or frozenRecovery mode
    Technician-level useDial code

    Common Problems After Reset (And Solutions)

    Phone Asking for Google Account

    This is normal due to security protection.

    Solution:

    • Sign in with the previously linked Google account
    • If forgotten, proper account recovery is required

    Phone Still Slow After Reset

    Possible reasons:

    • Old hardware limitations
    • Storage wear
    • App compatibility issues

    Reset improves software, not aging hardware.


    Reset Did Not Fix the Problem

    If the issue continues, it may be:

    • Firmware corruption
    • Hardware fault
    • Power IC or memory issue

    In such cases, software flashing or professional repair may be required.

    Also read: What Is Mobile Phone Flashing and When Is It Needed? (internal link opportunity)


    Expert Tips for Safe Reset (From Repair Experience)

    • Always try reboot first
    • Avoid repeated resets unnecessarily
    • Do not interrupt the reset process
    • Keep phone connected to battery if possible
    • Use original button combinations only

    Reset Myths You Should Ignore

    • ❌ Reset improves battery health (false)
    • ❌ Reset fixes broken hardware (false)
    • ❌ Reset recovers deleted data (false)

    A reset only fixes software-level problems.


    Frequently Asked Questions (Quick Answers)

    Does hard reset remove viruses?
    Yes, most software-based malware is removed.

    Will reset unlock a stolen phone?
    No. Security protections remain active.

    Can data be recovered after reset?
    Usually no, unless backups exist.


    Final Thoughts

    Resetting a Samsung Galaxy S5 is a powerful troubleshooting step when used correctly. Whether you choose a factory reset from settings or a hard reset using buttons, the key is preparation and understanding.

    Use resets wisely, back up your data, and remember that not every phone problem needs formatting.

    A reset is a solution—not a shortcut.

  • Essential Tools for Beginner Cell Phone Repair Technicians

    Essential Tools for Beginner Cell Phone Repair Technicians

    Starting a career in mobile phone repairing can feel exciting and confusing at the same time. You see damaged smartphones every day—broken screens, weak batteries, charging issues, sound problems—and you know they can be fixed. But the first big question is simple:

    What tools do I actually need to start repairing phones properly?

    Many beginners make the mistake of buying random kits online or investing in expensive equipment too early. The truth is, successful technicians begin with the right basics, not with everything available in the market.

    This guide explains the essential tools for beginner-level phone repair work, why each one matters, and how to use them safely. Whether you want to fix Android devices, iPhones, or other mobile phones, this article will help you build a strong foundation.

    “Good repair work is not about speed. It is about accuracy, patience, and using the right tools at the right time.”

    It is not necessary to buy all of the tools. Instead you can get only those which are only essential, as some of them are required only if you are master technicians. For example, you will need soldering station and all other soldering related stuff only if you want to perform soldering. Otherwise you can just carry on with the basic tools.

    Without a proper set of tools you will not be able to open and then fix the handset.


    Understanding the Role of Tools in Mobile Repairing

    A smartphone has tiny screws, delicate connectors, fragile flex cables, and sensitive components. Using incorrect or low-quality equipment can cause more damage than the original fault.

    The right tools help you:

    • Open devices without breaking frames or glass
    • Remove and refit parts safely
    • Diagnose hardware problems accurately
    • Work faster with fewer mistakes
    • Build customer trust through professional work

    For beginners, the goal is not advanced micro-soldering on day one. The goal is safe disassembly, basic diagnosis, and correct replacement of common parts.

    Popular Cell Phone Repair Tool Companies

    It is very important to buy tools of high quality. For this you also need to know the best companies manufacturing this stuff. Below are some widely trusted tool manufacturers used in mobile phone repairing workshops around the world.

    • Sunshine
    • Mechanic
    • Relife
    • iFixit
    • 2UUL
    • QianLi
    • Hakko
    • Sugon
    • Yaxun

    Important Note

    No single brand is perfect for all tools. Most professional technicians build their toolkit gradually by combining:

    • Reliable brands
    • Personal comfort
    • Repair requirements

    It is always better to start with essential tools from trusted manufacturers and upgrade as your skills improve. When you wish to upgrade and start advanced level repairis, you will need to buy advanced chip-level and motherboard-level eMMC mobile repairing tools that most technicians of this level have.


    Basic Hand Tools Every Beginner Technician Must Have

    Precision Screwdriver Set

    Modern smartphones use very small screws. Different brands use different screw heads.

    A good precision screwdriver set usually includes:

    • Phillips
    • Pentalobe (commonly used in iPhone models)
    • Torx
    • Tri-point
    • Flat head

    Important tip:
    Always apply gentle pressure. Stripped screws are one of the most common beginner mistakes.

    Why it matters:
    Without the correct screwdriver, opening a device safely is almost impossible.


    Plastic Opening Tools and Spudgers

    Plastic tools are safer than metal when opening a phone.

    These tools help you:

    • Separate the screen from the body
    • Disconnect battery and display connectors
    • Pry open clips without scratching components

    Never use sharp metal objects on connectors. One slip can damage the motherboard.


    Suction Cup Tool

    A suction cup helps lift displays gently, especially in smartphones with tightly sealed screens.

    Used mainly for:

    • Screen replacement
    • Battery access
    • Back glass removal (with care)

    Practical insight:
    Warm the edges slightly before using a suction cup. This softens adhesive and reduces cracking risk.


    SIM Card Ejector Pin

    This simple tool is often overlooked.

    It is needed to:

    • Remove SIM trays before opening phones
    • Prevent tray damage during disassembly

    Using needles or pins can bend or break the tray.


    Essential Power and Heating Tools

    Hot Air Gun or Heat Pad

    Most smartphones use strong adhesive for screens and batteries.

    Controlled heat helps:

    • Loosen display adhesive
    • Remove batteries safely
    • Open sealed back panels

    Safety reminder:
    Too much heat can damage OLED screens, batteries, or internal sensors. Always use moderate temperature and patience.


    Adjustable Power Supply (Basic Level)

    At beginner stage, this is optional but useful.

    It helps with:

    • Checking short circuits
    • Power consumption testing
    • Understanding phone boot behavior

    Experience tip:
    Start learning power supply usage during training. It builds strong diagnostic skills early.


    Measuring and Testing Tools

    Digital Multimeter

    A multimeter is one of the most important diagnostic tools.

    It is used to:

    • Check continuity
    • Measure voltage
    • Identify short circuits
    • Test fuses and coils

    Important fact:
    Modern smartphones use digital sensors and ICs, so a multimeter cannot test everything. But it remains essential for basic hardware checks.


    USB Current Tester

    This tool shows how much current a phone draws while charging.

    Useful for diagnosing:

    • Dead phones
    • Charging issues
    • Power IC problems (basic understanding)

    Real-world example:
    A phone showing 0.00A while charging often points to charging port or power circuit issues.


    Cleaning and Maintenance Tools

    Isopropyl Alcohol (IPA)

    Used for:

    • Cleaning boards
    • Removing adhesive residue
    • Cleaning connectors and contacts

    Always use high-purity alcohol. Avoid water-based cleaners.


    Anti-Static Brush

    Helps remove dust and corrosion gently.

    Why it matters:
    Dust inside speakers, charging ports, and cameras can cause faults that look serious but are easy to fix.


    Microfiber Cloth

    Used for:

    • Cleaning displays
    • Final device finishing
    • Preventing fingerprints during assembly

    A clean finish improves customer satisfaction instantly.


    Soldering Tools (Beginner Awareness Level)

    Soldering Iron (Temperature Controlled)

    At beginner stage, soldering is usually limited to:

    • Charging port replacement
    • Speaker terminal repair
    • Simple wire jumpers

    Important:
    Avoid cheap, non-temperature-controlled irons. They cause board damage.


    Solder Wire and Flux

    • Use good-quality solder wire
    • Flux improves solder flow and reduces heat damage

    Practical insight:
    Clean solder joints always look shiny. Dull joints often mean weak connections.


    Safety Tools You Should Never Ignore

    Anti-Static Wrist Strap

    Prevents electrostatic discharge (ESD), which can silently damage ICs.

    Especially important when:

    • Handling motherboards
    • Working in dry environments

    Safety Glasses

    Glass shards from broken screens can cause eye injuries.

    Simple protection saves long-term problems.


    Heat-Resistant Gloves

    Useful while handling heated devices and batteries.


    Organizing Tools for Professional Work

    Magnetic Screw Mat

    Smartphones contain many screws of different sizes.

    A magnetic mat helps you:

    • Keep screws organized
    • Avoid mixing lengths
    • Prevent internal damage during reassembly

    Expert habit:
    Label screw positions while removing them.


    Tool Storage Box

    A clean workspace builds discipline.

    Organized tools mean:

    • Faster repairs
    • Fewer lost parts
    • Better customer confidence

    Common Beginner Mistakes With Tools

    Understanding mistakes is part of experience.

    Avoid these errors:

    • Using force instead of patience
    • Applying too much heat
    • Using metal tools near connectors
    • Mixing screws
    • Buying advanced tools without basics

    “In phone repair, most damage happens not because of lack of knowledge, but because of hurry.”


    Choosing Tool Quality: Cheap vs Reliable

    Beginners often ask whether low-cost kits are enough.

    Balanced advice:

    • Avoid extremely cheap tools
    • You don’t need premium brands initially
    • Focus on reliability and comfort

    A broken screwdriver tip can ruin a device costing thousands.


    Tools vs Skills: What Matters More?

    Tools alone do not make a technician.

    Skills come from:

    • Proper training
    • Supervised practice
    • Understanding phone design
    • Learning troubleshooting logic

    Good tools support your skills. They do not replace them.


    Building Your First Beginner Tool Kit (Summary List)

    For easy reference, a beginner toolkit should include:

    • Precision screwdriver set
    • Plastic opening tools
    • Suction cup
    • Heat gun or heat pad
    • Digital multimeter
    • USB current tester
    • Isopropyl alcohol (IPA)
    • Anti-static brush
    • Microfiber cloth
    • Magnetic screw mat
    • SIM ejector pin
    • Basic soldering iron (optional early)

    This setup covers most screen, battery, charging, speaker, and basic hardware repairs.


    Career Insight for New Repair Technicians

    Mobile phone repairing is not just about fixing devices. It is about problem-solving.

    You will work on:

    • Android smartphones
    • iPhones
    • Tablets
    • Different brands and designs

    Technology changes, but fundamental repair principles remain the same. Strong basics always win.


    Final Thoughts

    Starting phone repair work becomes much easier when you know what tools truly matter. You do not need everything at once. Begin with essentials, practice safely, and upgrade as your skills grow.

    Focus on:

    • Correct tools
    • Clean working habits
    • Patience and learning

    If you build your foundation properly, advanced repairs will feel natural later.

    A well-prepared technician fixes phones confidently, not forcefully.

  • What Are the Main Parts Inside a Cell Phone & Their Functions?

    What Are the Main Parts Inside a Cell Phone & Their Functions?

    Have you ever wondered what is inside your mobile phone? We use smartphones every day for calling, browsing, photography, payments, and work. Yet most people have no idea how many parts work together inside a small device to make all this possible.

    Understanding the internal parts of a cell phone is useful for many reasons. It helps users take better care of their devices. It helps students and beginners learn mobile technology basics. And for mobile repairing technicians, this knowledge is the foundation of troubleshooting and repair work.

    You don’t need to open a phone to respect it—just knowing what’s inside changes how you use it.

    In this guide, we will clearly explain the main parts inside a cell phone and their functions, using simple language and practical examples. The information applies to Android phones, iPhones, and most modern smartphones, with minor design differences across brands.


    External Parts vs Internal Parts of a Cell Phone

    Before going deeper, it is important to understand how mobile phone parts are broadly classified.

    External Parts

    External parts are the components you can see and touch from outside, such as:

    • Screen glass
    • Back panel
    • Side buttons
    • Camera lens cover
    • SIM tray

    These parts protect the phone and help with user interaction.

    Internal Parts

    Internal parts are located inside the phone body. These components handle power, processing, sound, display, connectivity, and sensors. Most phone problems occur due to issues with these internal components.

    This article focuses mainly on internal smartphone parts and how they work together.


    1. Motherboard (PCB / Logic Board)

    The motherboard, also called the PCB (Printed Circuit Board) or logic board, is the most important part inside a cell phone.

    It is usually green, blue, or black in color and holds all major electronic components.

    What the motherboard does:

    • Connects all internal parts
    • Distributes power across the phone
    • Controls communication between components
    • Houses critical chips and ICs

    In simple words:
    The motherboard is to a phone what an engine is to a car.

    Key components mounted on the motherboard:

    • Processor (CPU)
    • Memory chips
    • Power management IC
    • Network and signal ICs
    • Audio IC
    • Charging IC

    If the motherboard is damaged, the phone may not power on at all.


    2. Processor (CPU / SoC)

    The processor, also known as the CPU or System on Chip (SoC), is the brain of the smartphone.

    Function of the processor:

    • Executes apps and commands
    • Controls system operations
    • Handles multitasking
    • Processes camera and video data

    Modern processors combine multiple functions like graphics, AI processing, and connectivity into one chip.

    A faster processor improves:

    • App performance
    • Gaming experience
    • Camera processing
    • Power efficiency

    3. Battery

    The battery supplies power to the entire mobile phone.

    Most smartphones use lithium-ion or lithium-polymer batteries.

    Battery functions:

    • Stores electrical energy
    • Powers all phone components
    • Supplies voltage to the motherboard

    Typical smartphone batteries operate around 3.7V to 3.8V DC.

    Common battery-related issues:

    • Fast draining
    • Overheating
    • Phone not charging
    • Sudden shutdowns

    Important tip:
    Using poor-quality chargers can reduce battery life and damage charging circuits.


    4. Display (Screen Module)

    The display is the visual output unit of a smartphone.

    It allows users to:

    • See content
    • Watch videos
    • Read messages
    • Navigate apps

    Types of displays:

    • LCD (Liquid Crystal Display)
    • OLED / AMOLED displays

    All modern phones use display assemblies, where the screen and touch layer are fused together.


    5. Touchscreen (Digitizer)

    The touchscreen, also called the digitizer, is a transparent layer placed above the display.

    Function:

    • Detects finger touch
    • Converts touch into electrical signals
    • Sends input to the processor

    6. Microphone (Mic)

    The microphone converts sound into electrical signals.

    Types of microphones in smartphones:

    • Primary mic (for calls)
    • Secondary mic (for noise cancellation)

    Location:

    • Usually near the bottom of the phone
    • Sometimes near the camera for video audio

    If the mic fails:

    • The other person cannot hear your voice clearly
    • Voice recordings may sound distorted

    7. Earpiece Speaker (Receiver)

    The earpiece speaker, also called the receiver, is used during phone calls.

    Function:

    • Converts electrical signals into sound
    • Allows you to hear the caller’s voice

    It is located at the top front of the phone.

    Low sound during calls often indicates:

    • Dust blockage
    • Speaker damage
    • Audio IC issues

    8. Loudspeaker (Ringer / Buzzer)

    The loudspeaker, commonly called the ringer, produces loud sound.

    Used for:

    • Ringtones
    • Music
    • Videos
    • Notifications
    • Speakerphone calls

    If the loudspeaker is faulty:

    • Ringtones may be silent
    • Media sound may not work

    9. Vibration Motor

    The vibration motor creates vibration alerts.

    Function:

    • Rotates or oscillates to produce vibration
    • Alerts users silently during calls or notifications

    Modern phones use compact vibration motors that are power-efficient and precise.


    10. Antenna

    The antenna is responsible for signal transmission and reception.

    Handles:

    • Voice calls
    • Mobile data
    • Wi-Fi
    • Bluetooth
    • GPS

    In modern smartphones:

    • Antennas are internal
    • Integrated into the frame or PCB
    • Not visible from outside

    Weak signal issues are often related to antenna damage or loose connections.


    11. Charging Port (Charging Connector)

    The charging port connects the phone to a charger.

    Functions:

    • Charges the battery
    • Transfers data to computers
    • Supplies power to the motherboard

    Common problems include:

    • Loose charging
    • Slow charging
    • Phone not detected by PC

    Dust and moisture are the biggest enemies of charging ports.


    12. SIM Card Connector

    The SIM connector connects the SIM card to the motherboard.

    Function:

    • Identifies the user on the mobile network
    • Enables calling, messaging, and data services

    If damaged:

    • “No SIM” error appears
    • Network signal may drop

    13. Battery Connector

    The battery connector transfers power from the battery to the motherboard.

    It must:

    • Provide stable voltage
    • Maintain firm contact

    Loose connectors can cause random shutdowns.


    14. Flex Cables (Flex)

    Flex cables are thin, flexible connectors used inside phones.

    Used to connect:

    • Display
    • Touchscreen
    • Camera
    • Buttons
    • Sensors

    They allow compact internal design and easy component communication.


    15. Cameras (Front & Rear)

    Smartphones contain multiple cameras.

    Functions:

    • Photography
    • Video recording
    • Video calls
    • Face recognition

    Camera modules are connected to the motherboard via flex connectors.


    16. Fingerprint Sensor

    The fingerprint sensor provides biometric security.

    Types:

    • Rear-mounted
    • Side-mounted
    • In-display sensors

    It connects directly to the motherboard and works with secure system software.


    17. Power and Volume Buttons

    These switches allow physical control of the device.

    Functions:

    • Power on/off
    • Lock/unlock screen
    • Adjust volume
    • Take screenshots

    They are connected using flex cables or small switch boards.


    Plug-and-Play vs Soldered Components

    Internal phone parts are either:

    • Plug-and-play (connectors, speakers, cameras)
    • Soldered (ICs, chips)

    Important for technicians:
    Soldered parts require proper soldering skills and tools for repair.


    Why Knowing Phone Parts Is Important

    Understanding internal phone components helps:

    • Diagnose problems faster
    • Avoid unnecessary repairs
    • Use phones more carefully
    • Learn mobile repairing professionally

    Every phone problem tells a story—knowing the parts helps you read it correctly.


    Final Thoughts

    A cell phone may look simple from the outside, but inside it is a complex combination of electronic components working together in perfect coordination. From the motherboard to the smallest flex cable, every part has a specific role.

    Whether you are a curious user, a student, or an aspiring mobile repair technician, understanding the main parts inside a cell phone and their functions gives you clarity, confidence, and technical awareness.

    Knowing what’s inside your smartphone helps you use it smarter—and fix it better when something goes wrong.

  • Free Cell Phone Repair Guides And Tutorials

    Free Cell Phone Repair Guides And Tutorials

    Free Cell Phone Repair Tutorials

    You can easily learn cell phone repair for free with our free cell phone repair guides and tutorials. Here we are providing free training for people interested in learning the skills required to repair all types of smartphones, iPhones and tablets because tablets are also almost the same, nothing different! Also you have to keep in mind that the repair procedure for all mobile phones is almost same. All the following guides start from basics of repairs and also cover advanced troubleshooting methods.

    In the age of internet, you can learn anything like a do-it-yourselfer by getting access to proper manuals, tips, guides or tutorials. You will also need lots of practice and have to do trial and error until you learn a particular skill perfectly.

    Other than our guides which are for both beginners and experts, you can get loads of tips and information on many other tutorial websites. I have come across many people who have learned cell phone repair only through Google and YouTube! YouTube is the best resource to get free information of various mobile phone repair procedures and techniques.

    free cell phone repair tutorials

    Free Cell Phone Repair Lessons

    The topics covered are how to use various tools, how to check various parts and components inside a mobile phone the components, the printed circuit board (motherboard) description and all the stuff you need to learn. We are also providing here tips to start and successfully run your own cell phone repair business.

    How To Use A Multimeter In Mobile Phone Repairs

    How To Make Jumpers in Mobile Phones Repairs

    How To Test Or Check LCD Of A Cell Phone

    How To Check Battery Of A Cell Phone With Multimeter

    How To Check A Ringer (Loud Speaker) In Cell Phones

    How To Check A Mic In Cell Phones

    How To Check A Speaker In Cell Phones

    How To Check A Ringer (Loud Speaker) In Cell Phones

    How To Check Tracks On A PCB For Mobile Phone Repairs

    How To Use A Rework Station In Mobile Phone Repairing

    How To Repair A Water Damaged Smartphone

    How To Run A Cell Phone Repair Business – Easy Guide

    Default Security Codes Of All Cell Phones

    How To Factory Reset/Format A Cell Phone To Remove Virus

    How To Use Ultrasonic Cleaner Machine In Cell Phone Repairs

    How to Start A Cell Phone Repair Shop

    How To Check Shorting In Mobile Phones

    How To Remove Shorting In Mobile Phones

    List Of All Faults In Cell Phones

    How To Repair Your Cell Phone Yourself (DIY) – Easy Guide

    Other than the above mentioned topics, there are many other websites where you can get the information you need to learn cell phone repair.

    The other top sites for free cell phone repair guides and tutorials are

    1. iFixit: iFixit is among the top websites in the world for do-it-yourselfers. They have many guides for repairs of mobile phones, laptops, computers, iPhones, iPads and various other gadgets.
    2. GSM Forum: GSM forum is the world’s biggest and oldest forum of mobile phone technicians. Here all the oldies as well as newbies share the information for various techniques used to fix various models of phones and tablets. They have many different categories for different purposes. You should make it a habit to visit this site daily to increase you knowledge. Visiting it frequently helps you to keep yourself updated with the latest technology and developments.
    3. Another valueable theory resource: cellphonerepairtutorials.blogspot.com is a very good place to get all the basic knowledge of electronics. This website has a comprehensive list of many guides for beginners. Right from explanation of various parts and components to understanding the functioning of mobile communication, there are lots of topics which are useful as well as informative and is a must read for all the newbies.

    Read The 5 Best Mobile Repairing Institutes In Mumbai

    In addition to the above mentioned websites, there are various blogs, forums, Youtube channels, Whatsapp groups and Facebook groups which provide plenty of useful tips to newbie mobile repairing technicians. And all new technicians should have a passion of Googling and surfing Youtube for a few years daily to learn all those techniques and tricks which are essential to be learned by every mobile phone repair technician. Every technician must also follow mobile phone repair blogs to keep themselves updated.

    Note: All the above tips and tutorials are solely for information purpose. We do not guarantee the accuracy of any tip or technique.

    We have spent a lot of time writing these articles. So please share it on facebook and twitter to make it a success.

    Please keep visiting this page for getting more tips and updates.

    Please let us know if we can add any more important tutorials in this article.

  • How To Hard Reset Sony Xperia Z1 – All Methods

    How To Hard Reset Sony Xperia Z1 – All Methods

    Learn how to make a hard reset or format Sony Xperia Z1 by using any of our simple methods. Sony Xperia Z1 code named ”Honami” is a high-end Android smartphone produced by Sony. It is water as well as dust proof with a 20.7 megapixel camera and is shipped with Android 4.2 (Jelly Bean) operating system.

    Hard-reset means to format i.e you delete all the data in the phone memory. Many mobile repairing technicians do not know how to open pattern locks. With a hard reset through key combinations, you can easily open pattern locks in Android phones.The cell phone will also come back to its original factory settings. It is also called master-reset and even alternate reset. We are showing here all the methods to hard-reset your Xperia Z1.

    You should first try a soft-reset i.e to re-boot your handset. Just press the power button until it shuts down and then restart it. If the fault gets resolved, you do not need to perform a hard-reset.

    When is hard-reset required?

    • If you want to bring your phone back to its default settings.
    • If your device is infected by any virus.
    • If your handset is functioning very slowly.
    • If it gets stuck, freezes, hangs or become unresponsive frequently.
    • Some of the apps are crashing and not functioning properly and you are unable to even uninstall them manually.
    • If there is some software or OS related problem which you cannot resolve by basic methods.
    • When you are planning to sell your handset and want to delete all your personal data.
    • If you have forgotten phone code or user code.
    • When your handset is pattern locked due to too many wrong pattern attempts. You have forgotten the pattern as well as the gmail account ID or password associated with that device. ( if you know the gmail ID and password of that handset, you can recover the pattern and save your data.)

    Read Difference between hard reset and soft reset in cell phones

    Learn how to backup and restore an android cell phone

    There are 3 methods of doing a hard reset on Sony Xperia Z1

    1. Hard-Reset through physical button:

    sony xperia Z1 physical hard reset

    You can format Sony Xperia Z1 by a special physical button. Just remove the memory card and besides the SD card slot, you will find a small red coloured button. Press and hold this button for 3 to 10 seconds. The phone will now shut down. Now press the power button to switch it on.

    2. Hard-Reset through settings:

    This is the most simple and easy method and is possible if you are able to access the menu and go to settings.

    1. Search for the settings option in the menu.
    2. Now select ‘Backup Ad Restore’
    3. Now select the ‘Factory Data Reset’ option.
    4. Now select ‘Reset Phone’ option.
    5. Now tap on ‘Erase Everything’. The process will take some time and the handset will now restart. It will then restart.

    3. Hard-Reset through key combinations:

    If you cannot access the menu due to pattern lock or booting related problems, you can use this option.

    Volume Up + Power Button

    sony xperia z1 hard reset

    1. Switch-off your handset

    2. Press the power button volume up button simultaneously and hold until you see the android logo.

    3. You will see an option – Wipe data/Factory reset. Go to this option with volume down button. Select this option with power button.

    4 Now come down to the option – delete all user data with volume down option and select it with power button.

    5. The device will now be formatted. After this select the option – reboot system now by pressing the power button.

    Perform a factory data reset only if absolutely necessary as it will remove all the below things including all your data:

    • Google account
    • Downloaded apps and their data.
    • App settings
    • Contacts, messages, music, pictures, videos, etc.

    If your problem or fault is still not resolved after performing a hard reset, you will have to flash or update your cell phone.

    Note:

    1. Hard reset erases all data, so take a backup of all your data if possible before performing a hard-reset to an external device.

    2. It is important that your phone battery is charged enough to last the procedure i.e atleast for 10-15 minutes.

    Please let us know if any of the above method is not working. Please also let us know if the above procedure solved your problem or not in the comments section below.

  • How to Fix a Wet Cell Phone Step by Step (Water Damage Repair)

    How to Fix a Wet Cell Phone Step by Step (Water Damage Repair)

    Dropping a cell phone in water is one of the most stressful moments for any user. Whether it slips into a sink, falls into a bucket, gets soaked in rain, or lands in a toilet, the panic is real. Smartphones are expensive, personal, and deeply connected to daily life.

    The good news is this: a wet cell phone does not always mean a dead phone. Many water-damaged devices can be saved if the right steps are taken quickly and correctly.

    This guide explains how to fix a wet cell phone step by step, using practical, technician-approved methods. It covers what to do immediately, what to avoid, and when professional repair is the best option.

    “In water damage cases, speed and the right actions matter more than luck.”


    Understanding What Water Does to a Smartphone

    Before jumping into repair steps, it helps to understand what actually happens when a phone gets wet.

    Water itself is not the biggest enemy. The real damage comes from:

    • Electrical short circuits
    • Corrosion on internal components
    • Mineral deposits left behind after drying

    When a powered device meets moisture, current flows where it should not. This can damage chips, connectors, and the motherboard.

    That is why the first few minutes after water exposure are critical.


    Step 1: Remove the Phone From Water Immediately

    This step sounds obvious, but hesitation can be costly.

    • Take the mobile phone out of water as fast as possible
    • Do not press any buttons while removing it
    • Do not check if it is still working

    Every second the device stays powered and wet increases the risk of permanent damage.


    Step 2: Power Off the Device Right Away

    If the phone is still on, turn it off immediately.

    • Hold the power button and switch it off
    • Do not restart or unlock it
    • Do not check notifications

    Keeping a wet phone powered on is the biggest mistake users make.

    If the phone turns off by itself, do not try to turn it back on.


    Step 3: Remove All External Parts

    Next, strip the device down as much as possible without tools.

    Remove:

    • SIM card
    • Memory card
    • Phone case
    • Accessories like earphones or charging cables

    These parts can trap moisture and slow down drying.

    Place the SIM card and memory card separately on a dry cloth.


    Step 4: Gently Dry the Outside

    Use a soft, lint-free cloth to gently wipe the phone.

    • Pat dry the screen, back, and sides
    • Shake gently to remove water from ports
    • Keep charging port and speaker openings facing downward

    Do not use force. Do not insert anything into ports.

    This step only removes surface water. Internal moisture still remains.


    Step 5: Do NOT Do These Common Mistakes

    Many well-known “home remedies” actually make water damage worse.

    Avoid the following:

    • ❌ Using a hair dryer or heat gun
    • ❌ Placing the phone on a heater
    • ❌ Microwaving the phone (extremely dangerous)
    • ❌ Charging the phone to “check if it works”

    Heat can:

    • Warp internal components
    • Push moisture deeper inside
    • Damage battery cells

    “Heat dries water fast—but it destroys electronics even faster.”


    Step 6: Use Controlled Air Drying

    The safest drying method is time and airflow, not heat.

    What you can do:

    • Place the phone on a dry towel
    • Keep it in a well-ventilated room
    • Use a fan at a distance to improve air circulation

    Position the device so that:

    • Charging port faces downward
    • Speaker grills are not blocked

    Leave it undisturbed.


    Step 7: Silica Gel vs Rice – What Actually Works?

    The Truth About Rice

    Some people keep their phone submerged in unccoked rice for a few hours. Rice absorbs moisture slowly and unevenly. It can also leave dust and starch particles inside ports.

    Rice is better than nothing, but not ideal.

    Silica Gel (Much Better Option)

    Silica gel packets:

    • Absorb moisture efficiently
    • Do not leave residue
    • Are used in professional drying environments

    If available:

    • Place the phone in a sealed container
    • Add silica gel packets around it
    • Leave for at least 24–48 hours
    rice method for fixing wet cell phone

    Silica gel is safer and more effective than rice. However this will work only if the wetness is little and at the start of the holes/gaps.


    Step 8: Wait Long Enough Before Powering On

    Patience is critical.

    Recommended waiting time:

    • Minimum: 24 hours
    • Safer range: 48 hours or more

    Do not rush this step. Moisture trapped under chips and connectors takes time to evaporate.

    Turning on the phone too early can permanently short the motherboard.


    Step 9: Power On and Observe Carefully

    After sufficient drying time:

    • Power on the device
    • Do not plug in the charger yet
    • Check basic functions

    Test:

    • Screen display
    • Touch response
    • Speaker sound
    • Microphone
    • Camera

    If the phone does not turn on, do not panic. This does not always mean it is dead.


    Step 10: If the Phone Turns On but Shows Problems

    Common post-water-damage issues include:

    • No sound
    • Charging problems
    • Foggy camera lens
    • Random shutdowns

    These issues often indicate:

    • Residual moisture
    • Corrosion starting on connectors

    At this stage, professional cleaning is recommended.


    When to Take the Phone to a Repair Technician

    You should visit a repair professional if:

    • The phone does not power on after drying
    • The phone heats up abnormally
    • Charging is unstable
    • Display flickers or touch fails

    Technicians use:

    • Isopropyl alcohol cleaning
    • Ultrasonic cleaners
    • Board-level inspection

    Early professional intervention can prevent long-term corrosion.


    Water-Resistant vs Waterproof Phones: Know the Difference

    Many smartphones are advertised as water-resistant.

    Important points:

    • Water resistance is not permanent
    • Seals degrade over time
    • Drops, repairs, or wear reduce protection

    Water-resistant does not mean water-proof.
    Damage can still occur, especially in saltwater or dirty water.


    Saltwater and Dirty Water: Extra Risk

    If the phone fell into:

    • Sea water
    • Pool water
    • Muddy or dirty water

    The risk is higher due to:

    • Salt corrosion
    • Chemical residue
    • Mineral deposits

    In such cases, professional cleaning is strongly advised, even if the phone seems fine.


    Battery Safety After Water Damage

    Lithium-ion batteries are sensitive to moisture.

    Warning signs:

    • Phone gets hot
    • Battery drains fast
    • Swelling or bulging

    If any of these occur:

    • Stop using the phone
    • Do not charge it
    • Seek professional help

    Battery failure can be dangerous if ignored.


    Data Recovery From a Water-Damaged Phone

    Even if the phone does not fully recover:

    • Data may still be retrievable
    • Storage chips often survive

    Technicians can:

    • Access internal memory
    • Recover photos, videos, and documents

    This is another reason not to attempt risky DIY fixes.


    Can You Fix Water Damage at Home Completely?

    Minor water exposure can sometimes be handled at home if:

    • The phone was powered off quickly
    • Drying was done correctly
    • No corrosion started

    However, deep water damage often requires professional tools.

    Home methods reduce risk—but they do not replace proper cleaning.


    Preventing Water Damage in the Future

    Simple habits reduce risk:

    • Use waterproof cases near water
    • Avoid using phones in bathrooms
    • Keep devices away from kitchen sinks
    • Do not charge phones near liquids

    Prevention is always cheaper than repair.


    Technician-Level Insight: Why Some Phones Die Later

    Some phones work fine after drying, then fail weeks later.

    Reason:

    • Hidden corrosion slowly eats circuit paths

    This is why technicians recommend internal cleaning, not just drying.

    “Water damage is not always immediate. Sometimes it waits.”


    Repair or Replace: Making the Right Decision

    Consider replacing the phone if:

    • Motherboard damage is severe
    • Repair cost is too high
    • The phone is very old

    Repair makes sense if:

    • Damage is caught early
    • Device value is high
    • Data is important

    A technician can help evaluate honestly.

    Frequently Asked Questions (FAQs)

    1. Can a wet cell phone be repaired completely?

    Yes. Many wet cell phones can be repaired if they are powered off quickly and dried properly. Early professional cleaning greatly improves success.


    2. How long should I wait before turning on a water-damaged phone?

    If you are not giving the handset for repairs. you should wait at least 24–48 hours after proper drying. Turning it on too early can cause permanent internal damage.


    3. Does putting a wet phone in rice really work?

    No. Rice can absorb very little moisture, but it is not very effective. Silica gel packets work better but only if the water is minimum and at the border only.


    4. Can water damage affect a phone later even if it works now?

    Yes. Corrosion can develop slowly and cause problems days or weeks later if the phone is not cleaned internally.


    5. Should I repair or replace a water-damaged smartphone?

    Repair is worth it if the phone is newer or data is important. Replacement may be better if repair costs are high or damage is severe.


    Final Thoughts

    A wet cell phone is not automatically a lost cause. Quick action, correct steps, and patience can save many water-damaged smartphones.

    The most important rules to remember:

    • Power off immediately
    • Avoid heat and charging
    • Allow proper drying time
    • Seek professional help when needed

    Smart handling can mean the difference between recovery and permanent failure.

  • How to Improve Weak Mobile Phone Network Signal?

    How to Improve Weak Mobile Phone Network Signal?

    Few things are more frustrating than a weak mobile phone network signal. Calls drop suddenly. Messages fail to send. Mobile data crawls when you need it most. Whether you are using an Android phone, an iPhone, or another smartphone, poor network reception can interrupt work, travel, and daily life.

    A weak signal is not always the fault of your device. Many factors affect how well your phone connects to the network, including location, surroundings, network congestion, and even how you hold your phone. The good news is that in many cases, you can improve signal strength with simple and practical steps.

    A strong connection is not about having the newest phone, but about understanding how your device interacts with the network around you.

    This guide explains what causes weak mobile network signals and shows clear, proven ways to improve reception. The advice is practical, experience-based, and written to help real users—not just to sound technical.


    What Does Weak Mobile Network Signal Mean?

    A weak mobile network signal means your phone is struggling to communicate with the nearest cell tower. This affects:

    • Voice call quality
    • Call stability
    • Internet speed
    • App performance
    • Location services

    Signal strength is usually shown as bars on your phone screen. Fewer bars mean weaker reception, but bars alone do not tell the full story. A phone may show bars yet still struggle with data due to network congestion or interference.


    Common Reasons for Weak Mobile Phone Signal

    Understanding the cause helps you choose the right solution.

    1. Distance From Cell Towers

    Mobile phones rely on nearby towers. The farther you are, the weaker the signal becomes. This is common in rural areas, highways, or remote locations.

    2. Physical Obstructions

    Concrete walls, metal structures, basements, elevators, and underground parking areas block signals. Even thick building materials can reduce reception indoors.

    3. Network Congestion

    When too many users connect to the same tower, speeds drop and calls may fail. This often happens during peak hours or large public events.

    4. Weather and Environment

    Heavy rain, storms, or dense foliage can slightly affect signal quality, especially for data services.

    5. Phone Hardware Limitations

    Older devices or damaged antennas inside the phone can struggle to maintain stable reception.

    6. Software or Network Settings

    Incorrect network mode, outdated software, or SIM-related issues can reduce signal performance.


    How to Improve Weak Mobile Phone Network Signal

    1. Move to a Better Location

    This sounds simple, but it works more often than people expect.

    • Step closer to a window
    • Go outside briefly
    • Move to a higher floor
    • Avoid enclosed spaces

    Even a few steps can make a noticeable difference because the phone may connect to a clearer signal path.


    2. Turn Airplane Mode On and Off

    This forces your smartphone to reconnect to the nearest available tower.

    How it helps:
    It refreshes the network connection and often resolves temporary signal drops.

    When to use it:

    • After traveling
    • When calls suddenly start dropping
    • When data stops working

    Wait about 10 seconds before turning airplane mode off.


    3. Restart Your Mobile Phone

    Restarting clears temporary software glitches and resets network connections.

    This simple step can:

    • Improve call stability
    • Restore mobile data
    • Fix sudden signal loss

    If your phone has not been restarted for days or weeks, this is a good place to start.


    4. Check Network Mode Settings

    Modern smartphones support multiple network types such as 2G, 3G, 4G LTE, and 5G.

    What to do:

    • Ensure your phone is set to automatic network selection
    • Avoid locking the device to a single network mode unless necessary

    In areas with weak 5G coverage, switching temporarily to 4G LTE can provide more stable performance.


    5. Update Phone Software

    Manufacturers regularly release updates that improve network compatibility and performance.

    Software updates can:

    • Improve signal handling
    • Fix modem-related bugs
    • Enhance carrier compatibility

    Always install official updates from your device manufacturer.


    6. Check the SIM Card

    A faulty or old SIM card can cause poor reception.

    Try this:

    • Remove the SIM card
    • Clean it gently
    • Reinsert it properly

    If the SIM is very old or damaged, request a replacement from your mobile service provider.


    7. Use Wi-Fi Calling Where Available

    Wi-Fi calling allows your phone to make calls using an internet connection instead of cellular towers.

    Best for:

    • Homes with weak indoor signals
    • Office buildings
    • Basement locations

    Most Android phones and iPhones support Wi-Fi calling if enabled by the carrier.


    8. Reduce Signal Interference Indoors

    Certain household items can interfere with mobile signals:

    • Routers placed too close to phones
    • Metal furniture
    • Large appliances

    Try changing where you sit or where you keep your device when using it indoors.


    9. Keep Your Phone Case in Check

    Some thick or metal phone cases can block antennas.

    If you notice signal issues:

    • Remove the case temporarily
    • Check if signal improves

    If it does, consider switching to a lighter, signal-friendly case.


    10. Reset Network Settings (When Necessary)

    This clears saved network data and reconnects your phone from scratch.

    What it resets:

    • Mobile network settings
    • Wi-Fi connections
    • Bluetooth connections

    Use this only if other steps do not help, as you will need to reconnect to networks again.


    Advanced Ways to Improve Mobile Signal

    Mobile Signal Boosters

    Signal boosters amplify existing cellular signals and rebroadcast them indoors.

    Pros:

    • Effective in remote or weak-signal areas
    • Improves call quality and data speed

    Cons:

    • Requires installation
    • Needs at least some existing signal to work

    They are useful for homes or offices with consistent signal issues.


    External Antennas (Limited Use)

    Some devices and routers support external antennas, but most smartphones do not. This option is more relevant for mobile hotspots or data routers.


    Myths About Improving Mobile Network Signal

    It is important to avoid false solutions that waste time or money.

    Myth: Apps can magically boost signal
    Reality: Apps cannot increase signal strength beyond hardware limits.

    Myth: Wrapping the phone in foil improves reception
    Reality: This usually makes reception worse.

    Myth: Signal bars always reflect real performance
    Reality: Data speed and call quality depend on many factors beyond bars.


    How Network Type Affects Signal Quality

    Voice Calls

    Voice calls need stable connectivity more than speed. A moderate signal can still provide clear calls.

    Mobile Data

    Data services are more sensitive to congestion and signal quality. Weak signals often result in slow browsing and buffering.

    VoLTE and Wi-Fi Calling

    These technologies improve call clarity when supported by your carrier and device.


    Android vs iPhone: Any Difference in Signal Strength?

    Both Android phones and iPhones follow similar network principles.

    Differences usually come from:

    • Antenna design
    • Modem quality
    • Software optimization

    A newer device may perform slightly better, but location and network quality still matter more than brand.


    When the Problem Is the Network Provider

    Sometimes the issue is not your phone at all.

    Signs include:

    • Everyone nearby facing similar issues
    • Signal drops at specific times daily
    • Poor coverage maps for your area

    In such cases:

    • Contact customer support
    • Report the coverage issue
    • Ask about tower upgrades or alternative network options

    Technology works best when the environment supports it. Even the smartest phone needs a reliable network behind it.


    Practical Real-Life Scenarios

    At Home

    Use Wi-Fi calling, sit near windows, and avoid basements for important calls.

    While Traveling

    Toggle airplane mode after crossing regions. Network handovers can cause temporary drops.

    At Work

    Identify signal-friendly spots. Some buildings have dead zones due to construction materials.


    When to Consider a Phone Upgrade

    Upgrading makes sense if:

    • Your device is very old
    • It lacks support for newer network bands
    • The antenna has physical damage

    However, upgrading alone will not fix poor coverage in your area.


    Safety and Battery Considerations

    A phone struggling for signal consumes more battery.

    To reduce drain:

    • Use Wi-Fi when possible
    • Avoid constant signal searching in no-coverage zones
    • Enable low-power modes when signal is weak

    Quick Checklist for Improving Weak Signal

    • Restart your phone
    • Toggle airplane mode
    • Move to a better location
    • Check SIM and network settings
    • Update software
    • Use Wi-Fi calling
    • Avoid signal-blocking cases

    Final Thoughts

    Weak mobile phone network signal is a common issue, but it is not always permanent or unsolvable. By understanding how signals work and applying practical steps, you can improve call quality, data speed, and overall smartphone performance in many situations.

    Focus first on simple fixes before considering advanced solutions. Most signal problems are caused by environment, settings, or temporary network conditions—not faulty devices.

    If issues persist despite trying everything, reaching out to your service provider is the most reliable next step.

    A stable connection makes your phone truly useful. With the right approach, better signal strength is often closer than you think.

  • iPhone vs Android: Best Phones for Work and Personal Use

    iPhone vs Android: Best Phones for Work and Personal Use

    Since the invention of various brands of smartphones and its various operating systems, there has been a battle between Android devices and Iphones. An Iphone user will boast about its features and Siri while Android user will tell you about different ways they can customize their phones. The battle is endless and no matter how many compliments the users speak about their device over the other, there is no real winner. In the end, it all comes down to the user.

    Choosing between an iPhone and an Android phone is no longer just about brand loyalty. Smartphones have become work tools, personal assistants, entertainment hubs, and communication devices—all packed into one pocket-sized gadget.

    For many users, the real question is not which is better overall, but which phone works better for work and which suits personal life. Some even use both.

    This guide offers a clear, balanced, and practical comparison of iPhone and Android devices for professional and personal use. No hype. No myths. Just real-world insights based on how people actually use their smartphones today.

    “The best phone is not the most powerful one—it’s the one that fits your daily life.”


    Understanding the Core Difference Between iPhone and Android

    At the highest level, the difference is simple:

    • iPhone runs on Apple’s iOS
    • Android phones run on Android OS by Google

    But the experience goes far beyond the operating system. It affects how you work, how you relax, how secure your data is, and how flexible your phone feels.


    iPhone for Work Use: Why Professionals Prefer It

    Many professionals lean toward iPhones for work-related tasks. This preference is not accidental.

    1. Strong Focus on Security and Privacy

    One of the biggest reasons businesses trust iPhones is data security.

    Key advantages:

    • Tighter control over apps
    • Hardware-level encryption
    • Consistent security updates

    For people handling sensitive data—emails, financial apps, client information—this reliability matters.


    2. Smooth Performance Over Time

    iPhones are known for:

    • Stable performance
    • Minimal lag even after years of use
    • Consistent app behavior across devices

    This makes them dependable work tools, especially for users who cannot afford app crashes or unexpected slowdowns during meetings or tasks.


    3. Better App Optimization for Business Tools

    Many popular work-related apps are first optimized for iOS, including:

    • Productivity tools
    • Design and creative apps
    • Video conferencing platforms

    Apps often feel more polished and predictable on iPhones, which matters in professional settings.


    4. Seamless Ecosystem for Workflows

    If you use:

    • A MacBook
    • An iPad
    • Apple Watch

    The iPhone integrates seamlessly. Features like file sharing, device continuity, and synchronized notifications save time and reduce friction.


    Android for Work Use: Where It Stands Strong

    Android phones are no longer just “budget devices.” Many Android smartphones are powerful business tools.

    1. Better Customization for Work Needs

    Android allows:

    • Custom launchers
    • App automation
    • Advanced notification control

    Professionals who like to tailor their phone exactly to their workflow often prefer Android.


    2. Wide Hardware Choices for Different Professions

    Android offers:

    • Large screens for multitasking
    • Stylus support on some models
    • Rugged phones for field work

    This flexibility is useful for engineers, designers, technicians, and on-site professionals.


    3. File Management Feels More Like a Computer

    Android handles files more openly:

    • Easy drag-and-drop
    • Direct access to folders
    • Better compatibility with external storage

    For people dealing with documents, media, or technical files, this can be a major advantage.


    iPhone for Personal Use: Simplicity and Experience

    For personal use, iPhones shine in areas related to ease and enjoyment.

    1. User-Friendly Interface

    The iPhone interface is:

    • Clean
    • Consistent
    • Easy to learn

    Even non-technical users feel comfortable quickly. This makes it ideal for everyday tasks like calling, messaging, photography, and browsing.


    2. Camera Performance for Everyday Moments

    iPhones are known for:

    • Natural-looking photos
    • Reliable video quality
    • Easy-to-use camera apps

    For social media, family moments, and casual photography, iPhones deliver consistent results without much effort.


    3. Long-Term Software Support

    iPhones receive updates for many years. This means:

    • New features over time
    • Better resale value
    • Longer usable life

    For personal users who do not upgrade often, this matters a lot.


    Android for Personal Use: Freedom and Value

    Android smartphones offer unmatched variety for personal use.

    1. Wide Price Range for Every Budget

    Android phones are available:

    • From entry-level to premium
    • With different designs and features

    This makes Android accessible to students, families, and first-time smartphone users.


    2. Customization and Personal Expression

    Android allows users to:

    • Change themes
    • Customize home screens
    • Use widgets freely

    For people who enjoy personalizing their phone, Android feels more expressive.


    3. Better Control Over Notifications and Apps

    Android gives more control over:

    • App permissions
    • Background activity
    • Notification behavior

    This is helpful for managing screen time and avoiding distractions.


    Work-Life Balance: Using One Phone vs Two Phones

    Many professionals today use:

    • One phone for work
    • One phone for personal life

    A common setup:

    • iPhone for work (emails, meetings, official apps)
    • Android for personal use (media, customization, experimentation)

    This separation helps maintain boundaries and reduces stress.

    “Sometimes productivity improves not by doing more, but by separating what matters.”


    Performance Comparison: iPhone vs Android

    iPhone Performance Highlights

    • Strong optimization between hardware and software
    • Reliable long-term speed
    • Fewer background conflicts

    Android Performance Highlights

    • High-end Android phones offer powerful processors
    • More RAM options
    • Better multitasking on large displays

    Both platforms perform well. The difference lies in how performance is managed, not raw power alone.


    Battery Life and Charging Experience

    Battery experience varies by model, but trends are clear.

    iPhone Battery Approach

    • Focus on efficiency
    • Optimized power usage
    • Predictable performance

    Android Battery Approach

    • Larger battery options
    • Faster charging technologies
    • More charging accessories compatibility

    Users who value fast top-ups may prefer Android. Users who value consistent battery health may prefer iPhone.


    App Availability and Compatibility

    Both platforms have strong app ecosystems.

    iPhone App Experience

    • Strict quality control
    • Fewer poorly designed apps
    • Better privacy enforcement

    Android App Experience

    • Greater variety
    • More flexibility
    • Ability to install apps outside the official store

    Your preference depends on whether you value control or curation.


    Security and Privacy: A Balanced View

    iPhone Strengths

    • Controlled ecosystem
    • Faster security updates
    • Hardware-level data protection

    Android Strengths

    • Improved security in recent versions
    • More permission control
    • Secure devices from trusted brands

    Both are secure when used responsibly. The difference is how much control the user wants.


    Repairability and Service Perspective

    From a technician-level view:

    • Android phones are often easier and cheaper to repair
    • iPhones require specialized tools and skills

    However:

    • iPhones offer better parts consistency
    • Android parts availability varies by brand

    Repair choice matters for long-term ownership.


    Pros and Cons Summary

    iPhone – Key Strengths

    • Strong security
    • Long software support
    • Smooth ecosystem
    • Consistent user experience

    iPhone – Limitations

    • Limited customization
    • Higher repair costs
    • Closed system

    Android – Key Strengths

    • Customization freedom
    • Wide price range
    • Hardware variety
    • Better file control

    Android – Limitations

    • Update consistency varies
    • App quality depends on source
    • Performance differs by brand

    Which Is Better for You?

    There is no single correct answer.

    Choose iPhone if you:

    • Value stability and security
    • Use Apple products
    • Want long-term reliability

    Choose Android if you:

    • Want customization and flexibility
    • Prefer more hardware choices
    • Need better file control

    Choose both if you:

    • Want clear work-life separation
    • Use different ecosystems
    • Need the best of both worlds

    Final Thoughts

    The iPhone vs Android debate is not about winners and losers. It is about use cases.

    Smartphones are tools. The best phone is the one that supports your work, fits your lifestyle, and feels comfortable to use every day.

    Understanding your needs matters more than following trends.

  • What Is the Future of Smartphones? Next Tech, Features & Trends

    What Is the Future of Smartphones? Next Tech, Features & Trends

    Smartphones have become an essential part of daily life. From simple calling devices, they have evolved into powerful pocket computers. Today, a mobile phone is used for work, payments, photography, entertainment, navigation, health tracking, and much more.

    Naturally, this raises an important question: what is the future of smartphones, and how will mobile technology change in the coming years?

    This article explores upcoming smartphone technology, future phone features, and emerging trends in a clear, practical, and realistic way. There is no hype here—only fact-based insights drawn from industry patterns, consumer behavior, and current technological direction.

    “Technology moves forward not to impress us, but to quietly become essential.”


    Understanding the Direction of Smartphone Evolution

    The future of smartphones is not about sudden radical change. Instead, it is about steady improvement in performance, intelligence, durability, and user experience.

    Manufacturers focus on solving real problems:

    • Battery anxiety
    • Device longevity
    • Data security
    • Performance efficiency
    • Smarter daily assistance

    Rather than reinventing the smartphone, companies are refining it to become more intelligent, more personal, and more reliable.


    Smarter Phones Powered by On-Device Intelligence

    One of the biggest shifts in future smartphones is deeper on-device intelligence.

    Modern smartphones already use machine learning, but upcoming devices will rely even more on local processing instead of cloud dependency.

    What this means for users:

    • Faster response without internet
    • Better privacy since data stays on the device
    • Smarter camera processing
    • More accurate voice commands

    Phones will understand user habits better, such as:

    • When you usually charge your device
    • Which apps you open at certain times
    • How you interact with notifications

    This intelligence works quietly in the background, improving efficiency without constant user input.


    Battery Technology Focused on Longevity, Not Just Speed

    Battery life remains one of the most discussed smartphone concerns.

    Future smartphones are focusing on:

    • Longer battery lifespan, not just fast charging
    • Smarter power management
    • Reduced battery degradation

    Instead of only increasing charging speed, manufacturers are improving:

    • Charging cycles
    • Heat management
    • Adaptive charging behavior

    This means your smartphone battery will stay healthy for more years, reducing the need for early replacement.

    From a technician’s perspective, this also means better-designed power circuits and safer charging systems.


    Displays That Adapt to Usage

    Screens are becoming smarter, not just brighter.

    Upcoming smartphone displays will focus on:

    • Adaptive refresh rates that change based on content
    • Reduced eye strain through intelligent color tuning
    • Better outdoor visibility with lower power usage

    Foldable and flexible display technology continues to improve. While not every user prefers foldable phones, this technology pushes innovation in:

    • Screen durability
    • Compact device design
    • Multi-tasking experiences

    Traditional slab smartphones will still dominate, but with more refined display quality and durability.


    Cameras Will Focus More on Intelligence Than Hardware

    Smartphone cameras are no longer just about megapixels.

    The future lies in computational photography, where software enhances images more than hardware alone.

    Improvements include:

    • Better low-light photography
    • Realistic portrait effects
    • Accurate color reproduction
    • Intelligent video stabilization

    Phones will recognize scenes automatically:

    • Documents
    • Food
    • Night scenes
    • Movement

    For users, this means better photos without manual settings.
    For technicians, it means more complex camera modules integrated tightly with software.


    Stronger Focus on Repairability and Durability

    There is a growing demand for devices that last longer.

    Future smartphones are slowly moving toward:

    • More durable materials
    • Improved water and dust resistance
    • Modular internal design where possible

    While fully modular phones are rare, manufacturers are making internal layouts more service-friendly than before.

    This benefits:

    • Users, through longer device life
    • Technicians, through safer and cleaner repair processes

    Expect better-quality connectors, improved adhesives, and more standardized components in many models.


    Enhanced Security and Privacy by Default

    Security is no longer optional. It is expected.

    Upcoming smartphones emphasize:

    • Hardware-level security chips
    • On-device biometric processing
    • Improved encryption standards

    Future mobile phones will:

    • Store sensitive data locally
    • Reduce third-party tracking
    • Give users clearer permission controls

    For example:

    • Facial recognition and fingerprint data stay within secure hardware
    • App permissions become more transparent

    This makes smartphones safer for:

    • Banking
    • Digital payments
    • Work-from-home usage

    The phone could measure several human characteristics and accordingly unlock itself for the user. If some intruder tries to hack in, the phone could immediately erase all data. Or better yet, hide all the data and make it seem like there is nothing there. The mobile phone should equally be able to resist all types of virusses and malware. It could also fake a malfunction to keep the nosey people out of the phone’s contents.


    Connectivity That Feels Seamless

    Future smartphones are designed to stay connected everywhere with minimal user effort.

    Improvements include:

    • Faster mobile data speeds
    • Smarter switching between Wi-Fi and mobile networks
    • Better signal stability in crowded areas

    Devices will automatically choose the best connection based on:

    • Speed
    • Stability
    • Battery usage

    This is especially useful for video calls, navigation, and cloud-based work.


    Smartphones as Health and Lifestyle Companions

    Mobile phones are becoming health-aware devices.

    Future trends include:

    • Advanced motion tracking
    • Better sleep analysis
    • Stress and activity insights

    While phones will not replace medical devices, they will:

    • Encourage healthier habits
    • Offer early warnings
    • Integrate more deeply with wearables

    This shift makes smartphones more personal and useful beyond communication.


    Seamless Ecosystem Integration

    The future smartphone is not a standalone gadget. It is part of an ecosystem.

    Phones will work smoothly with:

    • Laptops and tablets
    • Smartwatches and earbuds
    • Smart TVs and home devices

    Users can expect:

    • Easy file sharing
    • Unified notifications
    • Cross-device continuity

    This ecosystem approach improves productivity and convenience, especially for professionals and students.


    Software Experience Will Matter More Than Ever

    Hardware differences between phones are narrowing.

    What truly sets devices apart is software experience.

    Future smartphones will offer:

    • Cleaner interfaces
    • Less unnecessary background activity
    • Longer software support

    Users value:

    • Stability
    • Timely updates
    • Smooth daily performance

    This also means technicians must understand software troubleshooting alongside hardware repair.


    Sustainability and Responsible Manufacturing

    Sustainability is becoming part of smartphone design.

    Brands are focusing on:

    • Reduced electronic waste
    • Longer software support
    • Eco-friendly packaging

    For users, this means:

    • Phones that stay usable longer
    • Better resale and refurbishing value

    For repair professionals, this creates more demand for repair and refurbishment services.

    “The best technology is the one that lasts longer and wastes less.”


    Will Smartphones Replace Other Devices?

    Smartphones are already replacing many tools:

    • Cameras
    • GPS devices
    • Music players
    • Wallets

    In the future, smartphones will handle even more tasks, but they will not completely replace laptops or desktops.

    Instead, they will:

    • Handle quick tasks
    • Support remote work
    • Act as control centers for other devices

    This balanced role keeps smartphones central to digital life.


    What This Means for Users

    For everyday users, the future of smartphones means:

    • More reliable devices
    • Better performance with less effort
    • Improved privacy and security
    • Longer usable life

    Upgrading will be driven less by trends and more by actual need.


    What This Means for Technicians and Repair Professionals

    For mobile repair technicians, future smartphones bring:

    • More advanced diagnostics
    • Increased importance of software knowledge
    • Better-quality components
    • Continued demand for skilled repair

    Basic repairs will still exist, but technician-level skills such as board-level troubleshooting and precise component handling will matter more.


    Pros and Possible Challenges Ahead

    Advantages

    • Smarter, more efficient devices
    • Better user experience
    • Increased device lifespan
    • Strong repair and service ecosystem

    Challenges

    • More complex internal design
    • Higher skill requirement for repairs
    • Increased dependence on software tools

    Overall, benefits clearly outweigh challenges.

    Frequently Asked Questions (FAQs)

    1. Will smartphones still be relevant in the future?

    Yes. Smartphones remain essential for communication, work, payments, navigation, and entertainment. Their role continues to expand rather than decline.


    2. Will future smartphones focus more on software or hardware?

    Future smartphones will focus more on software intelligence, while hardware improvements will support better performance, efficiency, and durability.


    3. Will smartphone batteries last longer in the future?

    Yes. New battery technologies and smarter power management aim to increase battery lifespan, not just charging speed.


    4. Will smartphones become harder to repair?

    Some repairs may become more complex, but manufacturers are also improving internal design, tools, and documentation, keeping skilled repair work relevant.


    5. Will future smartphones replace laptops completely?

    No. Smartphones will handle more daily tasks, but laptops and desktops will still be needed for heavy professional and creative work.


    Final Thoughts

    The future of smartphones is not about flashy gimmicks. It is about refinement, intelligence, and reliability.

    Mobile phones will become:

    • Smarter companions
    • More secure personal devices
    • Longer-lasting everyday tools

    For users, smartphones will feel simpler to use despite advanced technology underneath.
    For professionals and technicians, they will continue to offer strong opportunities for learning and growth.

    The smartphone is evolving—but it is not going anywhere.