Category: Mobile Phone Repair

  • Phone Speaker Not Working on Calls but Works on Music: Solution

    Phone Speaker Not Working on Calls but Works on Music: Solution

    When a phone speaker works perfectly for music, videos, and ringtones but stays silent during calls, it creates confusion for users and fresher technicians alike. Many people immediately assume hardware failure. In reality, this problem is often linked to settings, software conflicts, call audio routing, or partial speaker faults rather than a fully dead component.

    This detailed guide explains why call audio fails while media audio works, how to diagnose the exact cause, and what solutions actually work—from simple user-level checks to technician-grade repair steps for Android devices, iPhones, and other smartphones.

    “In phone repair, the fastest fix comes from understanding how audio paths are separated inside a device.”


    Understanding How Call Audio and Music Audio Are Different

    Before fixing the issue, it is important to understand how smartphones handle sound.

    Most modern mobile phones use different audio paths for different functions:

    • Music, videos, alarms, and ringtones usually play through the ringer (loudspeaker / bottom speaker).
    • Voice calls normally use the earpiece speaker (receiver / top speaker).
    • Speakerphone calls switch audio back to the loudspeaker.
    • Bluetooth and wired headsets override internal speakers completely.

    This separation means one speaker can work while the other fails, or software can block only call audio.


    Common Signs of This Problem

    You may be facing this issue if:

    • Music, YouTube, and WhatsApp voice notes play clearly
    • Incoming calls connect, but no sound from the top speaker
    • Speakerphone works, but normal call mode does not
    • Headphones work fine during calls
    • The other person can hear you, but you cannot hear them

    These symptoms strongly point toward earpiece speaker or call audio routing problems.


    Main Reasons Why Call Speaker Is Not Working

    1. Earpiece (Receiver) Speaker Fault

    The most common hardware cause is a damaged earpiece speaker, also known as:

    • Receiver
    • Call speaker
    • In-call speaker
    • Top speaker
    • Voice speaker

    Unlike the loudspeaker, the earpiece is small and delicate. It can fail due to:

    • Dust and sweat buildup
    • Moisture exposure
    • Drop impact
    • Wear after long-term usage

    Key clue: Speakerphone works, but normal call audio does not.


    2. Blocked or Dirty Earpiece Mesh

    Even if the receiver is electrically fine, blocked sound output can make it appear dead.

    Common causes include:

    • Pocket dust
    • Ear wax
    • Makeup residue
    • Screen protector covering the grill

    Many phones are “repaired” simply by cleaning the earpiece mesh properly.


    3. Call Audio Routed to Bluetooth

    Phones automatically route call sound to Bluetooth when:

    • Wireless earbuds were recently connected
    • Car audio was paired earlier
    • Bluetooth did not disconnect correctly

    Result: Call audio plays nowhere unless Bluetooth reconnects.


    4. Incorrect Sound or Accessibility Settings

    System-level settings can mute call audio without affecting music.

    Common problem settings:

    • Call volume set to zero
    • Mono audio conflicts
    • Hearing aid compatibility glitches
    • Accessibility audio balance shifted left or right

    These settings are often overlooked.


    5. Proximity Sensor Malfunction

    The proximity sensor controls screen behavior during calls. If it fails:

    • Screen stays black
    • Touch becomes unresponsive
    • Call audio may mute unexpectedly

    This creates the false impression of a speaker problem.


    6. Software Bug or Corrupted Audio Driver

    Software-related call audio issues are more common after:

    • System updates
    • Custom ROM installation
    • App conflicts
    • Failed firmware upgrades

    In such cases, music audio remains unaffected, while call audio fails.


    7. Audio IC or Motherboard Fault (Advanced)

    If both earpiece and software checks fail, the issue may lie in:

    • Audio codec IC
    • Call audio line from CPU
    • Broken solder joints
    • Liquid damage to audio section

    This is less common but critical for technicians to consider.


    Step-by-Step Solutions for Users (Non-Technical)

    Step 1: Increase Call Volume Properly

    During an active call:

    1. Press the volume up key
    2. Ensure call volume is not muted
    3. Do not rely on media volume

    Call and media volumes are separate controls.


    Step 2: Turn Off Bluetooth Completely

    1. Disable Bluetooth
    2. Restart the phone
    3. Make a test call

    Many call audio issues disappear after this simple step.


    Step 3: Test Speakerphone Mode

    • Make a call
    • Enable speakerphone

    If audio is clear on speakerphone, the earpiece speaker is likely faulty or blocked. Also try restarting the phone before cleaning the receiver (Next Step).


    Step 4: Clean the Earpiece Grill Safely

    Use:

    • Soft brush
    • Toothpick (gently)
    • Isopropyl alcohol (minimal)

    Avoid pins or sharp metal tools.

    Never apply liquid directly into the grill.


    Step 5: Check Safe Mode (Android)

    Safe Mode disables third-party apps.

    • If call audio works in Safe Mode
    • The issue is likely caused by an app conflict

    Uninstall recently added audio, call, or recording apps.


    Step 6: Reset Sound Settings (Without Data Loss)

    Many smartphones allow resetting system settings only.

    This fixes:

    • Corrupted audio profiles
    • Accessibility conflicts
    • Call routing errors

    Technician-Level Diagnosis and Repair Guide

    This section is for mobile repair technicians, students, and advanced learners.


    Step 1: Confirm Speaker Type Involved

    Use this logic:

    • Music works → Loudspeaker OK
    • Speakerphone works → Loudspeaker OK
    • Headphones work → Audio codec partially OK
    • Normal call silent → Receiver path issue

    This narrows diagnosis quickly.


    Step 2: Test Earpiece Speaker Using Multimeter

    • Measure resistance across earpiece terminals
    • Typical value: 25–60 ohms (varies by model)
    • Open circuit = faulty receiver

    Learn how to test ear speaker (receiver) with a multimeter. Replace with a known-good speaker for confirmation.


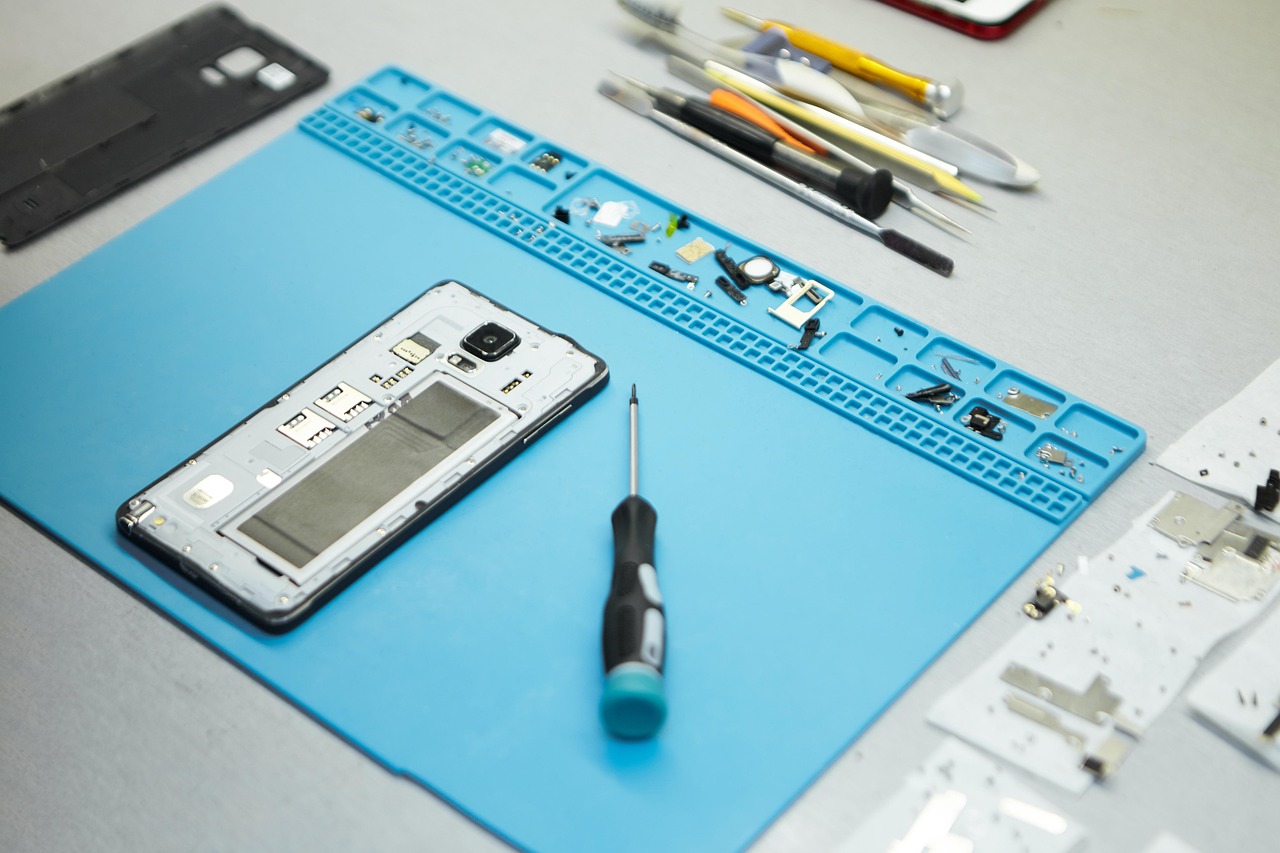
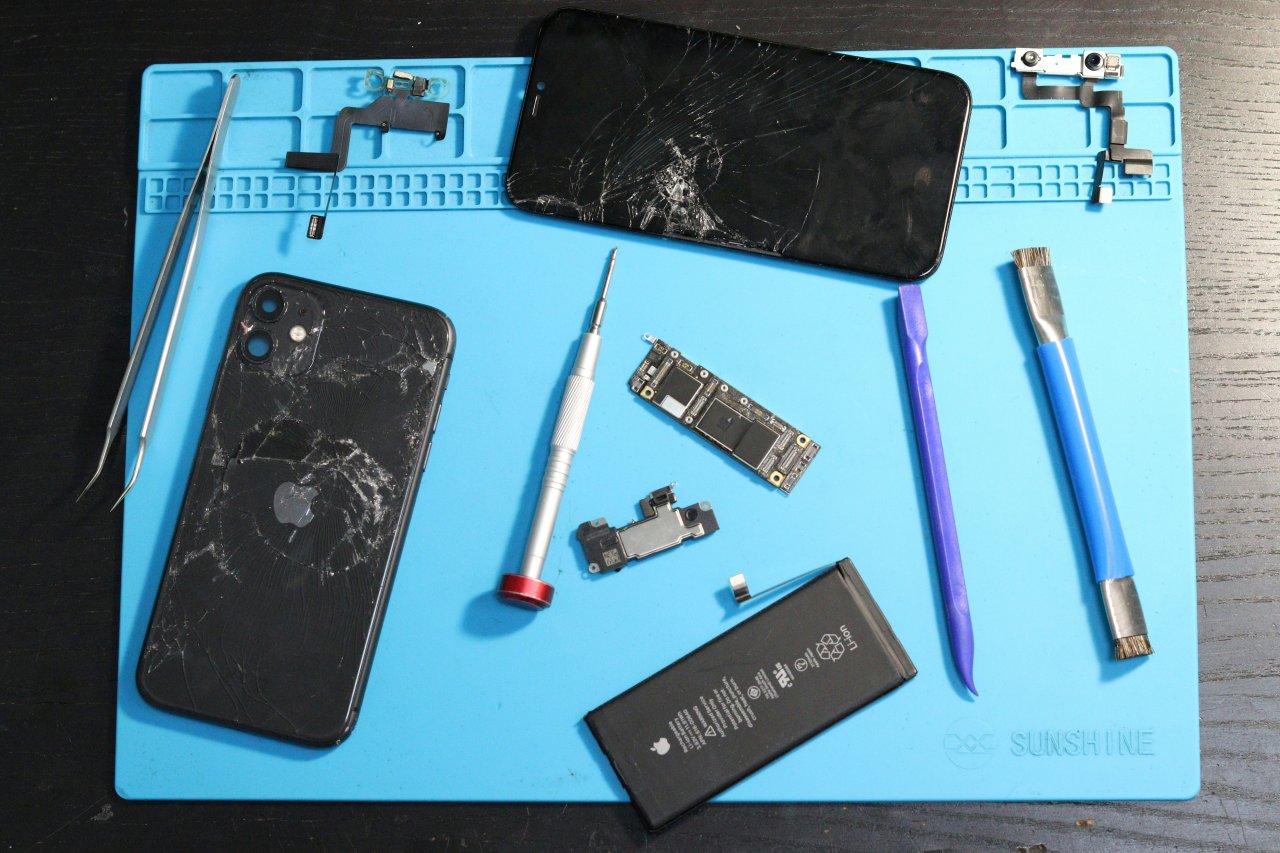
    Step 3: Inspect Earpiece Connector and Flex

    Check for:

    • Loose contact
    • Oxidation
    • Bent pins
    • Torn flex cable

    On many phones, the receiver connects via:

    • Front flex
    • Screen assembly
    • Dedicated earpiece board

    Step 4: Swap with Known Working Part

    The fastest professional test is part substitution.

    • Replace earpiece
    • Test call audio
    • Confirm before full reassembly

    This avoids unnecessary motherboard work.


    Step 5: Check Proximity Sensor Function

    Dial test codes or use diagnostic menus.

    If the proximity sensor:

    • Stays triggered constantly
    • Does not respond to hand movement

    Fix or replace sensor before audio IC suspicion.


    Step 6: Software Flash or Firmware Restore

    If hardware tests pass:

    • Backup data
    • Flash stock firmware
    • Avoid third-party ROMs during diagnosis

    Software corruption often mimics hardware failure.


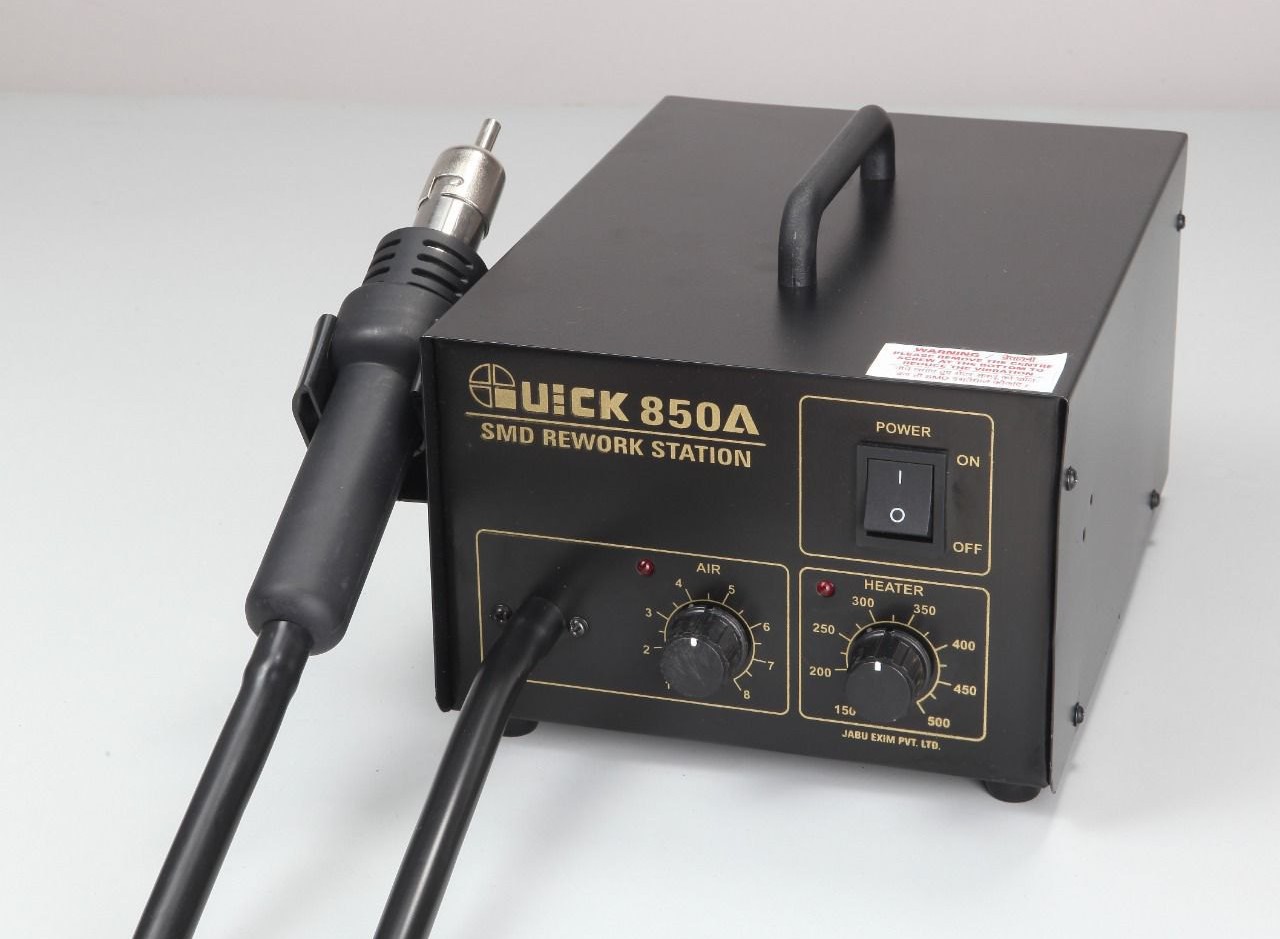
    Step 7: Audio IC and Board-Level Inspection

    Only if all above steps fail:

    • Inspect audio IC area
    • Check for liquid damage
    • Measure call audio line continuity
    • Reball or replace IC if needed

    This step requires proper tools and experience.

    “Good technicians replace parts. Great technicians replace only what is proven faulty.”


    iPhone-Specific Call Speaker Issues

    On iPhones, this problem often relates to:

    • Face ID flex damage
    • Earpiece mesh blockage
    • Proximity sensor failure
    • Water damage near top assembly

    Important note: On many iPhone models, the earpiece speaker is linked to Face ID components. Incorrect replacement can disable Face ID permanently.

    Always follow model-specific procedures.


    Android-Specific Observations

    On Android phones:

    • Audio routing bugs are more common
    • Custom UI updates may affect call sound
    • Low-quality replacement earpieces cause distortion

    Use original-quality parts whenever possible.


    When Replacement Is Necessary (And When It Is Not)

    Replace the earpiece speaker if:

    • No sound in normal calls
    • Speakerphone works
    • Resistance reading is abnormal
    • Cleaning does not help

    Do not replace immediately if:

    • Bluetooth is active
    • Call volume is muted
    • Safe Mode restores sound
    • Software reset fixes issue

    Balanced judgment saves time and money.


    Preventive Tips for Long-Term Reliability

    • Keep earpiece area clean
    • Avoid phone calls with wet ears
    • Do not blow air forcefully into speaker grills
    • Use quality screen protectors with proper cutouts

    Small habits reduce speaker failures significantly.


    Frequently Asked Questions (Quick Answers)

    Can receiver problem be fixed without opening the phone?
    Yes. Many cases are caused by settings, Bluetooth, or dirt.

    Is speaker issue a motherboard problem?
    Rarely. Most cases involve the receiver or software.

    Why does WhatsApp audio work but calls do not?
    Different apps may route audio differently.

    Does factory reset always fix receiver problem?
    Only if the issue is software-related.


    Final Thoughts

    When a phone speaker does not work during calls but plays music clearly, the issue is rarely mysterious. It is usually a receiver speaker fault, blocked sound path, audio routing error, or software glitch.

    For users, simple checks often restore sound within minutes. For technicians, structured diagnosis prevents unnecessary part replacement and builds professional credibility.

    “Understanding signal flow is more powerful than replacing parts blindly.”

    If you approach this problem step by step, you will not only fix it faster—but fix it right.

  • Mobile Phone Repair Technician Resume Sample (Free Download)

    Mobile Phone Repair Technician Resume Sample (Free Download)

    Finding a job as a mobile phone repair technician becomes much easier when you have a clear and professional resume. Many skilled technicians struggle with job applications not because they lack skills, but because their resume, CV, or bio-data is poorly written or confusing.

    A good resume does not need big English words or complicated formats. It only needs to clearly show what you can repair, what experience you have, and how an employer can contact you. Whether you are a fresher learning mobile repair or an experienced technician handling Android phones and iPhones daily, a simple and correct resume makes a strong first impression.

    “Skills open the door, but a good resume helps you walk through it.”

    This guide explains how to create a mobile phone repair technician resume, also known as a CV (Curriculum Vitae) or bio-data, and provides ready-to-use editable samples you can download and modify.


    What Is Inside a Mobile Phone Repair Technician Resume?

    A mobile repair technician resume is a short document that explains:

    • Your repair skills
    • Your work experience
    • The type of phones and devices you can handle
    • Your contact details

    In different countries, the same document may be called:

    • Resume
    • CV (Curriculum Vitae)
    • Bio-data
    • Job profile
    • Technician profile

    All these terms mean the same thing in practical job applications.


    Why a Simple Resume Works Best for Technicians

    Many technicians think a resume must look fancy. This is not true.

    Workshop owners, service centers, and mobile repair shops look for:

    • Clear skills
    • Honest experience
    • Practical knowledge
    • Easy-to-read information

    A simple resume gets more callbacks than a complicated one.


    Important Sections Every Technician Resume Must Have

    No matter your experience level, your resume should include only these essential sections.

    1. Personal Details

    • Name
    • Mobile number
    • Email (if available)
    • City or area

    Keep this short and clear.


    2. Career Objective or Summary

    This is 1–2 lines about your goal.

    Example:

    • To work as a mobile phone repair technician and grow my technical skills.

    Avoid long paragraphs.


    3. Technical Skills (Most Important Section)

    This is what employers read first.

    Mention skills such as:

    • Android phone repair
    • iPhone repair
    • Battery replacement
    • Charging problem repair
    • LCD screen replacement
    • Software flashing
    • Fault diagnosis

    Always write only what you can actually do.


    4. Work Experience

    If you have experience, mention:

    • Number of years
    • Type of shop or service center
    • Devices handled (Tablets, iPhones, Android phones)

    If you are a fresher, write:

    • Trainee or fresher
    • Practical training experience

    5. Education or Training

    This can be simple:

    • School education
    • Mobile phone repairing course
    • ITI or short-term training

    Education level is less important than repair skills in this field.


    Resume Tips from Real Repair Experience

    • Do not write false experience
    • Do not use copied online resumes
    • Keep resume to one page
    • Avoid spelling mistakes
    • Use simple language

    “Honest skills last longer than fake experience.”


    Resume Format for Different Experience Levels

    To make it easy, below are three ready resume formats based on skill level.

    1. Basic Resume (For Freshers)

    Best for:

    • Freshers
    • New learners
    • Trainees

    Focus:

    • Basic repair skills
    • Willingness to learn

    2. Intermediate Resume (1–3 Years Experience)

    Best for:

    • Shop technicians
    • Service center helpers

    Focus:

    • Repair skills
    • Daily repair work
    • Software and hardware skills

    3. Advanced Resume (Experienced Technicians)

    Best for:

    • Senior technicians
    • Board-level repair workers

    Focus:

    • Hardware and software repair skills
    • IC work
    • Advanced fault diagnosis
    sample simple and basic resume bio-data format for entry level technicians. imae credit to shine.com

    Free Download: Editable Resume Samples (MS Word)

    You can download and edit these resumes easily on mobile or computer.

    📄 Resume Downloads

    • 👉 Basic Mobile Repair Technician Resume (MS-Word)
      Download
    • 👉 Intermediate Mobile Repair Technician Resume (MS-Word)
      Download
    • 👉 Advanced Mobile Repair Technician Resume (MS-Word)
      Download

    These files are:

    • Editable in MS Word
    • Simple and clean
    • Suitable for job applications
    • Easy to understand for technicians

    Resume vs CV vs Bio-Data: Which One Should You Use?

    • Resume → Common in the United States and service centers
    • CV (Curriculum Vitae) → Common globally
    • Bio-data → Common in India and Gulf countries

    You can use the same format for all. Only the name changes.


    Common Resume Mistakes Technicians Should Avoid

    • Writing long stories
    • Adding unrelated jobs
    • Using difficult English
    • Mentioning skills you don’t know
    • Using decorative designs

    Clear information matters more than design.


    Who Can Use These Resume Samples?

    These resume formats are suitable for:

    • Mobile phone repair technicians
    • Smartphone service center staff
    • Android repair technicians
    • iPhone repair technicians
    • Freshers and experienced workers

    Free Apps to Create a Professional Resume

    If you do not have a computer, you can still prepare a professional resume, CV (Curriculum Vitae), or bio-data using free mobile apps. These apps are easy to use and suitable for mobile phone repair technicians, even if you are not highly educated.

    Below are trusted, free apps with official download links.


    1. Indeed Resume Builder (Free)

    Indeed offers a free resume builder inside its official job search app.

    Download links:

    Why technicians use it:

    • Very simple and clean resume format
    • Professional look
    • Good for freshers and basic technicians
    • Resume can be downloaded as PDF

    2. Resume Builder – CV Maker (Android)

    Several free resume apps are available on Android under this name.

    Download link (Android):

    Why it is useful:

    • Step-by-step resume filling
    • Easy bio-data style formats
    • No design or English expertise needed

    Best for Android users and entry-level technicians.


    Tip: Always choose simple and professional templates, not colorful ones.


    3. Microsoft Word Mobile (Free)

    Microsoft Word mobile app is best for editing resume or bio-data files.

    Download links:

    Why it is recommended:

    • Very simple and professional
    • Works perfectly with Word resume samples
    • Accepted by all employers

    4. Google Docs (Free)

    Google Docs also provides resume templates and easy editing.

    Download links:

    Why it is useful:

    • Completely free
    • Auto-save feature
    • Easy sharing with employers

    Final Thoughts

    A mobile phone repair technician does not need a complicated resume. What matters is clarity, honesty, and practical skills. A clean resume shows professionalism and helps employers trust your abilities even before meeting you.

    If you update your resume as your skills grow, it becomes a strong career tool.

  • How to Use SMD Rework Station for Mobile Repair (Guide)

    How to Use SMD Rework Station for Mobile Repair (Guide)

    In the world of mobile phone repairing, the SMD rework station is one of the most essential and powerful tools. It allows technicians to heat, solder, remove, and reflow components with precision. Whether you want to repair a charging port, fix a loose IC, or carry out micro-level maintenance, this tool is the backbone of hardware repair work.

    Yet many beginners feel intimidated by it. They fear damaging nearby components, overheating ICs, or using the wrong settings. In reality, using a rework station is simple once you understand the fundamentals. It is a tool of accuracy, not force, and the more confidently you handle it, the better your repair results.

    As many experienced technicians say, “A rework station is only dangerous in untrained hands — in skilled hands, it’s a miracle machine.”

    This guide covers everything you need to know, from how the tool works to professional techniques you can start using immediately.


    What Is an SMD Rework Station?

    An SMD rework station (also called a hot air rework station, BGA rework station, or simply “blower” in repair shops) is a machine that blows out controlled hot air. This hot air allows you to:

    • Heat ICs
    • Remove ICs
    • Reflow solder joints
    • Fix dry solder faults
    • Replace SMD components
    • Install charging ports
    • Repair microphones, sensors, and connectors

    It provides precision heating, something a soldering iron cannot achieve on its own.

    Modern rework stations come with:

    • Temperature control
    • Airflow control
    • Different nozzle sizes
    • Anti-static safety measures
    • Heating element protection
    • Digital displays (in many models)
    • Infrared versions for highly sensitive components

    The goal is not to burn components, but to heat them safely and evenly until solder melts or reflows.


    Why Do ICs and Components Need Heating or Rework?

    Several real-world conditions cause ICs and SMD components to develop loose connections:

    • Vibrations
    • Sudden impacts or drops
    • Repeated heating and cooling cycles
    • Normal wear and tear
    • Moisture
    • Manufacturing limitations
    • Poor quality soldering
    • Excessive current load

    The result is a dry solder joint, meaning the solder balls or pads lose proper contact with the PCB.

    Depending on which component is affected, you may experience issues like:

    • Phone not switching ON
    • No charging
    • No network
    • No sound
    • Display not working
    • Auto restart
    • Heating issues
    • Touch not working
    • Camera errors

    This is especially common with BGA ICs, which have hundreds of tiny solder balls under them.

    Sometimes, simply heating the IC with the rework station reflows the dry joints and fixes the issue.

    If the problem remains, technicians proceed with:

    1. Reballing the IC (rare and advanced)
    2. Replacing the IC with a new one

    Different Types of Rework Stations

    While your original content mentions the traditional hot air station, today’s market includes several advanced types:

    1. Hot Air Rework Station (Most Common)

    • Uses controlled hot air
    • Works for most mobile repair jobs
    • Affordable and easy to learn

    2. Infrared Rework Station

    • Heats using infrared light
    • Does not burn plastic parts
    • Useful for sensitive components
    • More expensive but safer

    3. Hybrid Rework Station

    • Combines hot air + infrared
    • Excellent for BGA ICs
    • Used in professional repair labs

    For most mobile repair technicians and DIY learners, a standard hot air rework station is more than enough.


    Parts of the Rework Station You Must Understand

    A rework station has several core controls:

    • Temperature Control (Heat Control)

    Sets how hot the air will be.
    Higher temperatures melt solder faster, but can damage components if misused.

    • Airflow Control (Air Control)

    Regulates the force of air coming out.
    Too much airflow can blow components away.

    • Nozzles / Tips

    Direct the air to a precise area.
    Narrow nozzles: ICs and small jobs
    Wide nozzles: Larger components, heating areas

    • Heating Element

    Inside the handle, it heats the air.

    • Stand

    Holds the handle safely when not in use.

    Learning these parts makes operation safer and more accurate.


    Choosing the Correct Temperature

    A common question is:
    What temperature should I use?

    Your old content mentioned 300–400°C, which is still accurate — but technique matters more than raw numbers.

    General Temperature Guidelines

    • Small SMD components: 280–330°C
    • Medium-size ICs: 320–350°C
    • Large ICs or BGA chips: 350–400°C
    • Charging ports: 300–350°C
    • Plastics nearby: Use lower heat or shield them

    The actual temperature required depends on:

    • PCB thickness
    • IC size
    • Nozzle size
    • Type of solder
    • Position of nearby parts
    • Condition of the board

    Important:
    Never start with high heat. Begin low, then increase slowly.


    Choosing the Correct Airflow Setting

    Airflow is just as important as temperature.

    Too much air = components blown away
    Too little air = heating element gets damaged

    Recommended airflow:

    • Slightly above the minimum
    • Smooth, controlled flow
    • Enough to allow even heating

    For beginners, a low-to-medium airflow gives the best results.


    Selecting the Right Nozzle

    Different tasks require different air concentration.

    Narrow nozzles

    • Use for ICs, SMD parts, connectors
    • Direct heat precisely
    • Reduce damage to nearby components

    Wide nozzles

    • Use for removing shields
    • Heating large areas
    • Preheating boards

    Choosing the right nozzle prevents accidental damage.


    Using Soldering Flux: The Secret to Clean Work

    Flux is essential during heating and removal.

    Benefits of using flux:

    • Lowers melting temperature
    • Prevents oxidation
    • Allows solder to flow smoothly
    • Avoids pad lifting
    • Protects delicate joints

    Apply flux around the edges of the IC or part before heating.

    Without flux, your work will be harder and riskier.


    How to Use the Rework Station Step-by-Step (Beginner-Friendly)

    Now let’s convert everything into a practical, easy-to-follow process.


    Step 1: Prepare the Work Area

    • Use a clean, flat surface
    • Make sure lighting is bright
    • Keep tools organized
    • Wear anti-static precautions if possible

    Step 2: Apply Soldering Flux

    Apply a small amount around:

    • The IC
    • Charging port
    • Component you want to remove or heat

    Flux helps in reflow and removal.


    Step 3: Set Temperature and Airflow

    A safe starting point:

    • Heat: 320–350°C
    • Air: Slightly above minimum

    Adjust based on board response.


    Step 4: Start Heating in Circular Motion

    Do not hold the nozzle directly in one spot.
    Move the handle in small circular motions around the component.

    This ensures:

    • Even heating
    • No overheating of one area
    • Smooth solder melting

    Professionals say: “Your hand must dance, not stay still.”


    Step 5: Continue Heating Until the Component Loosens

    You will notice:

    • Solder becomes shiny
    • IC edges loosen
    • Component moves slightly with tweezers

    Do not pull or force removal.
    If it resists, heat a little more.

    For reflow (not removal), 2–3 rounds of slow circular heating are usually enough.


    Step 6: Lift the Component Carefully

    Use:

    • Fine tweezers
    • IC lifter
    • Straight motion

    Avoid twisting, as this may lift pads from the board.


    Step 7: Clean the Pads and Prepare for New Component

    Use:

    • Solder wick
    • Flux
    • Low-heat iron
    • IPA (isopropyl alcohol)

    Clean pads must be shiny and flat before replacing any component.


    When to Use Reflow, Reballing, or Replacement

    1. Reflow (Heating only)

    Use when:

    • IC connections are dry
    • Minor faults appear after drops
    • Device behaves intermittently

    Most common and safest method.


    2. Reballing

    Used rarely by technicians because:

    • Time-consuming
    • Requires specialized tools
    • Risky for beginners

    Performed only when:

    • IC is good
    • Solder balls are shorted or oxidized
    • No replacement IC available

    3. IC Replacement

    Use when:

    • IC is faulty
    • Component is burnt
    • Reflow does not fix the issue
    • Overheating persists
    • No power faults exist

    Replacing the IC is often the best solution for dead phones.


    Infrared Rework Stations: Modern Alternative

    Infrared stations are gaining popularity.

    Benefits:

    • No airflow = no component blowing
    • Safe for plastics
    • Very even heating
    • Ideal for sensitive ICs

    Drawback:

    • More expensive
    • Requires practice to control heat spread

    If you repair phone motherboards regularly, infrared is a great investment.


    Common Problems Beginners Face (and Solutions)

    1. Nearby parts melting or shifting

    • Reduce air
    • Change nozzle
    • Use aluminum tape to protect parts

    2. IC does not loosen

    • Increase temperature slightly
    • Allow more preheating
    • Apply more flux

    3. Pads lift from PCB

    • Too much heat
    • Holding heat too long
    • Pulling the component forcefully

    Solution: Practice on dead boards first.


    4. Board burns or turns black

    • Overheating
    • Air too low
    • No movement of nozzle

    Keep the nozzle moving at all times.


    5. Coil inside handle burns

    • Airflow too low
    • Blocked nozzle

    Always ensure airflow is slightly above minimum.


    Practical Real-Life Example

    A technician receives a phone that does not charge.
    Diagnosis:

    • Charging port loose
    • Connections cracked internally

    Solution:

    1. Apply flux
    2. Heat port with medium heat
    3. Remove port safely
    4. Clean pads
    5. Install new port with reflow + iron

    The phone charges perfectly after repair.

    This is a common situation solved easily with a rework station.


    Safety Tips You Should Always Follow

    • Never touch the nozzle during or after use
    • Use tweezers, not fingers
    • Keep flammable objects away
    • Do not point hot air at cables or battery
    • Let the machine cool before storing
    • Practice on dead boards before real repairs

    Safety comes first — mobile boards are small and sensitive.


    Conclusion

    Using an SMD rework station may seem complex, but once you understand heat control, airflow, nozzles, and flux, the process becomes smooth and almost artistic. It is one of the most important skills in mobile phone hardware repair, enabling you to fix ICs, connectors, charging ports, and countless other components with precision.

    Start with simple tasks, practice on dead boards, and gradually move to more advanced repairs. With patience and consistency, you’ll master the rework station and unlock a whole new level of repair expertise.

  • How To Extend The Life of Your iPhone: Tips For Preventing Repair

    How To Extend The Life of Your iPhone: Tips For Preventing Repair

    If you own an iPhone, you already know it is not a small investment. You want it to last long, run smoothly, and stay in good condition. But many people end up spending a lot on repairs because their phones get damaged, slow down, or face battery issues. The good news is that you can avoid most of these problems by learning how to extend the life of your iPhone and following a few simple habits every day.

    This guide is based on real experiences shared by Apple technicians, repair experts, and long-time iPhone users. It includes only authentic information so you can trust what you are reading.


    Why it is Important to Learn How To Extend The Life of Your iPhone

    Understanding how to extend the life of your iPhone can save you a lot of trouble later. iPhone repairs like screen changes, back-glass replacement, and battery replacements can be expensive. In some cases, they cost almost half the price of a new phone.

    By learning how to care for your device, you benefit from:

    • Less repair cost
    • Better battery life
    • Smoother performance
    • Longer device lifespan
    • Higher resale value

    Most iPhones can last 4 to 6 years if you maintain them properly. So, these habits are worth your time.


    1. Use a Strong Case and Quality Screen Protector

    Physical damage is the most common reason iPhones need repairs. A single drop can crack the screen or damage internal components, especially the motherboard. So, one of the most basic but powerful steps in preventing repair is protecting your device.

    Choose:

    ✔ A shock-resistant or military-grade case
    ✔ A tempered glass screen protector
    ✔ A case with raised edges to protect the camera lenses

    Avoid carrying your phone with keys, coins, or sharp objects. Even tiny scratches can weaken the glass over time.


    2. Follow Proper Battery Care to Keep Health High

    Good battery health is essential if you want your iPhone to last several years. Apple uses lithium-ion batteries, and they age faster due to heat and overcharging. Proper charging habits pkays a major part in exteding the life of your iPhone or other smartphone and thereby preventing repairs.

    Battery care tips:

    • Keep battery between 20% and 80%
    • Turn on Optimized Battery Charging
    • Avoid charging overnight every day
    • Use Apple-certified chargers
    • Remove case if phone heats while charging

    If you plan to store your iPhone unused for a long time, keep it at around 50% charge.


    3. Keep Your iPhone Software Updated

    Many users skip updates, but Apple releases them for a reason. Updates fix bugs, prevent crashes, and improve security. They may even help battery performance. This is a key step to avoid software related issues.

    Do the following:

    • Install system updates when available
    • Restart your phone once a week
    • Avoid third-party system cleaning apps
    • Update apps regularly

    Experts say that regular updates help prevent overheating, battery drain, and app glitches.


    4. Smart Storage Management for Better Performance

    Too little storage slows down the phone and causes freezing or lag. That is why storage care is equally important.

    Useful storage tips:

    • Keep 10–20% storage free
    • Delete duplicate photos and downloaded files
    • Enable Offload Unused Apps
    • Move large files to iCloud or a computer drive

    Try not to install heavy apps you do not use.


    5. Prevent Overheating – A Silent Phone Killer

    Heat destroys battery life faster than anything else. Many users ignore this, but temperature control is one of the strongest Tips For Preventing Repair.

    Avoid:
    🚫 Playing heavy games while charging
    🚫 Leaving the phone inside a parked car
    🚫 Keeping the screen brightness too high for long periods

    If your iPhone feels hot:

    • Close background apps
    • Stop charging
    • Remove the case
    • Keep it in shade until temperature reduces

    6. Charge Your iPhone Correctly

    People damage their phones by using cheap chargers and overcharging. Safe charging is a crucial part of extending the life of your iPhone.

    Recommended charging habits:

    ✔ Use original or MFi-certified chargers
    ✔ Prefer slow charging when possible
    ✔ Avoid fast charging all the time
    ✔ Do not use power banks of unknown brands

    Wireless charging is fine, but it generates more heat, so avoid very long sessions.


    7. Keep the Charging Port, Mic & Speakers Clean

    Dust can block your microphone, reduce speaker volume, and disturb charging. For safe cleaning:

    • Use a soft, dry brush
    • Do not use needles or toothpicks
    • Keep your phone in a clean pocket or bag

    Many charging issues happen because people force the cable into a dusty port and bend the pins inside.


    8. Reduce Battery Drain with Smart Usage

    You can make battery life longer and reduce heating by following a few daily habits:

    • Use Wi-Fi instead of mobile data when possible
    • Turn on Low Power Mode when battery is low
    • Disable Bluetooth, AirDrop, Location when unused
    • Lower screen brightness when indoors

    Small habits make a big difference in How To Extend The Life of Your iPhone: Tips For Preventing Repair.


    9. Handle Your Phone Carefully

    Even small drops and pressure can damage internal parts. Be mindful of how you use your iPhone.

    Avoid:
    🚫 Sitting with your phone in the back pocket
    🚫 Keeping it under pillows while sleeping (heat danger)
    🚫 Using it near water, sinks, pools, or rain without protection

    Even water-resistant models can get damaged by steam or saltwater.


    10. Replace Battery When Needed, Not Too Late

    If your battery health falls below 80%, Apple recommends a replacement. For better safety and reliability:

    ✔ Use Apple Authorized Service Providers
    ✔ Avoid low-quality local batteries

    A weak battery can swell and damage the display, causing expensive repairs.


    Final Words

    These simple steps will help you keep your iPhone fast, safe, and reliable for years.

    To summarize, remember to:

    ⭐ Use a strong case and tempered glass
    ⭐ Protect and maintain battery health
    ⭐ Update iOS regularly
    ⭐ Manage storage wisely
    ⭐ Avoid overheating
    ⭐ Charge safely with certified chargers
    ⭐ Clean the ports carefully
    ⭐ Handle your iPhone with care
    ⭐ Replace the battery at the right time

    With these habits, you save money, reduce repair needs, and enjoy a smooth, long-lasting iPhone experience.

    Do let us know your views in the comments below.

  • DIY iPhone Repair: Tips for Fixing Your Phone at Home

    DIY iPhone Repair: Tips for Fixing Your Phone at Home

    Many people prefer fixing small phone issues on their own. It saves time, reduces repair costs, and helps you understand your device better. But iPhones are delicate, and even a tiny mistake can damage an important part. This guide on DIY iPhone Repair explains safe, beginner-friendly fixes and also shows you when it’s better to let a technician handle the job.

    Repair experts often give one simple piece of advice: start with what you truly understand. This applies to every beginner trying to repair an iPhone at home.


    Why People Choose DIY Repairs

    Most users try simple DIY iPhone or mobile repairs because many common problems don’t need a technician. Issues like slow speed, poor battery backup, charging interruptions, audio problems, or a broken screen protector are usually easy to solve.

    Fixing these small problems at home can:

    • Save money
    • Save travel time
    • Help you understand your device
    • Avoid unnecessary repair shop visits

    However, it’s important to remember that iPhones are tightly built, and their internal components are sensitive. Only attempt tasks you’re confident about.


    Essential Tools for Safe iPhone Repair at Home

    Regular household tools are not suitable for opening an iPhone. You need proper precision tools to avoid damaging screws or delicate internal parts. Some commonly used tools include:

    • Pentalobe screwdriver
    • Small Phillips screwdriver
    • Plastic pry tools
    • Suction cup
    • Tweezers
    • Spudger
    • ESD-safe mat (to prevent static damage)

    These tools make the repair process smoother and reduce the risk of accidental damage.


    Common iPhone Issues You Can Fix Yourself

    1. Battery Drain

    Battery issues are among the most common complaints. Before opening the device, try these simple steps:

    • Close unwanted background apps
    • Reduce brightness
    • Check battery health from Settings
    • Turn off Bluetooth, Wi-Fi, or location when not needed

    If the battery is swollen or losing charge unusually fast, avoid opening the phone. Swollen batteries can be dangerous and should be handled only by trained technicians.


    2. Slow Performance or Freezing Screen

    These problems usually don’t require opening the phone. You can try:

    • Restarting your device
    • Updating to the latest iOS
    • Deleting unused files
    • Offloading apps
    • Resetting settings (not data)

    These quick steps often resolve lagging and freezing issues.


    3. Charging Problems

    Charging issues are very common, and many times the culprit is simple dust in the charging port.

    You can try:

    • Turning off the phone
    • Cleaning the port gently with a wooden toothpick
    • Using light bursts of compressed air

    Never use metal objects or apply too much pressure.
    If the port feels loose or physically damaged, it’s better to visit a repair center.


    4. Speaker Not Working

    Before assuming anything is broken, try these checks:

    • Ensure the volume is turned up
    • Disable Bluetooth (to avoid connecting to a speaker/headset)
    • Clean the speaker grill with a soft brush
    • Restart your phone

    If the sound is still distorted or very low, the internal speaker might need professional repair.


    5. Cracked Screen Protector

    Replacing a screen protector is one of the easiest DIY tasks:

    1. Gently lift one corner using a plastic card
    2. Peel it off slowly
    3. Clean the screen
    4. Apply a new protector smoothly

    This does not require any technical experience.


    Safety Tips for DIY iPhone Repairs

    Working safely is more important than finishing fast. Keep these basic rules in mind:

    • Switch off your phone before opening it
    • Disconnect the battery first if you open the device
    • Avoid metal tools inside the phone
    • Work on a clean, well-lit surface
    • Keep screws organized—iPhones use many different sizes
    • Take your time and avoid rushing

    Following these precautions reduces the chances of mistakes.


    When DIY Repair Is Not Recommended

    Not all issues should be handled at home. Some repairs are complex and require experience:

    • Screen replacement
    • Battery replacement (especially swollen batteries)
    • Motherboard repairs
    • Liquid damage
    • Face ID or Touch ID issues
    • Camera module problems

    These components are delicate, and mishandling them can lead to permanent damage. For such cases, professional help is the safest choice.


    Benefits of Doing Your Own Repairs

    When done correctly, DIY repairs offer several advantages:

    • Lower repair costs
    • Quick solutions for small issues
    • Increased knowledge about your device
    • Less reliance on repair centers
    • Confidence in handling basic problems

    Just remember: being a responsible DIY repairer means knowing your limits.


    Common Mistakes to Avoid

    Beginners often run into trouble because of simple errors. Avoid:

    • Using cheap or poor-quality replacement parts
    • Applying too much force
    • Mixing screws during reassembly
    • Opening the phone without proper tools
    • Ignoring safety advice

    Any of these can worsen the damage or make the phone unusable.


    How to Keep Your iPhone Working Well After Repair

    After fixing any issue, regular care will help your phone last longer:

    • Clean the phone, especially ports and speaker grills
    • Avoid moisture or extreme heat
    • Use a good-quality case and screen protector
    • Keep iOS updated
    • Handle the phone carefully, especially after repairs

    Good habits reduce the chances of future problems.


    Final Thoughts

    DIY iPhone repair can be a great way to solve small issues at home. Simple steps, the right tools, and patience can help you fix several common problems safely. But it’s equally important to understand which issues require professional skills.

    Repair technicians always say: “Do what you know. Leave the risky part to experts.” If you follow that advice, you can keep your iPhone safe and still enjoy the benefits of solving minor issues on your own.

  • All Cell Phone Repair Tips and Tricks: A Complete Guide for Beginners and Technicians

    All Cell Phone Repair Tips and Tricks: A Complete Guide for Beginners and Technicians

    Mobile phones have become essential for almost everything—communication, business, capturing memories, navigation, payments, entertainment, and more. So when a device stops working, even for a few hours, it feels like life has slowed down. That’s why mobile repair skills are more valuable today than ever.

    Whether you’re a beginner learning to fix phones, a technician brushing up your skills, or simply someone curious about troubleshooting, this guide will teach you the most important repair tips and tricks in a simple, practical, easy-to-understand way.

    As repair professionals often say, “Every device has a solution—you just need the right tools and the right approach.”


    What This Guide Covers

    This article offers a complete overview of:

    • Understanding the structure of mobile devices
    • Identifying motherboard components
    • Diagnosing hardware and software issues
    • Hands-on troubleshooting
    • Safety practices
    • Flashing, formatting, and firmware repairs
    • Practical tips for beginners
    • Common mistake-prevention methods
    • Examples from real repair scenarios

    Everything is written in clean, conversational language so you can learn quickly and confidently.


    Introduction to Mobile Phone Repair

    Mobile repair may look complicated from the outside—chips, circuits, tiny components, advanced software—but the reality is simpler than most people think. Repairing devices becomes easy when you understand how they work, why they fail, and what steps restore them back to normal.

    You’ll find three major pillars in mobile repair:

    1. Dismantling and assembling
    2. Hardware diagnostics
    3. Software troubleshooting

    Master these, and you can fix almost any phone, whether it’s Samsung, Apple, Oppo, Vivo, Xiaomi, Motorola, Tecno, or any less-known brand.

    And remember this quote that every good technician lives by:
    “Knowledge grows when you use your hands, not just your eyes.”


    Understanding How a Smartphone Works

    Before learning repair techniques, you must understand the major parts inside a mobile phone.

    https://www.researchgate.net/publication/340813692/figure/fig2/AS%3A882736332013568%401587472150016/nternal-circuit-diagram-of-a-high-end-Android-based-smartphone-This-figure-shows-the.jpg?utm_source=chatgpt.com
    https://www.mobilecellphonerepairing.com/wp-content/uploads/2013/07/Mobile-Phone-Parts.jpg?utm_source=chatgpt.com

    Every smartphone contains:

    1. Display Assembly

    • Touchscreen (digitizer)
    • LCD or AMOLED display
    • Frame and supporting layers

    2. Battery

    Removable or non-removable lithium-ion battery.

    3. Motherboard

    The heart of the device. It includes:

    • CPU & GPU
    • RAM
    • Power IC (PMIC)
    • Charging IC
    • Audio IC
    • Network IC
    • RF components
    • EEPROM / ROM
    • Wi-Fi & Bluetooth modules

    4. Cameras

    Front and rear modules with separate sensors.

    5. Antennas

    Responsible for network, Wi-Fi, GPS, Bluetooth.

    6. Speakers & Microphones

    Ear speaker, loudspeaker, primary and secondary mics.

    7. USB/Charging Port

    Often one of the most replaced components.

    8. Vibrator Motor

    For haptic feedback.

    When you learn to identify these components, half the troubleshooting already becomes easy.


    Tools You Need for Mobile Repair

    Having the right tools ensures accuracy and safety.

    https://i.ebayimg.com/images/g/fTIAAOSwy15grASR/s-l1200.jpg?utm_source=chatgpt.com
    https://m.media-amazon.com/images/I/71y5rSTkgHL.jpg?utm_source=chatgpt.com
    https://images.thdstatic.com/productImages/750c58f8-a5e8-4b21-bc62-37a733166716/svn/general-tools-home-tool-kits-660-64_1000.jpg?utm_source=chatgpt.com

    Essential tools include:

    Basic Tools

    • Precision screwdriver set
    • Plastic pry tools
    • Tweezers
    • Opening picks
    • SIM ejector
    • Isopropyl alcohol (IPA)
    • Magnifying lamp

    Intermediate Tools

    • Soldering iron
    • Hot air rework station
    • Multimeter
    • DC power supply
    • PCB holder
    • Microscope (optional but helpful)

    Software Tools

    • Flashing tools (brand-specific)
    • Drivers and firmware files
    • Data recovery applications
    • Unlocking utilities (legal use only)

    High-quality tools protect devices from damage and improve your success rate.


    Dismantling and Assembling a Mobile Phone

    Correct dismantling prevents accidental damage to:

    • Display
    • Motherboard
    • Flex cables
    • Connectors
    • Fingerprint sensors

    Safe Dismantling Steps

    1. Power off the phone completely
    2. Remove SIM, SD card, and accessories
    3. Gently heat the back cover if it’s glued
    4. Use plastic tools—not metal—to lift edges
    5. Disconnect the battery before touching anything else
    6. Handle flex cables carefully—they tear easily
    7. Store screws in separate groups to avoid confusion

    Reassembling Tips

    • Never over-tighten screws
    • Ensure all connectors click into place
    • Clean surfaces with IPA before closing
    • Test everything before final sealing

    Identifying Motherboard Parts and Their Functions

    Understanding the roles of ICs helps you diagnose issues confidently.

    Important IC Components

    Power IC (PMIC):
    Controls battery power, charging, and voltage distribution.

    Charging IC:
    Handles fast charging, USB communication, and battery detection.

    Audio IC:
    Manages speakers, headphones, and microphone-related functions.

    Network IC / RF section:
    Controls SIM detection, signal strength, and mobile data.

    Backlight IC:
    Lights up the display; faulty IC causes dim or black screen.

    CPU & RAM:
    Brains of the phone—rarely replaced but often fail due to overheating or water damage.

    Learning how these parts interact dramatically improves your fault-finding ability.


    Diagnosing Hardware Problems

    Hardware faults are usually related to:

    • Battery issues
    • Display damage
    • Motherboard faults
    • Charging problems
    • Audio issues
    • Camera failures
    • Water damage

    Here’s how to approach them.


    1. Battery Problems

    Common symptoms:

    • Phone turns off randomly
    • Full charge drains rapidly
    • Device only works when plugged in

    Solutions:

    • Calibrate battery
    • Replace degraded battery
    • Check charging IC or PMIC if battery is new

    2. Display Problems

    Symptoms:

    • Touch not working
    • Flickering screen
    • Lines on display
    • Black screen

    Fix:

    • Replace LCD or AMOLED
    • Clean flex cable connection
    • Check display IC

    3. Charging Issues

    One of the most frequent hardware repairs.

    Symptoms:

    • Slow charging
    • Not charging at all
    • Phone heats while charging
    • Charging only at specific angles

    Fix:

    • Replace charging port
    • Clean connector pins
    • Test with DC power supply
    • Check Charging IC and PMIC if port is fine

    4. Camera Problems

    Symptoms:

    • “Camera failed” message
    • Blurry photos
    • Camera not opening

    Solutions:

    • Replace camera module
    • Clean connectors
    • Update or reset software

    5. Audio Problems

    Symptoms:

    • Caller can’t hear you
    • You can’t hear the caller
    • No sound in videos or apps

    Fix:

    • Replace speaker / mic
    • Reheat or replace Audio IC
    • Clean mesh filters (often clogged with dust)

    6. Water Damage Repairs

    Water damage is tricky but often repairable if treated quickly.

    Steps:

    1. Switch off device immediately
    2. Dry using absorbent cloth
    3. Open back cover
    4. Disconnect battery
    5. Clean motherboard with IPA
    6. Dry thoroughly before testing

    Never use a hairdryer—it can push moisture deeper.


    Diagnosing Software Problems

    Many issues are software-related and easy to fix.


    1. Device Running Slow

    • Clear cache
    • Uninstall heavy apps
    • Reset settings

    2. Boot Loop or Stuck Logo

    Often fixed by:

    • Flashing firmware
    • Wiping data and cache

    3. Network or SIM Issues

    Try:

    • Reset network settings
    • Replace SIM
    • Flash firmware
    • Check baseband status

    4. App Crashes

    • Update apps
    • Clear app data
    • Check storage space

    Flashing and Formatting Mobile Phones

    Flashing refers to reinstalling the phone’s operating system.
    Formatting refers to wiping user data.

    Why Flashing is Needed

    • Stuck on logo
    • Software corruption
    • Virus or malware
    • Forgotten password (legitimate use only)

    How to Flash Safely

    • Use official firmware only
    • Install correct drivers
    • Backup user data (if possible)
    • Fully charge the device
    • Never interrupt the flashing process

    Using the wrong firmware can permanently damage the device, so accuracy matters.


    Practical Tips and Tricks for Repair Technicians

    Here are the most useful mobile repair insights gathered from real-world experience.

    1. Always Start with Visual Inspection

    Look for:

    • Burn marks
    • Corrosion
    • Loose ICs
    • Broken connectors
    • Missing components

    2. Use a Multimeter for Quick Diagnosis

    Check:

    • Continuity of tracks
    • Short circuits
    • Voltage output from PMIC

    3. Clean First, Repair Later

    A huge number of issues are caused by:

    • Dirt
    • Moisture
    • Loose connectors

    4. Avoid Excessive Heat

    Too much heat:

    • Warps the motherboard
    • Damages ICs
    • Melts flex cables

    Use proper temperature ranges.

    5. Maintain a Troubleshooting Checklist

    This prevents missing simple solutions.

    6. Follow “Least Risk First” Approach

    Example:

    • Try cleaning → reconnecting → replacing minor parts → motherboard repair.

    7. Keep Learning

    Mobile technology changes fast.
    Forums, YouTube channels, and training institutes help build expertise.


    Common Mistakes and How to Avoid Them

    Mistake 1: Using metal tools on delicate parts

    Can cause short circuits.

    Mistake 2: Skipping ESD protection

    Electrostatic discharge can damage ICs.

    Mistake 3: Rushing during dismantling

    Leads to torn flex cables.

    Mistake 4: Ignoring battery safety

    Damaged batteries can swell or burst.

    Mistake 5: Flashing wrong firmware

    Causes dead phone or corrupted partition.


    When a Phone Is “Beyond Repair”

    A phone becomes near-impossible to repair when:

    • CPU or RAM is internally damaged
    • Motherboard is severely burnt
    • Board layers are broken
    • Severe corrosion has eaten through tracks
    • Device fails even after IC replacement

    However, skilled board-level technicians can still revive many cases that seem impossible.


    How to Improve Your Repair Skills Quickly

    1. Practice on Old Phones

    Before handling expensive devices.

    2. Watch Live Repair Videos

    Helps you understand real scenarios.

    3. Join Technician Communities

    Forums and groups offer daily learning.

    4. Learn Microsoldering

    Increases your repair success rate.

    5. Stay Updated

    New phone models require new methods.


    Conclusion

    Mobile phone repair is a blend of knowledge, observation, and hands-on practice. When you understand how phones work and follow a systematic troubleshooting approach, even complex problems become simple.

    Whether you’re repairing for personal use or building a professional career, the tips in this guide will help you diagnose faults faster, avoid common mistakes, and build confidence.

    If you approach every device with patience and curiosity, your skills will grow naturally and consistently.

  • All Mobile Phone Default Security Codes and How to Reset Them

    All Mobile Phone Default Security Codes and How to Reset Them

    Security codes play a crucial role in keeping your mobile phone safe. Even though modern devices now use advanced biometrics like fingerprint sensors and facial recognition, the traditional security code still remains an important layer of protection. It acts as a safeguard for your personal data, prevents unauthorized access, and is often required for functions like resetting the device or modifying key settings.

    Mobile Phone Security Codes: Complete Guide, Tips, and Reset Methods

    This guide explains everything you need to know about mobile security codes—from default codes used by many popular brands to the reasons your device may show a “wrong code” error, along with practical steps to reset forgotten codes. You’ll also learn why it’s essential to change the default security code and how to keep it safe without losing access to your phone.

    As the saying goes, “Your phone is your digital identity—protect it as carefully as you protect your home.”


    What Is a Mobile Phone Security Code?

    A security code is a numeric password set by the phone manufacturer or user. It is used to:

    • Prevent unauthorized access
    • Protect sensitive information
    • Reset or format the device
    • Modify security and privacy settings
    • Lock the device menu or key functions

    Most phones ship with a default security code, which remains unchanged until the user edits it.


    Why Security Codes Still Matter Today

    Even though smartphones today offer pattern lock, PIN, biometric unlock, app protection, and cloud-based security, the classic security code is still important because:

    • It is needed to perform a factory reset on many feature phones and older smartphones.
    • It helps technicians troubleshoot or restore devices.
    • Some models still require it for formatting, backup, and setup.
    • It provides a secondary protection layer if the main lock system fails.

    Think of it as a backup key—rarely used but extremely important when needed.


    When Does a Phone Ask for the Security Code?

    Your device may request the security code during:

    • Accessing the main menu (on some keypad phones)
    • Changing privacy or security settings
    • Performing factory reset
    • Opening restricted phone features
    • After multiple failed unlock attempts
    • Repair or software flashing processes (varies by model)

    If you have activated security lock settings manually, the phone will request the code more frequently.


    Why You Should Change the Default Security Code

    Leaving the default security code unchanged can put your data at risk.

    Most default codes are publicly known, which means anyone familiar with mobile repair or phone settings can guess them. To protect your privacy, it is important to:

    • Change the default code immediately
    • Choose a memorable but strong combination
    • Avoid predictable codes like 0000 or 1234
    • Store your code somewhere safe

    Once changed, the phone will not accept the old default code anymore, and inserting the wrong code repeatedly may lock certain functions.


    What Does “Wrong Code” or “Code Error” Mean?

    If your phone displays messages like:

    • Wrong code
    • Code error
    • Incorrect password

    …it usually indicates:

    • The default code has been changed earlier
    • The user forgot the new code
    • Someone else changed it intentionally or accidentally
    • The device software is malfunctioning
    • The keypad entered digits incorrectly

    In most cases, the device is not faulty—the security code simply mismatch.

    security codes options

    Default Security Codes of Popular Mobile Phone Brands

    Here are commonly used default codes across various manufacturers. These codes come directly from factory settings and work unless changed by the user.

    Note: Manufacturers may update security features over time, and some newer keypad phones require you to create a code during setup instead of using a default one.


    Samsung Phones

    • 0000
    • 000000
    • 00000000

    (Some models accept any of these depending on region and firmware.)


    Nokia Phones

    • 12345 (most common and widely used)

    Other Popular Brands (Sony, Motorola, LG, Panasonic, etc.)

    • 0000
    • 1234
    • 9999

    These brands often use one of the simple 4-digit combinations.


    Chinese & Generic Brands (Itel, Gionee, Micromax, Karbonn, and unbranded models)

    • 1122
    • 0000
    • 1234

    Lava Phones

    • 4321

    This is one of the few brands with a unique standard code.


    Important Note About Newer Keypad Phones

    Many recent feature phones no longer come with a preset factory security code. Instead:

    • During first-time setup, the phone asks you to create your own security code.
    • You must remember this code, as there is no universal default.
    • If forgotten, the phone must be reset using special software or hardware methods.

    This shift strengthens security and reduces unauthorized access.


    If the Default Code Does Not Work

    There are only two possibilities:

    1. The code was changed earlier, and the new code is unknown.
    2. The phone’s software requires resetting, because the security file is corrupted.

    If you are sure you’re entering the correct default code but it still fails, the only way to unlock is:

    • Reset through specialized software
    • Hard-reset using key combinations (if supported)
    • Visiting a service center or professional technician

    Each brand uses different reset protocols, so there is no universal method.


    How to Reset or Recover a Forgotten Security Code

    Here are the main methods used in real repair environments.


    1. Hard Reset (Button Method)

    Many keypad phones and some older smartphones support a button-based hard reset.

    Common steps include:

    1. Switch off the device
    2. Press and hold specific key combinations (varies by model)
    3. Enter recovery mode
    4. Select “wipe data/factory reset”
    5. Confirm

    Once reset, the phone returns to factory settings, and the security code resets to its default.

    This method erases all data, so use it only if necessary.


    2. Flashing the Device

    For phones with forgotten security codes, flashing can:

    • Remove the current security lock
    • Restore original firmware
    • Fix corrupted operating system files

    This method requires technical expertise and tools like:

    • Brand-specific firmware
    • Flashing boxes (for feature phones)
    • USB drivers
    • Backup utilities

    It is widely used by professional repair technicians.


    3. Using Special Software Tools

    Different brands require different software. Examples include:

    • Tools for Nokia keypad models
    • Software utilities for Chinese MTK keypad devices
    • Brand-specific service suites

    These programs can:

    • Read the current security code
    • Remove the lock
    • Restore the default settings

    They must be used legally and responsibly, especially for devices that do not belong to you.


    Precautions When Resetting Any Phone

    Before performing a hard reset or flashing, always follow these precautions:

    • Backup data, if possible
    • Ensure the battery is sufficiently charged
    • Use only compatible firmware
    • Do not disconnect the cable during flashing
    • Be aware that formatting erases personal files

    Incorrect flashing can render the phone unusable, so proceed only if you understand the process.


    Security Code vs. Other Locks: What’s the Difference?

    Phones today include multiple layers of security. Understanding them helps avoid confusion.

    Security FeaturePurposeReset Difficulty
    Security CodeMenu/Settings access, resetsEasy to moderate
    PIN CodeControls SIM accessEasy (SIM provider can reset)
    Password/Pattern/PIN LockLocks phone screenEasy to moderate
    FRP / Mi Account / iCloud LockPrevents unauthorized resetHard (requires ownership proof)

    A security code is only one part of a larger ecosystem of protections.


    Tips to Keep Your Security Code Safe

    To avoid being locked out of your own device:

    ✔ Use a unique combination

    Avoid using your birth year, mobile number, or 0000.

    ✔ Write it down temporarily

    Store it safely until you memorize it.

    ✔ Do not share it casually

    Even close contacts do not need access to your personal code.

    ✔ Update it if someone learns it

    Your privacy is your responsibility.

    ✔ Reset only when necessary

    Frequent resets can confuse your memory.

    In digital safety, small habits make the biggest difference.


    Common Myths About Security Codes

    Myth 1: Every phone has a default code.

    Not true. Many new models require creating your own code at first use.

    Myth 2: Security codes and SIM PINs are the same.

    They are completely different.

    Myth 3: Entering the wrong code many times will permanently lock the phone.

    Most phones allow resets through recovery or flashing.


    Frequently Asked Questions

    1. What happens if I never change the default code?

    Anyone who knows default codes can unlock certain functions of your phone. It reduces privacy and security.

    2. Can security codes be bypassed easily?

    Only through technical methods like flashing or specialized tools—never by guessing unless default values were not changed.

    3. Will resetting remove the security code?

    Yes, a full factory reset usually restores the default code.

    4. Can a technician unlock the phone without data loss?

    Sometimes yes, depending on the model and software tools available.


    Conclusion

    Security codes play a vital role in protecting personal information stored inside your phone. While modern devices offer advanced unlocking methods, the traditional security code remains a valuable backup and an essential part of device management. Changing the default code, remembering it, and knowing how to reset it when forgotten are fundamental steps in maintaining control over your digital life.

    With the right knowledge, even situations like “wrong code” errors or forgotten passwords can be solved confidently. The key is to follow safe methods, understand your phone’s brand-specific behavior, and always prioritize privacy.

  • How to Protect Your Phone From Viruses and Malware

    How to Protect Your Phone From Viruses and Malware

    Mobile phones have become essential to daily life. We use them for communication, payments, entertainment, work, online shopping, banking, and storing personal information. Because of this, smartphones have become a prime target for cyber threats. Just like computers, phones can be infected by viruses, malware, spyware, ransomware, worms, and other malicious programs designed to harm the device or steal important data.

    A phone virus behaves very much like a computer virus—it spreads, multiplies, disrupts normal functions, and can cause serious damage if left unchecked. As one security expert puts it, “Your phone is not just a device; it holds your digital identity. Protect it like your most valuable asset.”

    This comprehensive guide explains how mobile viruses spread, how to identify infections, and—most importantly—how to protect your phone from malware using simple, practical methods that actually work.


    What Is a Mobile Phone Virus?

    A mobile phone virus is a malicious software program created to:

    • Disrupt normal phone operations
    • Damage or delete data
    • Steal personal information
    • Display unwanted ads
    • Track activity or monitor user behavior
    • Spread to other devices through networks, Bluetooth, or installed apps

    These viruses take advantage of vulnerabilities in your phone’s operating system, downloaded files, apps, or connectivity settings.

    Modern malware is far more advanced than early mobile viruses. Instead of simply corrupting data, today’s threats can:

    • Send unauthorized SMS or WhatsApp messages
    • Automatically install harmful apps
    • Steal passwords
    • Record conversations
    • Monitor browsing
    • Capture keystrokes
    • Encrypt files and demand ransom
    • Spread silently through WiFi, Bluetooth, or malicious websites

    Because smartphones store sensitive data like banking details and photos, viruses today pose not just a technical risk but also a privacy and financial threat.


    How Do Mobile Viruses Spread?

    Understanding the sources of malware is the first step toward preventing it.

    Here are the most common ways your phone can get infected:


    1. Bluetooth File Sharing

    Virus creators often target Bluetooth connections because:

    • Many users leave Bluetooth ON all the time
    • Files can be shared without internet
    • Users frequently accept files without checking the sender

    If your Bluetooth is set to “visible,” your phone becomes easy to target.


    2. Memory Cards & External Storage

    If someone uses an infected memory card and inserts it into your phone, the virus can automatically copy itself into your system. Similarly, sharing SD cards between devices increases the risk of transferring hidden malware files.


    3. Malicious Websites

    Certain websites automatically download harmful files when you:

    • Click ads
    • Download free ringtones, wallpapers, or apps
    • Visit unsafe or unverified pages

    This is one of the fastest-growing sources of mobile infections.


    4. Fake Apps and APK Files

    Apps downloaded from outside official app stores are a major threat.

    Many free or cracked apps:

    • Contain spyware
    • Ask for unnecessary permissions
    • Install hidden services
    • Display intrusive ads
    • Steal information

    Even the Google Play Store and Apple App Store occasionally remove apps that collect unauthorized data.


    5. Public WiFi Networks

    Hackers can intercept your data or inject malicious scripts when you connect to unsecured WiFi networks such as:

    • Cafes
    • Airports
    • Hotels
    • Railway stations

    Your phone becomes vulnerable to malware, phishing, and data theft.


    6. Email Attachments & Messages

    Opening unknown links or attachments from SMS, WhatsApp, Telegram, or email can install hidden malware.

    Cybercriminals often disguise themselves as:

    • Banks
    • Delivery companies
    • E-commerce websites
    • Payment services

    This is one of the most effective methods used by phishing attackers.


    Signs Your Phone Might Have a Virus

    Most mobile viruses operate quietly in the background, but you might notice:

    • Sudden battery drain
    • Phone heating unusually
    • Random pop-ups or ads
    • Slow performance
    • Unknown apps appearing on your device
    • Increased mobile data usage
    • Contacts receiving strange messages
    • Apps crashing frequently
    • Phone behaving unpredictably
    • Background noise during calls

    If multiple symptoms occur together, your phone might be infected.


    How to Protect Your Phone from Viruses: Complete Guide

    Below are the most effective and practical ways to secure your device from malware, spyware, and viruses. These methods combine modern cybersecurity practices with real repair-experience insights.


    1. Keep Bluetooth Turned Off When Not in Use

    One of the simplest yet most effective security habits is keeping Bluetooth OFF.

    When Bluetooth is always enabled:

    • Your phone becomes visible to nearby devices
    • Hackers can send harmful files
    • Malware can spread automatically

    Tip:
    If you must keep Bluetooth ON—for example, for earbuds or smartwatch—set your phone to “Hidden/Not Discoverable”.


    2. Never Open Unknown Files or Messages

    If an unfamiliar user sends you a file through Bluetooth, WhatsApp, or email, avoid opening it.

    Many viruses spread through:

    • Random images
    • “Funny” videos
    • Free wallpapers
    • ZIP/RAR files
    • APK installers

    Even a single click can activate a malicious script.

    Rule of thumb:
    If you don’t know the sender, don’t open the file.


    3. Download Apps Only from Trusted Sources

    Make sure to:

    • Use Google Play Store or Apple App Store
    • Avoid third-party websites that offer free APKs
    • Never install “cracked” or modified apps
    • Read user reviews before downloading
    • Check app permissions

    If an app needs access to things that don’t match its function (like a flashlight app asking for camera or microphone access), it’s a red flag.


    4. Install a Trusted Antivirus Program

    Antivirus apps help in:

    • Scanning for malware
    • Removing harmful files
    • Protecting your browsing
    • Blocking suspicious apps
    • Detecting unusual activity

    However, installing multiple antivirus apps can slow down your phone.
    Choose one reputable brand and keep it updated.

    Important:
    Always update your security apps, because new threats appear regularly.


    5. Keep Your Operating System Updated

    Software updates may seem annoying, but they often include:

    • Security patches
    • Fixes for vulnerabilities
    • Improved protection features

    Hackers target outdated devices because they are easier to exploit.

    Turn ON automatic updates whenever possible.


    6. Avoid Using Someone Else’s Memory Card

    Memory cards can hide malware even if they look empty.

    Sharing SD cards increases the risk of:

    • Hidden virus scripts
    • Damaged files
    • Corrupted folders
    • Spyware installation

    Likewise, avoid giving your card to others. A single infected device can compromise your data.


    7. Do Not Insert Unknown Pen Drives or OTG Devices

    OTG drives can contain autorun scripts that infect your phone immediately after plug-in.

    Use only trusted storage devices, especially if you handle important data.


    8. Use a Secure Lock Screen

    Although not directly related to viruses, it prevents unauthorized installation of harmful apps.

    Use:

    • Strong PIN
    • Alphanumeric password
    • Fingerprint
    • Face unlock

    Avoid predictable passwords such as birthdays or repeated digits.


    9. Be Careful on Public WiFi

    Public WiFi networks can allow attackers to:

    • Monitor your browsing
    • Inject malware
    • Steal login credentials
    • Redirect you to fake websites

    When using public WiFi:

    • Avoid banking or shopping apps
    • Do not log into important accounts
    • Use a VPN for safer browsing

    A VPN encrypts your data, making it difficult for hackers to intercept.


    10. Manage App Permissions Wisely

    Modern apps ask for multiple permissions. Some are necessary; others are not.

    For example:

    • A calculator app doesn’t need microphone access
    • A wallpaper app shouldn’t need location permission
    • A notes app shouldn’t need SMS access

    Review permissions every few months:

    Settings → Apps → Permissions

    Revoke anything unnecessary.


    11. Do Not Click Suspicious Ads

    Pop-up ads or banners such as:

    • “You have won a prize!”
    • “Your phone has a virus!”
    • “Click to clean your system!”

    …are often scams designed to install malware.

    Close such windows immediately.


    12. Avoid Rooting or Jailbreaking Your Phone

    Rooting removes built-in security protections, making your device vulnerable.

    Risks include:

    • Malware accessing your system files
    • Loss of warranty
    • Installation of unauthorized apps
    • Higher chance of system corruption

    Unless absolutely necessary, avoid rooting.


    13. Use Cloud Backup for Important Data

    If your phone becomes infected, corrupted, or encrypted by ransomware, having a backup is a lifesaver.

    Use:

    • Google Drive
    • iCloud
    • OneDrive
    • Secure external storage

    Backups allow you to restore your phone without losing essential files.


    14. Install a Reliable Firewall App (Android)

    A firewall helps:

    • Block suspicious network activity
    • Prevent unknown apps from accessing the internet
    • Monitor data usage

    This is especially useful for users who download many apps.


    15. Be Careful With QR Codes

    Malicious QR codes can redirect you to dangerous websites or trigger malware downloads.

    Scan only from trusted sources.


    If Your Phone Is Already Infected

    Here are effective steps to clean your device.


    Step 1: Run a Full Antivirus Scan

    Most antivirus apps can identify and remove harmful files automatically.


    Step 2: Uninstall Suspicious Apps

    Go to:

    Settings → Apps → Installed Apps

    Look for apps you don’t remember installing.


    Step 3: Clear Browser History & Downloads

    Sometimes infections hide in temporary files.


    Step 4: Reset App Permissions

    If a malicious app changed permissions, reset them manually.


    Step 5: Backup Important Files

    In case you need to format the device, ensure your photos, contacts, and documents are backed up.


    Step 6: Perform a Factory Reset

    If nothing works, a full reset removes all malware.

    Settings → System → Reset → Factory Reset

    This wipes all data, so backup first.

    “When your device is compromised, starting fresh is often the safest path.”


    Practical Real-Life Example

    A user once complained that their phone was overheating, sending messages automatically, and switching on Bluetooth without permission. On examination, the device contained a modified APK downloaded from an unknown website. The malware had installed background services that controlled Bluetooth, messaging, and internet usage.

    Solution steps included:

    • Removing unauthorized apps
    • Revoking permissions
    • Running a full security scan
    • Resetting the device
    • Installing a trusted antivirus
    • Educating the user on safe download practices

    This example shows how easily infections occur—and how they can be prevented with simple habits.


    Final Tips for Maximum Protection

    • Regularly update both apps and OS
    • Avoid suspicious downloads
    • Use strong passwords
    • Disable unnecessary connectivity
    • Remove unused apps
    • Keep antivirus updated

    Mobile safety is not difficult. It is simply a collection of smart habits practiced daily.


    Conclusion

    Protecting your phone from viruses is easier than most people think. The key lies in understanding how infections spread and applying simple, consistent security habits. Whether it’s turning off Bluetooth, installing trusted apps, or being careful with public WiFi, every small step contributes to a safer device.

    Smartphones carry our photos, messages, work files, payment apps, and personal information. Keeping them secure is not optional—it’s essential.

    By following the tips and practices in this guide, you can enjoy a smoother, safer mobile experience without worrying about hidden threats.

  • Tips To Select And Buy Your New Cell Phone

    Tips To Select And Buy Your New Cell Phone

    Choosing a new smartphone has become more challenging than ever. With so many brands, models, features, and price ranges, buyers often feel overwhelmed and confused. One phone offers a great camera, another focuses on battery life, and another shines with performance. Finding the “perfect” phone can feel like searching for a needle in a digital haystack.

    But the truth is simple: the best smartphone is the one that suits your lifestyle, your needs, and your budget. When you understand what features truly matter, choosing the right phone becomes easy and enjoyable.

    As many tech reviewers say, “A good phone isn’t the most expensive one—it’s the one that feels right in your hand and fits your daily life.”

    This complete guide will help you shortlist phones confidently, compare options intelligently, and avoid common buying mistakes. You’ll learn how to evaluate performance, battery, camera, build quality, brand support, and more—based on real-world usage, not just technical jargon.


    Why Choosing the Right Smartphone Matters

    Your smartphone is more than a device. It’s your camera, your wallet, your notebook, your work tool, your entertainment hub, and your connection to everything that matters. A good phone:

    • Makes your tasks faster
    • Improves communication
    • Keeps you entertained
    • Stores important memories
    • Enhances productivity
    • Saves time and effort

    On the other hand, a poor choice leads to:

    • Lagging performance
    • Heating issues
    • Weak battery life
    • Disappointing camera quality
    • Software problems
    • Regret and early replacement

    Buying a phone is an investment. Making the right choice ensures you get value for your money and satisfaction for years.


    The main points to remember BEFORE buying your new handset:

    Below are the most important factors to consider before choosing your next phone. These points will help you narrow down options and understand what truly matters based on how you use your device.


    1. Fix Your Budget: The First and Most Important Step

    Before comparing models or searching online, decide how much you can comfortably spend. Prices vary widely, from basic budget phones to premium flagships.

    A practical approach:

    • Budget segment: Basic usage (calling, messaging, light apps)
    • Mid-range: Best value for average users (multitasking, social media, camera, entertainment)
    • Premium: Top performance, best cameras, cutting-edge features

    Tip:
    Define your maximum budget and stretch limit before browsing phones. This prevents confusion and avoids emotional buying.


    2. Decide Your Preferred Brand

    Some people are loyal to brands like Samsung, Apple, Xiaomi, OnePlus, Vivo, or Motorola. If you already trust a brand’s quality, after-sales support, and user interface, your choices shrink automatically—making selection easier.

    Ask yourself:

    • Do you prefer iOS or Android?
    • Do you like customizable interfaces or simple layouts?
    • Do you care about software updates?
    • Is brand reputation important to you?

    Both iOS and Android have strengths. Choose the ecosystem you’re comfortable with.


    3. Understand Technical Specifications (In Simple Terms)

    This is where most users get confused. But specifications are simply tools to understand what a phone can do. Let’s break them down.


    • Processor (CPU) – The Brain of the Phone

    Popular chipset families include:

    • Apple Bionic
    • Qualcomm Snapdragon
    • MediaTek Dimensity/Helio
    • Samsung Exynos

    A good processor ensures:

    • Smooth performance
    • Efficient multitasking
    • Better gaming
    • Faster app loading

    Tip:
    For regular use, a mid-range chipset is enough. For gaming or heavy work, choose a faster processor.


    • RAM – For Multitasking

    RAM helps apps run smoothly.

    Basic recommendation:

    • 4 GB RAM: Light use
    • 6 GB RAM: Balanced performance
    • 8 GB RAM: Heavy multitasking
    • 12 GB+: Power users/gamers

    • Storage – For Apps, Photos, Videos & Files

    Phones get full quickly with photos, apps, and WhatsApp downloads.

    Choose:

    • 64 GB: Very basic use
    • 128 GB: Most users
    • 256 GB+: Heavy media usage

    Also check for:

    • Expandable storage
    • Cloud backup support

    4. Screen Size & Display Quality

    Your phone’s screen affects how you view videos, play games, read texts, and browse.

    Important things to check:

    Screen Size

    • Small (5.5–6.0″) → Compact, easy to handle
    • Medium (6.1–6.5″) → Best balance
    • Large (6.6″+) → Entertainment, gaming

    Display Type

    • LCD: Affordable, decent quality
    • AMOLED / Super AMOLED: Rich colors, deep blacks, more energy-efficient
    • OLED / LTPO: Flagship-grade, best for smoothness and clarity

    Refresh Rate

    • 60Hz: Basic
    • 90Hz / 120Hz: Smooth scrolling, better gaming
    • 144Hz+: High-end gaming phones

    A good display improves the entire user experience.


    5. Camera Quality: What Truly Matters

    Many buyers focus only on megapixels, but camera quality depends on much more.

    Key factors to check:

    • Sensor size
    • Aperture
    • Image stabilization (OIS/EIS)
    • Night mode performance
    • Video stabilization
    • Portrait clarity
    • Color accuracy
    • Ultra-wide capabilities

    Real-Life Example

    A 12MP camera with a large sensor can outperform a 108MP camera with weak processing. Always check sample photos, especially:

    • Low light
    • Portraits
    • Moving subjects

    If photography is important to you, prioritize camera software optimization and stabilization features.


    6. Battery Life: One of the Most Important Factors

    Nobody likes charging the phone multiple times a day.

    Look for:

    • Battery capacity: At least 4500–5000 mAh
    • Fast charging: 25W, 33W, 44W, 65W or higher
    • Battery optimization: Software-based efficiency
    • Heat management: Phones that heat excessively drain faster

    A durable battery ensures your phone stays reliable throughout the day.


    7. Build Quality & Durability

    Your phone must survive daily wear and tear.

    Check for:

    • Strong frame
    • Scratch-resistant glass
    • Water and dust resistance (IP rating)
    • Drop protection features
    • Metal or high-quality polycarbonate body

    Durability affects long-term satisfaction.


    8. Software & User Experience

    Operating system quality determines how smooth and intuitive your experience is. Look for:

    • Regular software updates
    • Security patches
    • Stable user interface
    • No heavy bloatware
    • Easy navigation
    • Good customization options

    Phones with cluttered systems feel slow even with strong processors.
    If you prefer simple and stable, choose brands known for clean UI.


    9. After-Sales Service & Reliability

    Good service can save you time, money, and stress.

    Consider:

    • Availability of service centers
    • Cost of spare parts
    • Warranty terms
    • Software update support

    A phone is only as good as the support behind it.


    10. Network Connectivity & Future-Proofing

    Modern phones come with advanced connectivity options. Look for:

    • 4G / 5G support
    • Carrier aggregation
    • VoLTE & VoWiFi
    • Dual SIM support
    • Latest WiFi standards
    • Bluetooth version updates

    A future-ready device ensures long usability.


    11. Gaming & Performance Needs

    If you are a gamer, consider:

    • High refresh rate display
    • Large battery
    • Vapor cooling system
    • High-performance chipset
    • Good GPU optimization

    Phones with gaming modes often deliver smoother gameplay.


    12. Speaker Quality & Audio Experience

    Good sound makes streaming, video calls, and music more enjoyable.

    Look for:

    • Stereo speakers
    • Dolby Atmos support
    • Clean call clarity
    • Good microphone performance

    Audio quality still matters more than people realize.


    13. Comfort & Hand Feel

    A phone may look great on paper but feel uncomfortable.

    Check:

    • Weight
    • Grip
    • Button placement
    • One-handed use
    • Pocket comfort

    Tip:
    Always hold the phone in your hand before finalizing. Comfort matters.


    14. Real-World Performance Matters More Than Specs

    Technical spec sheets can be misleading. What matters is how the phone performs daily:

    • Does it lag during multitasking?
    • Does it heat unexpectedly?
    • Does the battery drain fast?
    • Does the camera take consistent photos?
    • Is the display bright outdoors?

    This is why many buyers rely on reviews and user feedback.

    As one reviewer says, “Specs tell a story, but usage tells the truth.”


    15. Ask a Friend Who Owns the Same Model

    This is one of the oldest and most reliable buying strategies. A user who has used the phone for months can tell you:

    • What works well
    • What doesn’t
    • What breaks easily
    • How the battery behaves
    • How smooth the phone feels

    Holding and testing the same model yourself can give instant clarity.


    16. Check Reviews, Comparisons & Videos

    Reputable review platforms provide detailed insights into:

    • Camera performance
    • Display quality
    • Battery tests
    • Heating issues
    • Pros and cons

    Use multiple sources for a balanced opinion.


    17. Consider Long-Term Value, Not Just Price

    A phone with better software support and stronger durability may cost a little more initially but save money over time.

    Factors that add long-term value:

    • Clean software
    • Strong processor
    • Good battery
    • Durable build
    • Reliable brand
    • Regular updates

    A slightly higher price today can save you from replacing the phone prematurely.


    Conclusion

    Choosing the best smartphone doesn’t have to be confusing. When you know what to look for—budget, brand preference, display quality, camera performance, software, battery life, durability, and everyday usage—the decision becomes easy and enjoyable.

    A great smartphone is one that matches your lifestyle. Whether you use your phone for work, photography, entertainment, gaming, or simple communication, the right device makes your daily life more efficient and enjoyable.

    Take your time, compare wisely, and choose confidently. The perfect phone is out there—it just needs the right buyer to recognize it.

  • Why Nokia Is Not Successful in Mobile Phones: Full Analysis

    Why Nokia Is Not Successful in Mobile Phones: Full Analysis

    There was a time when Nokia ruled the world of mobile phones. Millions trusted the brand for its durability, long battery life, simple interface, and strong network reception. Nokia wasn’t just a company—it was a symbol of reliability and innovation. Yet today, the same brand struggles to gain even a small share of the smartphone market.

    How did one of the most powerful mobile brands in history lose its dominance?
    And why hasn’t it been able to bounce back, even after embracing Android and relaunching globally?

    This article offers a complete, updated, and deeply researched analysis of Nokia’s decline, its strategic missteps, and the challenges that still prevent it from succeeding today. As one industry expert says, “Markets don’t forgive delay, and technology doesn’t wait for anyone.”

    Let’s explore every factor that contributed to Nokia’s downfall and why the brand still struggles despite attempts to revive itself.


    Nokia’s Early Dominance: What Made It Great

    Before we understand why Nokia failed, we must understand why it succeeded so massively.

    Nokia once provided:

    • Strong, almost unbreakable phones
    • Long-lasting batteries
    • User-friendly interface
    • Reliable network performance
    • Affordable options for every budget
    • Trust and emotional connection with customers

    For years, Nokia set global standards for mobile design, battery life, and hardware quality. People used their phones for years without issues. Enthusiasts still remember the legendary Nokia 3310, which became a cultural icon.

    At one time Nokia was the No. 1 handset manufacturer in terms of ease of use & sales.

    However, markets change, and companies must evolve with them. Nokia’s biggest problem was not competition—it was resistance to change.


    The Core Reasons Behind Nokia’s Failure

    Below is a detailed breakdown of the major strategic, technological, and market-related factors that led to Nokia’s decline and continue to limit its success.


    1. Nokia Ignored the Shift to Smartphones

    The smartphone revolution began when touchscreens and app-based ecosystems became the future. Nokia had all the resources to lead this revolution but failed to act quickly.

    Instead of embracing modern operating systems, Nokia continued promoting:

    • Symbian OS
    • Physical keypad devices
    • Old-style interfaces

    This decision delayed their entry into the smartphone era.
    Competitors like Apple and Samsung moved fast, offering touchscreen devices with intuitive software. Nokia stayed stuck in the past.

    This single mistake allowed competitors to capture the market before Nokia even responded.


    2. Overdependence on Symbian OS

    Symbian was once a great platform. It was stable, lightweight, and perfect for feature phones. But it wasn’t built for modern smartphones.

    Its disadvantages became clear:

    • Poor touchscreen support
    • Complicated UI
    • Slow app development
    • Difficult for developers to program
    • Fragmented versions across devices

    While Android and iOS offered smooth, app-driven experiences, Symbian struggled to keep up.

    Nokia’s leadership underestimated the importance of modern software, believing hardware was enough to win. They failed to notice that software became the true heart of smartphones.


    3. Delaying Android Adoption: A Costly Mistake

    When Android arrived, many brands immediately adopted it. Samsung, HTC, Motorola, and later Xiaomi, Vivo, Oppo, and Realme built massive success on Android’s flexibility.

    Nokia, however, refused to adopt Android during its early growth.
    Instead, Nokia partnered with Microsoft to create Windows Phone.

    This was a turning point—and a mistake.

    Windows Phone offered:

    • Beautiful UI
    • Smooth animations
    • Strong security

    But lacked:

    • Apps
    • Developer support
    • Customization
    • Global adoption
    • Google services

    Users simply didn’t want a smartphone without the apps they loved.
    By the time Nokia finally adopted Android years later, the market was already dominated by powerful competitors.

    As someone once said, “In business, timing is often more important than talent.”


    4. The Microsoft Partnership: A Strategic Misalignment

    Nokia and Microsoft hoped to compete with Android and iPhone together. But the partnership faced many issues:

    • The Windows ecosystem was incomplete
    • App developers didn’t support the platform
    • Google rejected developing apps for Windows Phone
    • Customers didn’t want to switch
    • Carriers didn’t push the devices

    Internally, Nokia employees were divided about the partnership.
    The company’s direction became unclear.

    When Microsoft eventually bought Nokia’s mobile division, the decline accelerated instead of improving.


    5. Aggressive Competition From New Chinese Brands

    While Nokia struggled to find its identity, new brands entered the market with aggressive strategies:

    • Xiaomi
    • Vivo
    • Oppo
    • Realme
    • OnePlus
    • Huawei

    These companies offered:

    • Great cameras
    • Large storage
    • Fast charging
    • High refresh-rate displays
    • Stylish designs
    • Feature-packed smartphones at affordable prices

    Meanwhile, Nokia phones remained:

    • Underpowered
    • Overpriced compared to competitors
    • Slow to innovate
    • Behind on specifications
    • Lacking appealing features

    In a market driven by value and specifications, Nokia failed to match expectations.


    6. Outdated Design Choices and Slow Innovation

    Nokia phones were known for durability. But durability isn’t enough in the modern smartphone world. Today’s users want:

    • Sleek designs
    • Punch-hole cameras
    • Fast processors
    • High-resolution screens
    • Multiple lenses
    • Fast charging technology

    For years, Nokia released phones with:

    • Basic LCD screens instead of AMOLED
    • Average processors
    • Mid-tier cameras
    • Slow charging
    • Conservative designs

    Consumers found Nokia outdated, especially compared to more modern-looking alternatives.


    7. Poor Pricing Strategy

    Nokia’s pricing did not match user expectations. Many Nokia phones were:

    • Too expensive for the features offered
    • Placed directly against smartphones that outperformed them
    • Targeted at segments already dominated by aggressive competition

    In an industry where every rupee matters, price mismatch can destroy potential sales.


    8. Slow and Inconsistent Marketing

    Brands like Samsung, Xiaomi, and Apple invest heavily in marketing and brand visibility. Nokia, on the other hand, has:

    • Minimal online presence
    • Weak promotional campaigns
    • Low influencer or media collaborations

    Many buyers simply forget Nokia exists until they see it in a store.

    A brand cannot succeed without strong marketing support.


    9. Limited Focus on Camera Innovation

    Today, people choose smartphones based on camera performance. Social media platforms like Instagram, TikTok, and YouTube have changed how users value photography.

    Nokia once dominated mobile photography with its earlier models like Lumia 1020 and PureView.
    But in recent years, the brand has failed to keep up with:

    • Computational photography
    • AI enhancements
    • Low-light improvements
    • High-resolution sensors
    • Video stabilization features

    Other brands raced ahead while Nokia remained slow to innovate.


    10. Weak App Ecosystem and Developer Support (Historically)

    Even though Nokia uses Android now, its historical failure to build a strong ecosystem hurt its long-term reputation. Users who left Nokia years ago rarely returned.

    Many associate Nokia with:

    • Limited apps
    • Missing features
    • Uncertain platform future

    Brand perception takes years to rebuild.


    11. Failure to Capture the Youth Market

    The youth segment drives the majority of smartphone purchases today. They want:

    • Stylish designs
    • Smooth gaming performance
    • Social media-ready cameras
    • Fast charging
    • Trendy features

    Nokia’s image remained conservative, appealing more to:

    • Older users
    • Feature phone customers
    • Basic smartphone buyers

    This left the biggest market segment untouched.


    12. Confusing Product Line and Weak Differentiation

    Modern smartphone brands clearly categorize their devices:

    • Budget
    • Mid-range
    • Flagship

    Nokia often releases:

    • Overlapping models
    • Similar-looking devices
    • Confusing naming schemes
    • Minimal differentiation

    This confuses buyers and reduces brand clarity.


    13. Limited Global Availability and Distribution Challenges

    Unlike brands that aggressively expand across markets, Nokia’s distribution remains limited in many regions. Some models are difficult to find. Some arrive late. Others never launch in certain countries.

    A phone cannot succeed if customers cannot buy it easily.


    14. Slower Software Update Delivery (Despite Promises)

    Nokia initially promised fast Android updates as a selling point. But over time:

    • Updates slowed down
    • Some devices received delayed patches
    • A few models lacked consistent support

    This weakened consumer trust.


    15. Relying Too Much on Nostalgia

    Nokia relaunches classic models like the 3310, 8110, or slide phones. While nostalgic, these devices:

    • Do not drive significant sales
    • Appeal to older users, not the youth
    • Cannot compete with modern smartphones

    Nostalgia alone cannot rebuild a global brand.


    Can Nokia Recover? Challenges and Opportunities

    Despite the struggles, Nokia still has strengths:

    • Strong brand recognition
    • Good build quality
    • Clean Android interface
    • Security-focused software
    • Loyal feature phone customers

    But to succeed again, Nokia must:

    • Improve pricing strategy
    • Innovate aggressively
    • Target youth-oriented features
    • Strengthen marketing and online presence
    • Offer better specifications
    • Release competitive camera systems
    • Build trust with consistent software updates

    Nokia has potential, but the smartphone market demands speed, innovation, and bold decisions.


    Practical Real-Life Example of Nokia’s Decline

    Consider a customer comparing two phones:

    Nokia mid-range phone:

    • LCD screen
    • 4GB RAM
    • Basic camera
    • Slow charging
    • Higher price

    Competitive brand:

    • AMOLED screen
    • 6GB RAM
    • Triple AI camera
    • 33W/65W fast charging
    • Lower price

    Even if customers trust Nokia, the value difference is too large. They choose the competitor.

    This scenario reflects millions of real buying decisions that pushed Nokia down.


    Why Nokia Is Still Relevant (But Limited)

    Even though Nokia is not a top smartphone brand today, it remains relevant in areas like:

    • Feature phones
    • Basic smartphones
    • Enterprise and secure communication devices
    • Certain geographic markets
    • Software and telecom equipment

    However, the mainstream smartphone battle is highly competitive—and Nokia remains far behind.


    Conclusion

    Nokia’s decline is not due to one mistake but a combination of strategic missteps, late decisions, poor software choices, slow innovation, pricing issues, and intense competition. The brand once shaped the mobile world, but failing to adapt allowed faster, more innovative companies to take its place.

    Yet Nokia’s story is far from over. With the right decisions, stronger products, modern features, and customer-focused strategies, the brand still has an opportunity to regain significance—though perhaps never the dominance it once enjoyed.

    A powerful reminder remains:
    “Technology rewards those who innovate—and forgets those who stand still.”

    Note: This article is for information purpose only. This is our view according to the information we have.