Tag: iPhone repair

  • How To Format A Cell Phone To Remove Virus

    How To Format A Cell Phone To Remove Virus

    Mobile phones are powerful tools, but they are also vulnerable to malware, spyware, adware, and malicious apps. When a phone becomes infected, it may slow down, freeze, restart repeatedly, or behave strangely. In such cases, formatting the phone—also known as performing a factory reset—is often the most effective way to remove deep infections and restore normal performance.

    A factory reset wipes user data stored in the internal memory and restores the device to its original settings. Unlike computers, phones do not require reinstalling the operating system after formatting. The built-in OS (Android or iOS) remains intact and automatically reloads during the reset.

    Think of it this way:
    “When software becomes too cluttered to fix, a clean slate is the fastest solution.”

    This guide explains virus symptoms, the difference between formatting and flashing, step-by-step reset procedures, backup methods, and how to protect your phone afterwards. Everything has been updated to match modern phone features and security practices.


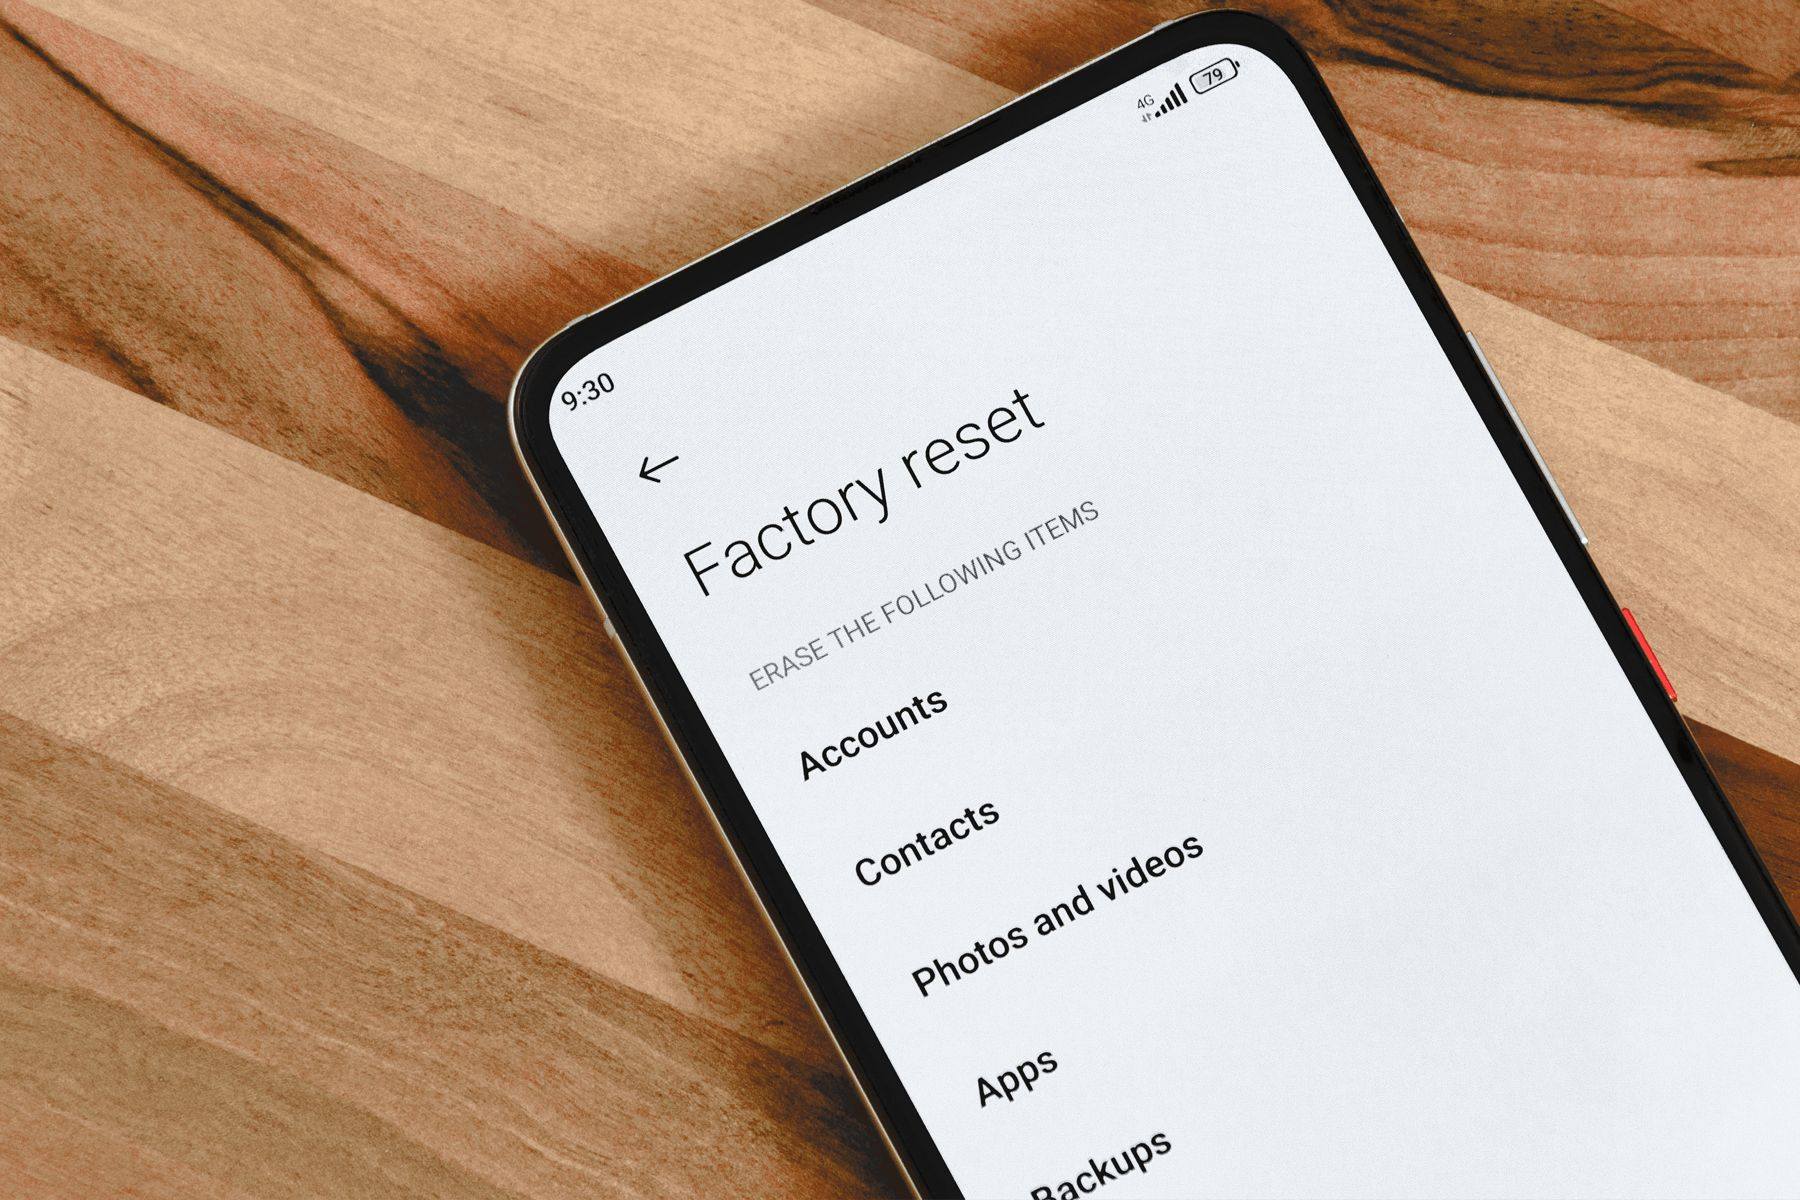
    1. What Formatting a Phone Actually Means

    Formatting a phone means erasing all data stored in internal storage, including:

    • Contacts (unless synced with cloud)
    • Photos and videos
    • Installed apps
    • Messages
    • Downloads
    • Saved accounts
    • Settings
    • Cache and temporary files

    Important:

    Formatting does not reinstall the operating system.
    The device automatically reloads its OS after reset.

    This is different from flashing, where a technician installs fresh firmware manually—usually after severe corruption or failed updates.

    What formatting does NOT erase:

    • Data stored on a microSD card
    • Cloud-synced items (Google/Apple account data)
    • SIM card contacts (if stored there)

    To fully remove infections, you may also need to clean or format the SD card, as many viruses hide inside external storage.


    2. Difference Between Formatting and Flashing

    Many DIY users confuse these two terms, but they are completely different.

    ProcessFormatting (Factory Reset)Flashing (Firmware Installation)
    Data WipeYesYes
    OS ReinstallNoYes
    Technical SkillLowHigh
    Removes MalwareYes, in most casesYes, fully
    When UsedVirus infection, slow phoneSevere system corruption
    Who Does ItAnyoneTrained technician

    Formatting solves most virus-related problems. Flashing is used mainly for phones that won’t boot, freeze permanently, or have damaged software.


    3. Signs Your Phone May Have a Virus

    Modern phone viruses behave differently than old-style malware. They often hide inside apps, notifications, or browser redirects.

    Here are the most common symptoms:

    1. Phone becomes slow

    Apps take longer to open, scrolling lags, or the screen freezes.

    2. Phone restarts by itself

    Unexpected shutdowns or frequent reboot loops.

    3. Apps crash or misbehave

    Certain apps close automatically, refuse to open, or behave strangely.

    4. Pop-ups appear frequently

    Random ads or warnings even when apps are closed.

    5. High data consumption

    Malware running in the background may use your internet without permission.

    6. Overheating

    Unwanted background processes overload the processor.

    7. Unknown apps show up

    Apps you didn’t install appear in your app drawer.

    8. Battery drains faster than normal

    Malicious software often runs continuously.

    9. Security warnings

    Your phone may alert you about harmful behavior from an app.

    If you face several of these issues together, formatting is often the best solution.


    4. Precautions Before Formatting a Phone

    Formatting wipes everything. So before resetting, follow these steps:

    ✔ Backup your data

    Use:

    • Google Drive (Android)
    • iCloud (iPhone)
    • External backup apps
    • Copy to computer manually

    ✔ Save WhatsApp chats

    WhatsApp > Settings > Chats > Chat Backup

    ✔ Sync contacts

    Make sure your contacts are saved to Google/Apple.

    ✔ Ensure phone battery is above 50%

    A reset requires sufficient power.

    ✔ Sign out of accounts only if required

    For example, before selling a device, sign out of accounts and disable device lock features.

    ✔ Remove SD card

    Prevents accidental wipe and protects external data.

    Once your backup is ready, you can safely format your device.


    5. How to Format an Android Phone (Factory Reset)

    Most modern Android devices support two reset methods:


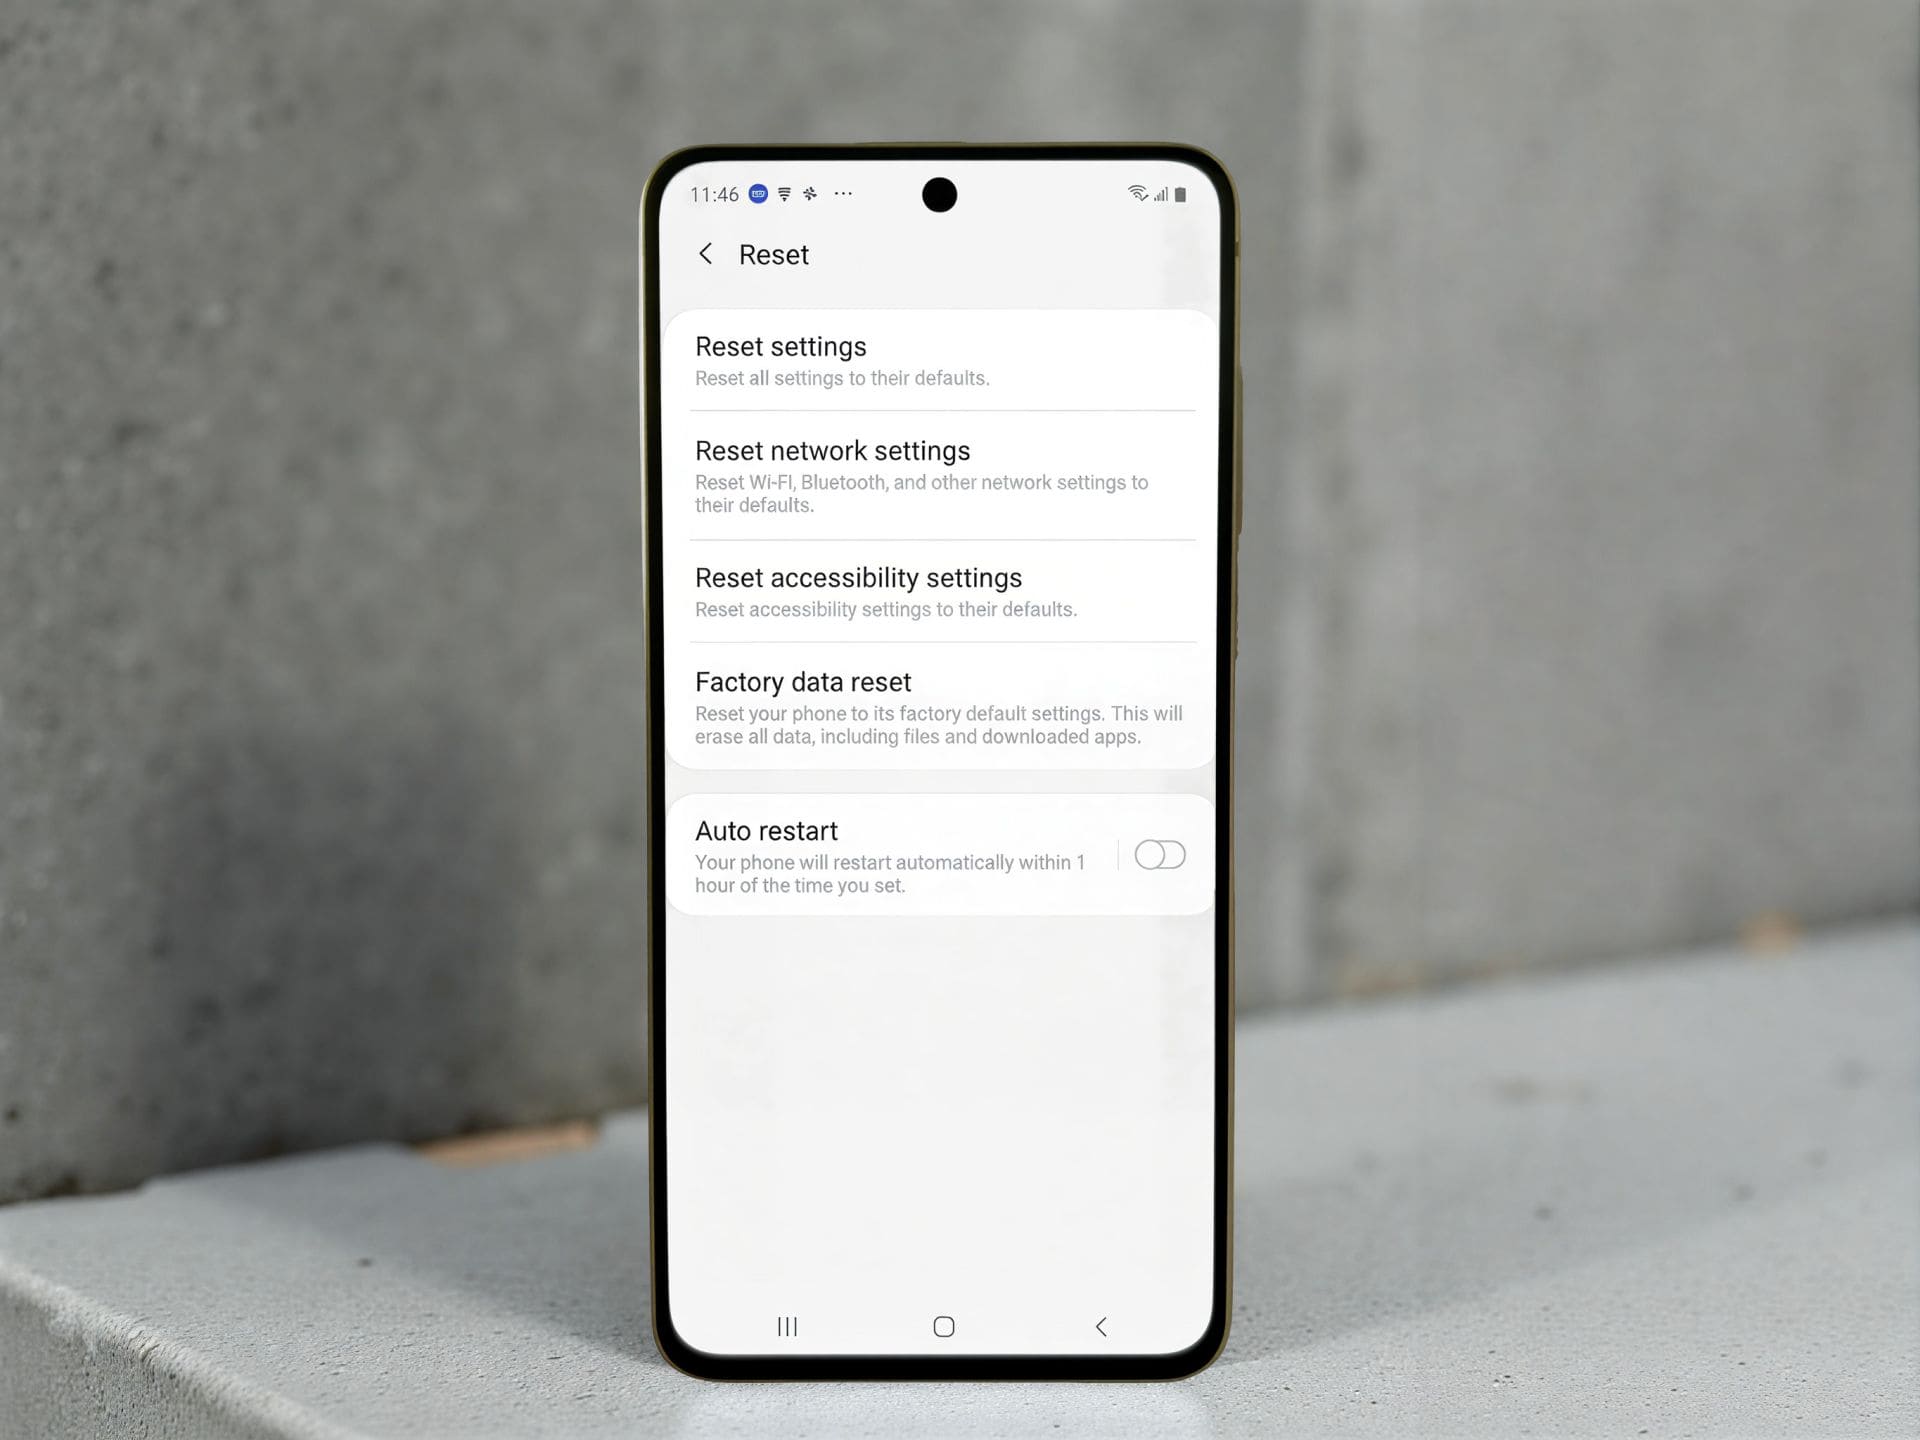
    Method 1: Reset Through Settings (Recommended)

    1. Open Settings
    2. Select System
    3. Tap Reset options
    4. Choose Erase all data (factory reset)
    5. Review what will be erased
    6. Enter PIN or password
    7. Tap Erase everything

    Your phone will restart and begin wiping internal storage.


    Method 2: Reset Using Recovery Mode

    Used when:

    • The phone freezes
    • You cannot access settings
    • A virus blocks system controls

    Steps:

    1. Power off the phone
    2. Press Power + Volume Up together (varies by model)
    3. Enter Recovery Mode
    4. Select Wipe data/Format Data/factory reset
    5. Confirm the action

    This bypasses the OS and performs a clean reset. You can also format Android smartphones through various special software like UMT dongle and Unlock Tool.

    how to format an android phone

    6. How to Format an iPhone (Erase All Content and Settings)

    iPhones rarely get viruses, but malicious profiles, unsafe apps, or system bugs can still affect performance.


    Method 1: Reset Through Settings (Best Option)

    1. Go to Settings
    2. Select General
    3. Tap Transfer or Reset iPhone
    4. Choose Erase All Content and Settings
    5. Enter passcode and Apple ID (if asked)
    6. Confirm reset

    The iPhone will erase all internal data and reboot.


    Method 2: Reset Using a Computer

    Useful when:

    • The iPhone won’t turn on properly
    • You forgot the passcode
    • The device is in recovery mode

    Steps:

    1. Connect your iPhone to a Mac or Windows PC
    2. Open Finder (Mac) or iTunes (Windows)
    3. Select your device
    4. Click Restore iPhone
    5. Confirm

    This restores the latest firmware while wiping all data.


    7. Formatting Internal Storage vs Formatting Memory Card

    A virus can infect both internal memory and SD cards.

    After formatting the phone, ensure your SD card is clean:

    Option A: Format SD card

    Insert → Settings → Storage → Format SD card

    Option B: Scan SD card with antivirus

    Good for removing malware without deleting files.

    Option C: Backup → Format → Restore

    Fastest and safest method.

    Important:
    Although memory cards have almost become extict, if you are using one, never insert an infected SD card into a newly formatted phone without cleaning it first.


    8. Can Formatting Remove All Viruses?

    In most cases, yes. A factory reset removes:

    • Malicious apps
    • Hidden scripts
    • Corrupted system data
    • Browser hijackers
    • Most adware and trojans

    However, a hard reset cannot remove:

    • Firmware-level malware (rare)
    • Root-installed spyware
    • Infections embedded in the SD card
    • Malware from custom ROMs

    For severe infections, flashing firmware may be required.


    9. What To Do After Resetting Your Phone

    Once your device restarts, you’ll need to set it up again. But this time, you can take steps to prevent reinfection.

    ✔ Install apps only from official stores

    Google Play Store or Apple App Store.

    ✔ Avoid installing unknown APKs

    Third-party apps often contain hidden malware.

    ✔ Update your device

    Security patches fix vulnerabilities.

    ✔ Use a mobile security app (optional but helpful)

    Choose a reputable antivirus brand.

    ✔ Enable Google Play Protect

    It regularly scans installed apps.

    ✔ Check app permissions

    Remove unnecessary access to:

    • Location
    • Contacts
    • Microphone
    • Files

    ✔ Avoid clicking unknown links

    Malicious links in SMS, email, or WhatsApp are common infection sources.

    ✔ Be careful with public Wi-Fi

    Use a VPN for extra protection.

    By following these habits, you significantly reduce the risk of future infections.


    10. Common Mistakes People Make While Formatting Phones

    Avoid these to ensure a smooth, safe reset:

    ❌ Not backing up data

    Always save important files before wiping.

    ❌ Forgetting to clean the SD card

    The virus may return immediately.

    ❌ Resetting without checking battery

    A shutdown during reset can corrupt the system.

    ❌ Installing the same infected apps again

    Only restore apps from trusted sources.

    ❌ Confusing reset with flashing

    Flashing is not required unless the OS is heavily corrupted.

    Formatting should be done carefully but confidently—it’s simpler than many users think.


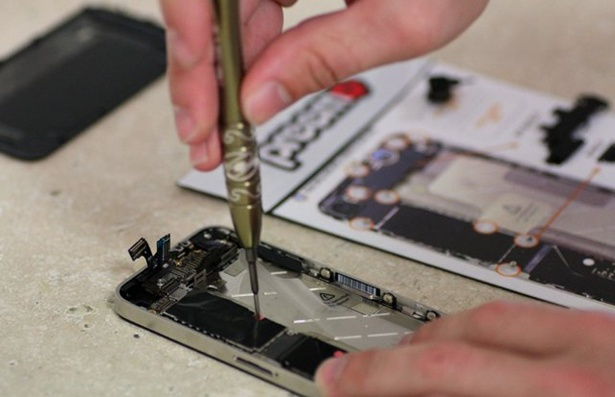
    11. Real-Life Example: When Formatting Actually Works

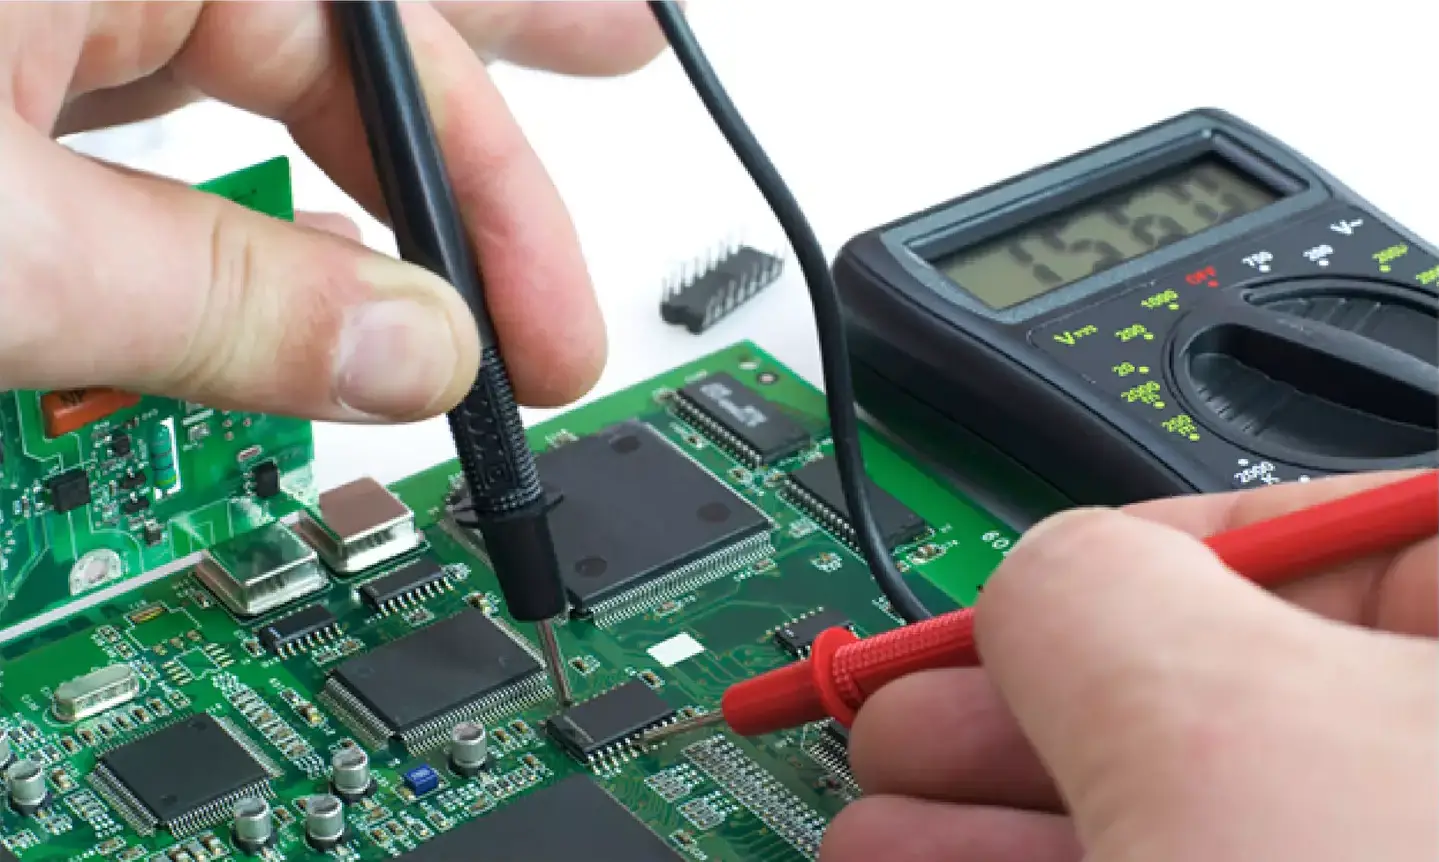
    A common scenario in repair shops:

    A customer brings a phone that:

    • Opens apps slowly
    • Displays random ads
    • Installs apps by itself
    • Restarts frequently

    Technicians check the device and find several malicious apps running in the background. After backing up important data, they perform a factory reset and clean the SD card. In nearly all such cases, the phone works perfectly again.

    Such examples show how a reset can restore a device without complicated repairs.


    Conclusion

    Formatting your phone is a powerful way to remove viruses, clean corrupted files, and restore smooth performance. It wipes internal data but keeps the operating system intact, making it one of the simplest and most reliable troubleshooting methods.

    Whether your phone is slowing down, freezing, showing pop-ups, or behaving strangely, a factory reset may be all it needs.

    As technicians often say:

    “When the system becomes cluttered, the cleanest repair is a fresh start.”

    Use this guide to format your device safely, protect it afterwards, and keep it running smoothly for the long term.ill have to format the memory card or scan it with an antivirus.

    You can also format mobile phones with the help of secret codes. Read secret codes of cell phones to know how to format phones with secret codes.

  • What Is the Future Scope of Mobile Phone Repair Business?

    What Is the Future Scope of Mobile Phone Repair Business?

    Smartphones have become essential for communication, work, education, entertainment, payments, health tracking, and daily life. As mobile phones become more expensive and complex, the demand for skilled technicians has risen dramatically. People rely on their devices every minute, so when a smartphone, iPhone, or Android device stops working, they need fast, reliable, and affordable repair services.

    This shift in user behavior has transformed what used to be a small trade into a large, stable, and highly profitable industry. For anyone considering a career or business in gadget repairs, understanding the future scope of the mobile phone repair business is crucial.

    The mobile phone repair industry has grown massively over the years. In the past, especially in countries like the US, Canada, and across Europe, many people believed it was better to buy a new phone instead of repairing a damaged one. Faulty devices were often thrown away and replaced immediately.

    That mindset has changed. Today, people prefer repairing their smartphones and tablets because it is far cheaper than buying a new device. With the high prices of iPhones, Samsung Galaxy phones, and other premium models, repairs have become the smarter choice.

    I personally know many technicians who started with almost nothing and built successful repair businesses. If repairs were not profitable, these repair centers would not have grown so much. The demand keeps increasing because users now understand that fixing a phone costs only a fraction of replacing it.

    A simple truth captures the heart of this industry:

    “As long as people use smartphones, they will always need someone to fix them.”

    In this guide, we explore the real opportunities, income potential, global demand, service expansion, and long-term future of the smartphone repair market.


    1. The Changing Mindset of Smartphone Users

    Years ago, especially in developed countries, people often replaced faulty phones instead of repairing them. New devices were relatively affordable, and repair shops were less common.

    Today, the scenario is very different.

    Why the mindset changed

    • Smartphones are more expensive now—premium iPhones and flagship Android phones cost as much as a laptop.
    • Repairing a damaged device is far cheaper than buying a new one.
    • Data stored inside the phone—photos, chats, contacts—is extremely valuable.
    • Eco-friendly habits and sustainability awareness encourage repairs over replacements.
    • Fast repair services make fixing devices more convenient than shopping for new ones.

    Customers now prefer a repair over replacement for even moderate issues. This shift itself has created a massive business opportunity.


    2. Global Scope of the Mobile Phone Repair Industry

    The smartphone repair industry has grown consistently because:

    • Every region uses mobile phones extensively
    • The lifespan of smartphones is increasing
    • People upgrade less frequently
    • Repairs are now standard practice

    High scope regions

    • Europe – Repairs are cost-effective compared to buying new flagship devices.
    • North America – Professional repair chains are growing rapidly.
    • Africa – High demand, limited repair centers, excellent business potential.
    • Australia & Middle East – High-income markets with expensive devices.
    • Asia – Very high competition but also very high demand.

    Even in competitive countries like India, Pakistan, Sri Lanka, Bangladesh, Philippines, Egypt, and Indonesia, technicians earn consistently because the number of smartphone users keeps rising.

    Competition exists in every business, but the repair industry continues to thrive because:

    • Devices break daily
    • More users join the digital world every year
    • Repairs offer high profit margins
    • Skills matter more than the number of shops

    As one technician said:

    “In this business, the one who solves problems quickly becomes the busiest shop in town.”


    3. Why the Future of the Repair Business Is So Bright

    1. Smartphones are getting more expensive

    People prefer repairing rather than replacing, especially flagship models.

    2. More smartphones = more repairs

    Every new user eventually needs help—broken screens, battery issues, charging problems, software glitches, etc.

    3. Growing awareness about sustainability

    Repairing reduces electronic waste. Many countries promote repairability through regulations.

    4. Rapid technological upgrades

    Each new smartphone brings new issues, creating consistent demand for skilled technicians.

    5. High profit margins

    Repairs often require low-cost parts but generate premium service charges.

    6. Repairs cannot be fully automated

    Technicians will always be required for:

    • Chip-level repairs
    • Soldering
    • Water damage treatment
    • Display replacements
    • Advanced diagnostics

    7. Online and doorstep repair models are booming

    Customers love same-day convenience.

    8. Repairs are needed by individuals AND businesses

    Corporate clients, schools, offices, and delivery companies all require bulk repairs.

    The future demand is not just strong—it’s expanding into new service categories.

    cell phone repair business

    4. Services You Can Offer in a Mobile Repair Business

    A phone repair shop can earn from multiple services, not just fixing screens or batteries. Here are the most profitable ones:

    1. Smartphone and tablet repairs

    • Screen replacement
    • Battery replacement
    • Charging port repair
    • Camera issues
    • Speaker/mic repairs
    • Water damage treatment
    • Software troubleshooting
    • Chip-level motherboard repair

    2. Selling accessories

    Headphones, chargers, cables, phone cases, screen guards, power banks, etc.

    3. SIM cards and mobile plan services

    Still works in regions where people prefer offline support.

    4. Digital downloads or support

    Assisting customers with apps, backups, transfers, or settings.

    5. Buying and selling used smartphones

    Huge demand—many prefer affordable second-hand devices.

    6. Selling refurbished phones

    High profit margins for technicians who restore phones professionally.

    7. Selling new phones

    Optional, but beneficial if you have investment.

    8. Doorstep repair services

    Fastest-growing segment; customers pay premium charges for convenience.

    9. Corporate repair services

    Schools, offices, banks, logistics companies often require bulk repairs.

    Even if competition is high, diversification keeps a shop profitable.


    5. Income Potential in Mobile Phone Repair Business

    Earnings depend on:

    • Location
    • Skill level
    • Number of services offered
    • Reputation and customer trust
    • Marketing
    • Quality and speed of work

    However, most repair shop owners earn a healthy profit because:

    • Repair parts often cost far less than the service fee
    • Chip-level repairs give very high margins
    • Bulk repairs from corporate clients add steady income
    • Accessory sales provide daily revenue
    • Buying/selling second-hand phones increases profit significantly

    A well-established repair center with good reviews can easily fix 8–15 devices a day, leading to a strong monthly income.

    A skilled technician often earns more than many traditional jobs, especially in areas with limited competition.


    6. How Competition Impacts the Repair Business

    Competition exists everywhere, but in this industry, it is not a threat—it is proof of market demand.

    Why competition is not a problem

    • Skill level varies widely; people prefer trusted technicians.
    • Customer loyalty is strong when you deliver quality.
    • New customers come continuously because phones keep breaking.
    • Many shops offer only basic repairs; advanced technicians stand out.

    How to stay ahead

    • Learn chip-level repairs
    • Maintain transparency with customers
    • Offer quick turnaround time
    • Keep spare parts in stock
    • Use good marketing—Google Maps, WhatsApp, social media
    • Provide warranties on repairs
    • Maintain a clean, professional workspace

    If you build trust, customers will travel far to visit your shop.


    7. The Future of the Mobile Repair Industry: Trends to Watch

    1. Chip-level repair demand will increase

    Modern devices are more complex, making advanced soldering skills valuable.

    2. Battery replacements will rise

    Users keep their phones longer, increasing battery service demand.

    3. Foldable phones repair market will grow

    Specialized tools and skills will be needed.

    4. Data recovery services will become important

    People value their data more than the device itself.

    5. Software repair skills will evolve

    Android and iOS security updates require constant learning.

    6. Doorstep repair will continue growing

    Convenience is king.

    7. Recycled and refurbished smartphones will dominate budget markets

    Repair shops benefit greatly from this trend.

    8. Corporate partnerships will expand

    Businesses rely heavily on phones, creating lucrative B2B repair opportunities.

    Overall, the future trend is expansion, not decline.


    8. What Makes Repairs the Most Profitable Service?

    Among all services a shop can offer, repairs have the highest scope because:

    ✔ Customers need fast solutions

    A broken device cannot wait.

    ✔ Replacement parts are affordable

    Margin between part cost and repair charge is profitable.

    ✔ Repair skills cannot be automated

    Hands-on expertise remains essential.

    ✔ High customer loyalty

    Once someone trusts you, they return for every issue.

    ✔ People care more about their data than the device

    This increases willingness to repair instead of replace.

    Repairs create a steady, almost guaranteed stream of income daily.


    9. Challenges in the Mobile Repair Business (and How to Overcome Them)

    Every business has challenges. Being aware of them prepares you for long-term success.

    1. Fake or low-quality spare parts

    Solution: Use trusted suppliers and give customers clear warranty details.

    2. Handling difficult customers

    Solution: Maintain professionalism, transparency, and clear communication.

    3. Rapid changes in technology

    Solution: Keep updating your skills every few months.

    4. Competition

    Solution: Stand out through service quality, speed, and reputation.

    5. Managing inventory

    Solution: Track stock, order in advance, and avoid unnecessary purchases.

    6. Maintaining trust

    Solution: Be honest, provide clear pricing, and show damaged parts when explaining repairs.

    Challenges are real, but manageable if you stay committed.


    10. Final Verdict: Is There a Future Scope in Mobile Phone Repair Business?

    Absolutely—the scope is not only high, it is growing every year.

    The industry will continue expanding because:

    • Smartphones are essential
    • Repairs are cheaper than replacements
    • Users update devices less frequently
    • Screens, batteries, and boards fail often
    • Corporate repairs are rising
    • Chip-level skills are in high demand
    • Eco-friendly repair culture is increasing

    If you gain proper technical skills, maintain honesty, and offer dependable service, the mobile repair business can give you strong income, long-term stability, and a respected position in your community.


    Conclusion

    The future scope of the mobile phone repair business remains extremely promising. With rising smartphone prices, increasing reliance on digital devices, and growing consumer awareness about repairability, skilled technicians are more valuable than ever.

    Whether you plan to open a shop, work from home, or start a doorstep repair service, this industry offers impressive income potential and long-term growth.

    Smartphones will keep evolving—but so will the opportunities for people who know how to fix them.

  • How to Run a Mobile Repair Business Successfully (Easy Guide)

    How to Run a Mobile Repair Business Successfully (Easy Guide)

    Running a mobile phone repair business today is easier than many people think, but it requires proper skills, discipline, planning, and consistent service quality. Smartphones, tablets, and other handheld devices have become essential to everyone’s daily life. Because people rely on their digital devices for communication, payments, work, and entertainment, the demand for quick and reliable repair services continues to grow.

    The mobile repair market is one of the few trades where a small shop can grow steadily with low investment, high demand, and repeat customers. A well-managed repair business can give faster returns than many other retail businesses. In this guide, you’ll learn practical, up-to-date methods for running a successful repair shop based on real industry experience and proven strategies.

    “In the repair business, your skill earns the money, but your service earns the customer.”


    Why Mobile Phone Repair Is Still a Strong Business

    People today own multiple devices—smartphones, tablets, smartwatches, and sometimes even backup phones. As device prices continue to rise, users prefer repairing instead of replacing. Whether it’s an iPhone with a broken back glass or an Android phone with a drained battery, repairs are often more affordable than buying a new device.

    In most cities, the number of repair shops has grown, but so has the number of devices. The industry has matured, but demand remains strong because:

    • People don’t want to lose their data.
    • Repairs are much cheaper than new devices.
    • Smartphone users expect quick service.
    • High-end devices are expensive to replace.
    • E-waste awareness encourages repair over replacement.

    This means that if you run your repair business professionally, you can earn stable income and build a trusted brand.


    Services You Can Offer in a Modern Mobile Repair Shop

    Here are the most relevant services a repair business can offer today. Obsolete services like ringtone downloads, old firmware loading, and outdated multimedia transfers have been removed and replaced with modern, necessary services.

    1. Smartphone and Tablet Repairs (Main Income Source)

    2. Sale of Common Mobile Accessories

    3. Data Transfer and Device Setup Services

    4. Buying & Selling Old or Refurbished Devices

    5. Selling New Mobile Devices (Optional, but high investment)

    6. Value-added Services (Tempered glass installation, cleaning, etc.)

    Each of these services can generate strong revenue when managed efficiently.


    1. Mobile Phone Repairs — Your Core Profit Area

    Repairing smartphones and tablets is the heart of your business. This includes:

    • Screen replacement
    • Battery replacement
    • Charging port repair
    • Back glass replacement
    • Camera issues
    • Software troubleshooting
    • Water damage treatment
    • Speaker and mic repairs
    • IC-level repairs (if you have the skill)

    On average, a single repair can earn anywhere from a small margin for basic fixes to large profits for advanced jobs. Repairs offer the fastest and most consistent income.

    Tips to Manage Repairs Professionally

    ✔ Repair devices within the promised time.
    Customers value speed. If you can complete simple repairs in 20–30 minutes, your shop becomes a preferred destination.

    ✔ Clearly communicate delays.
    If a part is not available or a repair is complicated, give a realistic time estimate. Customers appreciate honesty.

    ✔ Keep all customer items safe.
    Return SIM cards, memory cards, or cases immediately if not required. Small items often get misplaced.

    ✔ Inform customers before formatting or flashing a device.
    Let them know data will be lost. This avoids disputes later.

    ✔ Maintain a clean and organized workbench.
    A clean environment improves your reputation and reduces the chances of losing screws or components.

    ✔ Stock essential spare parts.
    Fast-moving parts include screens, batteries, charging pins, speakers, and cameras for popular brands.

    ✔ Track every repair.
    Use a software or register to record IMEI, customer contact, repair type, and payment.


    2. Sell Phone Accessories That Customers Need Daily

    Accessories can increase your profits without requiring extra skills.

    Popular, high-demand accessories include:

    • Chargers & fast chargers
    • Original and OEM cables
    • Tempered glass screen protectors
    • Earphones and Bluetooth headsets
    • Back covers and cases
    • Power banks
    • Car chargers
    • Mobile stands
    • Cleaning kits

    Focus on fast-moving and profitable products, and avoid unnecessary stock that will not sell.


    3. Data Transfer, Software Setup & Device Assistance

    Many customers, especially non-tech-savvy users, need help with:

    • Transferring data from old to new phones
    • Setting up a new smartphone
    • Installing important apps
    • Google or Apple ID configuration
    • Basic phone education for new users
    • Cloud backup support
    • Resetting a phone safely

    These services have low cost and high value. You only need a computer, internet, and basic knowledge.


    4. Buying and Selling Used or Refurbished Phones

    This is one of the most profitable parts of the mobile business. Many customers prefer buying refurbished phones instead of new ones.

    Tips for safely buying used smartphones:

    • Check if the phone is not stolen.
    • Verify IMEI number online.
    • Test the battery health, display, camera, and buttons.
    • Check speaker, mic, WiFi, Bluetooth, and network.
    • Confirm that the device is free from Google/Apple lock.
    • Inspect for water damage.
    • Ensure it charges properly.

    Once refurbished, these phones can be sold at a profit.


    5. Selling New Mobile Phones (Optional)

    Selling new devices requires more investment and strong supplier relationships. If you choose to do it:

    • Keep only models that sell well in your region.
    • Don’t invest heavily in slow-selling phones.
    • Offer combo deals (case + tempered glass).
    • Provide EMI or finance options if available.

    This part of the business grows slowly but adds credibility to your shop.


    6. Additional Services to Increase Daily Earnings

    To stand out and increase income, consider offering:

    • Professional tempered glass installation
    • Mobile cleaning and polishing
    • Deep cleaning for charging ports
    • Device diagnosis services
    • Quick battery health checkups
    • Premium screen protector application

    Small services add up and increase customer loyalty.


    7. How to Handle Spare Parts and Inventory Carefully

    Spare parts are the backbone of your repair operations. Managing them well reduces delays and increases profit.

    Best practices:

    • Build relationships with reliable wholesalers.
    • Test parts before installing when possible.
    • Keep stock of fast-moving models (Samsung, iPhone, Xiaomi, Vivo, Oppo).
    • Store parts in labeled boxes.
    • Maintain a digital inventory list to avoid shortages.

    Avoid cheap, unreliable parts — they reduce your reputation and increase returns.


    8. Customer Service: The Real Difference Between Shops

    Your technical skills get customers in the door, but your service brings them back. One satisfied customer can refer 10 more.

    Provide excellent service by:

    • Greeting customers politely
    • Explaining the issue in simple language
    • Keeping repair charges fair and transparent
    • Giving customers a receipt and warranty on parts
    • Updating them if the repair takes longer
    • Delivering phones in clean, ready-to-use condition

    “A repair shop doesn’t grow because of profits; it grows because of trust.”


    9. Pricing Your Services Correctly

    Avoid undercharging or overcharging. Both hurt your business.

    How to price repairs:

    • Calculate cost of spare parts
    • Add service fee based on time and difficulty
    • Consider local competition
    • Offer warranty to boost customer confidence

    For advanced repairs like IC work, motherboard jobs, and water damage treatment, charge for your expertise.


    10. Marketing Your Mobile Repair Business in Today’s World

    Modern marketing is essential for growth.

    Effective marketing methods:

    ✔ Google Business Profile
    This helps local customers find you quickly.

    ✔ Social media marketing
    Post repair videos, before/after photos, reviews, and offers.

    ✔ WhatsApp Business
    Send updates, take orders, and offer quick support.

    ✔ Referral discounts
    Reward customers who bring new clients.

    ✔ Local area banners or small boards
    Still effective in many regions.

    ✔ Reliability and word of mouth
    The strongest marketing tool in this field.


    11. Workflow Management for a Smooth Business Operation

    A repair shop runs efficiently when processes are clear.

    Follow this workflow:

    1. Register device details and IMEI
    2. Describe the issue and charges clearly
    3. Give time estimate
    4. Perform repair
    5. Test thoroughly
    6. Clean the device
    7. Deliver with warranty and a smile

    This simple system builds confidence and reduces mistakes.


    Conclusion

    Running a mobile repair business successfully requires skill, discipline, and professionalism—not huge investment. Whether you repair smartphones, sell accessories, or refurbish devices, your success depends on the quality of your service and your commitment to customer satisfaction.

    If you follow the strategies in this guide, you can build a profitable business with long-term stability and a loyal customer base.

  • How To Repair A Water Damaged Smartphone

    How To Repair A Water Damaged Smartphone

    A water-damaged phone can feel like a disaster. Whether your smartphone slips into the sink, gets caught in rain, falls in the toilet, or gets splashed during your day, water can easily reach sensitive components and cause serious damage. Modern smartphones—including Android devices, iPhones, and even premium waterproof models—are not fully protected from liquid exposure. Water can still enter speakers, charging ports, microphones, buttons, and even the motherboard.

    But here’s the good news: Water damage does not always mean your phone is dead.
    If you act quickly and follow the right steps, you can reduce the damage and improve the chances of saving your device.

    “Acting fast is the difference between a temporary issue and a dead device.”

    This guide offers a simple, step-by-step process based on real repair experience, updated knowledge, and practical insights from technicians who regularly handle water-damaged smartphones.

    The goal is to help you avoid common mistakes, protect your data, and understand when professional help is necessary.


    Understanding Water Damage in Smartphones

    A smartphone contains delicate circuits and micro-components. When liquid enters the phone, it can:

    • Short-circuit electrical paths
    • Corrode metal components
    • Damage the battery
    • Affect the screen and touch response
    • Block the speaker and microphone
    • Interrupt charging
    • Damage the logic board of the device

    Even a small amount of moisture can cause long-term damage if not handled properly.
    That is why the first few minutes matter the most.

    Before we begin, let’s clear a popular myth:

    Myth: “A water-resistant phone is safe in water.”

    Truth: Water-resistant does NOT mean waterproof.

    Water-resistance ratings (IP67, IP68) help only in controlled conditions—clean, still water, shallow depth, limited time. Real-world scenarios are different:

    • Soap water
    • Pool water
    • Saltwater
    • Hot water
    • High pressure

    All of these can breach seals easily.


    Immediate Steps to Take When Your Phone Gets Wet

    Here are the steps you must follow the moment your smartphone gets water exposure.


    1. Remove the Phone from Water Immediately

    The longer the device stays in water, the deeper the moisture travels.
    Quick action increases the chance of saving your smartphone.


    2. Turn Off the Phone Immediately

    This is the most important step.

    Do NOT press any other buttons.
    Do NOT check whether the phone is working.

    Why?
    Electricity + Water = Short circuit.

    Keeping the phone ON forces current into wet components, causing permanent damage.
    If your mobile phone is already OFF, leave it OFF.


    3. Remove the Case, SIM Card, Memory Card, and Accessories

    Take out:

    • Phone case
    • SIM tray
    • MicroSD card
    • Headphones or USB accessories

    This allows airflow and prevents components from trapping moisture.


    4. Dry the Phone Exterior Gently

    Use a soft, absorbent cloth or tissue.

    Avoid:

    • Shaking the phone
    • Blowing forcefully into ports
    • Using compressed air

    These actions push water deeper into the device.

    Pat dry gently instead.


    5. Keep the Phone Upright to Prevent Water Spread

    If liquid has entered the charging port or speaker, let gravity help.

    Place the phone vertically so the water drains downward.


    6. Do NOT Use Hair Dryers or Heat Guns

    Excess heat is dangerous for your device.
    It can:

    • Warp components
    • Damage the battery
    • Melt adhesives
    • Push moisture inside

    Some people also place phones under direct sunlight. Avoid this too.


    7. Do NOT Put the Smartphone in Rice

    The “rice method” is one of the biggest myths.

    Why you should avoid rice:

    • It does NOT remove moisture inside the phone
    • Rice dust can enter internal components
    • It delays proper treatment
    • It gives false hope

    Instead of using rice, allow the phone to dry naturally or seek professional help.


    What You SHOULD Do Instead: Safe Drying Methods

    If you want the best chance of recovery, follow these safe, technician-approved drying techniques.


    8. Use Silica Gel Packs (Highly Recommended)

    Silica gel packets absorb moisture much more effectively than rice.

    You can find them in:

    • Shoeboxes
    • Electronics packaging
    • Medicine bottles

    Place your device in an airtight box with silica gel for 24–48 hours.


    9. Let the Phone Air-Dry Naturally

    Place the phone:

    • In a cool, dry place
    • With good airflow
    • Away from heat sources

    Air drying gives moisture time to evaporate safely.


    10. Do Not Charge the Phone Until Fully Dry

    Charging a wet smartphone is extremely dangerous.

    NEVER plug in your phone after water exposure.
    Moisture in the charging port can:

    • Short the charging IC
    • Damage the motherboard
    • Burn internal components
    • Cause sparks

    Wait for at least 24–48 hours before testing the device.


    When to Turn the Phone Back On

    After the drying period (usually 1–2 days), turn the phone ON only when:

    • No visible moisture remains
    • Charging port is fully dry
    • Buttons respond normally
    • Phone feels dry to the touch

    If the device still has moisture or fog under the screen, do NOT turn it on.


    Signs Your Smartphone Still Has Water Inside

    Watch for these symptoms:

    • Foggy camera lens
    • Muffled speaker sound
    • Charging error messages
    • Screen flickering
    • Random touch inputs
    • Microphone not working
    • Device heating without use

    If you see any of these, do not continue using the phone. Switch it OFF and seek professional help.

    You can also read How To Repair Your Cell Phone Yourself (DIY) – Easy Guide


    Professional Water Damage Repair Process (What Technicians Do)

    If the phone does not turn on or shows problems after drying, take it to a mobile repair technician.
    Water damage repair involves:


    11. Disassembling the Phone

    The technician opens the device to inspect the:

    • Battery
    • Motherboard
    • Connectors
    • Display interface
    • Charging port

    This allows accurate diagnosis.


    12. Cleaning the Logic Board with Ultrasonic Machines

    Professional repair shops use ultrasonic cleaners to remove corrosion, salt, and minerals from the circuit board.

    This process uses:

    • High-frequency sound waves
    • Specialized cleaning solutions
    • Controlled temperature

    It safely restores many water-damaged devices.


    13. Removing Corrosion and Deposits

    Water leaves minerals that damage circuits.
    Technicians clean these using:

    • IPA (isopropyl alcohol)
    • Soft brushes
    • Micro tools

    Removing corrosion prevents long-term failure.


    14. Testing Components After Cleaning

    The technician checks:

    • Battery health
    • Charging IC
    • Power IC
    • Audio IC
    • Display
    • Touch
    • Network antennas
    • Microphone and speaker

    Water damage often affects multiple components.


    15. Replacing Faulty Parts

    If needed, the technician may replace:

    • Battery
    • Screen
    • Charging port
    • Buttons
    • Camera module
    • Microphone
    • Motherboard components

    Sometimes the entire logic board may need replacement.


    Common Problems After Water Damage

    Even if the device turns on, water exposure can cause long-term issues:

    • Battery draining fast
    • Weak charging
    • Touchscreen issues
    • Camera fog
    • Speaker distortion
    • Microphone failure
    • Poor network signals

    It’s important to get a full diagnosis if symptoms appear later.


    How to Prevent Water Damage in the Future

    Follow these simple habits to protect your smartphone:

    • Use a water-resistant case
    • Avoid using the phone near sinks or pools
    • Keep the phone away from steam and humidity
    • Dry hands before using the device
    • Prevent rain exposure
    • Avoid placing the device in your back pocket
    • Use waterproof pouches when traveling

    Prevention is always cheaper than repair.


    What You Should NEVER Do With a Wet Phone

    To avoid further damage:

    ❌ Do not turn the phone ON
    ❌ Do not charge the phone
    ❌ Do not press buttons
    ❌ Do not blow into ports
    ❌ Do not shake the device
    ❌ Do not use heat or dryers
    ❌ Do not use rice

    These actions push water deeper into the device or cause short circuits.


    Frequently Asked Questions About Water Damage

    1. Can a completely dead water-damaged phone be repaired?

    Yes, depending on the level of internal damage. Many phones recover after ultrasonic cleaning.

    2. Can saltwater damage be repaired?

    Saltwater causes quicker corrosion. Immediate cleaning is essential.

    3. How long should I keep my phone turned off?

    At least 24–48 hours before testing.

    4. Will waterproof phones survive water exposure?

    They resist water temporarily, not permanently. They can still get damaged.

    5. Does water damage void warranty?

    Yes, most manufacturers do not cover water damage.


    Conclusion

    A water-damaged phone does not always mean the end of your device. With the right steps—turning it off, drying it safely, and avoiding common mistakes—you can save your device or reduce the repair cost significantly. Acting quickly makes all the difference.

    If your smartphone still shows issues after drying, seek professional repair.
    Technicians have the tools and skills to restore components that home methods cannot fix.

    “Your speed and your decisions decide whether your phone survives water damage.”

    By following the safe procedures in this guide, you’ll protect your device, your data, and your investment.

  • How to Fix a Phone That Keeps Switching Off Automatically

    How to Fix a Phone That Keeps Switching Off Automatically

    A smartphone shutting down unexpectedly can be frustrating, especially when it happens repeatedly or when the battery is still full. Whether your phone keeps switching off automatically, restarts by itself, or powers down without warning, the problem can range from simple software issues to deeper hardware faults.

    The good news is that most cases can be fixed with the right troubleshooting steps.

    “Most phone problems look complicated, until you start fixing them one step at a time.”

    This guide explains why your device may be turning off by itself and provides a detailed step-by-step process to diagnose and repair it. The solutions apply to all types of smartphones — Android devices, iPhones, tablets, and even older feature phones.


    Why Phones Switch Off Automatically: Common Causes

    A device shutting down on its own is usually triggered by either a software failure, a battery/power issue, or a hardware fault. Knowing the cause helps you fix it more effectively.

    Here are the most common reasons:


    1. Loose or faulty battery connection

    A weak battery connector, bent pins, or a swollen battery can interrupt power supply, causing random shutdowns.


    2. Corrupted system software

    If your operating system or firmware has bugs, glitches, or corrupted files, the phone may restart or turn off automatically.


    3. Malware or virus infection

    A virus running in the background can overload the system, drain resources, and force the device to shut down unexpectedly.


    4. Overheating

    Smartphones automatically turn off when temperatures exceed safe limits to protect internal components.


    5. Damaged or deteriorated battery

    A worn-out battery may show 50% or 80% charge and still turn off suddenly. This is common in older smartphones.


    6. Moisture or dust on the motherboard

    Liquid damage or accumulated dust can cause short circuits, leading to random shutdowns.


    7. Faulty components on the logic board

    Issues with the power IC, CPU, resistors, capacitors, or charging IC often cause the phone to restart repeatedly.


    8. Power button stuck or malfunctioning

    A damaged or jammed power key can unintentionally trigger shutdowns.


    9. Heavy apps or RAM overload

    Large applications, background processes, or insufficient RAM can cause automatic reboots.


    10. Storage almost full

    Low storage space affects system performance and stability.


    Symptoms of a Phone Turning Off Automatically

    Your mobile may show one or more of these signs:

    • restarting again and again
    • switching off with full battery
    • device shutting down unexpectedly
    • turning off during calls or gaming
    • reboot loop (phone restarts and never reaches home screen)
    • switching off when unplugged
    • phone turning off by itself after heating

    Each symptom gives a clue about the underlying issue.


    Step-by-Step Guide: How to Fix a Phone That Keeps Switching Off Automatically

    Follow these troubleshooting steps in order. Start with the simplest solutions; move to advanced repairs only if needed.


    1. Check Battery Health and Physical Connection

    Battery issues are the most common cause of automatic shutdowns. Begin by inspecting the battery and connectors.

    What to do:

    • Remove the battery (if removable) and clean the metal terminals gently.
    • Check if the pins on the phone’s battery connector are bent or loose.
    • For non-removable batteries, use a flashlight to inspect swelling or deformation.
    • Clean the charging port and internal contacts with a soft brush.

    Important:

    If the battery is swollen, stop using the phone immediately. Swollen batteries are dangerous and must be replaced.


    2. Restart the Phone (Soft Reset)

    A simple reboot can clear temporary glitches, RAM errors, and unstable background processes.

    Steps:

    • For Android: long-press Power → Restart
    • For iPhone: press the Volume + Power button → Slide to power off → Turn on again

    This resolves minor issues that trigger random shutdowns.


    3. Update the Operating System

    Outdated software can cause instability, causing the device to switch off on its own.

    How to update:

    • Android: Settings → System → Software Update
    • iPhone: Settings → General → Software Update

    Keeping your phone updated improves performance, fixes bugs, and enhances system stability.


    4. Free Up Storage and Close Background Apps

    Insufficient storage and overloaded RAM can push your phone into auto-restart or shutdown.

    Do this:

    • Delete unused apps
    • Clear cache
    • Move media files to cloud or SD card
    • Force stop heavy apps running in background

    A lighter system runs more smoothly and reduces random shutdowns.


    5. Boot in Safe Mode

    Safe mode loads only essential system apps. If the phone works fine in safe mode, the issue is caused by a third-party app.

    How to enter Safe Mode:

    • Android: long press Power → long press “Power Off” → Safe Mode
    • iPhone: boot normally → uninstall recently installed apps manually

    Remove suspicious apps, especially free cleaners, battery boosters, or unknown APKs.


    6. Remove Malware or Virus

    Viruses can make your phone:

    • shut down automatically
    • restart again and again
    • heat excessively
    • drain battery

    Fix:

    • Install a trusted antivirus app
    • Scan and remove threats
    • Avoid installing apps from unknown sources

    If malware is severe, you may need to perform a reset (covered later).


    7. Check for Overheating Issues

    Phones automatically shut down when they exceed safe temperatures.

    To prevent overheating:

    • Avoid playing heavy games for long durations
    • Remove thick or metal cases
    • Reduce screen brightness
    • Turn off GPS, Wi-Fi, Bluetooth when not needed
    • Avoid charging while using the phone

    If overheating persists, a hardware fault in the power section may be present.


    8. Reset All Settings (Without Deleting Data)

    Resetting system settings can fix misconfigurations affecting device stability.

    How to reset:

    • Android: Settings → System → Reset Options → Reset all settings
    • iPhone: Settings → General → Transfer/Reset iPhone → Reset → Reset All Settings

    This won’t erase personal data.


    9. Factory Reset (Format the Device)

    If the phone still keeps switching off automatically, backup your data and perform a clean reset.

    Why this helps:

    A factory reset removes:

    • viruses
    • corrupted files
    • misconfigured settings
    • unstable apps
    • faulty data

    Steps:

    • Android: Settings → Reset → Factory Data Reset
    • iPhone: Settings → General → Erase All Content and Settings

    This solves most software-level shutdown issues.


    10. Flash or Reinstall the Firmware (Advanced Software Repair)

    If the operating system is deeply corrupted, reinstalling the firmware may be required.

    Technician-level process:

    • Android: use tools like Odin, SP Flash Tool, or brand-specific flashing software
    • iPhone: use iTunes/Finder → Restore iPhone

    This step is recommended only for users familiar with firmware flashing.


    11. Clean the Motherboard (Professional Servicing)

    Moisture and dust can cause short circuits on the PCB, making the phone shut down randomly.

    How technicians clean the board:

    • Disassemble the device
    • Clean PCB with IPA (isopropyl alcohol)
    • Use ultrasonic cleaning (best method)
    • Dry the PCB completely
    • Reassemble the phone

    If the problem disappears after cleaning, moisture or corrosion was the cause.


    12. Heat Treatment (Only for Professionals)

    Sometimes components like resistors, capacitors, or BGA chips lose contact due to micro-cracks.

    Heating the PCB can restore these connections.

    Methods used:

    • Hot air rework station
    • Controlled heating of the power IC
    • Reflow of loose components

    This must be done carefully to avoid damaging delicate parts.


    13. Inspect and Replace Hardware Components

    If none of the above methods fix the issue, check the following:

    Common faulty parts:

    • Power IC (PMIC) – most common cause of restarting
    • CPU / Application Processor – rare but serious
    • Battery connector
    • Charging IC
    • Faulty capacitors or resistors in power line
    • Thermal sensors

    A technician will use:

    • a multimeter
    • schematic diagrams
    • DC power supply
    • microscope

    to diagnose the exact fault.

    Replacing the faulty component usually fixes random shutdowns.


    14. Check the Power Button

    If the power key is stuck or damaged, the phone may behave as if you are pressing the button repeatedly.

    Fix:

    • Remove the case
    • Clean around the power button
    • Replace the button flex if unresponsive

    A defective button is an often overlooked reason for automatic shutdowns.


    15. Replace the Battery

    If your phone switches off with full battery or restarts when battery drops below 30%, the battery is likely weak.

    Signs of a bad battery:

    • sudden shutdowns
    • rapid battery drain
    • inaccurate battery percentage
    • overheating
    • swelling

    A simple battery replacement can solve the entire issue.


    When to Seek Professional Repair

    If your phone continues turning off automatically after trying the steps above, get it checked by a technician.

    Seek help if:

    • phone reboots immediately after turning on
    • device heats up before shutting down
    • battery drains even when the phone is off
    • flashing/reset did not help
    • motherboard shows corrosion
    • there are visible signs of liquid damage

    Technicians use specialized tools to diagnose complex faults.

    how to repair mobile phone auto turning off

    How to Prevent Your Phone From Switching Off Automatically

    To avoid future issues:

    • Keep your software updated
    • Don’t install suspicious apps
    • Use genuine chargers and batteries
    • Keep storage space above 20%
    • Avoid using the phone while charging
    • Regularly clean charging port and speaker grills
    • Avoid extreme temperatures
    • Use a surge protector

    These habits extend your device’s life and stability.

    A healthy phone isn’t just repaired — it’s maintained daily through small habits.”


    Conclusion

    A phone that keeps switching off automatically can be fixed in most cases. Whether the issue is related to battery health, system software, moisture, overheating, or hardware components, there is always a logical troubleshooting path to follow. Start with basic steps like checking the battery, updating software, and removing malware. Move toward advanced repairs like motherboard cleaning or power IC diagnosis only if needed.

    If your smartphone still turns off by itself, don’t worry — a professional technician can usually identify the exact cause and restore your device.

  • What Is an Unlocked Phone? Meaning, Benefits, and How It Works

    What Is an Unlocked Phone? Meaning, Benefits, and How It Works

    Most people have heard the term unlocked phone, yet few understand what it really means. Whether you’re buying a new smartphone, switching networks, or repairing mobile phones professionally, knowing the difference between a locked and unlocked device can save you money, time, and unnecessary stress.

    In simple words, an unlocked phone is a mobile device that can work with any compatible carrier’s SIM card. It is not restricted to a single telecom operator, and you are free to use it with any network you choose.

    As the saying goes, “Freedom in technology begins with understanding.”
    This is especially true when choosing between a locked and an unlocked smartphone.

    This guide explains everything—what phone unlocking actually means, how it works, its advantages, risks, and how to unlock a device safely.


    What Does Phone Unlocking Mean? (Simple Definition)

    Phone unlocking means removing the carrier-imposed restriction that prevents a mobile phone, iPhone, Android device, or feature phone from working on other telecom networks.

    A locked phone works only with the carrier it was originally purchased from.
    An unlocked phone can accept SIM cards from any supported carrier.

    In technical terms:

    A locked device has a network lock or SIM lock programmed into its firmware by the original carrier. Unlocking removes that lock, allowing the smartphone to register on other networks without limitations.


    Why Do Some Phones Come Locked?

    Carriers lock phones mainly for business reasons:

    • They offer devices at discounted prices or monthly installments.
    • Locking ensures the customer stays with their service until the contract ends.
    • It prevents immediate switching to another network.

    This is very common in many countries. However, the trend has shifted globally because more people now prefer factory-unlocked phones for flexibility.


    Types of Phone Unlocking

    There are different forms of unlocking, each used in different situations:

    1. Network Unlock (SIM Unlock)

    This removes the carrier’s restriction so you can use any SIM card.
    This is the most common and legal unlocking method worldwide.

    2. Bootloader Unlock (Android)

    This unlocks the device’s bootloader to allow custom ROMs or modifications.
    This is NOT the same as network unlocking and may void warranty.

    3. iCloud Unlock / Activation Unlock (Apple Devices)

    This unlocks a device tied to an Apple ID.
    Used only when a user has forgotten their password (illegal when misused).

    4. FRP Unlock (Factory Reset Protection – Android)

    This unlocks a phone locked after a factory reset due to forgotten Google credentials.

    For this article, we focus on network unlocking, as it relates directly to using your phone on any carrier.


    How to Check If Your Phone Is Unlocked

    Smartphone brands like Apple, Samsung, Xiaomi, Oppo, and others provide simple ways to verify the unlock status.

    Method 1: Try Another SIM Card

    Insert a SIM from a different carrier.

    • If it shows network signal → unlocked
    • If it says “Invalid SIM,” “SIM Not Supported,” or “Network Locked” → locked

    Method 2: Check in Settings (iPhone)

    Go to:
    Settings → General → About → Carrier Lock
    If it says No SIM restrictions, the iPhone is unlocked.

    Method 3: Carrier Check

    Your mobile network provider can confirm the status via customer support.

    Method 4: IMEI Database Check

    Technicians often use IMEI verification tools to confirm whether a device is locked or blacklisted.


    How Does Unlocking Work? A Simple Explanation

    Unlocking modifies the phone’s internal programming so it no longer checks for the original carrier’s SIM.

    Unlocking can be done by:

    • Requesting an unlock code from the carrier
    • Entering an official unlock code provided by the manufacturer
    • Remote unlock services using authorized IMEI tools
    • Official carrier or manufacturer websites

    Important:

    Unlocking does NOT jailbreak your phone, modify hardware, or affect your data.
    It only removes the SIM restriction.


    Benefits of Using an Unlocked Phone

    An unlocked phone gives more control, more savings, and more flexibility.

    Here are the most valuable benefits:


    1. Freedom to Choose Any Network

    This is the biggest advantage.
    You can switch to any carrier based on:

    • Better plans
    • Stronger network coverage
    • Cheaper data packages
    • Faster 5G availability

    This flexibility is especially useful when you relocate or travel.


    2. No Contract or Binding Commitments

    Unlocked phones are generally contract-free.
    You are not forced to stay with a carrier for years.


    3. Better Resale Value

    Unlocked devices have higher resale value because they are compatible with more buyers’ networks.


    4. No Hidden Restrictions by Carriers

    Some carriers disable certain features in locked phones.
    Unlocked devices come with the manufacturer’s clean software experience without limitations.


    5. Best for International Travel

    When traveling, you can simply insert a local SIM card to avoid expensive roaming charges.

    As many travelers say:
    “An unlocked phone turns the world into your network.”


    6. Works with eSIM and Dual SIM More Easily

    Modern smartphones offer:

    • eSIM + physical SIM
    • Dual eSIM
    • Dual physical SIM (some Android models)

    Unlocked phones support these features more reliably.


    Is Unlocking a Phone Legal?

    Yes. Unlocking is legal in most countries as long as:

    • You own the device
    • The contract is fulfilled
    • The carrier has authorized the unlock

    Illegal unlocking occurs only when attempting to unlock stolen or blacklisted devices.


    How to Unlock Your Phone (Step-by-Step)

    1. Unlocking Through Your Carrier (Recommended)

    Most carriers provide unlocking services if:

    • The device is fully paid off
    • The account is in good standing

    Steps:

    1. Contact your carrier.
    2. Request an unlock for your phone.
    3. Receive an unlock code or automatic unlock.
    4. Insert a new SIM and follow the instructions.
    how to unlock a cell phone

    2. Manufacturer or Official Website Unlock

    Some brands allow unlocking through:

    • Apple carrier unlock request
    • Samsung official unlock partners
    • Xiaomi and Oppo authorized service tools

    3. Technician-Based IMEI Unlocking

    Professional repair shops use specialized tools like:

    • Octoplus
    • Chimera
    • Sigma
    • Z3X

    These tools perform legal IMEI-based unlocking for many models.


    4. Remote Unlock Services (Use Carefully)

    Online unlocking services can unlock many phones, but you must choose trusted, legitimate providers.
    Avoid extremely cheap services — they may be scams.


    Risks or Disadvantages of Unlocking

    While unlocking is beneficial, there are some considerations:

    1. Warranty Issues (Rare but Possible)

    Some manufacturers may void parts of the warranty if unlocking leads to modification.

    2. Wrong Unlocking Methods Can Harm the Device

    Using unofficial tools or fake codes can:

    • Damage modem software
    • Cause network instability
    • Prevent future software updates

    3. Blacklisted Phones Cannot Be Unlocked Legally

    If a phone is reported stolen, it cannot be unlocked for network use.


    Locked vs Unlocked Phones: Quick Comparison

    FeatureLocked PhoneUnlocked Phone
    Network FreedomOnly one carrierAny compatible carrier
    CostCheaper upfrontYou pay full price
    Resale ValueLowerHigher
    International UseLimitedEasy with any SIM
    ContractUsually requiredNo contract
    Software RestrictionsPossibleNone

    Who Should Buy an Unlocked Phone?

    Unlocked smartphones are ideal for:

    • Frequent travelers
    • Students switching data plans often
    • Professionals working internationally
    • Users who want the best network quality
    • People who avoid carrier contracts
    • Smartphone technicians testing multiple SIMs

    “The more control you have over your phone, the more value it gives back to you.”


    Common Myths About Unlocking

    Let’s clear some misunderstandings:

    Myth: Unlocking slows down the phone.

    ✔ No. Unlocking does not affect performance.

    ❌ Myth: Unlocking removes your data.

    ✔ No. It only removes network restrictions.

    ❌ Myth: Unlocking is the same as jailbreaking.

    ✔ Completely different processes.

    ❌ Myth: Unlocking is illegal.

    ✔ Legal when done correctly.


    Tips to Stay Safe When Unlocking Your Phone

    • Always use official or authorized methods.
    • Avoid third-party apps that claim to “unlock instantly.”
    • Check the IMEI status before purchasing a used unlocked phone.
    • Keep your proof of ownership and receipts.

    Conclusion

    Understanding what an unlocked phone means gives you more power as a smartphone user. With the freedom to choose any carrier, better resale value, and fewer restrictions, unlocked phones are becoming the preferred choice for people worldwide.

    Whether you’re using an iPhone, Android device, or feature phone, unlocking helps you make the most of your device.

  • How to Check PCB Tracks in Mobile Phone Repair

    How to Check PCB Tracks in Mobile Phone Repair

    Checking PCB tracks is one of the most important skills in mobile phone repair. Technicians commonly call this process circuit tracing or line checking. It is used to find broken, damaged, or disconnected tracks on a printed circuit board (PCB).

    Many mobile phone problems are not caused by faulty components. Instead, they happen because a tiny copper track inside the PCB is broken. These tracks are usually hidden inside the board and cannot be seen directly. That is why proper testing methods are required.

    “A phone does not stop working because of one big fault. Most failures begin with one small broken connection.”

    This guide explains how to identify, test, and repair PCB tracks in smartphones, Android devices, iPhones, and feature phones. It is written for beginners as well as technicians who want to strengthen their fundamentals.


    What Is Circuit Tracing or Line Checking

    Circuit tracing means following the electrical path on a PCB to ensure that voltage and signals are reaching the correct components. A PCB is not just a flat green board. It is a complex structure made of multiple layers.

    Most modern mobile phone motherboards have:

    • 7 to 10 internal layers
    • Power tracks
    • Signal tracks
    • Ground planes
    • Shielded areas

    These tracks carry electricity from one point to another. If any track is damaged, the circuit becomes incomplete.


    Why PCB Tracks Get Damaged

    PCB tracks can break for several reasons, including:

    • Physical drop or impact
    • Water or moisture damage
    • Corrosion due to humidity
    • Overheating
    • Poor-quality previous repair
    • Excessive current or short circuit

    Even a small crack in a track can stop a component from working.


    Problems That Occur When PCB Tracks Are Broken

    Every function in a mobile phone depends on specific tracks. These tracks supply voltage and signals to different parts.

    When a track breaks, the related part may:

    • Stop working completely
    • Work intermittently
    • Fail only under load

    Common symptoms include:

    • Microphone not working
    • Speaker or ringer dead
    • Vibrator not functioning
    • Display not showing properly
    • Phone not charging
    • Network or SIM issues

    In many cases, technicians replace the component, but the problem remains. This usually indicates a track-level issue, not a component failure.


    How to Identify a Broken Track

    In older phones, many tracks were visible on the PCB surface. That is no longer the case with modern smartphones.

    Today:

    • Most tracks are internal
    • Many are hidden under ICs
    • Some run between multiple layers

    Because of this, technicians rely on logic, diagrams, and testing tools.

    Basic troubleshooting approach:

    1. Identify the faulty function
    2. Check the related component
    3. Measure voltage at the component
    4. If voltage is missing, trace the line

    If the component is fine but not receiving power or signal, the track is likely broken.


    Using Online Diagrams to Trace PCB Tracks

    One major advantage today is the availability of repair diagrams online. Many technicians use solution images shared by the repair community.

    You can search for diagrams using:

    • Google Images
    • Repair forums
    • Technical discussion boards

    Example searches:

    • Nokia microphone problem PCB solution
    • Samsung charging problem track diagram

    These diagrams usually show:

    • Power lines
    • Signal paths
    • Test points
    • Jumper locations

    Always compare multiple images before trusting one diagram.


    Selecting the Right Diagram

    Not all diagrams online are correct. Some are incomplete or wrongly marked.

    Choose diagrams that:

    • Are clear and high-resolution
    • Show exact component names
    • Have been shared by multiple sources
    • Match your board layout

    Using incorrect diagrams can cause further damage.


    How to Check PCB Tracks Using a Multimeter

    A digital multimeter is the most important tool for checking tracks.

    Multimeter setting:

    • Set the meter to continuity mode

    Step-by-step method:

    1. Place one probe at the starting point of the track
    2. Place the other probe at the ending point
    3. Listen for the beep sound
    • Beep sound = track is good
    • No sound = track is broken

    This method works for:

    • Power lines
    • Ground paths
    • Signal tracks

    You can also check continuity between test points shown in diagrams.

    smartphone motherboard tracks checking

    What to Do If a Track Is Broken

    If continuity is not present, the track needs repair.

    The most common repair method is jumpering.

    Jumper repair process:

    • Identify two healthy points on the same line
    • Use a thin insulated jumper wire
    • Solder carefully under magnification
    • Avoid nearby components
    • Recheck continuity after soldering

    Many diagrams also suggest checking or replacing:

    • Small resistors
    • Capacitors
    • Filter components

    Always double-check for short circuits after jumper repair.


    Importance of Jumper Accuracy

    A wrongly placed jumper can:

    • Short power to ground
    • Damage ICs
    • Make the phone completely dead

    Work slowly and logically. One correct jumper can save a motherboard. One wrong jumper can destroy it.


    Using Repair Forums and Community Resources

    Repair forums are valuable learning platforms. Technicians share:

    • Jumper diagrams
    • Real repair cases
    • Troubleshooting logic
    • Board-level solutions

    These resources help especially when official diagrams are not available.

    However, do not blindly follow everything. Always verify using your own testing.


    What If No Diagram Is Available

    Sometimes diagrams are not available for a specific model or fault.

    In such cases, the only option is:

    • Schematic diagrams
    • Board view files
    • Logical tracing

    Schematic diagrams show:

    • Complete circuit flow
    • Voltage sources
    • Signal directions
    • Component connections

    Reading schematics requires practice but is a core professional skill in advanced mobile repair.


    Hardware Faults vs Software Faults

    PCB track checking helps only with hardware-related problems.

    It will not fix:

    • Software crashes
    • Firmware corruption
    • OS bugs
    • App-related issues

    Always confirm that the issue is hardware-related before starting board-level work.


    Professional Insight and Experience (EEAT)

    From real repair experience, a large number of “dead” or “non-working” phones are repairable through proper track checking. Many boards that appear beyond repair can be revived with one correct jumper.

    This skill:

    • Saves expensive motherboards
    • Reduces unnecessary part replacement
    • Improves diagnostic accuracy
    • Builds technician confidence

    That is why circuit tracing is a key topic in structured mobile repair training and practical electronics education.

    “A skilled technician repairs what others replace.”


    Common Mistakes to Avoid

    • Jumping tracks without testing
    • Trusting a single online diagram
    • Applying excess heat
    • Ignoring grounding paths
    • Rushing the repair

    Patience and verification are more important than speed.


    Conclusion

    Checking PCB tracks is a fundamental and essential skill in mobile phone repair. It allows technicians to diagnose faults that are not visible and not solved by simple part replacement.

    With the help of:

    • Diagrams
    • Multimeters
    • Logical thinking
    • Careful soldering

    Most track-related problems can be identified and repaired successfully.

  • Soft Reset vs Hard Reset in Phones: What’s the Difference?

    Soft Reset vs Hard Reset in Phones: What’s the Difference?

    Modern smartphones have become powerful digital tools. A single device now handles communication, banking, navigation, entertainment, and work. With so many functions running together, it is normal for a mobile phone to sometimes slow down, freeze, or behave strangely.

    Most phone problems are not serious. Knowing the right fix at the right time makes all the difference.

    Many common phone issues can be solved without visiting a service center. Two simple solutions often help—soft reset and hard reset. These methods look similar on the surface but work very differently.

    This guide explains the real difference between soft reset and hard reset, when to use each one, what happens to your data, and what to do if problems continue even after resetting.


    Why Phones Start Misbehaving

    Smartphones run complex software. Over time, temporary files, background apps, system bugs, or failed updates can cause issues. Some phones start turning off by itself, others keep restarting, and some become slow even with a full battery.

    Common symptoms include:

    • Phone freezing or becoming unresponsive
    • Apps opening slowly or crashing
    • Screen not responding to touch
    • Phone switching off again and again
    • Device shutting down with full battery
    • Phone stuck on logo during startup
    • Random restarting without warning

    Most of these problems are software-related. That is where reset options help.


    What Is a Soft Reset? (Simple Restart Explained)

    A soft reset means restarting your smartphone normally or force-restarting it if the screen does not respond.

    It is the first and safest step to try when a phone behaves oddly.

    What a Soft Reset Does

    • Refreshes the system memory
    • Clears temporary background processes
    • Stops stuck apps and services
    • Reloads the operating system cleanly

    What a Soft Reset Does NOT Do

    • Does not delete data
    • Does not remove apps
    • Does not erase settings
    • Does not affect photos or contacts

    In simple words, a soft reset is like giving your phone a short break.


    When Should You Use a Soft Reset?

    A soft restart works best for minor problems, such as:

    • Phone is slow
    • Apps not opening properly
    • Screen not responding
    • Temporary network issues
    • Phone heating slightly
    • Phone restarting occasionally
    • Device behaving unusually after long usage

    Many technicians try a soft reset before doing anything else because it fixes a large number of issues instantly.


    How to Perform a Soft Reset (Android & iPhone)

    For Android Phones

    • Press and hold the Power button
    • Tap Restart, or
    • Hold Power for 10–20 seconds until the phone restarts

    For iPhones

    • For Face ID models: Press Volume Up + Power, then slide to power off
    • For Home button models: Hold Power, then slide to power off
    • Turn the phone back on after a few seconds

    This method is safe and can be repeated anytime.


    What Is a Hard Reset? (Factory Reset Explained)

    A hard reset, also known as a factory reset, erases all user data from the phone and restores it to its original condition.

    It is a last-resort solution when other troubleshooting steps fail.

    A hard reset does not repair hardware. It only gives the software a fresh start.


    What a Hard Reset Deletes

    A factory reset removes:

    • Google or Apple account data
    • Installed apps and app data
    • Contacts and call logs
    • Messages and chat history
    • Photos, videos, and downloads
    • System settings and preferences

    What It Does Not Remove

    • Operating system itself
    • Manufacturer firmware
    • Data on external memory card (in most cases)

    When Should You Use a Hard Reset?

    A hard reset is useful when:

    • Phone is switching off on its own
    • Phone is restarting repeatedly
    • Device stuck on boot logo
    • Severe lag even after restart
    • Malware or suspicious apps detected
    • Phone settings badly corrupted
    • Preparing the phone for resale

    It is also recommended if the phone keeps turning off automatically with full battery and software checks show no error.


    Important Checks Before Hard Reset

    Before performing a factory reset, always ensure:

    • Backup is taken (cloud or computer)
    • Battery level is above 50%
    • You remember your Google or Apple ID
    • SIM and memory card are removed (optional)

    Failing to back up data can cause permanent data loss.


    How to Perform a Hard Reset

    From Phone Settings

    1. Open Settings
    2. Go to System / General Management
    3. Tap Reset
    4. Select Factory data reset
    5. Confirm and wait

    Using Hardware Buttons

    Used when the phone does not turn on properly.

    Steps vary by model, but usually involve:

    • Power + Volume buttons
    • Selecting reset option using volume keys

    Soft Reset vs Hard Reset: Quick Comparison

    FeatureSoft ResetHard Reset
    Deletes data❌ No✅ Yes
    Fixes minor bugs✅ Yes✅ Yes
    Fixes major software issues❌ Sometimes✅ Often
    Safe to repeat✅ Yes❌ Limited
    Time requiredFew secondsSeveral minutes

    What If Reset Does Not Fix the Problem?

    Sometimes, even after a hard reset, the phone may still:

    • Keep shutting down
    • Restart automatically
    • Not boot properly

    In such cases, the issue could be:

    • Battery health problem
    • Power IC fault
    • Software corruption requiring firmware reinstall
    • Hardware damage

    At this stage, professional diagnosis is recommended.


    Common Myths About Phone Resets

    Myth: Reset repairs hardware
    Truth: Resets only fix software issues

    Myth: Reset improves battery health
    Truth: Battery performance depends on physical condition

    Myth: Hard reset removes system updates
    Truth: Updates remain installed


    Expert Tips for Safe Phone Usage

    • Restart your phone once every few days
    • Avoid installing unknown apps
    • Keep system updates enabled
    • Do not ignore repeated shutdown issues
    • Backup data regularly

    Most phone failuressues grow worse when ignored. Early action saves time and money.


    Soft Reset or Hard Reset: Which One Should You Try First?

    Always follow this order:

    1. Soft reset
    2. Check updates and apps
    3. Hard reset (only if needed)

    Jumping directly to factory reset is unnecessary in most cases.


    Final Thoughts

    Understanding the difference between a soft reset and a hard reset helps you make the right decision at the right time. A simple restart can solve many issues, while a factory reset should be used carefully and only when needed.

    If your smartphone is turning off by itself, restarting again and again, or shutting down with full battery, resetting may help—but only if the issue is software-related.

    When in doubt, start small. Let your phone tell you what it needs.

  • All Types of Mobile Phone Locks Explained (Screen, SIM & More)

    All Types of Mobile Phone Locks Explained (Screen, SIM & More)

    Mobile phones are no longer just calling devices. They store personal photos, private chats, banking apps, work files, and sensitive data. Because of this, mobile phone locks play a critical role in protecting both the device and the data inside it.

    Many users only know about screen locks like PIN or fingerprint. But in reality, there are multiple types of locks in smartphones, each designed for a specific purpose. Some protect privacy. Some protect network contracts. Others prevent theft or misuse after a factory reset.

    “A phone lock is not just about privacy. It’s about control, ownership, and security.”

    In this guide, we will clearly explain all types of mobile phone locks, how they work, when they appear, and what users should know before trying to remove or change them.


    What Is a Mobile Phone Lock?

    A mobile phone lock is a security mechanism that restricts access to a device, its features, or its network usage. The lock may activate:

    • When the screen turns on
    • When a SIM card is inserted
    • After a factory reset
    • When EMI payments are pending
    • When the phone connects to a network

    Each lock serves a different purpose, and confusing one lock for another often leads to panic or data loss.


    Why Do Smartphones Have So Many Types of Locks?

    Modern smartphones combine software security, hardware protection, and financial safeguards. Phone manufacturers, network providers, and finance companies all add their own layers of protection.

    These locks help to:

    • Prevent unauthorized access
    • Protect stolen devices
    • Enforce carrier or finance agreements
    • Secure personal and business data

    1. PIN Code Lock

    A PIN code lock is one of the oldest and most common screen security methods used in mobile phones.

    How It Works

    • User sets a numeric code
    • The phone asks for the code when the screen wakes up
    • Usually 4 to 6 digits long

    Where It Is Used

    • Feature phones
    • Android smartphones
    • iPhones

    Pros

    • Easy to remember
    • Works offline
    • Quick to unlock

    Cons

    • Can be guessed if too simple
    • Less secure than long passwords

    Tip: Avoid using common combinations like 1234 or birth years.


    2. Password Lock

    A password lock uses letters, numbers, and symbols to secure the phone.

    How It Works

    • User creates an alphanumeric password
    • Required every time the screen unlocks or device restarts

    Where It Is Used

    • Smartphones with higher security needs
    • Business or enterprise devices

    Pros

    • Very strong security
    • Hard to brute-force

    Cons

    • Slower to unlock
    • Easy to forget

    This lock is best for users who store sensitive or professional data.

    locks of cell phones

    3. Pattern Lock

    Pattern lock is popular among Android users due to its visual simplicity.

    How It Works

    • User draws a pattern connecting dots on the screen
    • Pattern must match exactly to unlock

    Pros

    • Fast to use
    • Easy for touch navigation

    Cons

    • Pattern marks can be visible
    • Less secure if simple patterns are used

    Technician insight: Many forgotten pattern locks require data reset unless backup credentials exist.


    4. Biometric Locks (Fingerprint & Face Unlock)

    Biometric locks use physical traits instead of memorized codes.

    Common Types

    • Fingerprint sensor
    • Face recognition

    How It Works

    • Phone scans fingerprint or face
    • Matches it with stored biometric data

    Pros

    • Very fast
    • Convenient
    • Hard to duplicate

    Cons

    • Requires fallback PIN or password
    • May fail in low light or with wet fingers

    Biometrics add comfort but do not replace traditional locks completely.


    5. Smart Lock (Android Feature)

    Smart Lock is an Android-only feature that keeps the phone unlocked in trusted conditions.

    How It Works

    The phone stays unlocked when:

    • Connected to a trusted Bluetooth device
    • Located at a trusted place
    • Carried by the owner

    Pros

    • Reduces repeated unlocking
    • Improves daily usability

    Cons

    • Less secure in public places
    • Depends on sensors and location accuracy

    Smart Lock should be used carefully, not as a primary security method.


    6. SIM Lock

    A SIM lock restricts the phone to specific SIM cards.

    How It Works

    • Phone accepts only approved SIM cards
    • Other SIMs show “SIM not supported” message

    Who Applies It

    • Network providers
    • Carriers

    Why It Exists

    • To enforce network contracts
    • To prevent misuse of subsidized phones

    Important Note

    SIM lock is different from screen lock and does not protect data.


    7. Network Lock

    Network lock is similar to SIM lock but applies at a carrier level.

    How It Works

    • Phone only works on approved network bands or providers
    • Common in contract-based phones

    Seen In

    • Imported smartphones
    • Carrier-bound devices

    Removing a network lock usually requires carrier authorization.


    8. Finance Lock (EMI Lock)

    Finance lock is increasingly common in phones purchased on EMI or loan plans.

    How It Works

    • Device locks automatically if payments are missed
    • Screen may show payment reminder
    • Some features become inaccessible

    Why It Exists

    • To protect lenders from default
    • To enforce payment discipline

    Key Point

    Finance locks are legal and server-controlled. Bypassing them without clearance is not advised.


    9. Factory Reset Protection (FRP Lock)

    FRP lock is one of the most misunderstood phone locks.

    How It Works

    • Activates after factory reset
    • Requires original Google account login

    Why It Exists

    • Prevents stolen phone reuse
    • Protects user identity

    Common Scenario

    User resets phone but forgets Google credentials.

    FRP lock turns a stolen phone into a useless device.


    Difference Between Screen Locks and System Locks

    TypePurpose
    Screen LocksProtect daily access
    SIM / Network LocksControl carrier usage
    Finance LocksEnforce EMI payments
    FRP LockPrevent theft after reset

    Understanding this difference helps users avoid unnecessary panic.


    Common Myths About Mobile Phone Locks

    • Resetting removes all locks
    • SIM lock protects data
    • Finance lock is same as FRP
    • Biometrics work without PIN

    Locks serve specific roles and cannot replace one another.


    When Should You Contact a Professional?

    Seek expert help when:

    • FRP lock credentials are lost
    • Finance lock appears unexpectedly
    • Network lock prevents SIM usage
    • Data is critical

    Attempting random fixes may cause permanent data loss.


    Best Practices for Managing Phone Locks

    • Always remember backup credentials
    • Keep Google or Apple account details safe
    • Avoid unknown unlocking tools
    • Understand your phone’s purchase terms

    FAQs – Mobile Phone Locks (Quick Guide)

    What is the most common phone lock?

    Screen lock like PIN, pattern, fingerprint, or face unlock.


    Is SIM lock same as network lock?

    No. SIM lock limits SIM cards. Network lock limits carriers.


    Does factory reset remove all locks?

    No. It removes screen lock only. FRP and finance locks remain.


    Why does FRP lock appear?

    To stop misuse. It asks for the previous Google account after reset.


    What if I forget my screen lock?

    You may need to reset the phone. Data can be lost and FRP may appear.


    Is finance lock legal?

    Yes. It activates when EMI payments are missed.


    Does fingerprint work without PIN?

    No. A PIN or password is always required as backup.


    Is Smart Lock safe?

    It’s convenient but not fully secure alone.


    Can technicians remove FRP?

    Only with valid ownership proof.


    How to know which lock is active?

    Check the screen message:

    • PIN → Screen lock
    • Google ID → FRP
    • No network → SIM/Network lock

    Does SIM lock affect Wi-Fi?

    No. Only mobile network is restricted.


    Are Android and iPhone locks different?

    Yes. Android uses FRP, iPhone uses Apple ID Activation Lock.


    Final Thoughts

    Mobile phone locks are not meant to frustrate users. They exist to protect ownership, data, and agreements. Once users understand which lock they are dealing with, solutions become much clearer.

    “A secure phone is not about more locks. It’s about the right lock at the right time.”

    By knowing the difference between screen locks, SIM restrictions, finance locks, and system protections, users can make smarter decisions and avoid costly mistakes.

  • How to Backup and Restore an Android Phone Step by Step

    How to Backup and Restore an Android Phone Step by Step

    A Standard Operating Guide for Safe Data Handling

    “A careful approach to data comes before any technical work.”

    Android phones today carry critical personal and professional information. Contacts, photos, videos, documents, app data, and account credentials are deeply integrated into the device. Any reset, software operation, or system failure can result in permanent data loss if precautions are not taken.

    That is why learning how to properly back up and restore an Android device is not optional anymore. It is a basic digital habit every user should follow, whether you use a budget Android phone or a premium smartphone.

    Learn how to backup and restore an Android phone step by step. Protect contacts, photos, apps, and data with safe, simple, and reliable methods.


    “Your phone can be replaced. Your data often can’t.”

    This guide outlines a structured and reliable process for backing up and restoring Android devices. It explains everything you need to know, in simple language, without technical confusion.


    Purpose of These Instructions

    • Prevent accidental data loss
    • Avoid account lock issues
    • Ensure smooth device setup after reset
    • Maintain clarity and consistency in data handling

    This guide focuses on correct sequence and verification, not shortcuts.


    Step 1: Initial Device Assessment

    Before any reset, update, or troubleshooting:

    Confirm:

    • A Google account is signed in
    • Backup options are accessible
    • Internet connection is available
    • Battery level is sufficient

    If any of these are missing, do not proceed.


    Step 2: Check Backup Status

    Never assume backup is active.

    How to Verify Backup

    1. Open Settings
    2. Go to Google
    3. Tap Backup
    4. Confirm:
      • Backup is ON
      • Recent backup date is visible

    If the backup date is old or missing, data is not protected.


    Step 3: Understand What the Backup Includes

    Android system backup usually covers:

    • Contacts synced to Google
    • Call history
    • Installed apps list
    • Supported app data
    • Device preferences

    Photos, videos, and chat apps require separate attention.

    android phone backup and restore

    Step 4: Perform a Manual Backup

    Even if automatic backup is enabled, run it manually.

    Manual Backup Steps

    1. Go to Settings → Google → Backup
    2. Tap Back up now
    3. Wait for completion

    Use Wi-Fi and avoid interruptions.


    Step 5: Secure Photos and Videos

    Media files are often the most sensitive data.

    Using Google Photos

    1. Open Google Photos
    2. Tap profile icon
    3. Go to Photos settings
    4. Enable Backup
    5. Wait until sync completes

    Scroll through older images to confirm upload.


    Step 6: Backup Messaging Apps Separately

    Messaging apps do not always rely on system backup.

    Example: WhatsApp

    1. Open WhatsApp
    2. Go to Settings → Chats → Chat backup
    3. Select Google account
    4. Tap Back up

    Important notes:

    • Same Google account required for restore
    • Same phone number required

    “A backup made today prevents panic tomorrow.”


    Step 7: Manual File Backup (Offline Option)

    When cloud backup is slow or unavailable:

    Manual Backup Process

    1. Connect phone to computer via USB
    2. Select File Transfer
    3. Copy folders:
      • DCIM
      • Pictures
      • Videos
      • Documents
      • Downloads
    4. Store them in a clearly labeled folder

    This method adds an extra safety layer.


    Step 8: Pre-Reset / Pre-Operation Checklist

    Before performing any reset or software change:

    ✔ Google backup completed
    ✔ Photos synced
    ✔ Messaging app backup done
    ✔ Contacts synced
    ✔ Important files copied

    Skipping this checklist leads to most data-loss problems.


    “Data safety is a process, not a feature.”


    Step 9: Restoring Data After Reset

    Restore begins during the initial setup of the device.

    When Restore Option Appears

    • After factory reset
    • After system reinstall
    • On first startup of a new device

    Step 10: Restore Using Google Account

    Restore Procedure

    1. Power on the device
    2. Choose language
    3. Connect to Wi-Fi
    4. Sign in with the same Google account
    5. Select Restore from backup
    6. Choose the latest available backup

    Apps and settings restore in the background.


    Step 11: What Restores Automatically

    Usually Restored

    • Contacts
    • Call logs
    • Installed apps
    • System settings

    Not Always Restored

    • Local files not synced
    • Some app data
    • Messaging app chats (unless separately backed up)

    This behavior is normal.


    Step 12: Restoring Photos and Files

    • Google Photos restores media automatically once signed in
    • Manual files must be copied back to original folders

    Ensure folder names remain unchanged.


    Step 13: FRP Lock Awareness

    After reset, the device may ask for:

    • Previously used Google account
    • Correct account password

    This is Factory Reset Protection and is a security feature.

    Without correct credentials, setup cannot continue.


    Step 14: Common Problems and Their Causes

    Backup Not Showing

    • Wrong Google account used
    • Backup never completed
    • Backup deleted or overwritten

    Restore Freezing or Slow

    • Weak internet connection
    • Background app downloads
    • Interrupted setup

    Patience and stable Wi-Fi solve most cases.


    Step 15: Best Practices for Safe Data Handling

    • Enable automatic backups
    • Verify backup regularly
    • Use both cloud and offline methods
    • Backup before updates or reset
    • Secure Google account credentials

    These habits eliminate most risks.


    Data Safety and Security Notes

    • Google backups are encrypted
    • Access requires account login
    • Two-step verification adds protection

    Avoid unknown third-party backup tools.


    Common Misunderstandings to Avoid

    • ❌ “Data stays after reset”
    • ❌ “Photos are always safe”
    • ❌ “Backup happens automatically”
    • ❌ “Backup is complicated”

    Backup is simple when done correctly.

    Official Android Apps That Help Restore Data Across Brands

    Many smartphone brands offer official data transfer and restore apps. These apps are designed to move data from any Android phone, not just the same brand. They are safe, trusted, and supported by the manufacturer.

    Below are the most reliable options.


    Samsung Smart Switch

    Brand: Samsung
    What it does:
    Helps transfer contacts, photos, videos, messages, call logs, apps, and settings from any Android phone or even iPhone to a Samsung device.

    Works with:
    Android, iPhone, Windows, macOS

    Play Store link:
    https://play.google.com/store/apps/details?id=com.sec.android.easyMover


    Mi Mover

    Brand: Xiaomi (Mi, Redmi, Poco)
    What it does:
    Allows fast wireless transfer of data from other Android phones to Xiaomi devices without internet. Supports photos, videos, contacts, apps, and files.

    Works with:
    Android phones of all brands

    Play Store link:
    https://play.google.com/store/apps/details?id=com.miui.huanji


    Clone Phone

    Brand: OPPO
    What it does:
    Transfers data like contacts, photos, videos, apps, and system data from any Android phone to OPPO devices using a direct Wi-Fi connection.

    Works with:
    Android phones (cross-brand)

    Play Store link:
    https://play.google.com/store/apps/details?id=com.coloros.backuprestore


    Easy Share

    Brand: Vivo
    What it does:
    Helps move data such as contacts, messages, media, apps, and documents from any Android phone to Vivo devices quickly and securely.

    Works with:
    Android phones of all brands

    Play Store link:
    https://play.google.com/store/apps/details?id=com.vivo.easyshare


    Phone Clone

    Brand: Huawei
    What it does:
    Copies contacts, photos, videos, messages, apps, and system data from Android or iPhone to Huawei phones without using mobile data.

    Works with:
    Android and iOS devices

    Play Store link:
    https://play.google.com/store/apps/details?id=com.hicloud.android.clone


    OnePlus Clone Phone

    Brand: OnePlus
    What it does:
    Transfers data from any Android phone to OnePlus devices, including media, contacts, call logs, and apps.

    Works with:
    Android phones (all brands)

    Play Store link:
    https://play.google.com/store/apps/details?id=com.oneplus.backuprestore

    Realme Clone Phone

    Brand: Realme
    What it does:
    Transfers contacts, photos, videos, apps, messages, and files from any Android phone to a Realme device. Uses a direct wireless connection, no internet needed.

    Works with:
    Android phones of all brands

    Play Store link:
    https://play.google.com/store/apps/details?id=com.coloros.backuprestore

    (Note: Realme uses the same core app framework as OPPO for data transfer.)


    Motorola Migrate / Motorola Data Restore

    Brand: Motorola
    What it does:
    Motorola phones now rely mainly on Google’s built-in restore system, but older and some current models support Motorola’s own data restore tools during setup. These allow restoring contacts, apps, call logs, and media from another Android device.

    Works with:
    Android phones (via Google backup or cable-based transfer)

    Play Store link (Motorola Data Restore):
    https://play.google.com/store/apps/details?id=com.motorola.migrate


    Important Notes About These Apps

    • These are official apps, not third-party tools
    • Most apps work across brands, not limited to the same manufacturer
    • Internet is usually not required
    • Both phones should be charged and close to each other
    • Data transfer speed depends on file size and device condition

    Always install these apps only from the Google Play Store.

    Backup Tips for Technicians and Repair Shops

    • Always inform customers about data loss
    • Ask if backup exists before repair
    • Avoid responsibility disputes
    • Encourage customers to sign backup consent

    This builds trust and professionalism.


    Final Summary

    Handling Android phones responsibly means prioritizing data before any technical action. Backup and restore are not advanced tasks. They are essential steps that prevent irreversible loss.

    Following a structured process ensures:

    • Smooth device transitions
    • Fewer account issues
    • No unexpected data loss

    A few minutes of preparation saves hours of recovery.