Tag: water damaged cell phone

  • Common Cell Phone Problems: Full List of Faults Explained

    Common Cell Phone Problems: Full List of Faults Explained

    Cell phones have become our closest companions. They wake us up, connect us, entertain us, and store our memories — so when a phone stops working, even a small fault can disrupt our entire routine. For repair technicians, understanding these issues is essential. For users, knowing the common problems helps you stay prepared and identify faults early.

    “Every problem has a root cause — the real skill lies in finding it.”

    This guide explains all major mobile phone faults, how they occur, what they mean, and how technicians typically diagnose them. The goal is to give you a clear, updated, and practical understanding of today’s smartphone issues — in simple language.


    Types of Mobile Phone Faults

    All phone problems fall into three broad categories:

    1. Settings-Related Faults

    These occur due to wrong configurations, disabled features, changed options, or simple mistakes made by the user.

    2. Software Faults

    These involve the phone’s operating system, apps, corrupt files, firmware crashes, or update failures.

    3. Hardware Faults

    These are physical failures such as broken displays, damaged charging ports, faulty motherboards, or non-working components.

    Understanding which category the issue belongs to helps technicians diagnose faster and more accurately.


    Full List of Modern Mobile Phone Faults (Updated)

    Below is an expanded and updated list of all common smartphone faults, including newly emerging issues found in today’s touchscreen devices.
    Obsolete or outdated faults (from keypad-era phones) have been removed, updated, or rewritten.


    1. Dead Phone (Not Powering On)

    A phone that doesn’t turn on, doesn’t vibrate, and shows no charging sign is considered dead.
    Causes may include:

    • Battery failure
    • Water damage
    • Short circuit
    • Faulty power IC (PMIC)
    • Damaged charging port

    Technicians diagnose this using power supply tools and multimeters.


    2. SIM Card Not Detected

    The phone shows “No SIM” or “Insert SIM Card” even when the SIM is inserted.
    Usually caused by:

    • Dirty or bent SIM pins
    • Damaged SIM slot
    • Software conflict
    • Network IC failure

    Modern eSIM phones may show activation issues instead.


    3. Hanging / Freezing / Lagging

    The cell phone becomes unresponsive or slow.
    Causes include:

    • Low storage
    • Heavy apps
    • Overheating
    • Corrupted firmware
    • Faulty RAM or CPU chip

    A common sign of deeper software damage.


    4. Network Issues (No Signal / Low Signal / Dropping Calls)

    This includes:

    • No network
    • Weak signal
    • “Emergency calls only”
    • Calls dropping automatically

    Reasons:

    • Damaged antenna
    • SIM issues
    • Firmware bugs
    • Network IC failure

    5. Microphone Not Working

    People cannot hear you during calls or voice recordings.

    Common reasons:

    • Dust in MIC hole
    • Water damage
    • Damaged MIC module
    • Firmware glitch
    • Noise cancellation mic fault

    Modern phones have multiple microphones, so diagnosis requires precision.


    6. Speaker Issues (No Sound During Calls)

    The earpiece speaker stops working, making you unable to hear the caller.

    Usually caused by:

    • Dust buildup
    • Flex cable damage
    • Moisture
    • Faulty earpiece speaker

    7. Loudspeaker / Media Speaker Fault

    No ringtone, music, notifications, or hands-free audio.

    Reasons:

    • Faulty loudspeaker unit
    • Software audio routing issue
    • Audio IC failure

    8. Vibration Not Working

    Vibration motor (haptic motor) stops functioning.

    Common causes:

    • Motor wear-out
    • Loose connection
    • Board damage

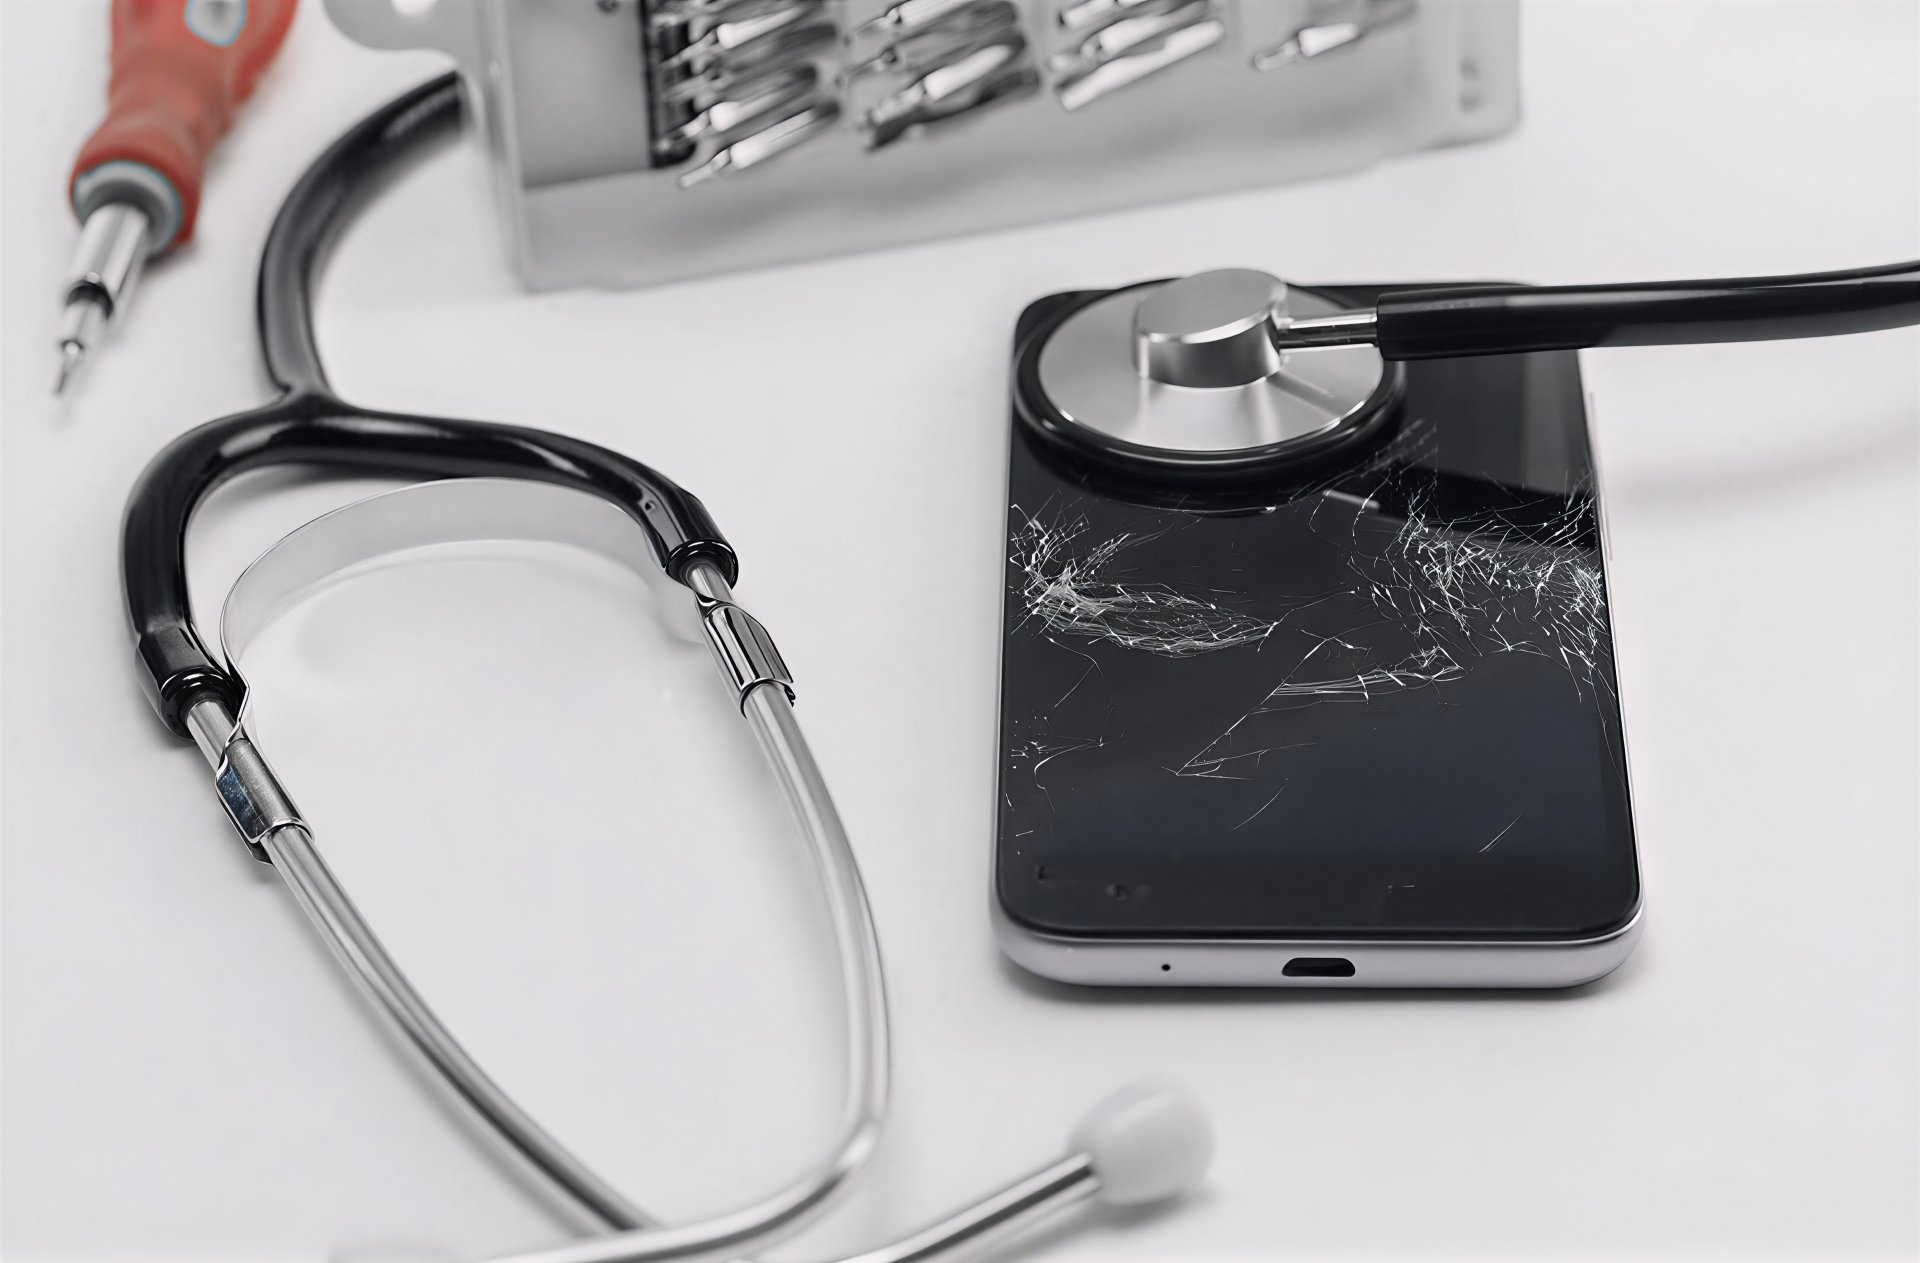
    9. Display / Screen Faults

    This includes:

    • Blank screen
    • Broken or cracked display
    • Flickering issue
    • Green/pink lines
    • Black spots
    • No backlight
    • Touch working but no display
    • Display working but touch not responding

    Modern OLED screens also face:

    • Burn-in
    • Ghosting
    • Color shifts

    10. Auto Power Off

    Phone switches off randomly without user action.

    Reasons:

    • Overheating
    • Battery failure
    • Power IC malfunction
    • Corrupt firmware

    11. Auto Restart (Bootloop)

    The phone continuously restarts or gets stuck on the logo.
    Causes:

    • System update failure
    • Damaged OS
    • Application conflict
    • Hardware shorting
    • Damaged booting IC

    Bootloops are common after failed software updates.


    12. Call Drops / Call Disconnecting

    The call ends abruptly.
    This may be due to:

    • Weak network
    • Software bugs
    • Damaged antenna
    • Faulty baseband IC

    13. Charging Problems

    One of the most common faults today. Includes:

    • Not charging
    • Slow charging
    • Intermittent charging
    • Overheating while charging
    • Charger connected but not increasing battery percentage

    Reasons:

    • Faulty cable or adapter
    • Broken charging port
    • Charging IC damage
    • Battery swelling
    • Dirt inside port

    14. Charging Port Damage (USB Port Faults)

    When the port becomes loose, bent, corroded, or physically damaged.
    Symptoms:

    • Cable must be held at an angle
    • Charging stops when moved
    • No data transfer

    15. Touchscreen Problems

    Touch issues are very common today.

    Includes:

    • Touch not working
    • Touch responding on its own (ghost touch)
    • Slow or delayed touch
    • Touch working only in some areas

    Causes:

    • Damaged touch panel
    • Faulty display connector
    • Software glitch

    16. Battery Draining Fast

    Battery percentage drops quickly even with light usage.
    Reasons:

    • Battery health degraded
    • Power-hungry apps
    • Background processes
    • Network fluctuations
    • Faulty charging IC
    • Swollen battery

    Technicians use software and multimeter tools to confirm battery health.


    17. Overheating Problems

    Phone becomes hot during use, charging, or even idle.

    Causes:

    • Heavy gaming
    • Faulty CPU
    • Short circuit
    • Damaged battery
    • Poor ventilation
    • Malware apps

    If the phone overheats too much, it may shut down automatically.


    18. Bluetooth Not Working

    Bluetooth won’t connect, keeps disconnecting, or doesn’t turn on.

    Reasons:

    • Corrupted Bluetooth firmware
    • Radio frequency interference
    • Damaged Wi-Fi/Bluetooth IC

    19. Wi-Fi Not Connecting

    Wi-Fi may show:

    • No connection
    • Authentication error
    • Frequent disconnection

    Possible causes:

    • Router conflict
    • Software bugs
    • Wi-Fi IC damage

    20. Mobile Data Not Working

    Internet does not work even though network bars are visible.

    Causes include:

    • APN settings wrong
    • Corrupt OS
    • Network provider issue
    • Baseband malfunction

    21. Camera Problems

    Modern camera modules face several faults:

    • Camera not opening
    • “Camera failed” error
    • Blurry pictures
    • Black screen when switching lenses
    • Ultrawide/macro lens not detecting
    • Front camera not working
    • Portrait mode failure
    • Video stabilization not working

    Some premium phones also face OIS motor failure.


    22. Fingerprint Sensor Not Working

    Includes:

    • No fingerprint detection
    • Slow recognition
    • Error in setup
    • In-display fingerprint failure

    Usually caused by:

    • Damaged sensor
    • Moisture
    • Software conflicts

    23. Face Unlock Not Working

    Face ID or Face Unlock may stop working due to:

    • Dirty front camera
    • Low light
    • Damaged sensors
    • Software update issues
    • TrueDepth camera failure (iPhone)

    24. Memory Card Not Detected

    For phones with SD card slots.

    Reasons:

    • Corrupted SD card
    • Dirty contacts
    • Damaged slot
    • Unsupported file format

    25. Proximity Sensor Issue

    Screen does not turn off during calls or turns off at the wrong time.

    Causes:

    • Screen guard blocking sensor
    • Sensor misalignment
    • Calibration error

    26. GPS / Location Problems

    Navigation becomes inaccurate or fails to track position.

    Reasons:

    • Weak GPS antenna
    • Software bugs
    • Location services turned off
    • Corrupted system files

    27. App Crashing / App Not Opening

    Apps force-close due to:

    • Outdated version
    • Low RAM
    • OS conflict
    • Corrupted data

    28. Storage Full Even When Not Used

    A common issue in modern phones.

    Reasons:

    • System cache
    • Duplicate files
    • Hidden media
    • Malware apps
    • Defective memory chip (EMMC/UFS)

    Technicians check using special memory analysis tools.


    29. Phone Not Detecting on Computer (USB Data Failure)

    Includes:

    • PC not recognizing phone
    • No file transfer
    • Only charging but no MTP mode

    Reasons:

    • Faulty USB driver
    • Cable issues
    • Data pins damaged
    • Motherboard fault

    30. Notification Problems

    User does not receive notifications on time.

    Occurs due to:

    • Battery optimization restrictions
    • Disabled app permissions
    • Software bugs

    31. Liquid Damage Faults

    Water damage causes unpredictable issues such as:

    • Touch not working
    • Speaker distortion
    • Charging short
    • No power
    • Corrosion on connectors

    Liquid damage requires deep cleaning and board-level diagnosis.


    32. Software Update Issues

    Phones may face:

    • Update stuck
    • Update failure
    • Feature missing
    • Battery draining after update

    Some updates introduce bugs that require patch fixes.


    33. Bootloader / FRP / Account Lock Issues

    Phones sometimes get locked due to:

    • Forgot password
    • Factory reset protection (FRP)
    • Carrier lock
    • Bootloader relocking

    Technicians use specialized software tools to resolve these cases (lawfully).


    34. Audio IC Failure (Common in Certain Models)

    Symptoms:

    • No sound
    • Voice not recorded
    • Speaker disabled
    • Microphone not detecting
    • Call drops when enabling loudspeaker

    This is a common board-level hardware problem.


    35. Backlight Failure

    Screen is ON but completely dark unless viewed under direct light.

    Causes include:

    • LED backlight strip damage
    • Backlight driver IC failure
    • Blown backlight filter

    Learn how to troubleshoot the most common cell phone faults by reading How To Repair Your Cell Phone Yourself


    Conclusion

    Mobile phones may look simple from the outside, but they contain hundreds of delicate components inside. Knowing the different types of faults helps technicians diagnose issues faster and gives users a better understanding of what might be wrong with their device.

    “A fault diagnosed well is already half repaired.”

    If you want to learn how to fix many of these problems yourself, always start with simple checks before attempting advanced repairs.

  • How to Check Shorting in Mobile Phones (Guide)

    How to Check Shorting in Mobile Phones (Guide)

    Short circuits are among the most common reasons for mobile phones to turn dead, overheat, restart, drain battery fast, or stop functioning suddenly. Every technician, whether beginner or experienced, must know how to diagnose shorting accurately before attempting any repair.

    A shorted motherboard requires careful handling and systematic testing. If diagnosed incorrectly, it may lead to further component damage. Fortunately, with the right tools and the right approach, finding a short circuit becomes simple and methodical.

    “A technician’s real skill lies not in replacing parts, but in identifying the root cause with precision.”

    This guide explains how to check shorting in mobile phones using two reliable methods:

    1. Continuity testing with a multimeter
    2. Current draw testing with a DC Power Supply (Battery Eliminator / Jhatka Machine)

    It also covers why shorting happens, how tracks work, and early symptoms of a short circuit.


    What Is Shorting in Mobile Phones?

    In simple terms, shorting happens when two electrically separate paths unintentionally touch each other, causing current to flow where it should not.

    Open Circuit

    • When a track breaks and current cannot flow
    • Example: cracked PCB or broken connection

    Short Circuit

    • When two separate tracks or components touch
    • Causes excessive current flow
    • Leads to heat, failure, or complete shutdown

    Shorting is one of the most damaging faults on a motherboard.


    Common Reasons for Shorting in Mobile Phones

    Short circuits do not happen randomly. They usually have specific causes:

    1. Water Damage

    The number one cause.
    Moisture creates conductive paths between tracks.

    2. Overheating

    Excessive heat melts solder joints and causes bridging.

    3. Using Faulty or Non-Compatible Chargers

    Cheap or fake chargers cause voltage spikes and component burns.

    4. Electrical Shock or Sparks Inside the Motherboard

    Can occur due to damaged components or loose connections.

    5. Physical Damage

    Drops or bends deform internal layers of the PCB.

    6. Manufacturing Defects

    Though rare, improper soldering from factory can cause short circuits later.


    Symptoms of a Shorted Motherboard

    Before testing the phone, technicians should look for signs:

    ✔ Phone completely dead

    ✔ No charging indication

    ✔ Phone heats up without powering on

    ✔ Auto-restart or shutdown

    ✔ Battery draining unusually fast

    ✔ DC Power Supply showing high current draw

    ✔ Burning smell or spark from inside

    ✔ Fast heating of a particular component

    These symptoms help narrow down the diagnosis.


    Understanding Tracks on a Mobile Motherboard

    Phones do not use wires internally. Instead, they use microscopic tracks on the PCB.

    Tracks carry different types of signals:

    • VBAT Tracks → Battery voltage
    • GND Tracks → Ground
    • RX/TX Tracks → Communication
    • I2C/SPI Tracks → Control signals
    • LDO Lines → Regulated power lines

    A short circuit happens when VBAT touches GND or any other unintended line.


    ⚠️ Very Important Safety Warning Before Testing

    Since this article is technician-level:

    • Do NOT use DC Power Supply without training
    • Do NOT touch exposed components during power tests
    • Always remove the battery before board testing
    • Avoid testing on a wet or unclean board
    • Wear anti-static protection when possible

    “A moment of care saves hours of repair.”


    METHOD 1: How to Check Shorting With a Multimeter (Continuity / Diode Mode)

    This is the fastest and safest method.


    Step 1: Set Multimeter Correctly

    • On digital multimeter → Continuity Mode / Diode Mode
    • On analog multimeter → Ohms (×10) Mode

    In diode mode:

    • A beep sound = electrical connection
    • No beep = open circuit

    Step 2: Identify Battery Connector Pins

    Most phone batteries have these pins:

    • VBAT (+) → Battery positive
    • GND (–) → Battery negative
    • BSI / ID → Battery status communication pin
    • BTEMP → Temperature sensor pin (varies by model)

    For shorting test, we focus on:

    • VBAT
    • GND

    Step 3: Position the Probes Correctly

    For multimeter short testing:

    ✔ Touch RED probe (+) to GND

    ✔ Touch BLACK probe (–) to VBAT

    Why this reverse connection?
    It creates a safe current path for testing without damaging components.


    Step 4: Read the Multimeter Response

    Case 1: Continuous Beep / Reading Shows Values

    This confirms:

    ➡ The motherboard is short.

    Case 2: No Beep / No Reading

    This confirms:

    ➡ The board is NOT short.


    Understanding Readings in Diode Mode

    If you test both ways:

    • If readings appear both timesShort circuit confirmed
    • If reading appears only onceNormal behavior

    Some motherboards may show numeric values (e.g., 254, 302, 1000).
    If values appear in both directions = shorting.


    Extra Checks With Multimeter

    ✔ Check heat

    Touch the board lightly to see if any component heats up during tests.
    (This should be done quickly and carefully.)

    ✔ Check for ground short near connectors

    Test charging IC, backlight section, power IC, audio IC, etc.


    METHOD 2: How to Check Shorting Using DC Power Supply (Jhatka Machine)

    This method is more advanced and must be done only by trained technicians.

    DC Power Supply is also called:

    • Battery Eliminator
    • Jhatka Machine
    • DC Regulator

    It supplies stable DC voltage for motherboard testing. Use a high quality, high precision DC Power Supply of 5 Amperes


    Step 1: Set Correct Voltage

    • Most mobile batteries operate at 3.7V – 4.4V
    • Set DC Supply to 4.0V for safe testing

    Never test above safe voltage levels.


    Step 2: Connect the Probes

    • Red Clip → VBAT Pin
    • Black Clip → GND Pin

    Do NOT touch other components during testing.


    Step 3: Read the Current Draw

    The current reading tells you a lot.

    Scenario 1: Current jumps instantly (0.5A – 2A)

    Short circuit confirmed.

    This means the power line is connected to ground.

    Scenario 2: Current remains at 0.00A

    No shorting.

    Scenario 3: Current slowly rises even without pressing power key

    Half short or leakage.
    This requires component-level diagnosis.


    Step 4: Identify Heating Component

    The fastest way to find a shorted component is:

    • Drop a little coolant spray
    • Apply DC Power again
    • See which area melts first (that’s the faulty part)

    Or use:

    • Thermal camera
    • Alcohol method (evaporates quickly at heating spot)

    Common Components That May Short

    • Power IC (PMIC)
    • Charging IC
    • Backlight IC
    • Audio IC
    • CPU caps
    • RAM/CPU solder joints
    • WIFI/Network IC
    • Filter capacitors (most common)
    • Diodes and coils

    90% of short circuits happen because of a single capacitor failure.


    Fixing Shorting in Mobile Phones

    After identifying the short, the repair steps include:

    ✔ Removing shorted capacitors

    ✔ Replacing faulty ICs

    ✔ Cleaning corrosion from water damage

    ✔ Reworking solder joints

    ✔ Checking line voltage again after removal

    Technicians must ensure the short is completely cleared before applying battery.


    Preventing Short Circuits in Mobile Phones

    Your customers can prevent shorting by:

    • Avoiding cheap chargers
    • Keeping phones away from water
    • Not using the phone while charging
    • Avoiding extreme heat
    • Using protective back covers
    • Getting phones serviced after water exposure

    “Prevention costs nothing—repairs cost time, money, and sometimes trust.”


    Conclusion

    Short circuits are one of the most serious faults in mobile phones. But with the right tools, techniques, and a systematic approach, diagnosing shorting becomes straightforward and safe.

    Technicians must always begin any dead phone repair by checking for shorting, because a shorted board cannot boot, charge, or function normally until the short is removed.

    Learning to test shorting using a multimeter and DC power supply gives you a strong foundation in mobile hardware repair, helping you diagnose faults confidently and accurately.

  • How to Clean and Service Your Cell Phone Safely (Guide)

    How to Clean and Service Your Cell Phone Safely (Guide)

    Your phone goes everywhere with you—your home, office, gym, market, public transport, and sometimes even the bathroom. It touches dozens of surfaces daily, comes into contact with your hands, face, pockets, and bags, and collects dust, oils, sweat, germs, and environmental pollutants. Cleaning your device is not only about hygiene—it also helps your phone run smoother and last longer.

    Many people clean only the screen, ignoring the ports, speakers, microphone holes, and tiny spaces where dirt accumulates and slowly affects performance. A clean phone charges better, stays cooler, lasts longer, and looks more presentable.

    “A little care every week keeps your phone healthy for years—maintenance is cheaper than repair.”

    This guide explains how to clean and service your cell phone safely using modern and trustworthy methods. Whether you use an iPhone, Samsung Galaxy, Xiaomi, Realme, OnePlus, Motorola, Vivo, Oppo, or any other brand, these steps apply to all.


    Why You Should Clean Your Cell Phone Regularly

    Cleaning is not only for looks. It helps improve:

    ✔ Hygiene

    Your phone can carry more bacteria than public surfaces if not cleaned properly.

    ✔ Touchscreen responsiveness

    Oil, dust, and residues reduce touch accuracy.

    ✔ Charging performance

    A dusty charging port causes slow or inconsistent charging.

    ✔ Call quality

    Dust in microphone or speaker grill reduces clarity.

    ✔ Heat management

    Dirt blocks ventilation and increases temperature.

    ✔ Component life

    Clean hardware lasts longer because it avoids corrosion and moisture buildup.

    Regular cleaning gives you a healthier device—and a better user experience.

    “Your phone works hard for you every day. Treat it with a little respect, and it will return that care through reliable performance.”


    Before You Begin: Safety Steps

    Always follow these precautions before cleaning or servicing:

    • Turn off the phone completely.
    • Unplug the charger and remove accessories.
    • Remove the case and screen guard if needed.
    • Remove the SIM tray.
    • If your phone has a removable battery, take it out—but never attempt to remove batteries in sealed phones unless you are trained.
    • Never spray liquids directly on your phone.
    • Avoid using household cleaners, bleach, or strong chemicals.

    These steps protect your phone from accidental damage.


    Tools and Materials You Should Use

    Use only safe, phone-friendly cleaning items:

    ✔ Microfiber cloth

    Lint-free and gentle on screens.

    ✔ Soft brush (paintbrush or anti-static brush)

    For cleaning ports and corners.

    ✔ 70–99% Isopropyl Alcohol (IPA)

    Safe for electronics. Evaporates quickly.

    ✔ Compressed air can (optional)

    Helps remove dust from tiny holes.

    ✔ Toothpicks or SIM ejector pin

    For cleaning edges (very gently).

    ✔ Cotton swabs (dry or lightly moistened)

    Useful for small areas.

    ✔ UV or disinfecting wipes approved for phones

    Safe for daily sanitizing.

    ✔ Ultrasonic cleaner (for technicians only)

    For deep cleaning of PCBs.

    Avoid harmful items such as glass cleaners, perfumes, hand sanitizers, paper towels, metal tools, or excessive water.


    STEP 1: Clean the Phone Exterior

    This includes the body, edges, buttons, and back panel.

    1. Use a microfiber cloth

    • Lightly moisten it with water or IPA.
    • Wipe in straight strokes, not circles.
    • Remove smudges, sweat, makeup, and dust.

    2. Clean buttons and seams

    Use a soft brush or cotton swab to remove dirt from:

    • Volume buttons
    • Power button
    • Frame edges
    • Speaker grill
    • Microphone holes

    Avoid using too much liquid—moisture can seep inside.

    3. Clean the back panel

    Especially if you use a polycarbonate or glass-backed phone.


    STEP 2: Clean the Display Safely

    The screen is the most frequently touched part and attracts fingerprints, dust, and bacteria.

    ✔ Recommended Method

    • Use a microfiber cloth slightly dampened with distilled water or IPA.
    • Wipe gently in horizontal or vertical lines.
    • Do not press hard—this may damage the display or touch sensors.

    ✔ To remove sticky stains

    • Use 70% IPA—strong enough to clean, mild enough for coatings.

    ✔ Do NOT use:

    • Cleaning sprays meant for glass windows
    • Baby wipes
    • Alcohol with fragrances
    • Hand sanitizer

    These can damage the oleophobic coating.

    Optional: Reapply oleophobic coating

    After long-term use, the coating fades. High-quality coating kits are available, but apply them only if comfortable following instructions.


    STEP 3: Clean the Charging Port (Important)

    A dirty charging port is one of the most common reasons for:

    • Slow charging
    • Loose connection
    • Phone not charging
    • Cable not fitting properly

    ✔ Clean using:

    • Soft brush
    • Compressed air
    • Wooden toothpick (very gently)

    Steps:

    1. Turn the phone off.
    2. Insert the toothpick gently and move it side-to-side.
    3. Remove lint or compacted dust.
    4. Blow compressed air to clear remaining particles.

    Never use metal pins, needles, or water.


    STEP 4: Clean Speakers and Microphone Holes

    Dust often blocks sound pathways.

    ✔ Use a soft brush

    Brush gently in one direction.

    ✔ Use adhesive putty

    Roll it lightly over speaker grills to lift dirt.

    ✔ Use compressed air

    Short bursts only; too much pressure can damage membranes.


    STEP 5: Clean Phone Cases and Accessories

    Your phone case collects more germs than the phone itself.

    ✔ Silicone Cases

    • Wash with warm soapy water.
    • Let them dry completely.

    ✔ Hard Plastic Cases

    • Wipe with IPA.

    ✔ Leather Cases

    • Use leather-safe cleaners.

    ✔ Screen Protectors

    If the protector is scratched, lifting, or yellowing—replace it.


    STEP 6: Service Your Phone Internally (Technician-Level)

    Only perform these steps if you’re trained or experienced.
    If not, leave these to a professional technician.

    ✔ Remove Back Panel

    Some phones allow safe removal; others do not.

    ✔ Inspect for Dust or Corrosion

    Use a magnifying glass or microscope.

    ✔ Clean Internal Components

    Use:

    • 99% IPA
    • Soft brush
    • Compressed air

    ✔ Ultrasonic Cleaning (Advanced)

    Professionals use an ultrasonic cleaner to deep-clean PCBs, especially in cases of liquid damage. This removes corrosion and contaminants safely.

    ✔ Check for Loose Screws or Connectors

    Loose connections can cause:

    • No display
    • Touch malfunction
    • Battery drop
    • Network issues

    Gently reseat flex cables if required.

    ✔ Do NOT

    • Remove batteries from sealed phones
    • Pry forcefully
    • Use water or soap inside

    Internal servicing must be done only with correct tools and experience.


    STEP 7: Clean SIM Tray and Slots

    A dusty SIM slot can cause:

    • SIM card not detected
    • Weak network
    • Call drop issues

    ✔ Steps

    • Use a dry brush to clean the tray.
    • Use compressed air to clear the slot.
    • Avoid inserting liquids or cotton inside the slot.

    STEP 8: Sanitize Your Phone (Final Step)

    After cleaning, sanitize to kill germs.

    ✔ Use approved disinfectant wipes

    Apple, Samsung, and other brands allow alcohol-based wipes for sanitizing.

    ✔ Do NOT use

    • Bleach
    • Excess water
    • Vinegar
    • Strong surface cleaners

    These damage coatings and internal components.


    How Often Should You Clean Your Phone?

    ✔ Light wiping: Daily

    ✔ Full cleaning: Weekly

    ✔ Deep cleaning/service: Every 2–3 months

    ✔ Professional servicing: Every 6–12 months

    Regular maintenance improves hygiene, performance, and lifespan.


    Signs Your Phone Needs Cleaning or Servicing

    • Charging is slow or intermittent
    • Touchscreen feels less responsive
    • Sound is muffled
    • Phone overheats
    • Buttons feel sticky
    • Screen has smudges or oily spots
    • Dust around camera or speaker grills
    • SIM not detected randomly
    • Phone looks dull or dirty

    If you notice any of these, clean your device following the steps above.


    Advanced Servicing Benefits (Performed by Technicians)

    Professional servicing includes:

    • Deep PCB cleaning
    • Port replacement if needed
    • Battery health assessment
    • Thermal paste reapplication (only in advanced repairs)
    • Speaker and mic dust removal
    • Rechecking board connections
    • Power and charging diagnostics

    These services help keep your phone running smoothly.


    Conclusion

    Cleaning and servicing your cell phone is simple, safe, and highly beneficial when done correctly. A clean phone performs better, stays healthier, and lasts longer. With regular care, you reduce the chances of overheating, slow charging, sound issues, and even hardware failure.

    “Good maintenance isn’t just about protecting your device—it’s about protecting the investment you carry every day in your pocket.”

    Take a few minutes every week to clean your phone, and enjoy a device that looks great, feels fresh, and works flawlessly.

  • How to Fix a Wet Cell Phone Step by Step (Water Damage Repair)

    How to Fix a Wet Cell Phone Step by Step (Water Damage Repair)

    Dropping a cell phone in water is one of the most stressful moments for any user. Whether it slips into a sink, falls into a bucket, gets soaked in rain, or lands in a toilet, the panic is real. Smartphones are expensive, personal, and deeply connected to daily life.

    The good news is this: a wet cell phone does not always mean a dead phone. Many water-damaged devices can be saved if the right steps are taken quickly and correctly.

    This guide explains how to fix a wet cell phone step by step, using practical, technician-approved methods. It covers what to do immediately, what to avoid, and when professional repair is the best option.

    “In water damage cases, speed and the right actions matter more than luck.”


    Understanding What Water Does to a Smartphone

    Before jumping into repair steps, it helps to understand what actually happens when a phone gets wet.

    Water itself is not the biggest enemy. The real damage comes from:

    • Electrical short circuits
    • Corrosion on internal components
    • Mineral deposits left behind after drying

    When a powered device meets moisture, current flows where it should not. This can damage chips, connectors, and the motherboard.

    That is why the first few minutes after water exposure are critical.


    Step 1: Remove the Phone From Water Immediately

    This step sounds obvious, but hesitation can be costly.

    • Take the mobile phone out of water as fast as possible
    • Do not press any buttons while removing it
    • Do not check if it is still working

    Every second the device stays powered and wet increases the risk of permanent damage.


    Step 2: Power Off the Device Right Away

    If the phone is still on, turn it off immediately.

    • Hold the power button and switch it off
    • Do not restart or unlock it
    • Do not check notifications

    Keeping a wet phone powered on is the biggest mistake users make.

    If the phone turns off by itself, do not try to turn it back on.


    Step 3: Remove All External Parts

    Next, strip the device down as much as possible without tools.

    Remove:

    • SIM card
    • Memory card
    • Phone case
    • Accessories like earphones or charging cables

    These parts can trap moisture and slow down drying.

    Place the SIM card and memory card separately on a dry cloth.


    Step 4: Gently Dry the Outside

    Use a soft, lint-free cloth to gently wipe the phone.

    • Pat dry the screen, back, and sides
    • Shake gently to remove water from ports
    • Keep charging port and speaker openings facing downward

    Do not use force. Do not insert anything into ports.

    This step only removes surface water. Internal moisture still remains.


    Step 5: Do NOT Do These Common Mistakes

    Many well-known “home remedies” actually make water damage worse.

    Avoid the following:

    • ❌ Using a hair dryer or heat gun
    • ❌ Placing the phone on a heater
    • ❌ Microwaving the phone (extremely dangerous)
    • ❌ Charging the phone to “check if it works”

    Heat can:

    • Warp internal components
    • Push moisture deeper inside
    • Damage battery cells

    “Heat dries water fast—but it destroys electronics even faster.”


    Step 6: Use Controlled Air Drying

    The safest drying method is time and airflow, not heat.

    What you can do:

    • Place the phone on a dry towel
    • Keep it in a well-ventilated room
    • Use a fan at a distance to improve air circulation

    Position the device so that:

    • Charging port faces downward
    • Speaker grills are not blocked

    Leave it undisturbed.


    Step 7: Silica Gel vs Rice – What Actually Works?

    The Truth About Rice

    Some people keep their phone submerged in unccoked rice for a few hours. Rice absorbs moisture slowly and unevenly. It can also leave dust and starch particles inside ports.

    Rice is better than nothing, but not ideal.

    Silica Gel (Much Better Option)

    Silica gel packets:

    • Absorb moisture efficiently
    • Do not leave residue
    • Are used in professional drying environments

    If available:

    • Place the phone in a sealed container
    • Add silica gel packets around it
    • Leave for at least 24–48 hours
    rice method for fixing wet cell phone

    Silica gel is safer and more effective than rice. However this will work only if the wetness is little and at the start of the holes/gaps.


    Step 8: Wait Long Enough Before Powering On

    Patience is critical.

    Recommended waiting time:

    • Minimum: 24 hours
    • Safer range: 48 hours or more

    Do not rush this step. Moisture trapped under chips and connectors takes time to evaporate.

    Turning on the phone too early can permanently short the motherboard.


    Step 9: Power On and Observe Carefully

    After sufficient drying time:

    • Power on the device
    • Do not plug in the charger yet
    • Check basic functions

    Test:

    • Screen display
    • Touch response
    • Speaker sound
    • Microphone
    • Camera

    If the phone does not turn on, do not panic. This does not always mean it is dead.


    Step 10: If the Phone Turns On but Shows Problems

    Common post-water-damage issues include:

    • No sound
    • Charging problems
    • Foggy camera lens
    • Random shutdowns

    These issues often indicate:

    • Residual moisture
    • Corrosion starting on connectors

    At this stage, professional cleaning is recommended.


    When to Take the Phone to a Repair Technician

    You should visit a repair professional if:

    • The phone does not power on after drying
    • The phone heats up abnormally
    • Charging is unstable
    • Display flickers or touch fails

    Technicians use:

    • Isopropyl alcohol cleaning
    • Ultrasonic cleaners
    • Board-level inspection

    Early professional intervention can prevent long-term corrosion.


    Water-Resistant vs Waterproof Phones: Know the Difference

    Many smartphones are advertised as water-resistant.

    Important points:

    • Water resistance is not permanent
    • Seals degrade over time
    • Drops, repairs, or wear reduce protection

    Water-resistant does not mean water-proof.
    Damage can still occur, especially in saltwater or dirty water.


    Saltwater and Dirty Water: Extra Risk

    If the phone fell into:

    • Sea water
    • Pool water
    • Muddy or dirty water

    The risk is higher due to:

    • Salt corrosion
    • Chemical residue
    • Mineral deposits

    In such cases, professional cleaning is strongly advised, even if the phone seems fine.


    Battery Safety After Water Damage

    Lithium-ion batteries are sensitive to moisture.

    Warning signs:

    • Phone gets hot
    • Battery drains fast
    • Swelling or bulging

    If any of these occur:

    • Stop using the phone
    • Do not charge it
    • Seek professional help

    Battery failure can be dangerous if ignored.


    Data Recovery From a Water-Damaged Phone

    Even if the phone does not fully recover:

    • Data may still be retrievable
    • Storage chips often survive

    Technicians can:

    • Access internal memory
    • Recover photos, videos, and documents

    This is another reason not to attempt risky DIY fixes.


    Can You Fix Water Damage at Home Completely?

    Minor water exposure can sometimes be handled at home if:

    • The phone was powered off quickly
    • Drying was done correctly
    • No corrosion started

    However, deep water damage often requires professional tools.

    Home methods reduce risk—but they do not replace proper cleaning.


    Preventing Water Damage in the Future

    Simple habits reduce risk:

    • Use waterproof cases near water
    • Avoid using phones in bathrooms
    • Keep devices away from kitchen sinks
    • Do not charge phones near liquids

    Prevention is always cheaper than repair.


    Technician-Level Insight: Why Some Phones Die Later

    Some phones work fine after drying, then fail weeks later.

    Reason:

    • Hidden corrosion slowly eats circuit paths

    This is why technicians recommend internal cleaning, not just drying.

    “Water damage is not always immediate. Sometimes it waits.”


    Repair or Replace: Making the Right Decision

    Consider replacing the phone if:

    • Motherboard damage is severe
    • Repair cost is too high
    • The phone is very old

    Repair makes sense if:

    • Damage is caught early
    • Device value is high
    • Data is important

    A technician can help evaluate honestly.

    Frequently Asked Questions (FAQs)

    1. Can a wet cell phone be repaired completely?

    Yes. Many wet cell phones can be repaired if they are powered off quickly and dried properly. Early professional cleaning greatly improves success.


    2. How long should I wait before turning on a water-damaged phone?

    If you are not giving the handset for repairs. you should wait at least 24–48 hours after proper drying. Turning it on too early can cause permanent internal damage.


    3. Does putting a wet phone in rice really work?

    No. Rice can absorb very little moisture, but it is not very effective. Silica gel packets work better but only if the water is minimum and at the border only.


    4. Can water damage affect a phone later even if it works now?

    Yes. Corrosion can develop slowly and cause problems days or weeks later if the phone is not cleaned internally.


    5. Should I repair or replace a water-damaged smartphone?

    Repair is worth it if the phone is newer or data is important. Replacement may be better if repair costs are high or damage is severe.


    Final Thoughts

    A wet cell phone is not automatically a lost cause. Quick action, correct steps, and patience can save many water-damaged smartphones.

    The most important rules to remember:

    • Power off immediately
    • Avoid heat and charging
    • Allow proper drying time
    • Seek professional help when needed

    Smart handling can mean the difference between recovery and permanent failure.