Tag: iPhone repair

  • How to Check a Mobile Phone Ear Speaker (Receiver)

    How to Check a Mobile Phone Ear Speaker (Receiver)

    IWhen a customer says, “I can hear on loudspeaker but not during calls,” the problem often points to the ear speaker, also known as the receiver.
    This is one of the most common audio complaints in smartphones, Android devices, and iPhones.

    Fixing it is not about guessing.
    It is about systematic checking.

    “Good repair work is not about speed. It’s about knowing exactly where to look.”

    This guide explains how to check a mobile phone ear speaker step by step, using practical methods that technicians rely on daily.
    Whether you work on Android phones, iPhones, or feature phones, the logic remains the same.


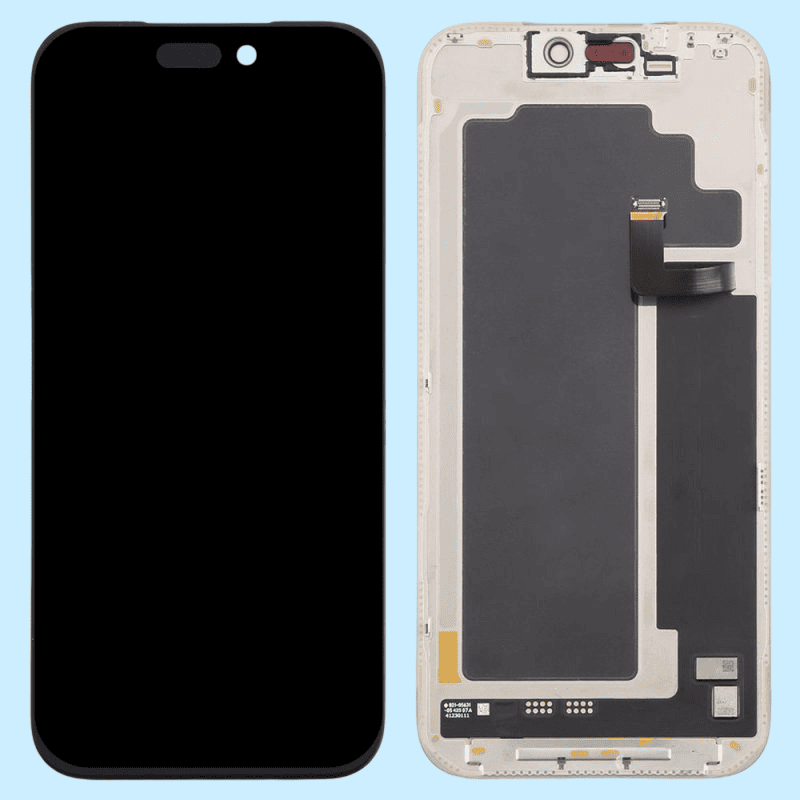
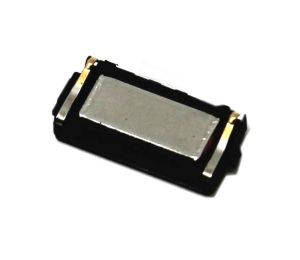
    What Is an Ear Speaker (Receiver) in a Mobile Phone?

    The ear speaker is the small internal speaker placed near the top of a phone.
    It allows users to hear the caller’s voice during normal calls, without enabling loudspeaker mode.

    Other Common Names Used by Technicians

    • Receiver
    • Call speaker
    • Top speaker
    • In-call speaker
    • Voice speaker

    Do not confuse it with:

    • Loudspeaker (bottom speaker)
    • Ringtone speaker
    • Media speaker

    Each one has a different circuit path.

    A sample ear speaker

    Common Symptoms of a Faulty Ear Speaker

    Before opening a device, always understand the complaint clearly. If you do not hear phone speaker sounds during calls and just hear music and multimedia sound, then it means your phone receiver (ear speaker) is not working.

    Typical Problems Reported

    • No sound during calls
    • Very low voice while calling
    • Sound works only on loudspeaker
    • Distorted or crackling voice
    • Intermittent sound when pressing the top area
    • Sound disappears after water exposure
    • Works with headphones but not directly

    If the loudspeaker works but the ear speaker does not, the issue is localized, not system-wide.


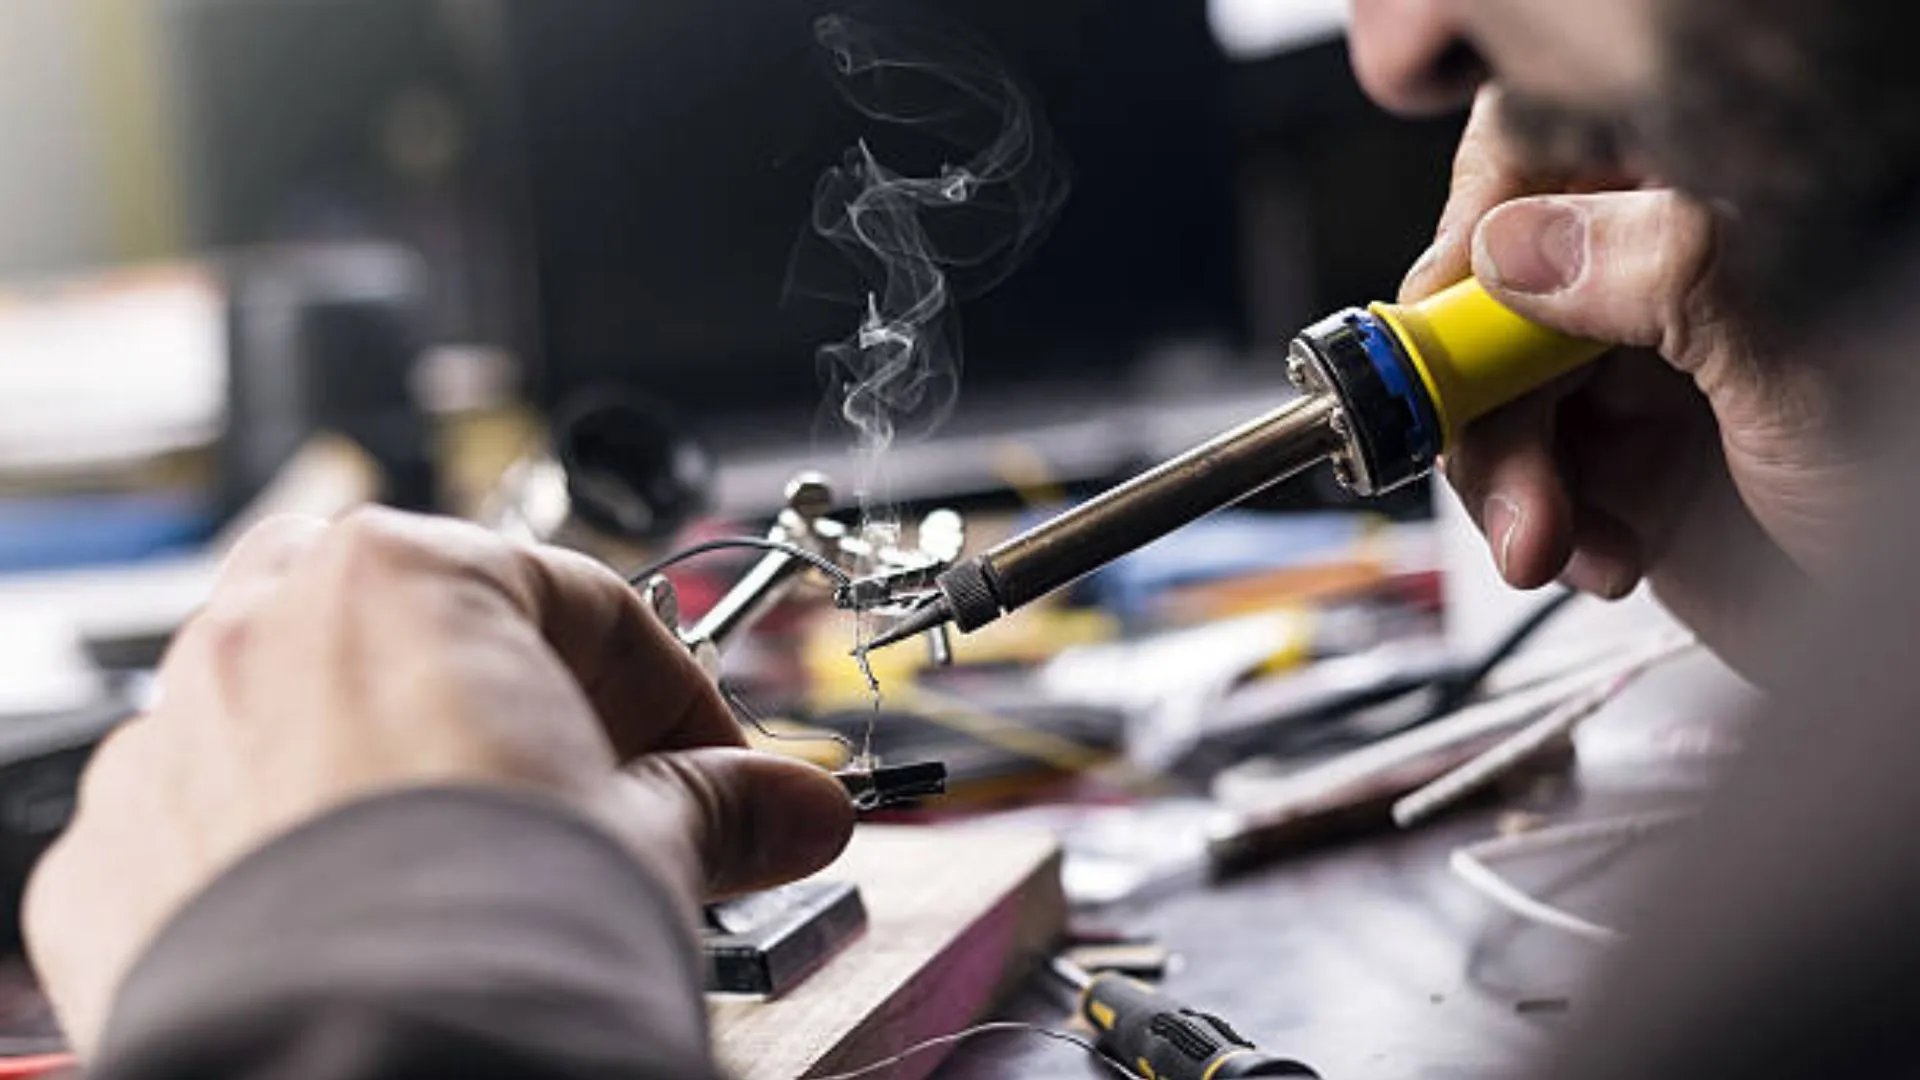
    Tools Required to Check an Ear Speaker

    A technician does not need advanced equipment for initial diagnosis.

    Basic Tools

    • Known-good SIM card
    • Working earphones
    • Soft brush
    • Isopropyl alcohol (IPA)
    • Screwdrivers
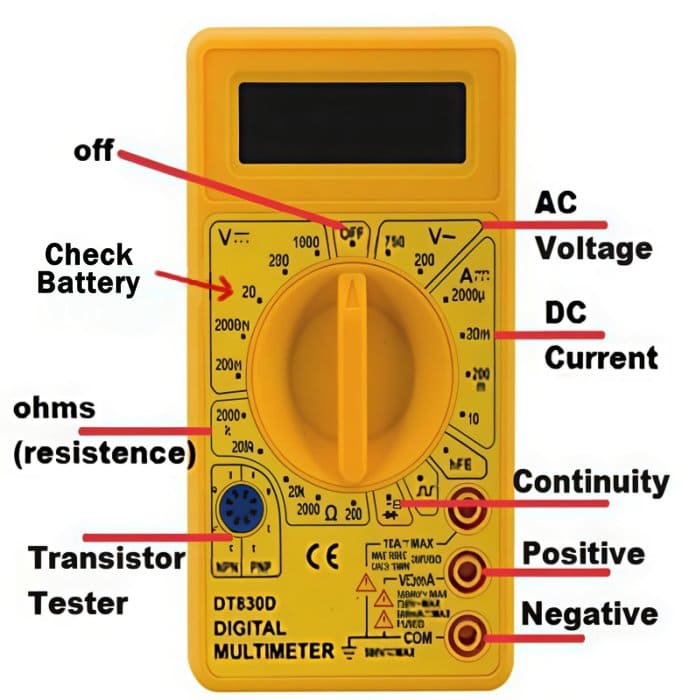
    • Multimeter (continuity and resistance mode)

    Optional Advanced Tools

    • DC power supply
    • Service box or diagnostic app
    • Schematic or block diagram (if available)

    Here is a list of essential and basic cell phone repair tools all beginner technicians shoul have.


    Step 1: Basic Call Test (Most Important First Step)

    Always begin with non-invasive testing.

    How to Perform

    1. Insert a working SIM card.
    2. Make a normal voice call.
    3. Do not enable loudspeaker.
    4. Increase call volume using volume keys.
    5. Place the phone close to your ear.

    What to Observe

    • Clear sound → Ear speaker is fine
    • Low sound → Mesh blockage or weak receiver
    • No sound → Continue diagnosis

    Never open a phone before confirming the issue through a call test.


    Step 2: Check Using Loudspeaker Comparison

    This step helps isolate the problem.

    Method

    • During the same call, enable loudspeaker.
    • If loudspeaker audio is clear:
      • Microphone and network are working
      • Audio codec is likely fine
      • Problem is receiver-side

    If both ear speaker and loudspeaker fail, the issue may be:

    • Audio IC
    • Software
    • Network
    • Call settings

    Step 3: Test with Headphones or Earphones

    This is a fast and reliable check.

    Results Interpretation

    • Sound works with earphones → Receiver or path issue
    • Sound does not work → Deeper audio problem

    If sound switches correctly when earphones are plugged in, the phone’s audio routing is functioning.


    Step 4: Check Call Settings and Software Audio Paths

    Many phones today have software-level audio controls.

    Things to Check

    • Call volume set to maximum
    • Accessibility settings (mono audio, hearing aid mode)
    • Call recording apps interfering
    • Bluetooth disconnected
    • Safe mode test (Android)

    Restart the device once before proceeding.

    A simple restart solves more problems than most people expect.


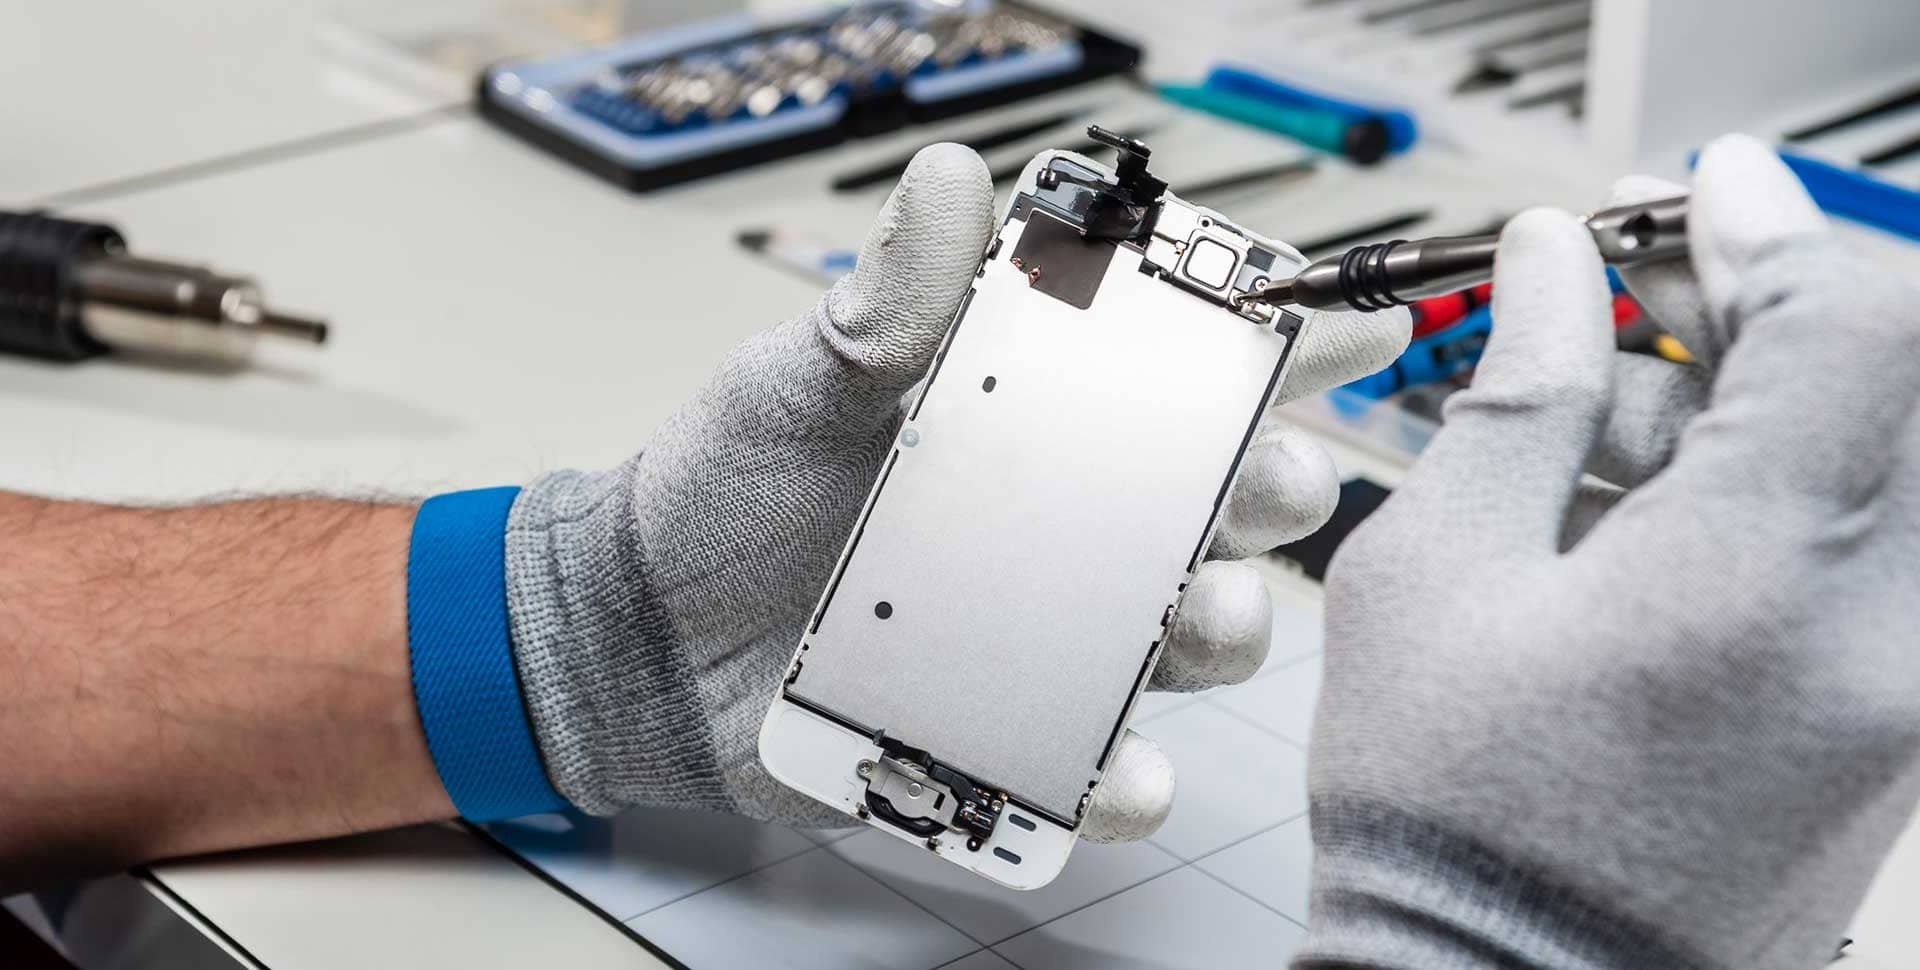
    Step 5: Visual Inspection and Cleaning

    Dust and sweat are silent killers of ear speakers.

    Cleaning Method

    1. Power off the phone.
    2. Remove top mesh or grill (if accessible).
    3. Use a soft brush.
    4. Lightly clean with IPA.
    5. Let it dry fully.

    Many “dead receivers” come back to life after cleaning.


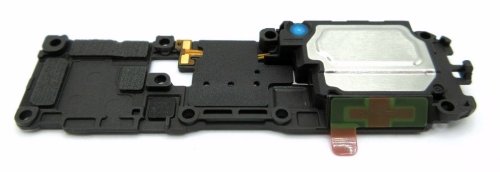
    Step 6: Swap Test with a Known-Good Receiver

    This is a technician’s shortcut.

    How It Helps

    • If replacement receiver works → Original is faulty
    • If replacement also fails → Path or board issue

    Always test with:

    • Same model
    • Same impedance rating

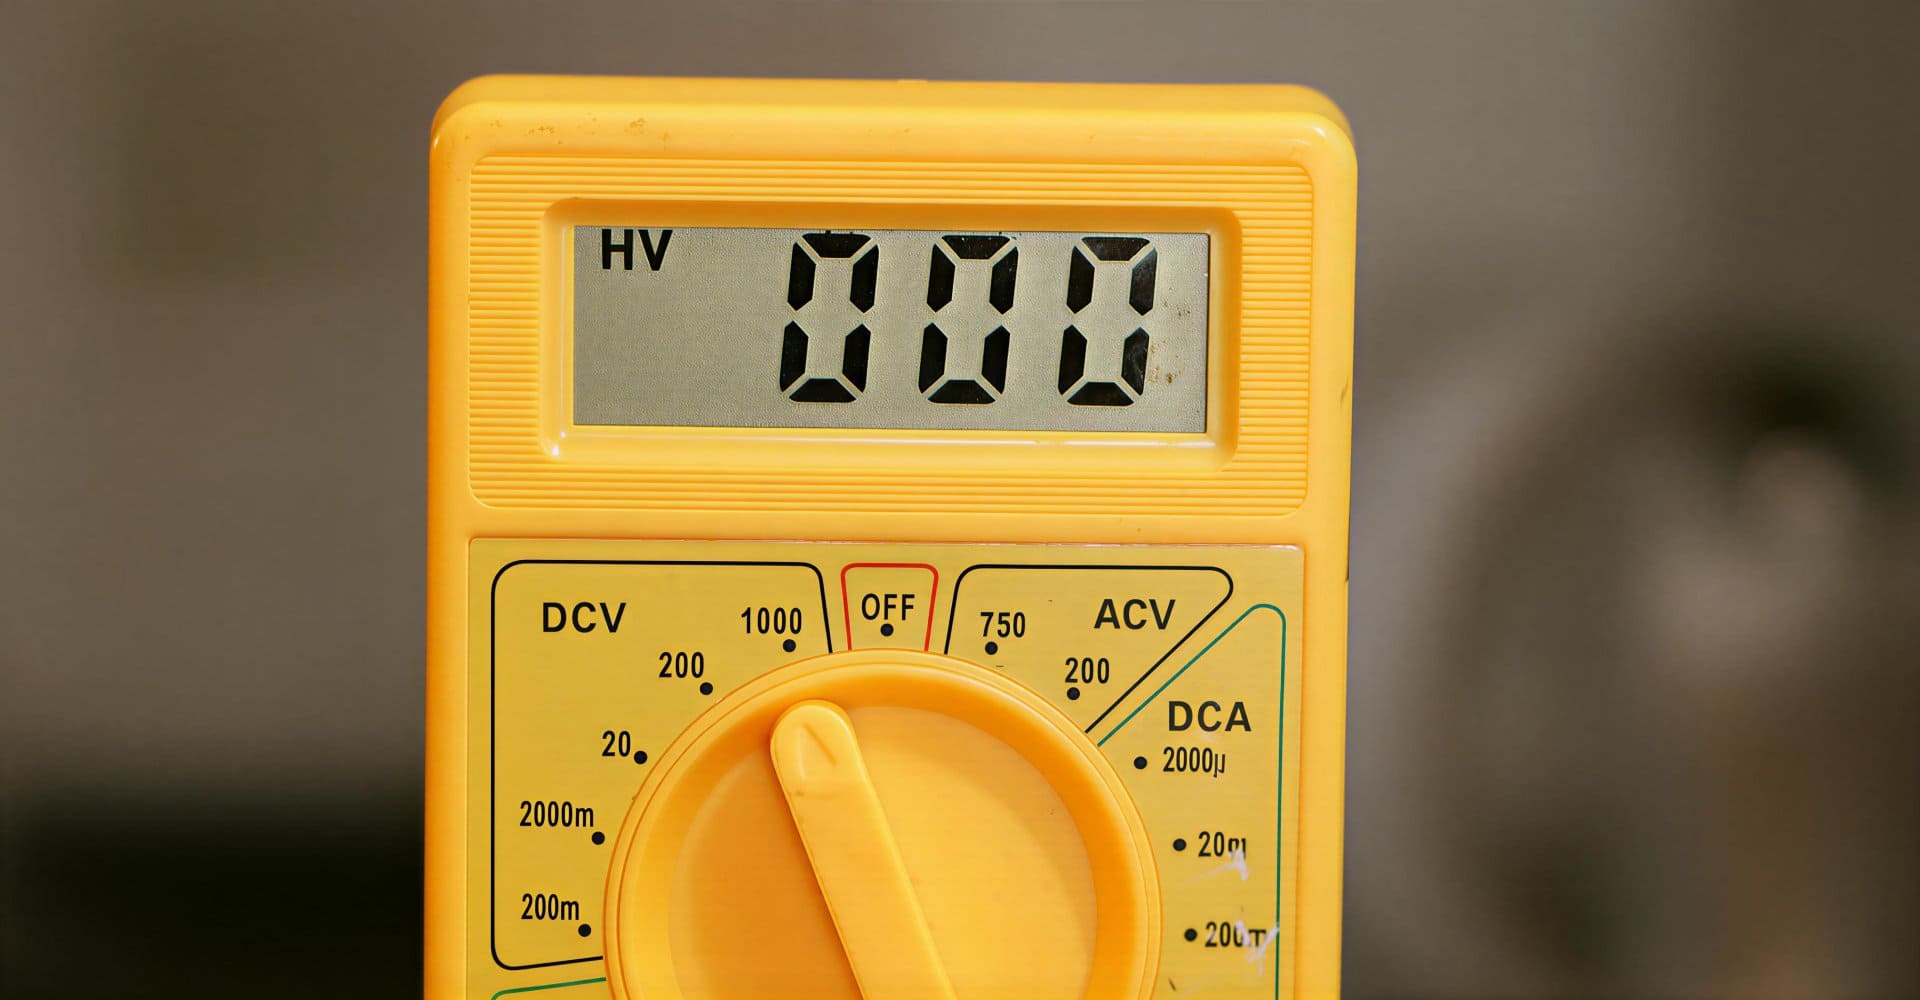
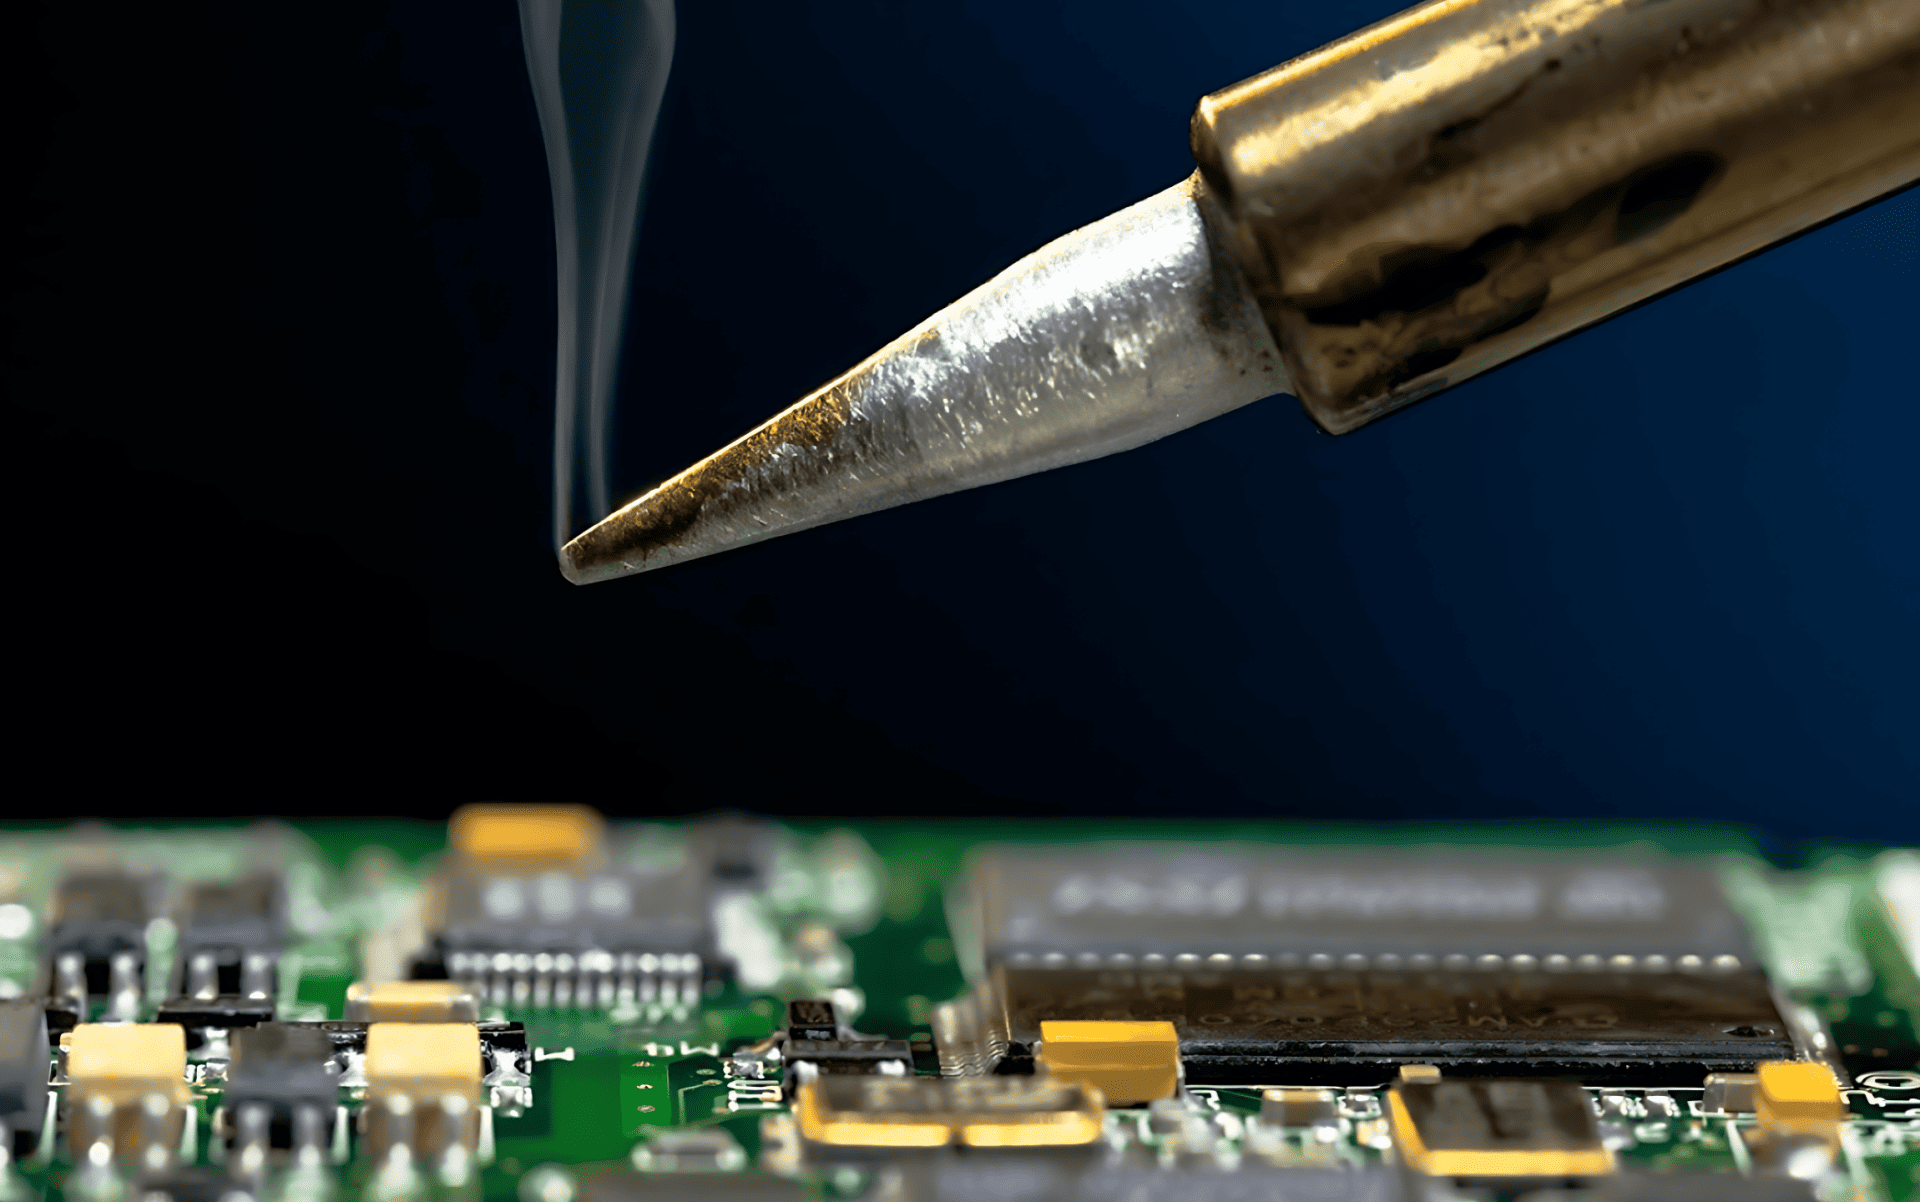
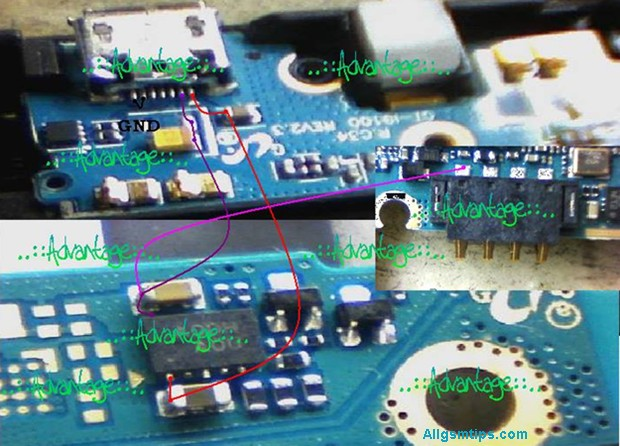
    Step 7: Multimeter Test (Receiver Resistance Check)

    This step confirms whether the ear speaker coil is open.

    Typical Resistance Values

    • Usually between 25Ω and 60Ω
    • Depends on model

    Procedure

    1. Remove the ear speaker.
    2. Set multimeter to resistance (Ω).
    3. Touch probes to speaker terminals.

    Readings

    • Normal resistance → Speaker is electrically fine
    • No reading / infinite → Coil open, replace speaker
    • Zero resistance → Shorted speaker

    This test is reliable and fast.


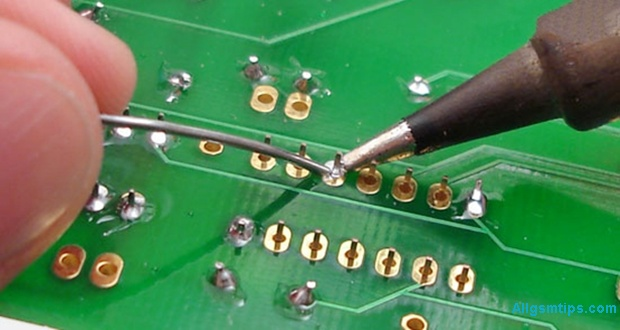
    Step 8: Check Receiver Line Continuity on PCB

    If the receiver is fine, check the signal path.

    What to Check

    • Receiver connector pins
    • Audio line continuity
    • Ground path
    • Series resistors
    • EMI filters

    Use continuity mode on a multimeter.

    Broken tracks often occur after:

    • Drops
    • Water damage
    • Poor previous repairs

    Step 9: Check Audio IC and Power Supply (Advanced)

    This is required only if:

    • Receiver is good
    • Tracks are fine
    • Software is ruled out

    Indicators of Audio IC Issues

    • No sound in any mode
    • Heating near codec IC
    • Sound works only sometimes
    • Crackling across outputs

    At this stage, experience matters more than tools.


    Step 10: Water Damage Considerations

    Water damage affects ear speakers first.

    Signs

    • Green corrosion near receiver pads
    • Rust on connector
    • White residue

    Action

    • Clean PCB properly
    • Check under microscope if available
    • Replace receiver even if it looks fine

    Water damage is never just “dry and done.”


    Common Mistakes Technicians Make

    Avoid these errors:

    • Replacing receiver without testing
    • Ignoring software settings
    • Not checking ear mesh
    • Skipping continuity checks
    • Overheating near audio IC

    Good repair is about logic, not shortcuts.


    Ear Speaker vs Loudspeaker: Quick Comparison

    FeatureEar SpeakerLoudspeaker
    Used forCallsMedia, ringtone
    LocationTopBottom
    PowerLowHigh
    Common faultDust, coil openDistortion

    When to Replace vs Repair

    Replace Receiver If

    • Coil is open
    • Sound is distorted
    • Volume is permanently low

    Repair Path If

    • Connector is loose
    • Track is broken
    • Pad is damaged

    Practical Technician Tips

    • Always keep tested receivers in stock
    • Label removed parts
    • Avoid touching receiver diaphragm
    • Never blow air directly into mesh
    • Test before full reassembly

    “A repair is only complete after final testing.”


    Final Checklist Before Returning the Phone

    ✔ Call test completed
    ✔ Volume stable
    ✔ No distortion
    ✔ Proximity sensor working
    ✔ No loose connections


    Conclusion

    Checking a mobile phone ear speaker is not guesswork.
    It is a step-by-step diagnostic process that saves time, parts, and reputation.

    By following the methods explained above, technicians can:

    • Identify faults accurately
    • Avoid unnecessary replacements
    • Deliver consistent results

    A phone may be small, but precision matters.

  • How to Check Cell Phone Mic (Microphone) Like a Technician

    How to Check Cell Phone Mic (Microphone) Like a Technician

    A phone microphone looks like a small, simple part. But in real-world repair work, it is one of the most common complaint points. Customers report issues like low voice, no sound during calls, voice notes not recording, or videos capturing silence.

    For a repair technician, guessing is not an option. A proper microphone check helps you decide whether the problem is software-based, dirt-related, flex damage, IC-level, or board-related.

    “A good technician never replaces parts first. He diagnoses first.”

    This guide is written for repair technicians, trainees, and serious learners who want to check a mobile phone microphone professionally, not casually. The methods explained here are used in real repair shops on Android phones, iPhones, and modern smartphones.


    Understanding the Microphone System in Smartphones

    Before testing, you must understand what you are testing.

    How Many Microphones Does a Phone Have?

    Most modern devices have multiple microphones, not just one.

    • Primary microphone
      Used during normal calls and voice recordings.
    • Secondary microphone
      Used for noise cancellation during calls.
    • Tertiary microphone (in some models)
      Used for video recording, speaker mode, or voice assistants.

    A phone can appear to have a “mic problem” even if only one mic is faulty.

    Common Microphone Locations

    • Bottom side near charging port
    • Top side near headphone jack or camera
    • Rear camera area
    • Side frame (on some models)

    Knowing mic placement helps in accurate diagnosis.


    Common Symptoms of Phone Microphone Problems

    A technician should first listen to the complaint carefully. Different symptoms point to different faults.

    Typical Mic-Related Complaints

    • Other person cannot hear during calls
    • Voice recording sounds very low or muffled
    • Voice notes not recording
    • Video recording has no sound
    • Speakerphone works but normal call doesn’t
    • Google Assistant or Siri can’t hear commands

    Each symptom requires a different testing approach.


    Step 1: Initial Visual Inspection (Technician Habit)

    Never start with apps or software tests. Start with your eyes.

    What to Check First

    • Dust or lint blocking the mic hole
    • Corrosion near mic area
    • Liquid damage indicators
    • Bent frame blocking mic path
    • Poor-quality back covers or cases

    Many microphone problems are simply caused by blockage, not failure.

    Clean gently using:

    • Soft brush
    • Isopropyl alcohol (if needed)
    • Compressed air (carefully)

    Step 2: Basic Voice Recording Test (Controlled Method)

    This test checks the primary microphone.

    How Technicians Perform This Test

    1. Open the default voice recorder
    2. Speak clearly from normal distance
    3. Record for 10–15 seconds
    4. Play back using earphones and speaker

    What to Observe

    • Clear voice → mic likely working
    • Very low sound → partial blockage or weak mic
    • Distorted sound → moisture or mic damage
    • No sound → mic line or IC issue

    Repeat the test while slightly tapping near the mic area. A reaction confirms mic connectivity.


    Step 3: Call Testing (Network-Independent Method)

    A phone call tests mic behavior under real conditions.

    Technician-Level Call Test

    • Call another phone
    • Speak normally
    • Switch between:
      • Normal mode
      • Speaker mode
      • Wired earphones
      • Bluetooth (if available)

    Diagnosis Clues

    • Mic works on speaker but not normal call → primary mic issue
    • Works with headset but not phone → phone mic hardware issue
    • Works intermittently → flex or solder issue

    This test helps separate mic fault from audio routing issues.


    Step 4: Hidden Hardware Test Menus (Professional Shortcut)

    Many Android phones have built-in diagnostic menus.

    Example Test Codes (May Vary by Brand)

    • ##4636##
    • ##6484##
    • #0#
    • *#0243#

    Inside these menus, technicians can:

    • Test each microphone individually
    • Check audio input levels
    • Identify dead or weak mics

    This is one of the fastest technician-level checks.

    For iPhones, diagnostics are usually done via:

    • Voice memos
    • Call tests
    • Service diagnostic tools (at center level)

    Step 5: Video Recording Test (Secondary Mic Check)

    Video recording uses different microphones depending on mode.

    How to Test Properly

    • Record video using:
      • Front camera
      • Rear camera
    • Speak while covering one mic at a time

    Interpretation

    • Sound missing only in video → secondary mic issue
    • Rear camera video silent → top mic problem
    • Front camera video silent → front mic path issue

    This method helps pinpoint which microphone is faulty.


    Step 6: Noise Cancellation Test (Advanced Diagnosis)

    Noise cancellation relies on secondary microphones.

    Technician Test Method

    1. Make a call
    2. Cover the top mic
    3. Speak and observe sound clarity

    If voice becomes unclear or drops, the noise-cancellation mic may be defective or misconfigured.

    Improper noise cancellation often feels like a “mic problem” to customers.


    Step 7: Software-Level Checks (Before Opening Phone)

    A professional technician always rules out software causes.

    Important Software Checks

    • App microphone permissions
    • System sound settings
    • Do Not Disturb mode
    • Third-party recording apps
    • Safe mode testing
    • System updates or recent app installs

    Sometimes a single permission change fixes the issue.


    Step 8: Charging Port and Mic Flex Inspection

    On many smartphones, the microphone is connected via the charging port flex cable.

    Technician Observations

    • Replaced charging port recently?
    • Local duplicate flex installed?
    • Mic contacts dirty or loose?

    Low-quality flex cables are a major cause of mic complaints after repairs.


    Step 9: Multimeter and Continuity Testing (Hardware-Level)

    This step is for trained technicians.

    What to Test

    • Mic line continuity
    • Ground connection
    • Short to ground
    • Flex-to-board signal flow

    Use circuit diagrams when available.
    A broken line often mimics a dead microphone.


    Step 10: Audio IC and Board-Level Diagnosis

    If everything else passes, suspect audio IC or logic board damage.

    Indicators of IC-Level Mic Fault

    • Multiple mics not working
    • Random audio issues
    • Heating near audio IC
    • History of liquid damage

    This stage requires:

    • Microsoldering skills
    • Schematics
    • Experience

    “Replacing a microphone is easy. Fixing an audio IC takes skill.”

    Can a Phone Microphone Be Checked Using a Multimeter?

    This is a very common doubt among mobile repair technicians, especially those who learned repair work during the feature-phone and early smartphone era.

    The short and honest answer is:
    It depends on the type of microphone used in the phone.

    There are 2 types of microphones in cell phones

    1. Universal mic used in older smartphones and keypad phones
    2. Latest sensor (Digital) mic used in today’s smartphones.
    types of cell phone microphones

    Multimeter Testing for Older Analog Microphones

    Earlier mobile phones and some early smartphones used analog electret condenser microphones. These microphones could be checked using a basic multimeter test.

    The commonly used method was:

    • Set the multimeter to 20kΩ (resistance mode)
    • Connect the probes to the microphone terminals
    • Gently blow air into the microphone hole

    If the resistance value on the multimeter changed while blowing air, it indicated that the diaphragm was responding to sound pressure and the microphone was likely working.
    If there was no change in reading, the microphone was considered faulty.

    This method worked because analog microphones generate small electrical variations when sound moves the diaphragm.

    However, it is important to understand that this test only confirmed basic diaphragm movement. It did not guarantee sound clarity, noise performance, or real-world call quality.


    Why Multimeter Testing Does Not Work on Modern Smartphone Microphones

    Modern smartphones use digital MEMS (sensor-based) microphones, not analog microphones.

    These microphones:

    • Do not operate on resistance-based output
    • Communicate using digital data signals
    • Require power supply, clock, and data lines
    • Do not show meaningful resistance changes on a multimeter

    Because of this, digital smartphone microphones cannot be tested directly using a multimeter. Even a perfectly working microphone may show no change or misleading readings.

    Using resistance testing on MEMS microphones can result in incorrect diagnosis and unnecessary part replacement.


    How Technicians Confirm Digital Microphone Faults

    For digital microphones used in smartphones today, the only reliable confirmation method is functional testing, not electrical resistance testing.

    Technicians confirm microphone failure by:

    • Voice recording tests
    • Call and speaker mode testing
    • Video recording checks
    • Built-in hardware diagnostic menus (where available)
    • Replacing or swapping the microphone with a known-good part

    If the replacement microphone works correctly in the same phone, it confirms that the original microphone was faulty.
    If the issue remains even after replacement, the fault is usually related to:

    • Microphone flex cable
    • Power or data line issue
    • Audio IC
    • Logic board or motherboard damage

    Common Technician Mistakes to Avoid

    Even experienced technicians sometimes misdiagnose mic issues.

    Avoid These Errors

    • Replacing mic without testing
    • Ignoring secondary microphones
    • Using low-quality replacement parts
    • Skipping software checks
    • Not cleaning mic path properly

    Good diagnosis saves time, money, and reputation.


    Real-World Repair Scenario

    A customer complains: “My voice is not clear on calls.”

    • Voice recorder works fine
    • Video recording works
    • Only normal call has issue

    Diagnosis:

    • Noise cancellation mic faulty
    • Not primary mic

    Solution:

    • Replace top mic flex or disable noise cancellation (temporary)

    This is why technician-level testing matters.


    Tools Every Technician Should Have for Mic Testing

    • Good earphones
    • Soft brush and IPA
    • Multimeter
    • Known-good flex cables
    • Diagnostic apps (offline)
    • Strong lighting and magnifier

    Tools don’t replace skill, but they support accuracy.


    When to Replace the Microphone

    Replace the mic only when:

    • All software tests fail
    • Cleaning doesn’t help
    • Flex cable confirmed good
    • Continuity verified
    • Mic input shows no response

    Always use quality replacement parts.


    Building Trust With Proper Diagnosis

    Customers may not understand microphone technology, but they understand honesty.

    Explain:

    • What you tested
    • What failed
    • Why replacement is needed

    This builds long-term trust and repeat business.


    Final Thoughts: Think Like a Technician

    Checking a phone microphone is not about pressing record once. It’s about systematic elimination, understanding audio paths, and using experience.

    “Diagnosis is the difference between a parts changer and a technician.”

    Master these methods, and microphone issues will no longer confuse you.


    Simple Summary

    • Smartphones have multiple microphones
    • Always start with inspection and cleaning
    • Test calls, recordings, and videos
    • Use diagnostic menus when available
    • Rule out software before hardware
    • Replace parts only after confirmation

    A structured approach saves time and builds expertise.

  • How to Check Ringer (Loud Speaker) of Mobile Phone

    How to Check Ringer (Loud Speaker) of Mobile Phone

    A mobile phone that does not ring properly is more than a small inconvenience. For users, it means missed calls and alerts. For a repair technician, it is a common and important fault to diagnose correctly. Whether you are a beginner learning mobile repairing or an experienced technician handling smartphones daily, understanding how to test a mobile phone ringer is a must-have skill.

    The ringer plays a key role in call alerts, notifications, music, videos, and system sounds. A fault here can be hardware-related, software-related, or even due to simple settings issues. Jumping straight to replacement without proper testing often leads to wasted time and money.

    This guide explains how to check the ringer of a mobile phone step by step, using both basic and advanced technician methods, including multimeter testing. The focus is on clarity, accuracy, and real workshop experience, not guesswork.

    “Good technicians don’t replace parts first. They test, confirm, and then repair.”
    That mindset saves devices, builds trust, and improves your success rate.


    What Is a Ringer in a Mobile Phone?

    In mobile phones, the ringer is the component responsible for producing loud sound output. It is used for incoming calls, notification alerts, alarms, music playback, videos, and system tones.

    A ringer is commonly known by many names in the mobile repairing field, such as:

    • Speaker
    • Loud speaker
    • Buzzer
    • Ring speaker
    • Music speaker
    • Main speaker
    • Speaker module
    a sample ringer (loud speaker) spare part of a mobile phone

    All these terms generally refer to the same output unit used for high-volume sound. Earpiece speakers are different and should not be confused with the ringer.

    Understanding terminology is important because customers, spare part suppliers, and service manuals may use different names for the same component.


    Common Symptoms of Ringer Problems

    Before testing, observe the complaint carefully. Ringer issues usually appear in the following ways:

    • No sound during incoming calls
    • Very low volume even at maximum level
    • Distorted or crackling sound
    • Sound works only on earphones or Bluetooth
    • Sound works sometimes and fails sometimes
    • Ringer works for music but not for calls or notifications

    Each symptom points to a different possible cause. Correct diagnosis begins with understanding these signs.


    Tools Required to Check Mobile Phone Ringer

    For proper testing, a technician should have the following basic tools:

    • Known good ringer (for cross-testing)
    • Multimeter (digital preferred)
    • DC power supply (optional, for advanced testing)
    • Screwdrivers and opening tools
    • Cleaning brush and isopropyl alcohol
    • Service test codes or diagnostic menu access

    You do not need all tools for every job, but a multimeter is essential for professional diagnosis.


    Step 1: Check Sound and Settings (Basic but Critical)

    Many phones are repaired unnecessarily because basic checks are skipped.

    Start with these simple steps:

    • Increase volume to maximum
    • Check silent mode and vibration mode
    • Disable Do Not Disturb
    • Check accessibility sound settings
    • Test ringtone, alarm, and media sound separately

    On Android devices, media volume, call volume, and notification volume are often independent. On iPhones, ringer and alert volume may be linked to buttons or settings.

    Always confirm that the issue is not software or settings-related before opening the phone.


    Step 2: Test Using Service or Diagnostic Mode

    Most smartphones have built-in hardware test menus.

    Android Phones

    Technicians often use dialer codes like:

    • #0# (works on many Samsung devices)
    • OEM-specific diagnostic menus

    From here, you can directly test the loud speaker without opening any app.

    iPhone

    Apple devices use internal diagnostics accessed via software tools or service modes. For basic testing:

    • Play system sounds
    • Use voice memos or music playback
    • Test alerts and ringtones

    If sound fails in diagnostic mode, the issue is likely hardware-related.


    Step 3: Physical Inspection of the Ringer Area

    Before electrical testing, inspect the hardware physically.

    Check for:

    • Dust or lint blocking speaker grill
    • Water or moisture residue
    • Rust or corrosion near speaker contacts
    • Torn or punctured speaker membrane
    • Loose or misaligned speaker module

    Many low-sound issues are caused by dirt buildup, not speaker failure.

    Clean the speaker grill carefully using a brush and alcohol. Never use sharp objects that can damage the membrane.


    Step 4: Cross-Test with a Known Working Speaker

    This is one of the fastest technician methods.

    Steps:

    1. Remove the existing ringer.
    2. Connect a known good speaker temporarily.
    3. Play ringtone or music.

    If sound is clear:

    • Original speaker is faulty.

    If sound is still missing:

    • Problem lies in circuit, connector, or software.

    This method saves time and avoids unnecessary board work.


    Step 5: How to Check Mobile Phone Ringer Using a Multimeter

    This is the most important section for technicians.

    A multimeter helps confirm whether the speaker coil is open, shorted, or healthy.

    Understanding Speaker Basics

    Mobile phone ringers are usually:

    • Low-resistance speakers
    • Typically between 4Ω to 8Ω

    If resistance is abnormal, the speaker is faulty.


    Method 1: Resistance (Ohms) Test

    Steps:

    1. Set multimeter to resistance (Ω) mode.
    2. Touch probes to the speaker terminals.
    3. Observe the reading.

    Expected results:

    • 4Ω–8Ω → Speaker likely OK
    • OL or infinite → Coil open (speaker dead)
    • 0Ω or very low → Shorted coil (speaker faulty)

    This is the most reliable and safe test.


    Method 2: Continuity Test (Basic Check)

    Steps:

    1. Set multimeter to continuity mode.
    2. Place probes on speaker terminals.

    Results:

    • Beep sound → Coil continuity present
    • No beep → Coil broken

    Continuity alone does not confirm sound quality, but it confirms whether the speaker is completely dead.


    Important Multimeter Safety Tip

    Do not use voltage or current modes directly on speaker terminals.
    Always use resistance or continuity mode only.

    Incorrect testing can damage the speaker or the multimeter.


    Step 6: Checking Ringer Line on the PCB (Advanced Level)

    If the speaker tests fine, move to board-level diagnosis.

    Check:

    • Speaker connector solder joints
    • Speaker line continuity from IC to connector
    • Presence of audio signal using oscilloscope (advanced)
    • Audio IC output condition

    Use schematic or boardview if available. In many smartphones, audio output IC failure is rare but possible, especially after water damage.


    Software vs Hardware Ringer Issues

    Understanding the difference is crucial.

    Software-Related Causes

    • Corrupted system files
    • Faulty updates
    • Third-party sound control apps
    • Custom ROM bugs

    Solutions:

    • Safe mode testing
    • Cache reset
    • Software restore or flashing

    Hardware-Related Causes

    • Speaker coil damage
    • Water damage
    • Connector faults
    • Audio IC failure

    Solutions:

    • Cleaning
    • Replacement
    • Board repair

    Never assume software or hardware without testing.


    Common Technician Mistakes to Avoid

    Even experienced technicians make these errors:

    • Replacing speaker without testing
    • Ignoring basic settings check
    • Not cleaning speaker grill
    • Using low-quality replacement speakers
    • Skipping multimeter testing

    Diagnosis first, replacement second.


    Choosing the Right Replacement Speaker

    If replacement is needed:

    • Match exact model and size
    • Avoid cheap aftermarket parts
    • Check sound quality before final assembly
    • Secure proper contact alignment

    A low-quality ringer can cause distortion and customer complaints even if it works.


    Special Notes for iPhone Ringer Testing

    iPhone speakers are integrated into modules with antenna or flex connections.

    Keep in mind:

    • Improper fitting affects sound
    • Missing screws reduce volume
    • Dust mesh alignment matters

    Testing with original-quality parts is strongly recommended.


    Real Workshop Insight

    In daily repair work, more than half of “dead ringer” cases are caused by dust blockage, misalignment, or settings issues. Only a portion actually need speaker replacement.

    “Repairing smartly is not about speed. It is about accuracy.”

    This approach builds long-term customer trust and professional confidence.


    Summary: Best Way to Check Mobile Phone Ringer

    To correctly check the ringer of a mobile phone:

    1. Verify sound settings and modes
    2. Test via diagnostic or service menu
    3. Inspect and clean speaker area
    4. Cross-test with known good speaker
    5. Use multimeter to confirm speaker health
    6. Diagnose PCB or IC only if needed

    This structured approach works for Android phones, iPhones, and most modern smartphones.


    Final Thoughts

    Learning to test a mobile phone ringer properly separates a parts-changer from a real technician. Whether you are repairing entry-level Android devices or high-end smartphones, the principles remain the same: observe, test, confirm, and then repair.

    With practice, these steps become second nature and improve both repair success and professional reputation.

  • How to Check Mobile Phone Battery Using a Multimeter

    How to Check Mobile Phone Battery Using a Multimeter

    A mobile phone battery is the heart of every smartphone. No matter how powerful the processor or how advanced the display, a weak battery can make even a premium device unusable. For mobile repair technicians, battery-related complaints are among the most common issues faced in daily work.

    Customers often say things like “phone is not charging,” “battery drains too fast,” or “device switches off suddenly.” Behind these simple complaints can be multiple causes. That is why learning how to correctly check a mobile phone battery is a core skill for every technician, whether beginner or advanced.

    This guide explains battery testing in a clear, practical, and professional way. It avoids myths, focuses on real workshop practices, and helps you make confident repair decisions.

    “Power problems are rarely complicated. They only become expensive when testing is skipped.”


    A Mobile Phone Battery is Also Called

    In the repair industry, a mobile phone battery may be referred to as:

    • Rechargeable battery
    • Lithium-ion battery
    • Li-ion battery
    • Lithium-polymer battery
    • Li-Po battery
    • Power cell
    • Battery pack

    Although these names sound different, they often refer to the same function: storing and delivering electrical energy safely to the device.


    Types of Mobile Phone Batteries Used Today

    Understanding battery type helps in correct diagnosis and replacement.

    Lithium-Ion Battery (Li-ion Battery)

    This is the most widely used battery type in smartphones. Li-ion batteries are reliable but sensitive to heat, overcharging, and deep discharge.


    Lithium-Polymer Battery (Li-Po Battery)

    A lithium-polymer battery is a more flexible version of lithium technology. They have slim and lightweight design, can be shaped to fit thin phones and have better safety design compared to older lithium cells. They are often used in modern smartphones and iPhones

    In practical repair work, Li-ion and Li-Po batteries are tested in almost the same way.


    Minimum and Maximum Voltage of a Cell Phone Battery

    Knowing voltage limits is extremely important for battery diagnosis.

    Standard Voltage Ranges

    For most mobile phone batteries:

    • Minimum safe voltage: 3.0V
    • Nominal voltage: 3.6V to 3.7V
    • Fully charged voltage: 4.2V
    • Over-voltage (danger zone): Above 4.25V

    If a battery voltage drops below 3.0V, it is considered deeply discharged and may not recover safely.

    A battery showing zero or very low voltage is usually damaged. However, if it has not been used for a long time, it should be recharged once and then tested for proper performance.

    Problems Caused by a Faulty Mobile Phone Battery

    A defective mobile phone battery can create many confusing issues that often look like software or motherboard faults.

    • Dead phone – device does not power ON at all
    • Fast draining – battery drops quickly even after full charge
    • Stuck at logo / boot loop – phone restarts during startup
    • Auto switch OFF – shuts down suddenly, often below 40%
    • Swollen (pregnant) battery – back cover or display lifts
    • Charging issues – slow charging, no charging, or unstable charging
    • Works only on charger – phone turns OFF when unplugged
    • Overheating – battery heats during charging or normal use
    • Wrong battery percentage – sudden drops or jumps in charge level

    Technician note: Always check or replace the battery first before assuming software or motherboard problems.


    Tools Required to Check a Mobile Phone Battery

    Every repair technician should have:

    • Digital multimeter
    • Known good battery (for comparison)
    • Charging cable and adapter
    • DC power supply (advanced level)
    • Basic hand tools

    Among these, the multimeter is the most important diagnostic tool.


    How to Check Mobile Phone Battery Voltage Using a Multimeter

    This is the most reliable and professional method.

    Step-by-Step Battery Voltage Test

    1. Set the multimeter to DC voltage mode
    2. Select the 10V / 20V DC range (or auto-range)
    3. Place the red probe on the positive (+) terminal
    4. Place the black probe on the negative (–) terminal
    5. Read the voltage displayed
    how to check mobile phone battery with a multimeter

    How to Interpret the Reading

    • 4.1V – 4.2V → Battery fully charged
    • 3.7V – 3.9V → Battery in good condition
    • 3.3V – 3.6V → Battery partially discharged
    • Below 3.0V → Battery weak or damaged
    • 0V → Battery dead or protection circuit triggered

    A mobile phone battery showing below 3.7V on a multimeter is partially discharged. Some smartphones may still power ON around 3.3–3.6V, but a weak battery often fails to deliver enough current during startup, causing the phone to not turn ON or to switch OFF immediately. Below 3.3V, most smartphones will not power ON at all due to low-voltage protection.

    This test gives you a quick and accurate picture of the battery’s current charge level.


    Checking Battery Terminals and Contacts

    Sometimes the battery is fine, but power is not delivered properly.

    Inspect:

    • Battery terminals for corrosion
    • Bent or damaged contacts
    • Loose battery connectors
    • Dirt or oxidation on pins

    Poor contact can mimic battery failure.
    Always clean and inspect before declaring a battery faulty.


    A Funny but Unsafe Traditional Battery Checking Method (For Knowledge Only)

    There is an old and widely known method used by some traditional mobile phone repair technicians.

    They lightly touch the tip of their tongue to the positive (+) terminal of the battery.
    If a mild tingling or “spicy” sensation is felt, the battery is assumed to have some charge.
    If no sensation is felt, the battery is considered discharged.

    This method may give a rough idea, but it is unsafe, unhygienic, and unprofessional.

    It is mentioned here only for awareness and knowledge, and it is strongly advised not to use this method, except in extreme emergencies where no tools are available.

    A multimeter is safer, accurate, and professional.


    Why Multimeter Testing Is Not Enough for Fast Draining Batteries

    Many technicians believe that if voltage is normal, the battery is good. This is not always true.

    A multimeter only shows:

    • Current voltage
    • Surface charge level

    It does not show:

    • Internal chemical health
    • Capacity loss
    • Discharge speed

    This is why fast-draining batteries often confuse beginners. If your smartphone battery is draining very fast, know how to fix if a Phone Battery Drains Fast Even When Idle


    How to Check a Fast Draining Mobile Phone Battery

    If a battery drains very quickly even after full charging, simple voltage testing will not reveal the problem.

    This happens when:

    • Battery chemicals have weakened
    • Internal resistance has increased
    • Battery capacity has dropped significantly

    Practical Technician Method

    The most reliable method is replacement testing:

    1. Fully charge the existing battery
    2. Insert a known good or new battery into the same phone
    3. Use the phone normally
    4. Observe battery performance

    If the problem disappears:

    • The old battery is faulty

    If the problem remains:

    • The issue is with software, charging circuit, or power management IC

    This method reflects real-world usage and gives accurate results.


    Common Signs of a Bad Mobile Phone Battery

    Watch for these symptoms:

    • Battery percentage drops suddenly
    • Phone switches off at 20–30%
    • Battery heats up during charging
    • Phone restarts randomly
    • Charging takes too long
    • Battery drains even in idle mode

    Any two or more symptoms usually indicate battery replacement is needed.


    Charging Test: Another Important Battery Check

    Battery testing is incomplete without charging observation.

    Check:

    • Charging current stability
    • Charging time consistency
    • Battery temperature rise

    A battery that heats excessively during charging is unsafe and should be replaced immediately.


    Built-In vs Removable Battery Considerations

    Removable Battery Phones

    • Easy voltage testing
    • Easy replacement
    • Lower labor risk

    Non-Removable Battery Phones

    • Require careful opening
    • Risk of flex damage
    • Adhesive removal needed

    Regardless of design, battery testing principles remain the same.


    Choosing the Right Replacement Battery

    When replacing a battery:

    • Match exact model number
    • Prefer original or OEM-quality battery pack
    • Avoid cheap, low-capacity duplicates
    • Check voltage before installation

    A poor-quality power cell can damage the device or reduce customer trust.


    Technician-Level Best Practices

    • Never short battery terminals intentionally
    • Do not overcharge externally
    • Store batteries at safe voltage levels
    • Avoid swollen or leaking batteries
    • Dispose damaged batteries properly

    “Battery safety is not optional. One mistake can damage the phone or injure the technician.”


    Summary: How to Check a Mobile Phone Battery the Right Way

    To correctly diagnose a mobile phone battery:

    1. Identify battery type (Li-ion or Li-Po)
    2. Check voltage using a multimeter
    3. Understand minimum and maximum voltage limits
    4. Inspect terminals and contacts
    5. Test charging behavior
    6. Replace temporarily to confirm fast drain issues

    This approach works for Android phones, iPhones, and most modern smartphones.


    Final Thoughts

    Battery testing is not about speed. It is about accuracy. A technician who understands voltage behavior, chemical wear, and real-world usage can solve power issues confidently and professionally.

    Learning these fundamentals not only improves repair quality but also builds long-term customer trust.

  • How to Test a Smartphone LCD Screen Before Replacement

    How to Test a Smartphone LCD Screen Before Replacement

    Replacing a smartphone LCD screen without proper testing is one of the most common and costly mistakes in mobile repair. A phone may show a black screen, distorted display, or flickering image, but the actual fault may not always be the LCD panel itself. Many display issues are caused by battery problems, loose connectors, software glitches, or board-level faults.

    For repair technicians, learning how to test a smartphone LCD screen before replacement is essential. It saves time, reduces unnecessary part changes, and builds customer trust. Whether you work on Android phones or iPhones, the testing principles remain similar, with a few important differences.

    “Good repair work starts with confirmation, not assumption.”
    That principle applies perfectly to LCD diagnosis.

    This guide explains step-by-step LCD testing methods, practical workshop checks, and common mistakes to avoid. It is written for both beginner and experienced technicians.


    Smartphone LCD Screen: Names and Common Terms Used

    A smartphone LCD displays images, text, videos, system interfaces, and touch feedback when combined with a digitizer. In repair and user language, an LCD screen may also be called:

    • Phone screen
    • Mobile screen
    • Display
    • Display panel
    • Screen module
    • LCD panel
    • Display assembly
    • Touch and display unit
    • Folder
    • Screen combo

    Although modern phones may use OLED or AMOLED technology, technicians still commonly use the term LCD screen to refer to the complete display unit.


    Common LCD-Related Complaints from Customers

    Before testing, understand the complaint clearly. Customers usually describe display problems in simple words, such as:

    • Screen is black but phone is ON
    • Display is white or blank
    • Lines or spots on the screen
    • Flickering or dim display
    • Touch works but no image
    • Screen shows logo and then goes black

    Each symptom points to a different diagnostic path. Jumping straight to replacement can lead to wrong conclusions.


    Important: Check the Battery Before Testing the LCD

    This step is often ignored.

    A weak battery can cause LCD-related symptoms even when the screen is perfectly fine.

    Battery Voltage Reference (Very Important)

    For most smartphones:

    • Minimum operating voltage: around 3.3V
    • Nominal voltage: 3.6V – 3.7V
    • Fully charged voltage: 4.2V
    • Maximum safe voltage: around 4.25V

    Below approximately 3.3V, most smartphones will not power ON at all.

    If the battery is weak, unstable, or deeply discharged, the phone may:

    • Fail to boot
    • Restart repeatedly
    • Show a black or flickering display

    Always test or replace the battery first before blaming the LCD screen.


    Tools Required to Test a Smartphone LCD

    A professional technician should have:

    • Known good battery
    • Charging cable and adapter
    • Digital multimeter
    • Screwdrivers and opening tools
    • Known working LCD (for cross-testing)
    • Clean workspace with proper lighting

    Advanced tools like DC power supplies are useful but not mandatory for basic LCD testing.


    Step 1: Visual Inspection Without Opening the Phone

    Start with what you can see.

    Check for:

    • Cracks on the screen or glass
    • Ink-like black spots (LCD bleed)
    • White patches or discoloration
    • Uneven brightness
    • Lines across the display

    Cracked glass does not always mean the LCD is damaged, and an unbroken screen does not guarantee a healthy display.


    Step 2: Check if the Phone Is Actually Powering ON

    Many “LCD problems” are actually power issues.

    Confirm:

    • Vibration when power button is pressed
    • Sound during charging
    • Notification sounds
    • Backlight glow in dark environment

    If the phone shows signs of life but no image, LCD testing is required.


    Step 3: Torch Light Test (Basic but Useful)

    This is a quick field test.

    Steps:

    1. Turn ON the phone
    2. Shine a bright torch or flashlight on the screen at an angle
    3. Look closely for faint images

    If faint images are visible:

    • The display panel is working
    • Backlight or power delivery may be faulty

    This method works on many LCD-based displays and is especially helpful for beginners.


    Step 4: External Display or Screenshot Test (Android vs iPhone)

    For Android Phones

    • Take a screenshot using button combination
    • Connect phone to a PC
    • View the screenshot file

    If the screenshot looks normal:

    • The phone is generating display output
    • The LCD screen or display connection is likely faulty

    For iPhones

    • Use screen mirroring or backup tools
    • Check if display output is visible externally

    This helps separate software and GPU output from physical LCD failure.


    Step 5: Test Using a Known Good LCD Screen

    This is the most reliable technician method.

    Steps:

    1. Open the phone carefully
    2. Disconnect the existing display
    3. Connect a known working LCD screen
    4. Power ON the device

    If the phone displays properly:

    • Original LCD screen is faulty

    If the issue remains:

    • Problem may be battery, connector, or motherboard related

    This method prevents unnecessary LCD replacement.

    apple iPhone 17 pro max display lcd screen replacement spare part

    Step 6: Check LCD Connectors and Flex Cables

    Many display problems are caused by poor connections.

    Inspect Visually:

    • Bent or broken connector pins
    • Dust or corrosion on contacts
    • Torn flex cables
    • Improper seating of connectors

    Clean gently if needed and reseat connectors properly before final testing.


    Android vs iPhone: Additional LCD Checks

    Additional Points for Android Devices

    • Use hardware test codes (where available)
    • Boot into safe mode to rule out app conflicts
    • Check display settings and brightness controls

    Additional Points for iPhones

    • Ensure all screws are placed correctly
    • Check proximity sensor and earpiece alignment
    • Confirm display compatibility with the model

    Improper fitting can affect display behavior, especially in iPhones.


    LCD vs Touch Problem: How to Identify

    Understanding the difference saves time.

    LCD Issue Signs

    • No image
    • Lines or discoloration
    • Flickering display
    • White or black screen

    Touch/Digitizer Issue Signs

    • Image visible but touch not responding
    • Partial touch failure
    • Ghost touch

    A full display replacement may not always be necessary if only the touch layer is faulty.


    Can Software Cause LCD Problems?

    Yes, but rarely.

    Software-related display issues may include:

    • Stuck logo due to firmware corruption
    • Display glitches after updates
    • Incompatible ROMs

    In such cases:

    • Software restore or flashing may help
    • Hardware replacement should be the last step

    Common Technician Mistakes to Avoid

    • Replacing LCD without battery testing
    • Ignoring connector inspection
    • Assuming black screen always means dead LCD
    • Using low-quality display panels
    • Skipping cross-testing

    Testing first saves money, parts, and reputation.


    Choosing the Right Replacement LCD Screen

    If replacement is confirmed:

    • Match exact model and version
    • Prefer original or OEM-grade display
    • Check brightness and color accuracy
    • Test before final assembly

    A poor-quality screen leads to callbacks and dissatisfaction.


    Real Workshop Insight

    In daily repair work, many “LCD problems” are solved by fixing battery issues, reseating connectors, or correcting improper assembly. True LCD failure is common—but not as common as assumed.

    “Diagnosis is the skill that separates a repairer from a parts changer.”


    Summary: How to Test a Smartphone LCD Screen Before Replacement

    To test a smartphone LCD properly:

    1. Check battery voltage and condition
    2. Confirm the phone powers ON
    3. Inspect visually
    4. Use torch light test
    5. Cross-test with known good LCD
    6. Inspect connectors and flex cables
    7. Consider Android and iPhone-specific checks

    This process works for Android phones, iPhones, and most modern smartphones.


    Final Thoughts

    LCD testing is not about speed. It is about certainty. A technician who follows a structured testing process avoids mistakes, saves money, and delivers professional-level repairs.

    Master this skill, and LCD replacement will never be a guess again.

  • How to Use a Soldering Iron for Cell Phone Repair

    How to Use a Soldering Iron for Cell Phone Repair

    A soldering iron is one of the most important tools in cell phone repair. Whether you work on Android devices, iPhones, or basic mobile phones, soldering helps restore broken connections on the PCB. Many phone problems exist not because a component is dead, but because its solder joints have weakened, cracked, or completely disconnected.

    Modern smartphones use compact motherboards. Components are tiny. Tracks are thin. One careless move can damage the board permanently. That is why soldering is considered both a basic requirement and an advanced skill in mobile phone repairing.

    “Good soldering is invisible. Bad soldering is easy to spot.”

    This guide explains how to use a soldering iron correctly for cell phone repair, covering tools, preparation, techniques, mistakes, and real technician-level insights. It is written for beginners as well as experienced repair technicians.


    Introduction: Why Soldering Matters in Phone Repair

    A soldering iron is used to join metal parts using solder wire. In mobile phones, it is mainly used on the green-colored PCB (Printed Circuit Board) to attach spare parts or repair broken electrical connections.

    In repair shops, it is also commonly called:

    • A soldering station
    • A soldering pen
    • A micro soldering iron (for fine work)

    Most technicians today use a temperature-controlled soldering station because it provides stable heat and reduces board damage.


    Why Phone Components Need Resoldering

    Over time, solder joints inside a smartphone can fail. Common reasons include:

    • Physical shock or phone drop
    • Loose charging cable usage
    • Excessive heat
    • Repeated plugging and unplugging
    • Manufacturing stress points

    When solder joints fail, the component may still work but loses contact with the PCB.

    Common parts that often require soldering include:

    • Charging port
    • Battery connector
    • Power button
    • Volume keys
    • Headset connector
    • Antenna contact points
    • LCD connector (in selected models)
    • Microphone or speaker terminals

    In many low-cost or Chinese mobile phones, almost all components are soldered, including mic, speaker, and ringer. This reduces manufacturing cost but increases repair difficulty.


    Soldering Skill: Training vs Practice

    Soldering is not something you master overnight. Watching videos helps, but practice matters more than theory.

    Many self-taught technicians learned soldering by:

    • Practicing on dead phones
    • Removing and resoldering old components
    • Experimenting with different temperatures and tips

    Mobile phone soldering is more delicate than soldering computer motherboards or laptop boards. The margin for error is small.

    “The difference between a repair and a board replacement is often just soldering skill.”


    Types of Soldering Tools Used in Phone Repair

    1. Soldering Iron / Soldering Station

    Used for:

    • Connector soldering
    • Jumper wire work
    • Small component repair

    Temperature control is essential for smartphone boards.

    2. Micro Soldering Iron

    Used for:

    • IC legs
    • Tiny pads
    • Precision rework

    3. Soldering Pen

    Lightweight tool, suitable for beginners but limited in advanced work.

    4. Hot Air Rework Station

    Used for:

    • IC removal
    • BGA chips
    • Shield removal

    This article focuses mainly on the soldering iron, but advanced technicians often use both tools together.


    Choosing the Right Soldering Iron for Mobile Repair

    A good soldering setup should include:

    • Temperature control
    • ESD-safe design
    • Interchangeable fine tips
    • Stable heating element

    Avoid cheap non-regulated irons. They overheat pads and damage PCBs.

    Recommended temperature range for phone repair:

    • Lead solder: 320–350°C
    • Lead-free solder: 350–380°C

    Always start lower and increase gradually.


    Importance of ESD Safety in Smartphone Repair

    Modern smartphones are sensitive to static electricity. A small discharge can damage ICs silently.

    Basic ESD precautions include:

    • ESD-safe soldering iron
    • Grounded work surface
    • Anti-static wrist strap
    • Avoid synthetic clothing

    Ignoring ESD protection is one of the biggest hidden causes of repair failure.


    Role of Soldering Flux in Phone Repairs

    Soldering flux is not optional. It is essential.

    Flux:

    • Improves solder flow
    • Prevents oxidation
    • Reduces heat damage
    • Creates stronger joints

    Always use quality flux, especially for micro soldering. Avoid acidic or low-grade flux that leaves corrosive residue.


    Step-by-Step: How to Use a Soldering Iron for Cell Phone Repair

    Step 1: Prepare the PCB Surface

    Before soldering:

    • Clean the solder points using the iron tip
    • Remove old solder if required
    • Make the pads flat and shiny

    Dirty pads cause weak joints.


    Step 2: Heat the Soldering Iron Properly

    • Switch on the soldering station
    • Allow it to heat for around 2 minutes
    • Confirm stable temperature before starting

    Never solder with a half-heated iron.


    Step 3: Hold the Component Correctly

    • Right-handed technicians usually hold:
      • Component with left hand
      • Iron with right hand
    • Use precision tweezers for small parts

    Never hold components directly with fingers near heat.


    Step 4: Apply Solder Wire Correctly

    • Take a small amount of solder wire
    • Touch it to the iron tip
    • Position the component on the PCB
    • Touch the joint briefly

    Less solder is always better than excess solder.


    Step 5: Allow the Joint to Cool Naturally

    • Remove the iron tip
    • Do not move the component
    • Let the joint cool for a few seconds
    • Check strength manually

    If it looks dull or weak, resolder it.

    how to do soldering in mobile phone repair

    Making Jumpers Using a Soldering Iron

    Jumpers are used when PCB tracks are broken. This is advanced-level repair.

    Jumpers are usually made using:

    • Thin copper wire
    • Enamel-coated jumper wire

    Only attempt jumper work if you understand circuit paths. Otherwise, you may cause short circuits.

    If you do not repair motherboards at circuit level, you do not need jumper skills.


    Common Soldering Mistakes Technicians Make

    Avoid these common errors:

    • Overheating PCB pads
    • Using excessive solder
    • Not using flux
    • Dragging pads accidentally
    • Solder bridges between pins
    • Using blunt or dirty tips

    Most motherboard damage happens due to impatience, not lack of tools.


    Beginner Tips to Improve Soldering Skills Faster

    • Practice on dead smartphones
    • Start with charging ports
    • Use magnification
    • Clean tips frequently
    • Maintain steady hand posture

    Consistency improves accuracy.


    Advanced Technician Tips

    For experienced repair professionals:

    • Use different tips for different jobs
    • Combine hot air and iron strategically
    • Preheat boards for complex work
    • Inspect joints under microscope
    • Clean flux residue after repair

    Professional repair is about control, not speed.


    Soldering Iron vs Hot Air: When to Use What

    TaskBest Tool
    Charging portSoldering iron
    Button flexSoldering iron
    IC removalHot air
    Shield removalHot air
    Jumper wireSoldering iron

    Knowing the right tool saves boards.


    Safety Tips While Soldering Mobile Phones

    • Never touch hot tip
    • Work in ventilated area
    • Avoid inhaling fumes
    • Keep tools organized
    • Switch off iron after use

    Safety habits protect both technician and device.


    Is Soldering Still Relevant in Modern Smartphones?

    Yes. Despite increasing modular designs, soldering remains essential for:

    • Charging issues
    • Power failures
    • Network problems
    • Audio faults
    • Board-level repair

    Technicians who master soldering earn more and solve deeper issues.

    “Replacing parts is easy. Repairing boards builds real skill.”


    Who Should Learn Soldering in Mobile Repair?

    • Beginners entering phone repair
    • Advanced technicians upgrading skills
    • DIY enthusiasts
    • Electronics students
    • Service center professionals

    Soldering knowledge expands your repair capability significantly.


    Final Thoughts

    Using a soldering iron for cell phone repair is both an art and a technical skill. It demands patience, practice, and respect for the device. With the right tools, correct technique, and steady improvement, you can handle everything from simple connector repairs to advanced motherboard work.

    Start small. Practice often. Focus on quality, not speed.

    A well-made solder joint can bring a dead smartphone back to life.

  • How to Make Jumpers in Mobile Phone Repair to Fix Open Tracks

    How to Make Jumpers in Mobile Phone Repair to Fix Open Tracks

    Jumper work is one of the most important skills in mobile phone hardware repair. When a smartphone comes to a repair shop with charging problems, no display, no power, or dead keys, the fault is often not the component itself—but a broken track on the PCB.

    This article explains how to make jumpers in mobile phone repair to fix open tracks in a clear, practical, and technician-friendly way. It is written for beginners as well as working technicians who want to strengthen their fundamentals. The focus is on real repair logic, not shortcuts or myths.

    “Track repair is not about soldering wires randomly. It is about understanding the circuit and restoring the original path.”


    What Is a Track in a Mobile Phone PCB?

    A track is a thin copper pathway on a printed circuit board (PCB) that carries current and signals between components. These tracks connect:

    • ICs (integrated circuits)
    • Resistors and capacitors
    • Charging ports
    • Display connectors
    • Audio, network, and power sections

    In modern smartphones, tracks are:

    • Extremely thin
    • Spread across multiple PCB layers
    • Often hidden inside the board

    Because of this, track damage is not always visible to the naked eye.


    What Does an “Open Track” Mean?

    An open track means the electrical path is broken. Current cannot flow from one point to another.

    Common reasons for open tracks:

    • Water or liquid damage
    • Physical impact or bending
    • Corrosion over time
    • Excessive heat during previous repairs
    • Improper soldering or component removal

    When a track is open, the connected component will not receive proper voltage or signal, even if the part itself is perfectly fine.


    What Is Jumper Work in Mobile Phone Repair?

    Jumper work is the process of restoring a broken electrical path by creating an alternate connection using a thin wire. This wire replaces the damaged section of the PCB track.

    In simple words:

    • Original track = damaged
    • Jumper wire = new path

    If done correctly, the circuit behaves as if the track was never broken.


    When Do You Need to Make a Jumper?

    Jumper repair is required only after proper diagnosis.

    Common situations where jumper work is needed:

    • Charging section not working despite a good charging port
    • Phone dead even after battery and IC checks
    • Display backlight missing
    • Network issues due to broken RF lines
    • Speaker, mic, or vibrator not functioning

    Important:
    Never make a jumper without confirming an open track. Random jumpers can damage the device further.


    How to Confirm That a Track Is Broken

    Before making any jumper, you must prove that the track is open.

    Step 1: Check the Faulty Section

    First, identify what is not working:

    • Charging
    • Power
    • Display
    • Audio
    • Network

    Replace or test the component if required. A faulty part should be ruled out first.


    Step 2: Use a Digital Multimeter (Continuity Mode)

    Set your multimeter to continuity mode.

    • Place one probe on the starting point of the track
    • Place the other probe on the ending point

    If you hear a beep, the track is fine.
    If there is no beep, the track is open.

    This is the most reliable basic test in mobile phone repairing.

    Also read: How to Use a Multimeter in Mobile Phone Repairing


    Why Tracks Are Harder to Trace in Smartphones

    Older mobile phones had:

    • Single or double-layer PCBs
    • Visible copper lines

    Modern smartphones have:

    • 7 to 10 PCB layers or more
    • Very compact designs
    • Buried internal tracks

    Because of this, technicians rely on:

    • Jumper diagrams
    • Schematic diagrams
    • Boardview files
    • Logical circuit understanding

    Methods to Find Tracks for Jumper Work

    There are three practical ways technicians trace tracks today. Each has its own importance.


    Method 1: Using Jumper Diagrams (Most Common Method)

    Jumper diagrams are images that show:

    • Test points
    • Component connections
    • Alternative jumper locations

    These diagrams are widely used because they are easy to understand, even for beginners.

    How to search jumper diagrams in Google correctly:

    Use clear and specific search terms, such as:

    • “Samsung Galaxy s24 charging jumper”
    • “iPhone 17 backlight jumper solution”
    • “Redmi Note 15 no power jumper diagram”
    sample jumper diagram f a mobile phone

    Avoid vague searches.


    How to Use a Jumper Diagram Properly

    1. Identify the two points shown in the diagram
    2. Check continuity between them using a multimeter
    3. If continuity is missing, prepare to make a jumper
    4. Clean both solder points properly
    5. Solder a thin jumper wire between the points

    If done correctly, the fault often gets resolved immediately.

    Technician tip:
    Always cross-check with more than one diagram if available. Some images online can be misleading.


    Method 2: Using Schematic Diagrams (Professional Approach)

    A schematic diagram shows the complete electrical network of a mobile phone. It includes:

    • Power lines
    • Signal paths
    • Component values
    • IC pin functions

    This method requires more learning but gives maximum control over hardware repair.

    How schematic-based jumper repair works:

    1. Identify the faulty section (example: charging)
    2. Locate that section in the schematic
    3. Understand where voltage or signal should flow
    4. Trace the path using a multimeter
    5. Make a jumper only where continuity is missing

    If jumper repair does not solve the issue, the problem may be:

    • Faulty IC
    • Internal layer damage
    • CPU or power IC failure

    Method 3: Comparing With a Working PCB (Limited Use)

    Some technicians compare the faulty board with a known working PCB of the same model.

    How it is done:

    • Check continuity on a good board
    • Compare with the faulty board
    • Identify missing continuity

    This method:

    • Requires an extra board
    • Is time-consuming
    • Is not always accurate

    Still, in some cases, it helps when diagrams are unavailable.


    Trusted Paid Schematic & PCB Diagram Services for Mobile Repair

    These platforms provide official or professionally compiled schematics, layouts, bitmaps, boardviews, and track diagrams. They are widely used by experienced technicians to trace open tracks, locate components, and understand complex circuit paths.

    1. Borneo Schematics – Mobile & Electronics Hardware Solutions

    📌 Website: https://www.borneoschematics.com/

    Borneo Schematics is a paid service that delivers daily updated schematic diagrams, hardware solutions, and bitmap files for many mobile phones and other devices. It helps technicians trace voltages, open tracks, and component connections for multiple brands.
    It is often used by repair professionals who need accurate hardware diagrams and schematic guidance for troubleshooting complex faults.


    2. Pragmafix Schematics – Technician Mentor & Diagram Tool

    📌 Website: https://pragmafix.net/

    Pragmafix provides a comprehensive schematic solution paired with training resources and repair guides for mobile phone technicians. This server-based tool includes:

    • Thousands of mobile phone schematics and PCB layout files
    • Circuit tracking tools for signal and power lines
    • Component datasheets and block diagrams
    • Repair tutorials and mentoring materials

    Pragmafix aims to support technicians in both hardware and software repair learning, not only track tracing.


    3. Estech Schematics (Orion by Estech) – Boardview & PCB Guides

    📌 Website: https://estechschematics.com/

    Estech or GSM 24 Seven provides schematic and boardview services under products like Orion Schematics. These tools are designed to assist technicians in visualizing PCB layers, track routes, and component networks across many mobile and electronic devices.
    The service is useful when:

    • Standard images or diagrams are not available
    • Detailed boardview and circuit path views are needed for hardware troubleshooting
    • Multiple brands and models must be supported

    Orion and similar Estech products are popular among professionals working with both Android and Apple devices.


    Why Paid Schematic Services Matter for Track & Jumper Repair

    Tracked diagrams and boardviews are essential when:

    • The PCB has hidden internal layers
    • Simple continuity tests are insufficient
    • You need exact voltage pathways
    • The open track is complex or near critical ICs

    Paid schematic repositories often offer:

    • Multi-layer boardview files (showing hidden paths)
    • Bitmap or PDF schematics with component labels
    • Regular updates for new devices
    • Cross-reference tools for better trace identification

    Tips for Using Paid Schematic Platforms Safely

    • Choose reputable sources only — avoid uncertain or pirated materials.
    • Always back up data before trying advanced fixes.
    • Combine diagrams with actual multimeter testing for best results.
    • Learn basic schematic reading first to use these tools effectively.

    Tools Required for Jumper Work

    Having the right tools makes jumper repair safe and precise.

    Essential tools:

    • Digital multimeter
    • Fine-tip soldering iron (temperature controlled)
    • Thin jumper wire (copper or enamel-coated)
    • Flux (good quality)
    • Isopropyl alcohol for cleaning
    • Tweezers
    • Magnification (microscope or magnifier)

    Avoid thick wires. They can short nearby components.


    Step-by-Step: How to Make a Jumper Safely

    Step 1: Clean the Area

    Use isopropyl alcohol to remove dust, corrosion, and old flux.

    Step 2: Identify Exact Jumper Points

    Confirm both start and end points using:

    • Jumper diagram
    • Schematic
    • Multimeter continuity

    Step 3: Prepare the Jumper Wire

    • Use very thin wire
    • Strip only the required length
    • Apply a small amount of flux

    Step 4: Solder One End First

    • Use low heat
    • Ensure strong solder joint
    • Avoid touching nearby components

    Step 5: Route the Wire Neatly

    • Keep it short
    • Avoid sharp bends
    • Do not cross sensitive signal lines

    Step 6: Solder the Other End

    • Double-check position
    • Ensure no short circuit

    Step 7: Test Continuity Again

    Confirm beep sound across the jumper.


    Common Mistakes During Jumper Work

    Many beginners face failures due to avoidable errors.

    Avoid these mistakes:

    • Making jumper without confirming open track
    • Using thick or rigid wire
    • Applying too much heat
    • Creating long jumper paths
    • Skipping final continuity testing

    “A bad jumper creates more faults than the original damage.”


    When Jumper Work Will NOT Help

    Jumper repair has limitations.

    It will not fix:

    • CPU damage
    • Internal layer breaks near processor
    • Severe liquid damage under ICs
    • Dead memory or baseband ICs

    In such cases, advanced board repair or replacement is required.


    Jumper Repair vs Track Repair Using Scratching

    Sometimes tracks are repaired by:

    • Scratching PCB mask
    • Exposing copper
    • Rebuilding the track

    This works only when:

    • Track is on the top layer
    • Damage is very small

    For deeper layers, jumper wire is the safer solution.


    Practical Advice From Repair Experience

    • Always document your jumper paths
    • Keep jumper wires short and clean
    • Practice on dead boards first
    • Learn reading schematics slowly
    • Do not trust one image blindly


    Final Thoughts

    Learning how to make jumpers in mobile phone repair is a milestone for any technician. It transforms you from a parts replacer into a problem solver. With proper diagnosis, correct tools, and patience, jumper work can fix many “dead” phones that others give up on.

    Focus on understanding circuits, not just soldering wires.

    Good jumper work restores the original design, not just the connection.

  • How to Factory Reset & Hard Reset Samsung Galaxy S5 (All Methods)

    How to Factory Reset & Hard Reset Samsung Galaxy S5 (All Methods)

    If your Samsung Galaxy S5 is slow, frozen, locked, or behaving strangely, a reset is often the most practical solution. Many common software-related problems can be fixed by restoring the device to its original state. However, resetting a smartphone should always be done with proper understanding, because it permanently removes personal data from the device.

    This detailed guide explains all working methods to factory reset and hard reset the Samsung Galaxy S5, when to use each method, and what precautions you must take before proceeding. The steps are written in simple language so that even beginners can follow them confidently.

    “A reset does not repair hardware, but it often gives new life to a struggling smartphone.”


    Understanding Factory Reset and Hard Reset (Simple Definition)

    A factory reset means restoring a mobile phone to its original software condition, just like it was when first taken out of the box. All user data stored in the phone’s internal memory is erased.

    A hard reset is simply another way of performing a factory reset, usually done using hardware buttons or recovery mode when the phone cannot be accessed normally.

    Both terms are often used interchangeably in mobile repairing and smartphone troubleshooting.

    Important to know:

    • Internal storage data is deleted
    • SIM card data is not affected
    • Memory card data usually remains safe, but removing it is recommended

    About Samsung Galaxy S5 (Quick Overview)

    The Samsung Galaxy S5 is a popular Android smartphone known for features like:

    • Water and dust resistance
    • Fingerprint sensor
    • Private mode
    • Heart rate monitor

    Even though it is an older device, it is still widely used and frequently comes to repair shops for software resets, pattern lock issues, and performance problems.


    When Should You Reset Samsung Galaxy S5?

    A reset is not needed for every problem. It should be used only when basic troubleshooting fails.

    Common situations where reset is helpful:

    • Phone is very slow or lagging
    • Device freezes or hangs frequently
    • Apps keep crashing
    • Forgotten screen lock, PIN, or pattern
    • Phone stuck on logo or boot loop
    • Virus or malware infection
    • Before selling or giving away the phone
    • Major software errors after updates

    If your phone only has a minor glitch, restarting it may be enough.


    Soft Reset vs Hard Reset (Important Difference)

    Before moving to a full reset, always try a soft reset.

    Soft Reset (Simple Reboot)

    A soft reset means restarting the device without deleting data.

    How to do it:

    • Press and hold the Power button
    • Select Restart or Power Off
    • Turn the phone back on

    If the phone is frozen, keep the Power button pressed until it shuts down.

    If the problem is solved after reboot, a hard reset is not required.


    Things to Check Before Performing a Factory Reset

    Before resetting your Galaxy S5, take these precautions seriously.

    Essential pre-reset checklist:

    • Backup important data (contacts, photos, videos, documents)
    • Charge the battery to at least 40–50%
    • Remove memory card if possible
    • Sign out of important accounts if accessible

    Also read: How to Backup and Restore an Android Phone (internal link opportunity)

    “Data loss hurts more than a slow phone. Backup is not optional.”


    What Data Gets Erased After Reset?

    A factory reset will remove:

    • Google account linked to the device
    • Installed applications and app data
    • Contacts stored in phone memory
    • Messages, call logs
    • Photos, videos, audio files
    • System and app settings

    It does not repair hardware faults like broken screens, battery issues, or charging port damage.


    Method 1: Factory Reset Samsung Galaxy S5 Using Settings (Recommended)

    This is the easiest and safest method if you can access the phone menu.

    Steps:

    1. Open the Menu
    2. Go to Settings
    3. Scroll to Backup and Reset
    4. Select Factory Data Reset
    5. Tap Reset Device
    6. Confirm by selecting Erase Everything

    The phone will restart automatically and begin the reset process.

    Factory Reset Samsung Galaxy S5 Using Settings

    Best used when:

    • Phone is working normally
    • Screen lock is known
    • No boot issues

    Method 2: Hard Reset Samsung Galaxy S5 Using Hardware Buttons

    This method is useful when:

    • Phone is locked
    • Touchscreen is not responding
    • Device is stuck on logo
    • Settings menu is inaccessible

    Button Combination Method (Recovery Mode)

    Steps:

    1. Power off the Samsung Galaxy S5
    2. Press and hold:
      • Volume Up
      • Home button
      • Power button
    3. Release all buttons when the Android recovery screen appears
    4. Use Volume Down to navigate to Wipe data / factory reset
    5. Press Power button to select
    6. Choose Yes – delete all user data
    7. After completion, select Reboot system now

    The device will restart with factory settings.

    This is the most commonly used method by mobile repair technicians.

    Hard Reset Samsung Galaxy S5 Using Hardware Buttons

    Method 3: Factory Reset Using Dial Code (Advanced & Risky)

    Samsung devices support a reset code that forces formatting.

    Reset Code:

    *2767*3855#
    

    How it works:

    • Open the phone dialer
    • Enter the code exactly
    • The phone immediately starts resetting

    Important warnings:

    • No confirmation screen
    • No chance to cancel
    • Instant data deletion

    Use this method only if you fully understand the consequences.

    Factory Reset Samsung Galaxy S5 Using Dial Code

    Which Reset Method Should You Choose?

    SituationRecommended Method
    Phone working normallySettings reset
    Forgot pattern or PINButton method
    Phone stuck or frozenRecovery mode
    Technician-level useDial code

    Common Problems After Reset (And Solutions)

    Phone Asking for Google Account

    This is normal due to security protection.

    Solution:

    • Sign in with the previously linked Google account
    • If forgotten, proper account recovery is required

    Phone Still Slow After Reset

    Possible reasons:

    • Old hardware limitations
    • Storage wear
    • App compatibility issues

    Reset improves software, not aging hardware.


    Reset Did Not Fix the Problem

    If the issue continues, it may be:

    • Firmware corruption
    • Hardware fault
    • Power IC or memory issue

    In such cases, software flashing or professional repair may be required.

    Also read: What Is Mobile Phone Flashing and When Is It Needed? (internal link opportunity)


    Expert Tips for Safe Reset (From Repair Experience)

    • Always try reboot first
    • Avoid repeated resets unnecessarily
    • Do not interrupt the reset process
    • Keep phone connected to battery if possible
    • Use original button combinations only

    Reset Myths You Should Ignore

    • ❌ Reset improves battery health (false)
    • ❌ Reset fixes broken hardware (false)
    • ❌ Reset recovers deleted data (false)

    A reset only fixes software-level problems.


    Frequently Asked Questions (Quick Answers)

    Does hard reset remove viruses?
    Yes, most software-based malware is removed.

    Will reset unlock a stolen phone?
    No. Security protections remain active.

    Can data be recovered after reset?
    Usually no, unless backups exist.


    Final Thoughts

    Resetting a Samsung Galaxy S5 is a powerful troubleshooting step when used correctly. Whether you choose a factory reset from settings or a hard reset using buttons, the key is preparation and understanding.

    Use resets wisely, back up your data, and remember that not every phone problem needs formatting.

    A reset is a solution—not a shortcut.

  • Essential Tools for Beginner Cell Phone Repair Technicians

    Essential Tools for Beginner Cell Phone Repair Technicians

    Starting a career in mobile phone repairing can feel exciting and confusing at the same time. You see damaged smartphones every day—broken screens, weak batteries, charging issues, sound problems—and you know they can be fixed. But the first big question is simple:

    What tools do I actually need to start repairing phones properly?

    Many beginners make the mistake of buying random kits online or investing in expensive equipment too early. The truth is, successful technicians begin with the right basics, not with everything available in the market.

    This guide explains the essential tools for beginner-level phone repair work, why each one matters, and how to use them safely. Whether you want to fix Android devices, iPhones, or other mobile phones, this article will help you build a strong foundation.

    “Good repair work is not about speed. It is about accuracy, patience, and using the right tools at the right time.”

    It is not necessary to buy all of the tools. Instead you can get only those which are only essential, as some of them are required only if you are master technicians. For example, you will need soldering station and all other soldering related stuff only if you want to perform soldering. Otherwise you can just carry on with the basic tools.

    Without a proper set of tools you will not be able to open and then fix the handset.


    Understanding the Role of Tools in Mobile Repairing

    A smartphone has tiny screws, delicate connectors, fragile flex cables, and sensitive components. Using incorrect or low-quality equipment can cause more damage than the original fault.

    The right tools help you:

    • Open devices without breaking frames or glass
    • Remove and refit parts safely
    • Diagnose hardware problems accurately
    • Work faster with fewer mistakes
    • Build customer trust through professional work

    For beginners, the goal is not advanced micro-soldering on day one. The goal is safe disassembly, basic diagnosis, and correct replacement of common parts.

    Popular Cell Phone Repair Tool Companies

    It is very important to buy tools of high quality. For this you also need to know the best companies manufacturing this stuff. Below are some widely trusted tool manufacturers used in mobile phone repairing workshops around the world.

    • Sunshine
    • Mechanic
    • Relife
    • iFixit
    • 2UUL
    • QianLi
    • Hakko
    • Sugon
    • Yaxun

    Important Note

    No single brand is perfect for all tools. Most professional technicians build their toolkit gradually by combining:

    • Reliable brands
    • Personal comfort
    • Repair requirements

    It is always better to start with essential tools from trusted manufacturers and upgrade as your skills improve. When you wish to upgrade and start advanced level repairis, you will need to buy advanced chip-level and motherboard-level eMMC mobile repairing tools that most technicians of this level have.


    Basic Hand Tools Every Beginner Technician Must Have

    Precision Screwdriver Set

    Modern smartphones use very small screws. Different brands use different screw heads.

    A good precision screwdriver set usually includes:

    • Phillips
    • Pentalobe (commonly used in iPhone models)
    • Torx
    • Tri-point
    • Flat head

    Important tip:
    Always apply gentle pressure. Stripped screws are one of the most common beginner mistakes.

    Why it matters:
    Without the correct screwdriver, opening a device safely is almost impossible.


    Plastic Opening Tools and Spudgers

    Plastic tools are safer than metal when opening a phone.

    These tools help you:

    • Separate the screen from the body
    • Disconnect battery and display connectors
    • Pry open clips without scratching components

    Never use sharp metal objects on connectors. One slip can damage the motherboard.


    Suction Cup Tool

    A suction cup helps lift displays gently, especially in smartphones with tightly sealed screens.

    Used mainly for:

    • Screen replacement
    • Battery access
    • Back glass removal (with care)

    Practical insight:
    Warm the edges slightly before using a suction cup. This softens adhesive and reduces cracking risk.


    SIM Card Ejector Pin

    This simple tool is often overlooked.

    It is needed to:

    • Remove SIM trays before opening phones
    • Prevent tray damage during disassembly

    Using needles or pins can bend or break the tray.


    Essential Power and Heating Tools

    Hot Air Gun or Heat Pad

    Most smartphones use strong adhesive for screens and batteries.

    Controlled heat helps:

    • Loosen display adhesive
    • Remove batteries safely
    • Open sealed back panels

    Safety reminder:
    Too much heat can damage OLED screens, batteries, or internal sensors. Always use moderate temperature and patience.


    Adjustable Power Supply (Basic Level)

    At beginner stage, this is optional but useful.

    It helps with:

    • Checking short circuits
    • Power consumption testing
    • Understanding phone boot behavior

    Experience tip:
    Start learning power supply usage during training. It builds strong diagnostic skills early.


    Measuring and Testing Tools

    Digital Multimeter

    A multimeter is one of the most important diagnostic tools.

    It is used to:

    • Check continuity
    • Measure voltage
    • Identify short circuits
    • Test fuses and coils

    Important fact:
    Modern smartphones use digital sensors and ICs, so a multimeter cannot test everything. But it remains essential for basic hardware checks.


    USB Current Tester

    This tool shows how much current a phone draws while charging.

    Useful for diagnosing:

    • Dead phones
    • Charging issues
    • Power IC problems (basic understanding)

    Real-world example:
    A phone showing 0.00A while charging often points to charging port or power circuit issues.


    Cleaning and Maintenance Tools

    Isopropyl Alcohol (IPA)

    Used for:

    • Cleaning boards
    • Removing adhesive residue
    • Cleaning connectors and contacts

    Always use high-purity alcohol. Avoid water-based cleaners.


    Anti-Static Brush

    Helps remove dust and corrosion gently.

    Why it matters:
    Dust inside speakers, charging ports, and cameras can cause faults that look serious but are easy to fix.


    Microfiber Cloth

    Used for:

    • Cleaning displays
    • Final device finishing
    • Preventing fingerprints during assembly

    A clean finish improves customer satisfaction instantly.


    Soldering Tools (Beginner Awareness Level)

    Soldering Iron (Temperature Controlled)

    At beginner stage, soldering is usually limited to:

    • Charging port replacement
    • Speaker terminal repair
    • Simple wire jumpers

    Important:
    Avoid cheap, non-temperature-controlled irons. They cause board damage.


    Solder Wire and Flux

    • Use good-quality solder wire
    • Flux improves solder flow and reduces heat damage

    Practical insight:
    Clean solder joints always look shiny. Dull joints often mean weak connections.


    Safety Tools You Should Never Ignore

    Anti-Static Wrist Strap

    Prevents electrostatic discharge (ESD), which can silently damage ICs.

    Especially important when:

    • Handling motherboards
    • Working in dry environments

    Safety Glasses

    Glass shards from broken screens can cause eye injuries.

    Simple protection saves long-term problems.


    Heat-Resistant Gloves

    Useful while handling heated devices and batteries.


    Organizing Tools for Professional Work

    Magnetic Screw Mat

    Smartphones contain many screws of different sizes.

    A magnetic mat helps you:

    • Keep screws organized
    • Avoid mixing lengths
    • Prevent internal damage during reassembly

    Expert habit:
    Label screw positions while removing them.


    Tool Storage Box

    A clean workspace builds discipline.

    Organized tools mean:

    • Faster repairs
    • Fewer lost parts
    • Better customer confidence

    Common Beginner Mistakes With Tools

    Understanding mistakes is part of experience.

    Avoid these errors:

    • Using force instead of patience
    • Applying too much heat
    • Using metal tools near connectors
    • Mixing screws
    • Buying advanced tools without basics

    “In phone repair, most damage happens not because of lack of knowledge, but because of hurry.”


    Choosing Tool Quality: Cheap vs Reliable

    Beginners often ask whether low-cost kits are enough.

    Balanced advice:

    • Avoid extremely cheap tools
    • You don’t need premium brands initially
    • Focus on reliability and comfort

    A broken screwdriver tip can ruin a device costing thousands.


    Tools vs Skills: What Matters More?

    Tools alone do not make a technician.

    Skills come from:

    • Proper training
    • Supervised practice
    • Understanding phone design
    • Learning troubleshooting logic

    Good tools support your skills. They do not replace them.


    Building Your First Beginner Tool Kit (Summary List)

    For easy reference, a beginner toolkit should include:

    • Precision screwdriver set
    • Plastic opening tools
    • Suction cup
    • Heat gun or heat pad
    • Digital multimeter
    • USB current tester
    • Isopropyl alcohol (IPA)
    • Anti-static brush
    • Microfiber cloth
    • Magnetic screw mat
    • SIM ejector pin
    • Basic soldering iron (optional early)

    This setup covers most screen, battery, charging, speaker, and basic hardware repairs.


    Career Insight for New Repair Technicians

    Mobile phone repairing is not just about fixing devices. It is about problem-solving.

    You will work on:

    • Android smartphones
    • iPhones
    • Tablets
    • Different brands and designs

    Technology changes, but fundamental repair principles remain the same. Strong basics always win.


    Final Thoughts

    Starting phone repair work becomes much easier when you know what tools truly matter. You do not need everything at once. Begin with essentials, practice safely, and upgrade as your skills grow.

    Focus on:

    • Correct tools
    • Clean working habits
    • Patience and learning

    If you build your foundation properly, advanced repairs will feel natural later.

    A well-prepared technician fixes phones confidently, not forcefully.

  • What Are the Main Parts Inside a Cell Phone & Their Functions?

    What Are the Main Parts Inside a Cell Phone & Their Functions?

    Have you ever wondered what is inside your mobile phone? We use smartphones every day for calling, browsing, photography, payments, and work. Yet most people have no idea how many parts work together inside a small device to make all this possible.

    Understanding the internal parts of a cell phone is useful for many reasons. It helps users take better care of their devices. It helps students and beginners learn mobile technology basics. And for mobile repairing technicians, this knowledge is the foundation of troubleshooting and repair work.

    You don’t need to open a phone to respect it—just knowing what’s inside changes how you use it.

    In this guide, we will clearly explain the main parts inside a cell phone and their functions, using simple language and practical examples. The information applies to Android phones, iPhones, and most modern smartphones, with minor design differences across brands.


    External Parts vs Internal Parts of a Cell Phone

    Before going deeper, it is important to understand how mobile phone parts are broadly classified.

    External Parts

    External parts are the components you can see and touch from outside, such as:

    • Screen glass
    • Back panel
    • Side buttons
    • Camera lens cover
    • SIM tray

    These parts protect the phone and help with user interaction.

    Internal Parts

    Internal parts are located inside the phone body. These components handle power, processing, sound, display, connectivity, and sensors. Most phone problems occur due to issues with these internal components.

    This article focuses mainly on internal smartphone parts and how they work together.


    1. Motherboard (PCB / Logic Board)

    The motherboard, also called the PCB (Printed Circuit Board) or logic board, is the most important part inside a cell phone.

    It is usually green, blue, or black in color and holds all major electronic components.

    What the motherboard does:

    • Connects all internal parts
    • Distributes power across the phone
    • Controls communication between components
    • Houses critical chips and ICs

    In simple words:
    The motherboard is to a phone what an engine is to a car.

    Key components mounted on the motherboard:

    • Processor (CPU)
    • Memory chips
    • Power management IC
    • Network and signal ICs
    • Audio IC
    • Charging IC

    If the motherboard is damaged, the phone may not power on at all.


    2. Processor (CPU / SoC)

    The processor, also known as the CPU or System on Chip (SoC), is the brain of the smartphone.

    Function of the processor:

    • Executes apps and commands
    • Controls system operations
    • Handles multitasking
    • Processes camera and video data

    Modern processors combine multiple functions like graphics, AI processing, and connectivity into one chip.

    A faster processor improves:

    • App performance
    • Gaming experience
    • Camera processing
    • Power efficiency

    3. Battery

    The battery supplies power to the entire mobile phone.

    Most smartphones use lithium-ion or lithium-polymer batteries.

    Battery functions:

    • Stores electrical energy
    • Powers all phone components
    • Supplies voltage to the motherboard

    Typical smartphone batteries operate around 3.7V to 3.8V DC.

    Common battery-related issues:

    • Fast draining
    • Overheating
    • Phone not charging
    • Sudden shutdowns

    Important tip:
    Using poor-quality chargers can reduce battery life and damage charging circuits.


    4. Display (Screen Module)

    The display is the visual output unit of a smartphone.

    It allows users to:

    • See content
    • Watch videos
    • Read messages
    • Navigate apps

    Types of displays:

    • LCD (Liquid Crystal Display)
    • OLED / AMOLED displays

    All modern phones use display assemblies, where the screen and touch layer are fused together.


    5. Touchscreen (Digitizer)

    The touchscreen, also called the digitizer, is a transparent layer placed above the display.

    Function:

    • Detects finger touch
    • Converts touch into electrical signals
    • Sends input to the processor

    6. Microphone (Mic)

    The microphone converts sound into electrical signals.

    Types of microphones in smartphones:

    • Primary mic (for calls)
    • Secondary mic (for noise cancellation)

    Location:

    • Usually near the bottom of the phone
    • Sometimes near the camera for video audio

    If the mic fails:

    • The other person cannot hear your voice clearly
    • Voice recordings may sound distorted

    7. Earpiece Speaker (Receiver)

    The earpiece speaker, also called the receiver, is used during phone calls.

    Function:

    • Converts electrical signals into sound
    • Allows you to hear the caller’s voice

    It is located at the top front of the phone.

    Low sound during calls often indicates:

    • Dust blockage
    • Speaker damage
    • Audio IC issues

    8. Loudspeaker (Ringer / Buzzer)

    The loudspeaker, commonly called the ringer, produces loud sound.

    Used for:

    • Ringtones
    • Music
    • Videos
    • Notifications
    • Speakerphone calls

    If the loudspeaker is faulty:

    • Ringtones may be silent
    • Media sound may not work

    9. Vibration Motor

    The vibration motor creates vibration alerts.

    Function:

    • Rotates or oscillates to produce vibration
    • Alerts users silently during calls or notifications

    Modern phones use compact vibration motors that are power-efficient and precise.


    10. Antenna

    The antenna is responsible for signal transmission and reception.

    Handles:

    • Voice calls
    • Mobile data
    • Wi-Fi
    • Bluetooth
    • GPS

    In modern smartphones:

    • Antennas are internal
    • Integrated into the frame or PCB
    • Not visible from outside

    Weak signal issues are often related to antenna damage or loose connections.


    11. Charging Port (Charging Connector)

    The charging port connects the phone to a charger.

    Functions:

    • Charges the battery
    • Transfers data to computers
    • Supplies power to the motherboard

    Common problems include:

    • Loose charging
    • Slow charging
    • Phone not detected by PC

    Dust and moisture are the biggest enemies of charging ports.


    12. SIM Card Connector

    The SIM connector connects the SIM card to the motherboard.

    Function:

    • Identifies the user on the mobile network
    • Enables calling, messaging, and data services

    If damaged:

    • “No SIM” error appears
    • Network signal may drop

    13. Battery Connector

    The battery connector transfers power from the battery to the motherboard.

    It must:

    • Provide stable voltage
    • Maintain firm contact

    Loose connectors can cause random shutdowns.


    14. Flex Cables (Flex)

    Flex cables are thin, flexible connectors used inside phones.

    Used to connect:

    • Display
    • Touchscreen
    • Camera
    • Buttons
    • Sensors

    They allow compact internal design and easy component communication.


    15. Cameras (Front & Rear)

    Smartphones contain multiple cameras.

    Functions:

    • Photography
    • Video recording
    • Video calls
    • Face recognition

    Camera modules are connected to the motherboard via flex connectors.


    16. Fingerprint Sensor

    The fingerprint sensor provides biometric security.

    Types:

    • Rear-mounted
    • Side-mounted
    • In-display sensors

    It connects directly to the motherboard and works with secure system software.


    17. Power and Volume Buttons

    These switches allow physical control of the device.

    Functions:

    • Power on/off
    • Lock/unlock screen
    • Adjust volume
    • Take screenshots

    They are connected using flex cables or small switch boards.


    Plug-and-Play vs Soldered Components

    Internal phone parts are either:

    • Plug-and-play (connectors, speakers, cameras)
    • Soldered (ICs, chips)

    Important for technicians:
    Soldered parts require proper soldering skills and tools for repair.


    Why Knowing Phone Parts Is Important

    Understanding internal phone components helps:

    • Diagnose problems faster
    • Avoid unnecessary repairs
    • Use phones more carefully
    • Learn mobile repairing professionally

    Every phone problem tells a story—knowing the parts helps you read it correctly.


    Final Thoughts

    A cell phone may look simple from the outside, but inside it is a complex combination of electronic components working together in perfect coordination. From the motherboard to the smallest flex cable, every part has a specific role.

    Whether you are a curious user, a student, or an aspiring mobile repair technician, understanding the main parts inside a cell phone and their functions gives you clarity, confidence, and technical awareness.

    Knowing what’s inside your smartphone helps you use it smarter—and fix it better when something goes wrong.